abp(net core)+easyui+efcore实现仓储管理系统——EasyUI之货物管理六(二十四)
abp(net core)+easyui+efcore实现仓储管理系统目录
abp(net core)+easyui+efcore实现仓储管理系统——ABP总体介绍(一)
abp(net core)+easyui+efcore实现仓储管理系统——解决方案介绍(二)
abp(net core)+easyui+efcore实现仓储管理系统——领域层创建实体(三)
abp(net core)+easyui+efcore实现仓储管理系统——定义仓储并实现 (四)
abp(net core)+easyui+efcore实现仓储管理系统——创建应用服务(五)
abp(net core)+easyui+efcore实现仓储管理系统——展现层实现增删改查之控制器(六)
abp(net core)+easyui+efcore实现仓储管理系统——展现层实现增删改查之列表视图(七)
abp(net core)+easyui+efcore实现仓储管理系统——展现层实现增删改查之增删改视图(八)
abp(net core)+easyui+efcore实现仓储管理系统——展现层实现增删改查之菜单与测试(九)
abp(net core)+easyui+efcore实现仓储管理系统——多语言(十)
abp(net core)+easyui+efcore实现仓储管理系统——使用 WEBAPI实现CURD (十一)
abp(net core)+easyui+efcore实现仓储管理系统——菜单-上 (十六)
abp(net core)+easyui+efcore实现仓储管理系统——EasyUI前端页面框架 (十八)
abp(net core)+easyui+efcore实现仓储管理系统——EasyUI之货物管理一 (十九)
abp(net core)+easyui+efcore实现仓储管理系统——EasyUI之货物管理二 (二十)
在上一篇 abp(net core)+easyui+efcore实现仓储管理系统——EasyUI之货物管理五 (二十三) 文章中,我们修正了一些BUG,让货物信息管理的前端与后台功能基本实现了我们所要。现在我们运行起应用程序看看新增功能。
十五、新增货物信息
继续来实现我们的货物信息管理功能,之前我们已经实现了列表功能,现在我们来实现货物信息的增加功能。
1. 在Visual Studio 2017的“解决方案资源管理器”中,右键单击在领域层“ABP.TPLMS.Web.Core”项目中的Controller目录。 找到TPLMSControllerBase文件,添加一个新的方法JsonEasyUIResult。此方法用来实现当我们完成了增加货物信息之后,返回给前端相关信息。代码如下。
protected dynamic JsonEasyUIResult(int id,string result)
{

    string strId = string.Empty;
    if (id>0)
    {
        strId = id.ToString();
    }

        var obj = new
    {
        result = result,
        Id = strId
     };
     var json = ABP.TPLMS.Helpers.JsonHelper.Instance.Serialize(obj);
     return json;
}
 public ActionResult Add(CargoDto createDto)
        {
            var json = string.Empty;
            string result = "NO";
            if (createDto == null)
            {
                json = JsonEasyUIResult(0, result);
                return Content(json);

            }
            try
            {
                var cargo = ObjectMapper.Map<CreateUpdateCargoDto>(createDto);

                // TODO: Add logic here
                var obj = _cargoAppService.Create(cargo);
                int id = obj.GetAwaiter().GetResult().Id;
                if (obj != null)
                {
                    json = JsonEasyUIResult(id, "OK");

                }
                else

                {
                    json = JsonEasyUIResult(0,result);

                }
            }
            catch

            {
            }
            return Content(json);

        }
3.在Visual Studio 2017中按F5运行应用程序。
4.在浏览器中的地址栏中输入“http://localhost:5000/”,然后输入管理员用户名进行登录。
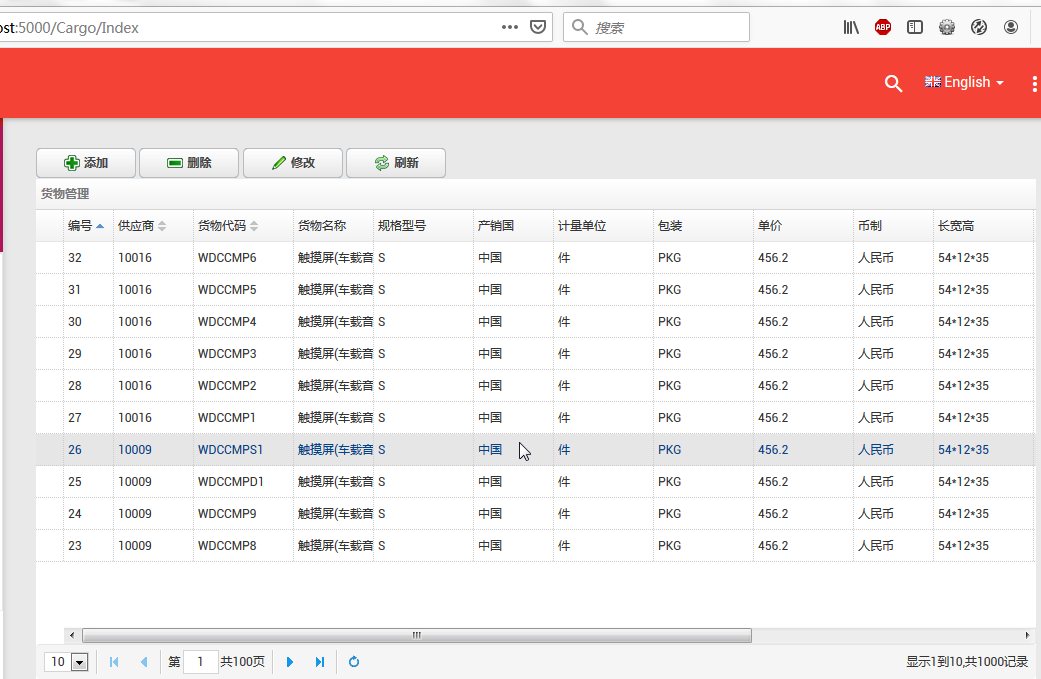
5.在主界面的菜单中,选择“Business->货物管理”菜单项,浏览器中呈现一个货物信息列表与四个按钮。如下图。关于菜单的生成可以参见文章(abp(net core)+easyui+efcore实现仓储管理系统——菜单-上 (十六) 与 abp(net core)+easyui+efcore实现仓储管理系统——菜单-下(十七) )。
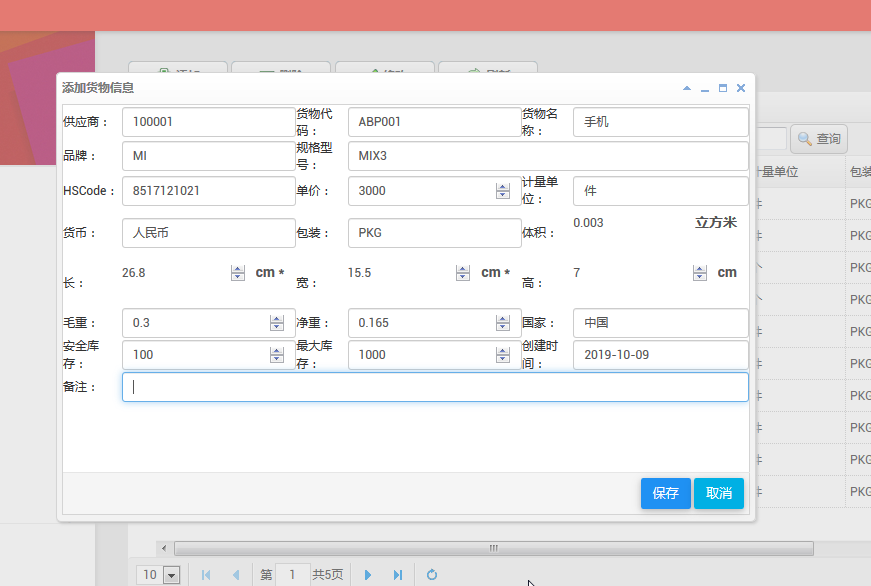
6.新增货物:点击“添加”按钮,弹出一个“添加货物”的操作界面,如下图中所示。
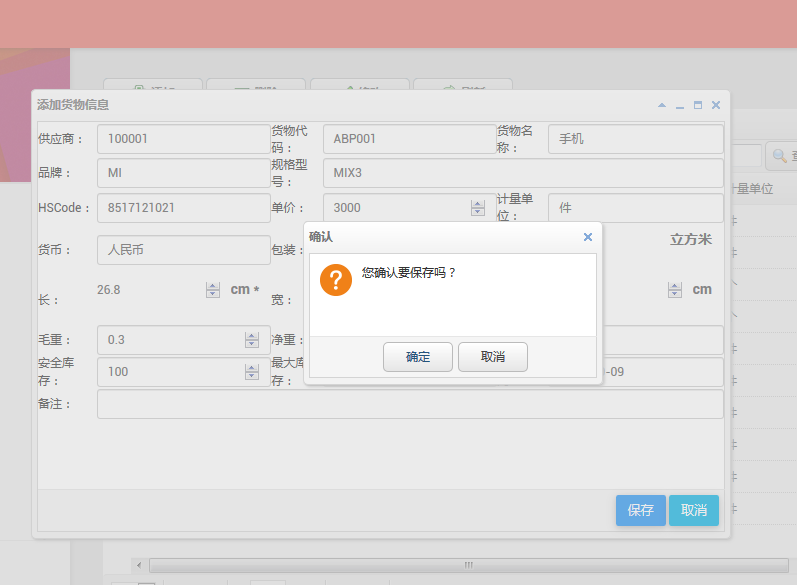
7.在输入相应的货物信息之后,点击“保存”按钮 。在弹出的确认对话框中点击“确定”按钮。在弹出的“保存成功”确认对话框中点击“确定”按钮。
8.然后系统就没有任何反应,没有弹出任何提示信息,查询数据也没有发现添加新数据。我们在浏览器中按F12,然后发现原来报错了。如下图。
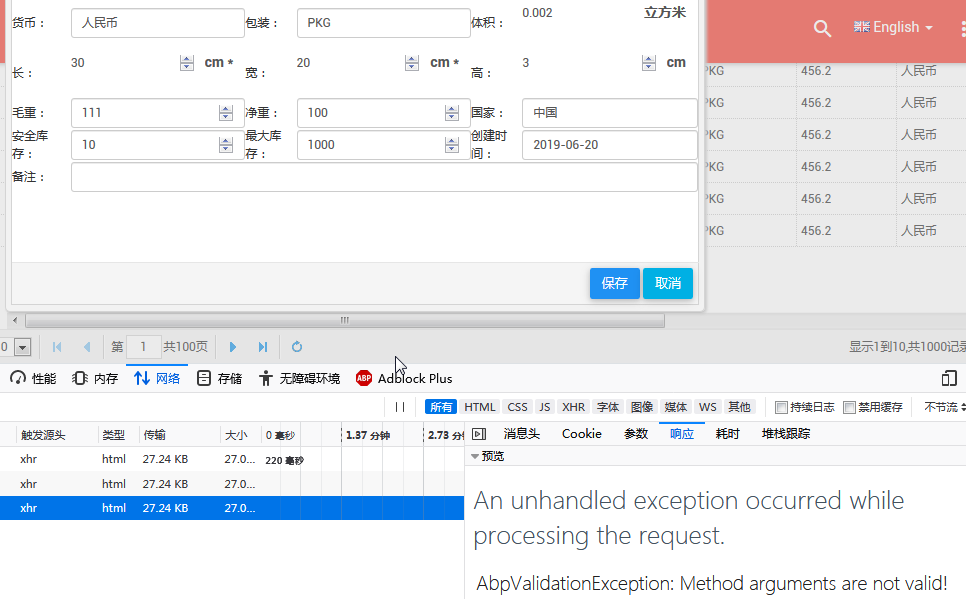
具体错误信息如下:
An unhandled exception occurred while processing the request.
AbpValidationException: Method arguments are not valid! See ValidationErrors for details.
Abp.Runtime.Validation.Interception.MethodInvocationValidator.ThrowValidationError() in MethodInvocationValidator.cs, line 118
9.原来是ABP的一个校验异常。ABP的两个特性EnableValidation和DisableValidation 用来控制validation。我们在Add方法上面添加两个特性[HttpPost]与[DisableValidation]。
[HttpPost]
[DisableValidation]
public ActionResult Add(CargoDto createDto)

{… 代码见第2步。}
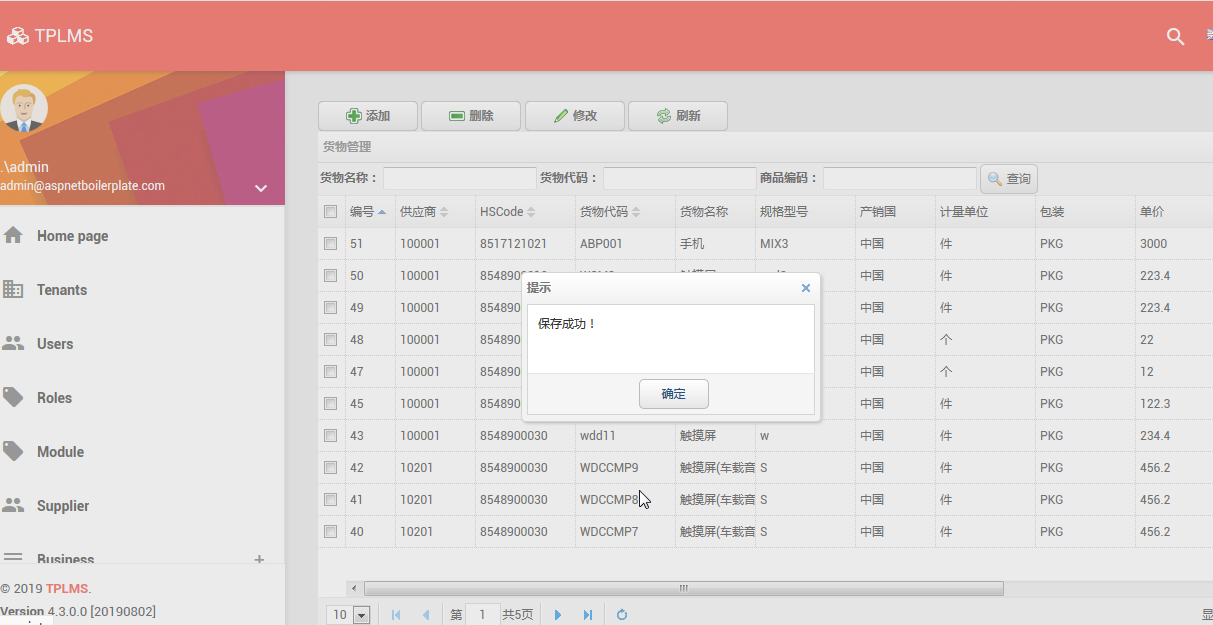
10.重新从第3步到第7步。这次保存成功。见下图。


 浙公网安备 33010602011771号