用C# GDI编写粒子效果
C#语言能不能画一些动画特效呢?闲来无事,特过一把编程瘾。一共写了6个例子特效动画,界面如下,程序在文末供下载。
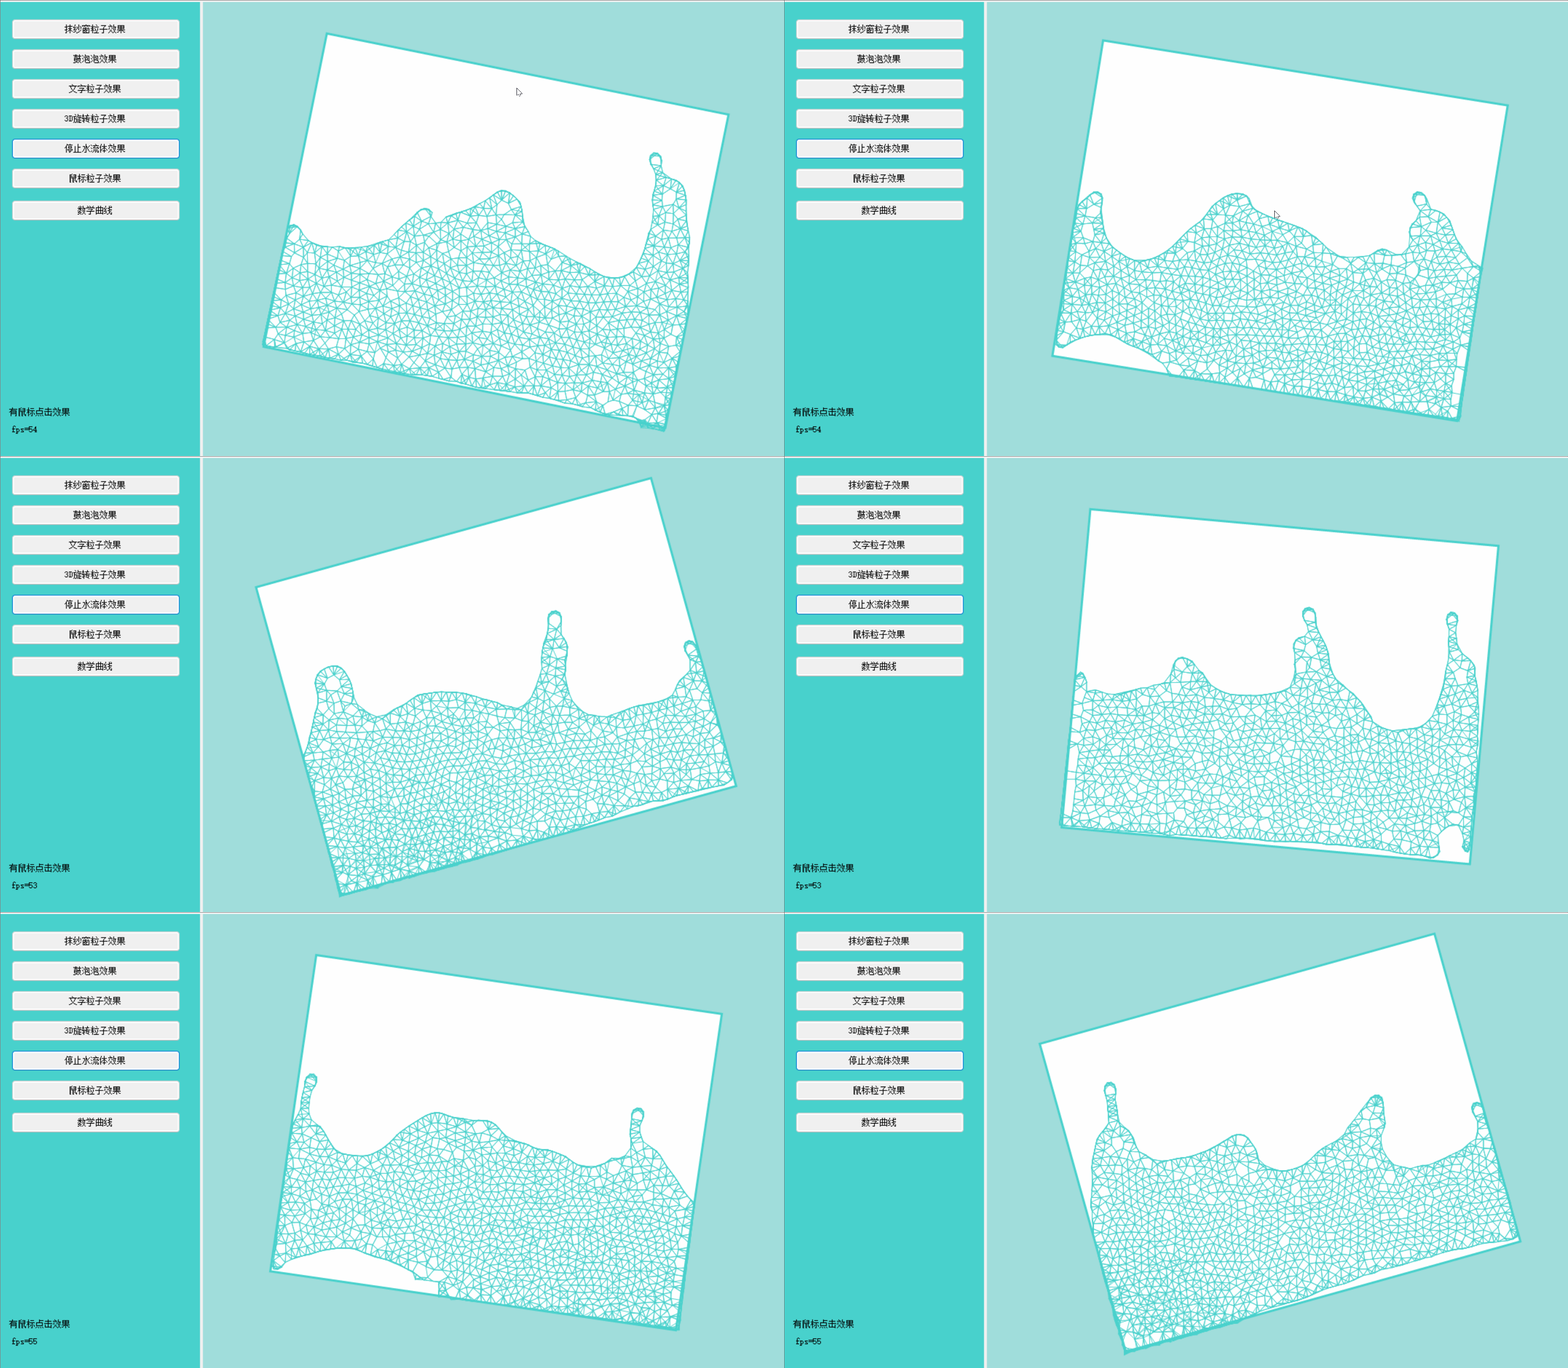
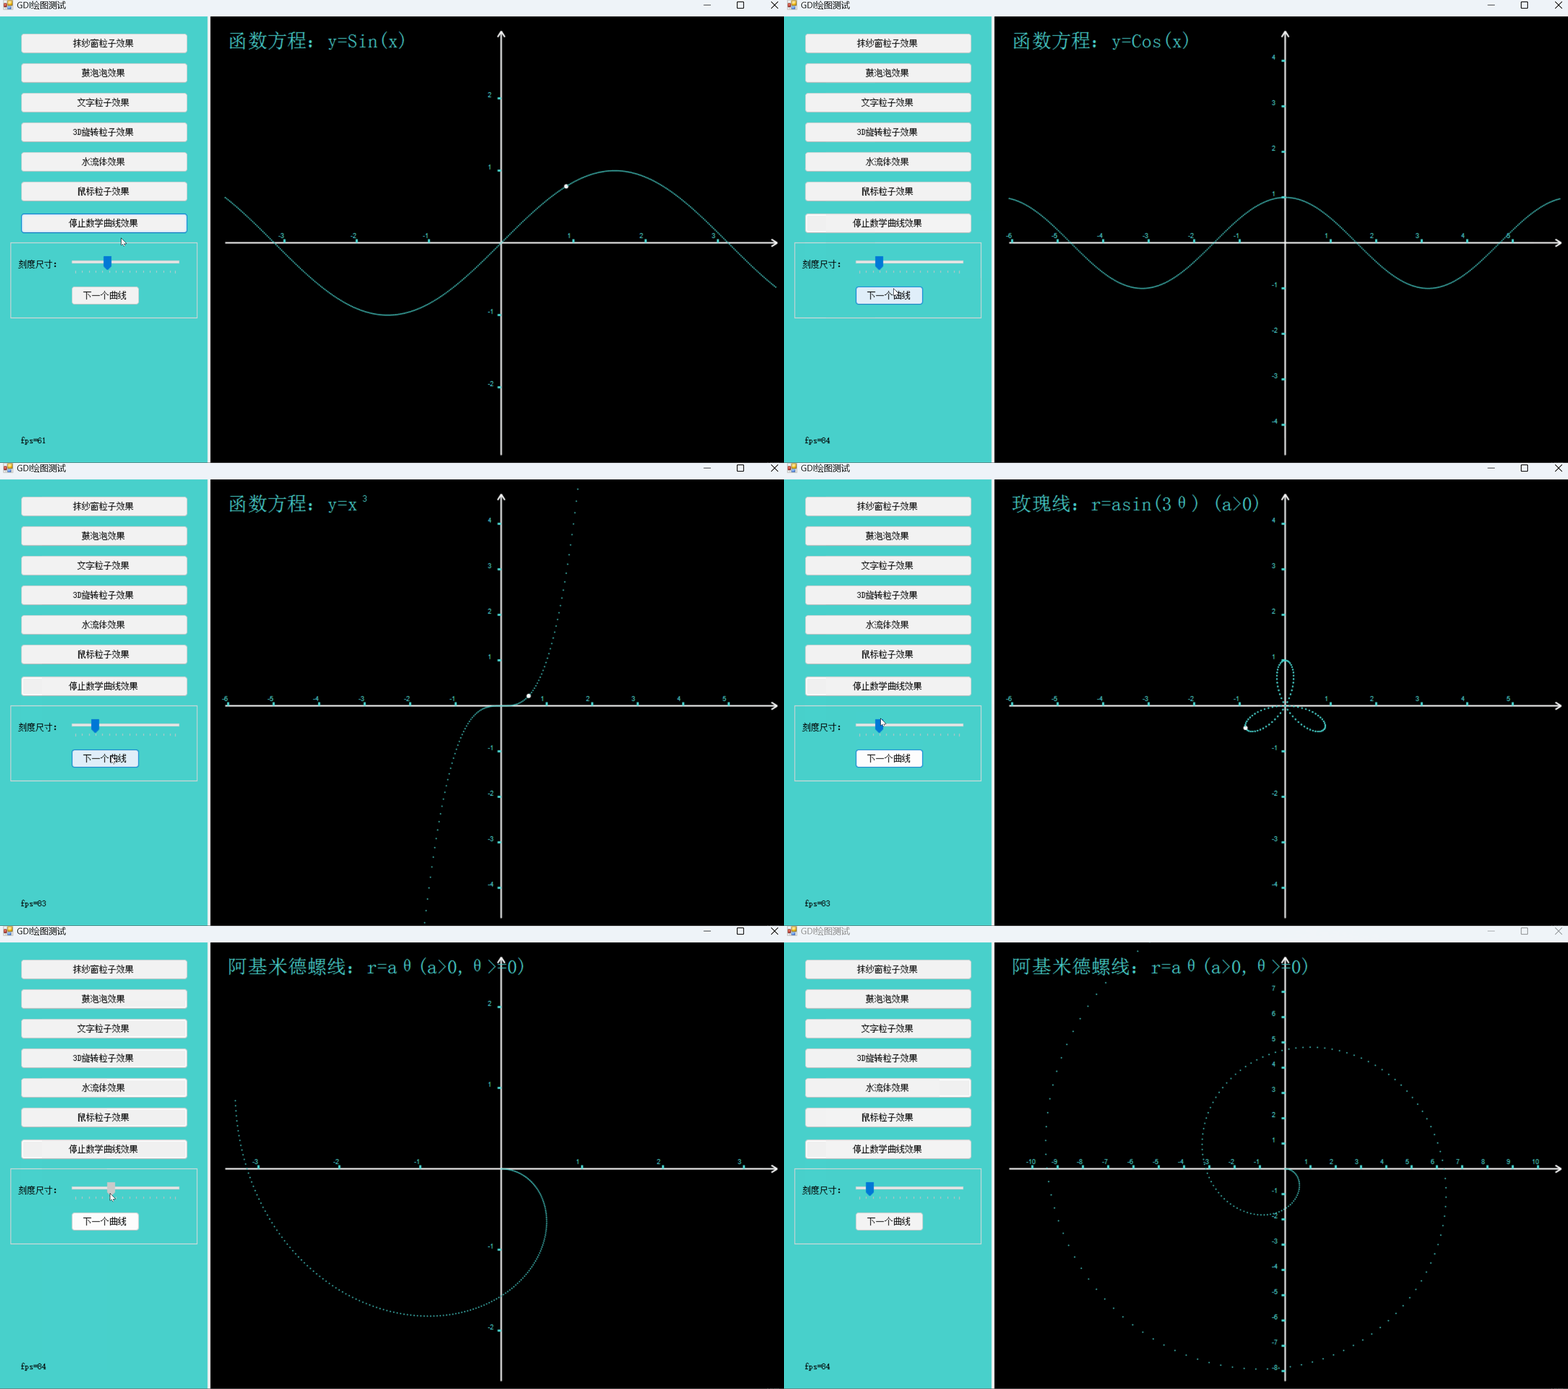
拿一个粒子效果“鼓泡泡效果”的类讲解,其他类似:
using System;
using System.Collections.Generic;
using System.Drawing;
using System.Drawing.Drawing2D;
using System.Drawing.Imaging;
using System.Linq;
using System.Runtime.InteropServices;
using System.Text;
using System.Threading.Tasks;
using System.Windows.Forms;

namespace CSharpGDI
{
    /// <summary>
    /// 粒子效果2
    /// </summary>
    internal class Particle2
    {
        public struct ParticleObj
        {
            public int px;//圆点坐标x
            public int py;//圆点坐标y
            public int d;//直径
            public int c;//颜色标识 1有颜色,0无色
            public int a;//透明度
            public Brush b;//画刷

            public int vx; //原x
            public int vy; //原y
            public int vd; //原直径
        }
        static List<ParticleObj> particles = new List<ParticleObj>();
        static int speed =1;
        static Bitmap bmp = null;
        static Graphics g = null;

        /// <summary>
        /// 初始化
        /// </summary>
        /// <param name="w">宽</param>
        /// <param name="h">高</param>
        /// <param name="span">间距</param>
        public static void Init(int w,int h,int size=15,int span=5)
        {
            particles.Clear();
            Random rnd=new Random();
            int r0 = Math.Min(w / size, h / size);
            for (var x = 0; x < w / r0; x++)
            {
                for (var y = 0; y < h / r0; y++)
                {
                    ParticleObj p = new ParticleObj()
                    {
                        px = x * r0 + (r0 - span)/2,
                        py = y * r0 + (r0 - span)/2,
                        d = r0-span,
                        c = rnd.Next(2),
                        a = rnd.Next(100, 255)
                    };
                    p.vx = p.px;
                    p.vy = p.py;
                    p.vd = p.d;


                    Brush b = new SolidBrush(Color.FromArgb(p.a, 255, 255, 255));
                    if (p.c == 1)
                        b = new SolidBrush(Color.FromArgb(p.a,72,209,204));
                    p.b = b;
                    particles.Add(p);
                }
            }

            bmp = new Bitmap(w, h, PixelFormat.Format32bppArgb);
            g = Graphics.FromImage(bmp);
        }

        /// <summary>
        /// 动画
        /// </summary>
        /// <param name="mouseX">鼠标x坐标</param>
        /// <param name="mouseY"></param>
        /// <param name="w">宽</param>
        /// <param name="h">高</param>
        /// <param name="R">圆的半径</param>
        public static Bitmap Start(int mouseX, int mouseY, int w, int h, int R=150)
        {
            if (particles.Count == 0)
                Init(w,h);

            g.Clear(Color.Black);
            g.SmoothingMode = SmoothingMode.AntiAlias;
            Random rnd = new Random();
            for (var i = 0; i < particles.Count; i++)
            {
                var p = particles[i];
                if (R * R > (p.px - mouseX) * (p.px - mouseX) + (p.py - mouseY) * (p.py - mouseY))
                {
                    if (p.px > mouseX)
                        p.px += speed ;
                    if (p.px < mouseX)
                        p.px -= speed;
                    if (p.py > mouseY)
                        p.py += speed ;
                    if (p.py < mouseY)
                        p.py -= speed;

                    if (rnd.Next(2) == 1)
                    {
                        p.d = (p.d+speed*5 >w/2?w/2:p.d+speed*5);
                    }
                    else
                    {
                        p.d =(p.d- speed*5<=0?10:p.d-speed*5);
                    }
                }
                else
                {
                    if (p.px > p.vx)
                        p.px = p.px - speed < p.vx ? p.vx : p.px - speed;
                    if (p.px < p.vx)
                        p.px = p.px + speed > p.vx ? p.vx : p.px + speed;
                    if (p.py > p.vy)
                        p.py = p.py - speed < p.vy ? p.vy : p.py - speed;
                    if (p.py < p.vy)
                        p.py = p.py + speed > p.vy ? p.vy : p.py + speed;

                    if (p.d > p.vd)
                    {
                        p.d -= speed;
                    }
                    if (p.d < p.vd)
                    {
                        p.d += speed;
                    }
                }
                particles[i] = p;
                g.FillEllipse(p.b, p.px - p.d / 2, p.py - p.d / 2, p.d, p.d);


            }
            return bmp;
        }
    }
}
效果如下:

思想很简单,Init() 方法根据屏幕大小和相关粒子大小参数产生粒子对象数组particles,然后在Onpait事件中反复调用Start()绘制粒子即可。其中可以根据鼠标位置,改变粒子大小和位置。
当点击“”鼓泡泡“”按钮事件:其实核心只是调用了pictureBox1.Refresh()方法而已,其他逻辑都不重要。
 private void btnParticle2_Click(object sender, EventArgs e)
 {

     if (btnParticle2.Text.Contains("停止"))
     {
         btnParticle2.Text = "鼓泡泡效果";
         animations.Clear();
     }
     else
     {
         animations.Clear();
         ResetButtons();
         btnParticle2.Text = "停止鼓泡泡效果";

         animations.Add("鼓泡泡");
         ReStartCalFps();
         pictureBox1.Refresh();
     }
 }
pictureBox1.Refresh()方法会触发pictureBox1的pictureBox1_Paint事件,在该事件中添加逻辑:
//重绘事件
private void pictureBox1_Paint(object sender, PaintEventArgs e)
{

    if(animations.Count==0) return;

    if (animations.Contains("抹纱窗"))
    {
        currbmp=Particle1.Start(mousePoint.X,mousePoint.Y,pictureBox1.Width,pictureBox1.Height,100,V);
        pictureBox1.Image = currbmp;
        CalFps();
    }

    if (animations.Contains("鼓泡泡"))
    {
        currbmp = Particle2.Start(mousePoint.X, mousePoint.Y, pictureBox1.Width, pictureBox1.Height,150);
        pictureBox1.Image = currbmp;
        CalFps();
    }

    ……

}
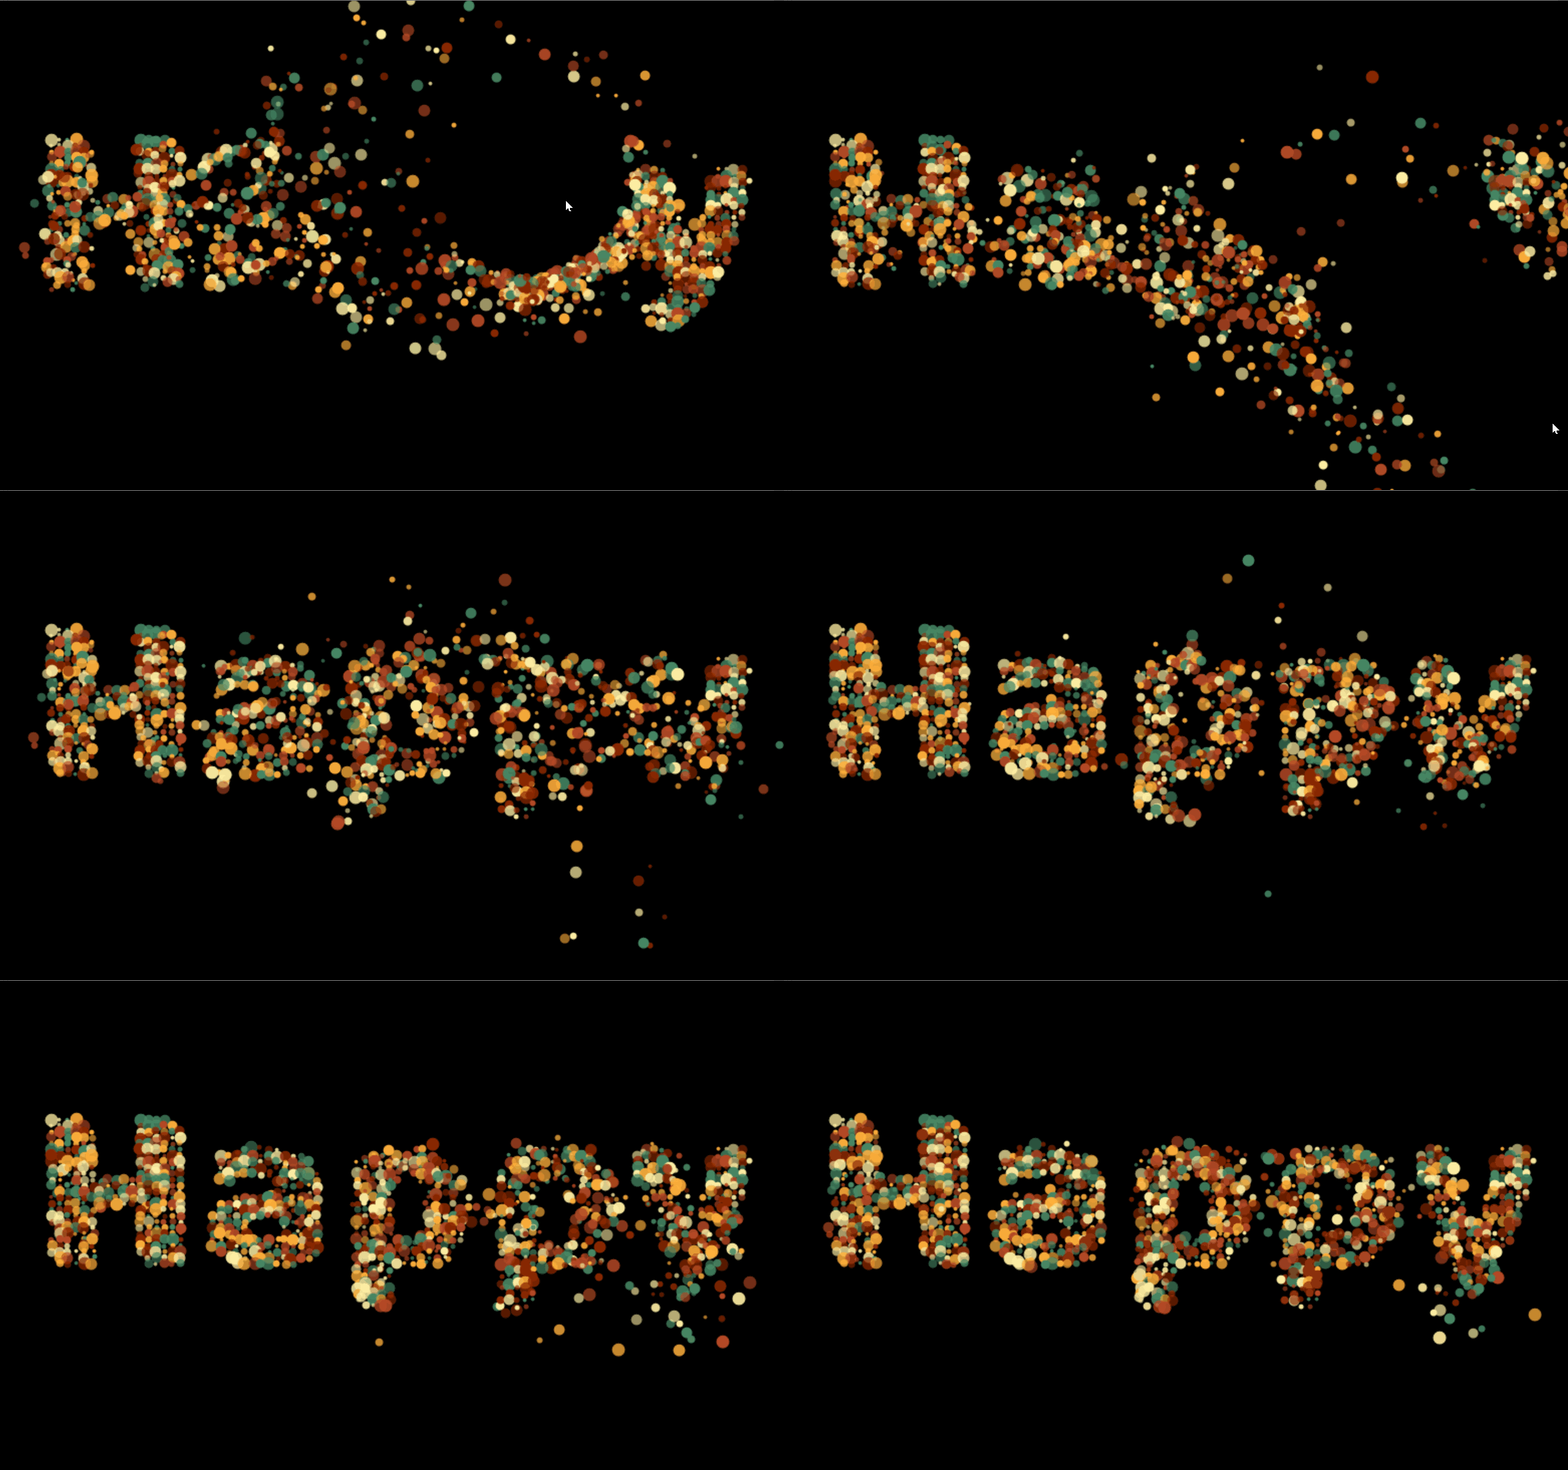
其他几个效果展示:
文字粒子效果:
爱心效果:
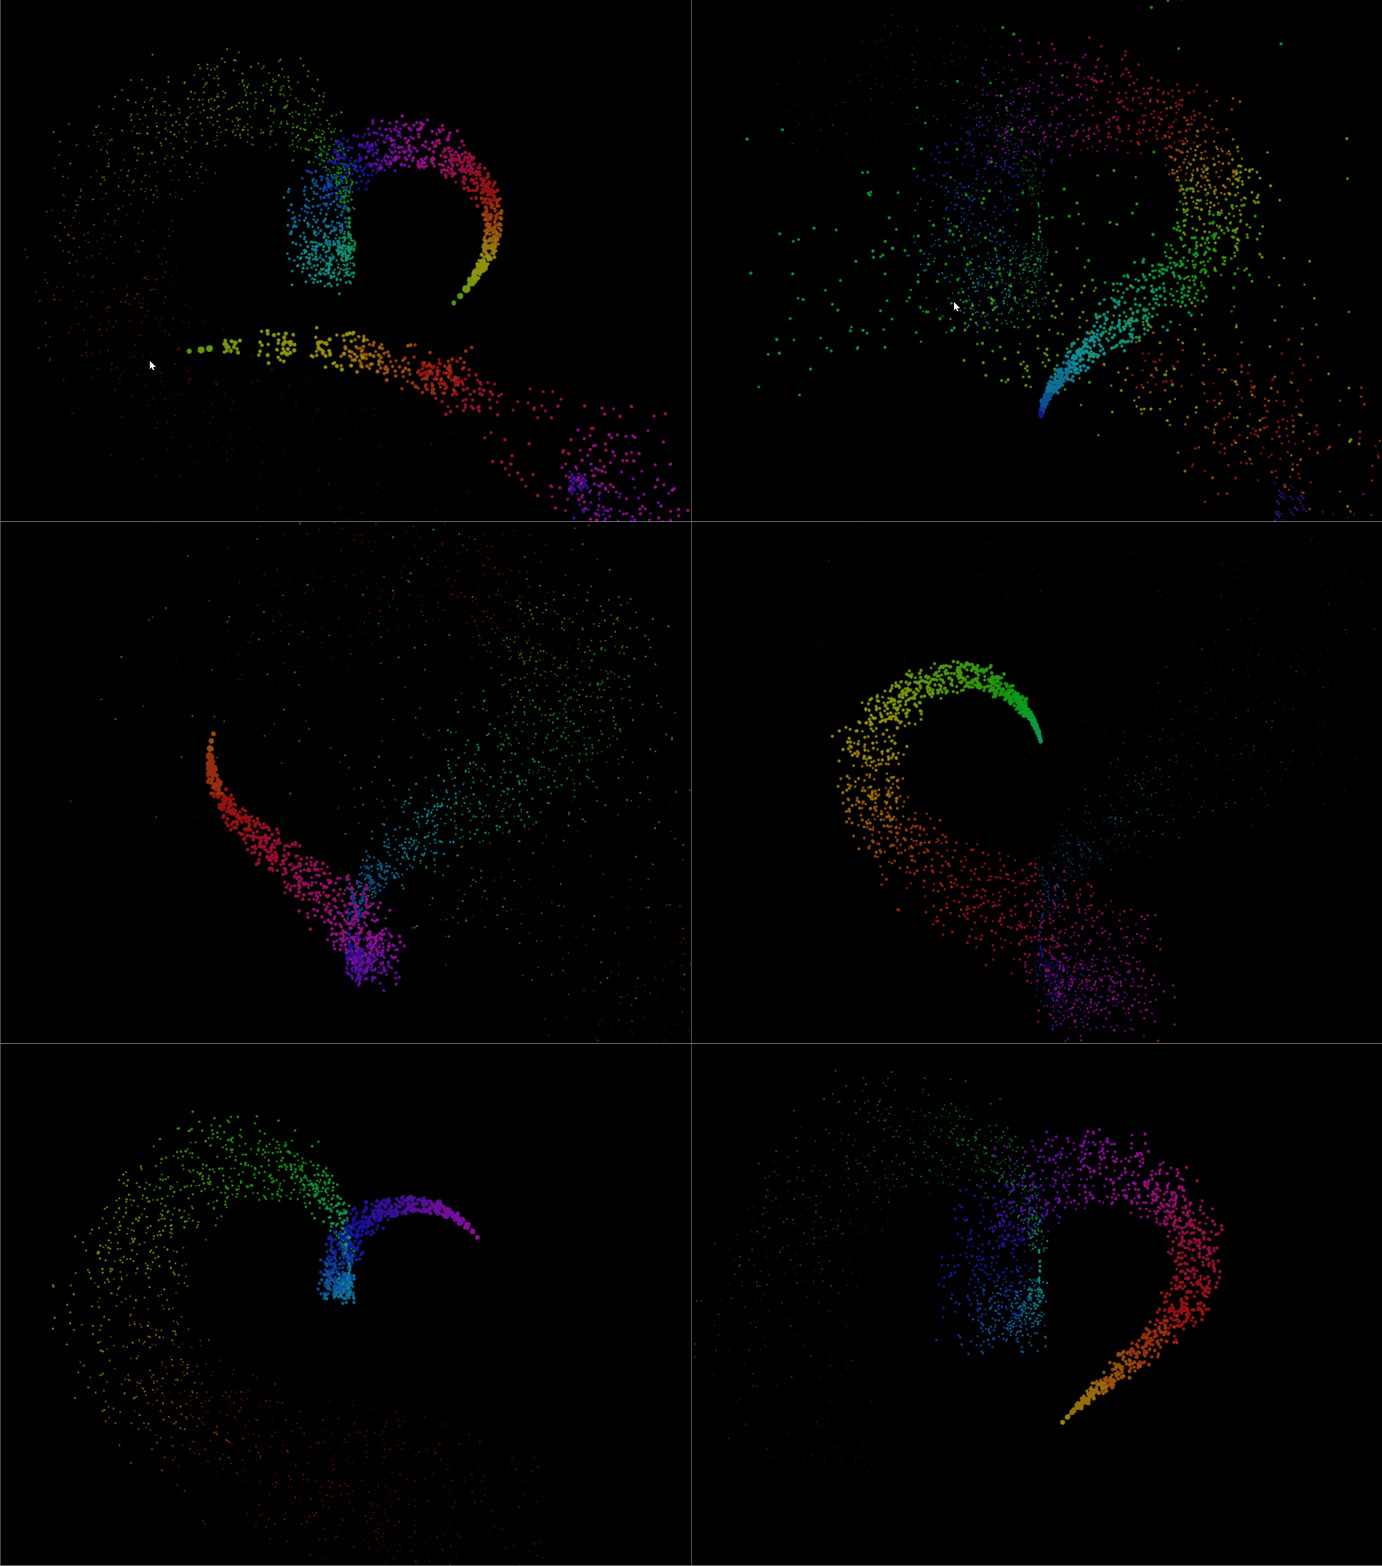
写完之后感受就是,C#也是可以写出炫酷的粒子效果的,而且不卡顿很丝滑。
其中几个关键点:
1. 窗体设置双缓存:
 public Form1()
 {
     DoubleBuffered = true;  //设置双缓冲
     InitializeComponent();
 }
2. 在Paint事件中重绘粒子,不要在While(true)之类的循环里无间隔调用。Winform中的Paint事件就相当于JavaScript中的requestAnimationFrame事件。
3. 每次重绘调用的方法统一返回一张Bitmap图片,换句话说就是把全部的粒子画到一张Bitmap中,不能直接用pictureBox1.CreateGraphics()的Graphics对象来画粒子。否则会出现卡顿。而且这个Bitmap要用公共变量,不能每次调用都重新创建,否则内存会疯涨。
4.取像素点的数据要用内存拷贝法,不可直接调用img.GetPixel(i ,j).R ,否则性能极差,粒子一多也会出现卡顿。
内存拷贝法取像素点代码如下:注意其中的Data.Stride属性,用LockBits返回的像素数据每一行会有个补全操作,若采用Format24bppRgb格式也就是每个像素占用24位,3个字节分别表示B,G,R,且每行长度为Stride,不足Stride的会补全。
 Bitmap bmp=new Bitmap(w,h, PixelFormat.Format24bppRgb);
 BitmapData data = bmp.LockBits(new Rectangle(0, 0, w, h), ImageLockMode.ReadWrite, PixelFormat.Format24bppRgb);
 int length = h * data.Stride;
 byte[] RGB = new byte[length];
 System.IntPtr Scan0 = data.Scan0;
 System.Runtime.InteropServices.Marshal.Copy(Scan0, RGB, 0, length);

 for (int y = 0; y < h; y++)
 {
     int index = y * data.Stride;
     for (int x = 0; x < w; x++)
     {
         if (x % span == 0 && y % span == 0)
         {
             particles.Add(new ParticleObj()
             {
                 x = x,
                 y = y,
                 vx = x,
                 vy = y,
                 vspeed = 2
             });
             //改变颜色。
             RGB[index + 3 * x] = 255;
             RGB[index + 3 * x+1] = 255;
             RGB[index + 3 * x+2] = 255;
         }
     }
 }
 System.Runtime.InteropServices.Marshal.Copy(RGB, 0, Scan0, length);
 bmp.UnlockBits(data);
 g.DrawImage(bmp,0,0);
程序下载:Demo
源码已经上传到 https://github.com/tuyile006/CShparGDIParticle


 浙公网安备 33010602011771号