
一、使用Spring AI实现简单聊天功能(准备工作)
一、使用Spring AI实现简单聊天功能(准备工作)
==================================================================================
==================================================================================
参考资料:
==================================================================================
Spring AI项目版本升级中的依赖变更解析-CSDN博客
基于SpringAI构建大模型应用 - songtianer - 博客园 (cnblogs.com)
SpringAI第二课——调用硅基流动免费模型_硅基流动spring ai-CSDN博客
==================================================================================
Spring AI 是 AI 工程的应用框架,它的目标是将Spring生态系统的设计原则应用于 AI 领域,比如Spring生态系统的可移植性和模块化设计,并促进使用 POJO 作为应用程序的构建块到 AI 领域;
Spring AI 的核心是提供了开发 AI 大模型应用所需的基本抽象模型,这些抽象拥有多种实现方式,使得开发者可以用很少的代码改动就能实现组件的轻松替换。
1、环境准备
- IntelliJ IDEA开发工具、JDK17
- 密钥申请DeepSeek、硅基流动、魔搭 api_key 任意一个
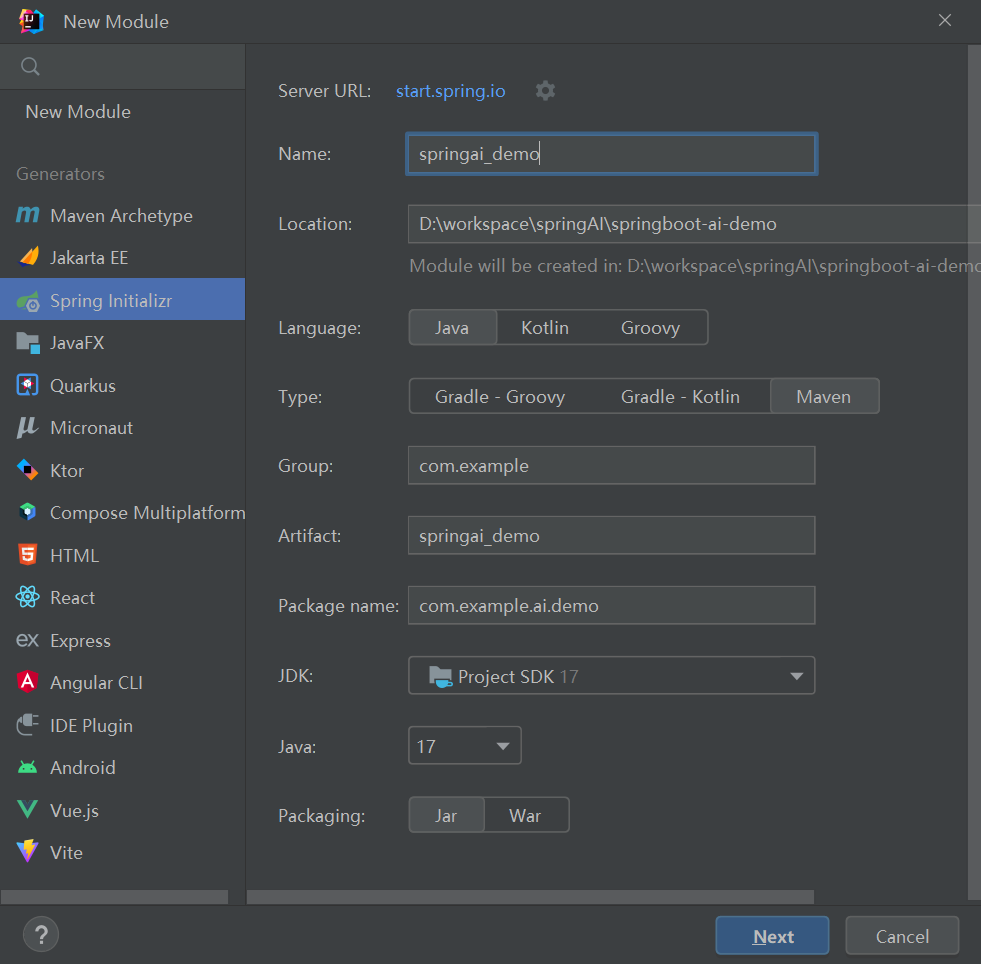
2、创建SpringBoot项目
2.1、创建父工程
因为需要实现多个不同功能,所以我们先创建一个父工程:spring-ai-demo,把每个实现功能都做为模块,父工程pom.xml如下
pip install camel-ai<?xml version="1.0" encoding="UTF-8"?>
<project xmlns="http://maven.apache.org/POM/4.0.0"
         xmlns:xsi="http://www.w3.org/2001/XMLSchema-instance"
         xsi:schemaLocation="http://maven.apache.org/POM/4.0.0 http://maven.apache.org/xsd/maven-4.0.0.xsd">
    <modelVersion>4.0.0</modelVersion>

    <parent>
        <groupId>org.springframework.boot</groupId>
        <artifactId>spring-boot-starter-parent</artifactId>
        <version>3.4.12</version>
        <relativePath/> <!-- lookup parent from repository -->
    </parent>

    <groupId>com.example</groupId>
    <artifactId>springAiDemo</artifactId>
    <packaging>pom</packaging>
    <version>1.0-SNAPSHOT</version>
    <modules>
        <module>springai_chat</module>
    </modules>

    <properties>
        <maven.compiler.source>17</maven.compiler.source>
        <maven.compiler.target>17</maven.compiler.target>
    </properties>

</project>
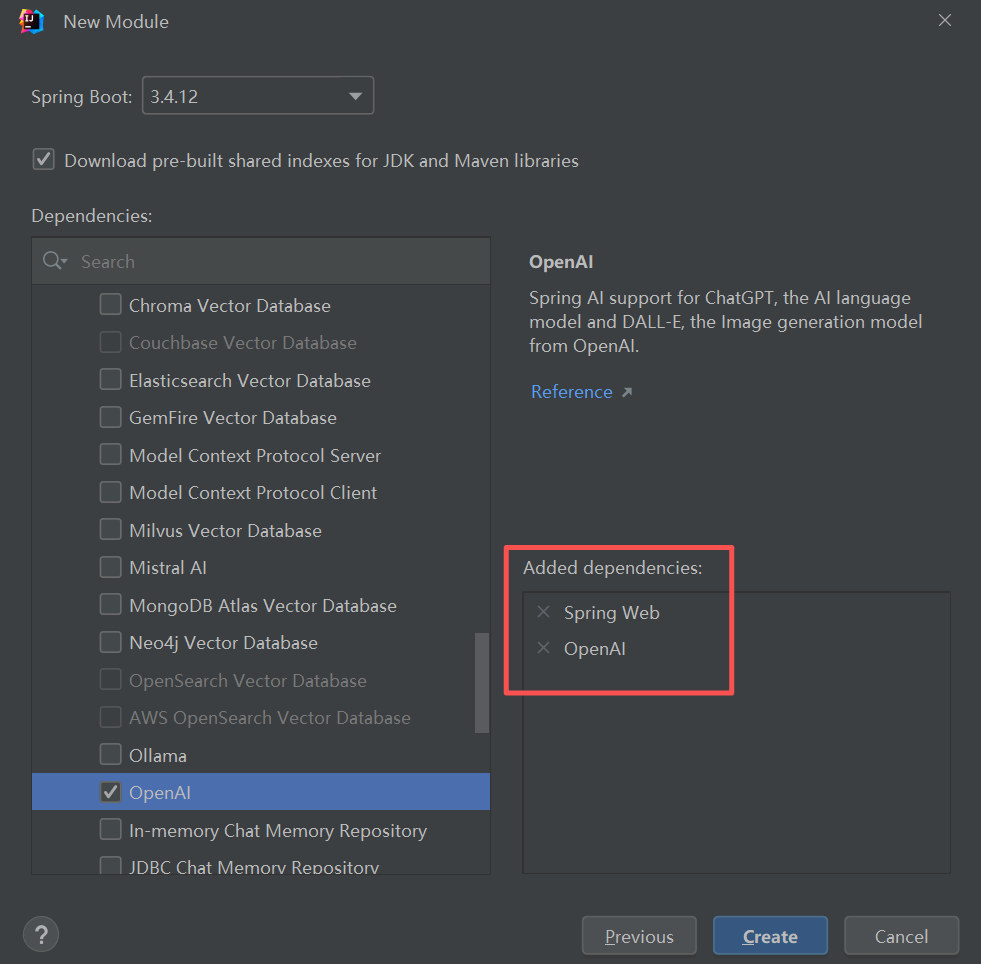
2.2、创建子模块
再创建一个module模块:springai_chat,截图springai_demo是借用先截的图,后面以springai_chat为准,需要读者自行对应修改。
<?xml version="1.0" encoding="UTF-8"?>
<project xmlns="http://maven.apache.org/POM/4.0.0" xmlns:xsi="http://www.w3.org/2001/XMLSchema-instance"
         xsi:schemaLocation="http://maven.apache.org/POM/4.0.0 https://maven.apache.org/xsd/maven-4.0.0.xsd">
    <modelVersion>4.0.0</modelVersion>
    <parent>
        <groupId>org.springframework.boot</groupId>
        <artifactId>spring-boot-starter-parent</artifactId>
        <version>3.4.12</version>
        <relativePath/> <!-- lookup parent from repository -->
    </parent>
    <groupId>com.youzhuo</groupId>
    <artifactId>springai_chat</artifactId>
    <version>0.0.1-SNAPSHOT</version>
    <name>springai_chat</name>
    <description>springai_chat</description>
    <url/>
    <licenses>
        <license/>
    </licenses>
    <developers>
        <developer/>
    </developers>
    <scm>
        <connection/>
        <developerConnection/>
        <tag/>
        <url/>
    </scm>
    <properties>
        <java.version>17</java.version>
        <spring-ai.version>1.0.3</spring-ai.version>
    </properties>
    <dependencies>
        <dependency>
            <groupId>org.springframework.boot</groupId>
            <artifactId>spring-boot-starter-web</artifactId>
        </dependency>
        <dependency>
            <groupId>org.springframework.ai</groupId>
            <artifactId>spring-ai-starter-model-openai</artifactId>
        </dependency>

        <dependency>
            <groupId>org.springframework.boot</groupId>
            <artifactId>spring-boot-starter-test</artifactId>
            <scope>test</scope>
        </dependency>
    </dependencies>
    <dependencyManagement>
        <dependencies>
            <dependency>
                <groupId>org.springframework.ai</groupId>
                <artifactId>spring-ai-bom</artifactId>
                <version>${spring-ai.version}</version>
                <type>pom</type>
                <scope>import</scope>
            </dependency>
        </dependencies>
    </dependencyManagement>

    <build>
        <plugins>
            <plugin>
                <groupId>org.springframework.boot</groupId>
                <artifactId>spring-boot-maven-plugin</artifactId>
            </plugin>
        </plugins>
    </build>

</project>
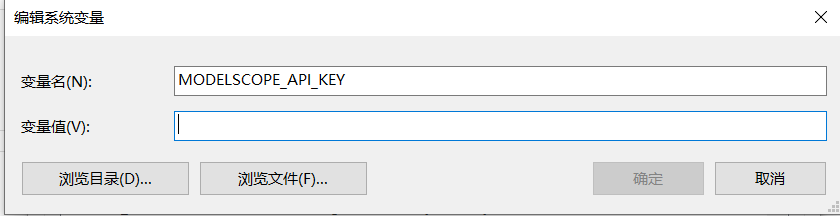
2.3、配置密钥环境变量
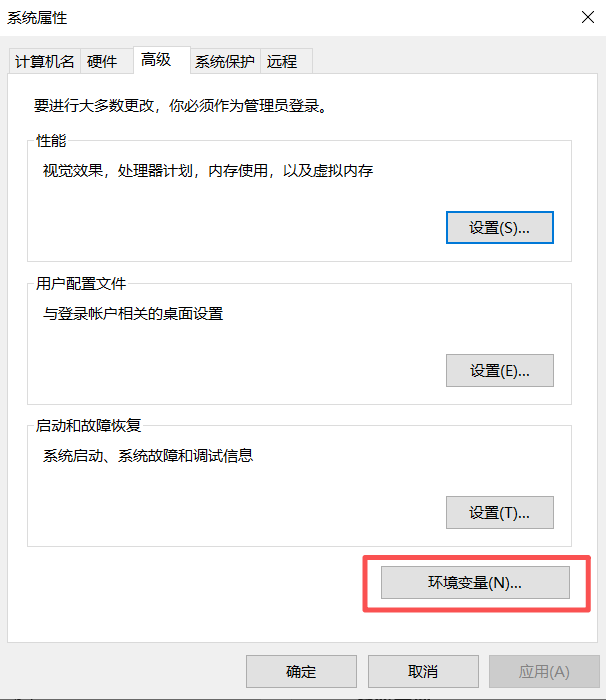
笔者使用的是魔搭,变量名:MODELSCOPE_API_KEY,这个名称在application.yml中会用上。
变量值填读者自己申请的密钥key。注意:每次设置完成后需要重启电脑,环境变量才会生效。
把密钥配置成环境变量的好处就是安全,如果直接在配置文件中明文设置会直接暴露API key,只适用于临时测试或本地开发,
存在以下安全风险:
- 若将代码提交到 Git 等版本控制系统,密钥会永久暴露在仓库历史中。
- 任何能访问代码的人均可窃取密钥,导致滥用或产生费用。
2.4、子模块对应application.yml配置
server:
  port: 8899
spring:
  application:
    name: springai_chat

  #  ai:
  #    openai:
  #      # DeepSeek api_key
  #      api-key: ${DEEPSEEK_API_KEY}  # 从环境变量读取密钥
  #      base-url: https://api.deepseek.com  #  DeepSeek 的 API 地址
  #      embedding:
  #        enabled: false  # 禁用 OpenAI 的嵌入模块,DeepSeek 的 API 暂不支持此功能
  #      chat:
  #        options:
  #          temperature: 1.3  # 控制输出随机性
  #          model: deepseek-chat  # 指定 DeepSeek 的模型

  #  ai:
  #    openai:
  #      # 硅基流动 api_key
  #      api-key: ${SILICONFLOW_API_KEY}  # 从环境变量读取密钥
  #      base-url: https://api.siliconflow.cn  #  硅基流动 的 地址
  #      chat:
  #        options:
  #          temperature: 1.3  # 控制输出随机性
  #          model: deepseek-ai/DeepSeek-R1-0528-Qwen3-8B  # 指定模型
  #        completions-path: /v1/chat/completions  #  完整API 地址

  ai:
    openai:
      # 魔搭 api_key
      api-key: ${MODELSCOPE_API_KEY}  # 从环境变量读取密钥
      base-url: https://api-inference.modelscope.cn  #  魔搭 的 地址
      chat:
        options:
          temperature: 0.7  # 控制输出随机性
          model: Qwen/Qwen3-235B-A22B-Instruct-2507  # 指定 Qwen 的模型
        completions-path: /v1/chat/completions  #  完整API 地址
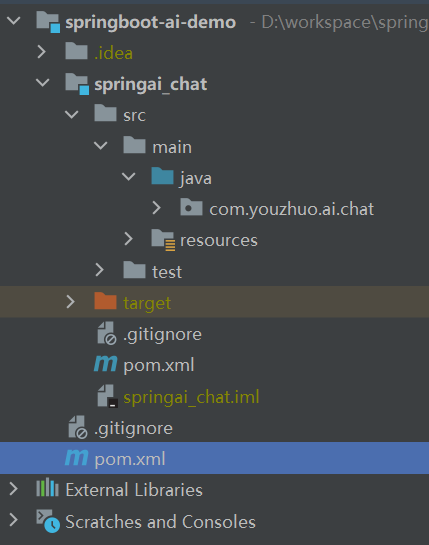
3、最后项目的结构
本文来自博客园,作者:老羅,转载请注明原文链接:https://www.cnblogs.com/laoluo2025/p/19252365

 浙公网安备 33010602011771号