
一起做RGB-D SLAM (3)
第三讲 特征提取与配准
2016.11 更新
- 把原文的SIFT替换成了ORB,这样你可以在没有nonfree模块下使用本程序了。
- OpenCV可以使用 apt-get install libopencv-dev ,一样能成功。
- 因为换成了ORB,所以调整了good match的阈值,并且匹配时需要使用 Brute Force match。
- 请以现在的github上源码为准。
师兄:同学们大家好,又到我们每周一次的“一起做RGB-D SLAM”时间啦!大家还记得上周我们讲了什么东西吗?
小萝卜:等一下师兄!我们的博客什么时候变成每周一更了?
师兄:这个,这不是因为终于到暑假了,我可以专门搞学术了嘛。
小萝卜:胡说!前两天我还看到你在超市开挖掘机来着!
师兄:这事你就别提了啊……
小萝卜:我还有照片为证呢!

师兄:你能不能别提这个事了啊……我们赶紧开始讲课吧。
小萝卜:师兄,那可是儿童专区啊,您可是个博士,自重啊!
上讲回顾
在上一讲中,我们介绍了如何把2D图像坐标转换为3D空间坐标。然后,利用推导的数学公式,实现了把图像转化为点云的程序。在上一讲的末尾,我们给出了一道作业题,希望读者去把这两件事做成一个函数库,以供将来调用。不知道大家回去之后做了没有呢?
小萝卜:读者这么勤奋肯定已经做好了啦!
师兄:嗯,所以呢,这一讲里面我们就要用到上面两个函数了。在讲解本讲的内容之前,先介绍一下我们是如何封装上节课代码的。在 代码根目录/include 下,我们新建了一个 slamBase.h 文件,存放上一讲以及以后讲到的各种函数:
include/slamBase.h:
 1 /*************************************************************************
 2     > File Name: rgbd-slam-tutorial-gx/part III/code/include/slamBase.h
 3     > Author: xiang gao
 4     > Mail: gaoxiang12@mails.tsinghua.edu.cn
 5     > Created Time: 2015年07月18日 星期六 15时14分22秒
 6     > 说明:rgbd-slam教程所用到的基本函数(C风格)
 7  ************************************************************************/
 8 # pragma once
 9
10 // 各种头文件
11 // C++标准库
12 #include <fstream>
13 #include <vector>
14 using namespace std;
15
16 // OpenCV
17 #include <opencv2/core/core.hpp>
18 #include <opencv2/highgui/highgui.hpp>
19
20 //PCL
21 #include <pcl/io/pcd_io.h>
22 #include <pcl/point_types.h>
23
24 // 类型定义
25 typedef pcl::PointXYZRGBA PointT;
26 typedef pcl::PointCloud<PointT> PointCloud;
27
28 // 相机内参结构
29 struct CAMERA_INTRINSIC_PARAMETERS
30 {
31     double cx, cy, fx, fy, scale;
32 };
33
34 // 函数接口
35 // image2PonitCloud 将rgb图转换为点云
36 PointCloud::Ptr image2PointCloud( cv::Mat& rgb, cv::Mat& depth, CAMERA_INTRINSIC_PARAMETERS& camera );
37
38 // point2dTo3d 将单个点从图像坐标转换为空间坐标
39 // input: 3维点Point3f (u,v,d)
40 cv::Point3f point2dTo3d( cv::Point3f& point, CAMERA_INTRINSIC_PARAMETERS& camera );
可以看到,我们把相机参数封装成了一个结构体,另外还声明了 image2PointCloud 和 point2dTo3d 两个函数。然后,在 src/ 目录下新建 slamBase.cpp 文件:
src/slamBase.cpp
 1 /*************************************************************************
 2     > File Name: src/slamBase.cpp
 3     > Author: xiang gao
 4     > Mail: gaoxiang12@mails.tsinghua.edu.cn
 5     > Implementation of slamBase.h
 6     > Created Time: 2015年07月18日 星期六 15时31分49秒
 7  ************************************************************************/
 8
 9 #include "slamBase.h"
10
11 PointCloud::Ptr image2PointCloud( cv::Mat& rgb, cv::Mat& depth, CAMERA_INTRINSIC_PARAMETERS& camera )
12 {
13     PointCloud::Ptr cloud ( new PointCloud );
14
15     for (int m = 0; m < depth.rows; m++)
16         for (int n=0; n < depth.cols; n++)
17         {
18             // 获取深度图中(m,n)处的值
19             ushort d = depth.ptr<ushort>(m)[n];
20             // d 可能没有值,若如此,跳过此点
21             if (d == 0)
22                 continue;
23             // d 存在值,则向点云增加一个点
24             PointT p;
25
26             // 计算这个点的空间坐标
27             p.z = double(d) / camera.scale;
28             p.x = (n - camera.cx) * p.z / camera.fx;
29             p.y = (m - camera.cy) * p.z / camera.fy;
30
31             // 从rgb图像中获取它的颜色
32             // rgb是三通道的BGR格式图,所以按下面的顺序获取颜色
33             p.b = rgb.ptr<uchar>(m)[n*3];
34             p.g = rgb.ptr<uchar>(m)[n*3+1];
35             p.r = rgb.ptr<uchar>(m)[n*3+2];
36
37             // 把p加入到点云中
38             cloud->points.push_back( p );
39         }
40     // 设置并保存点云
41     cloud->height = 1;
42     cloud->width = cloud->points.size();
43     cloud->is_dense = false;
44
45     return cloud;
46 }
47
48 cv::Point3f point2dTo3d( cv::Point3f& point, CAMERA_INTRINSIC_PARAMETERS& camera )
49 {
50     cv::Point3f p; // 3D 点
51     p.z = double( point.z ) / camera.scale;
52     p.x = ( point.x - camera.cx) * p.z / camera.fx;
53     p.y = ( point.y - camera.cy) * p.z / camera.fy;
54     return p;
55 }
最后,在 src/CMakeLists.txt 中加入以下几行,将 slamBase.cpp 编译成一个库,供将来调用:
ADD_LIBRARY( slambase slamBase.cpp )
TARGET_LINK_LIBRARIES( slambase
    ${OpenCV_LIBS}
    ${PCL_LIBRARIES} )
这两句话是说,把slamBase.cpp编译成 slamBase 库,并把该库里调到的OpenCV和PCL的部分,和相应的库链接起来。是不是感觉代码更有条理了呢?今后,我们会在每一讲里介绍新的内容,并把实现的代码封装里这个slamBase库中。
图像配准 数学部分
SLAM是由“定位”(Localization)和“建图”(Mapping)两部分构成的。现在来看定位问题。要求解机器人的运动,首先要解决这样一个问题:给定了两个图像,如何知道图像的运动关系呢?
这个问题可以用基于特征的方法(feature-based)或直接的方法(direct method)来解。虽说直接法已经有了一定的发展,但目前主流的方法还是基于特征点的方式。在后者的方法中,首先你需要知道图像里的“特征”,以及这些特征的一一对应关系。
假设我们有两个帧:$F_1$和$F_2$. 并且,我们获得了两组一一对应的特征点:$$P=\{p_1, p_2, \ldots, p_N \} \in F_1 $$ $$Q=\{ q_1, q_2, \ldots, q_N \} \in F_2 $$. 其中$p$和$q$都是$R^3$中的点。
我们的目的是求出一个旋转矩阵$R$和位移矢量$t$,使得:$$ \forall i, p_i = R q_i + t $$.
然而实际当中由于误差的存在,等号基本是不可能的。所以我们通过最小化一个误差来求解$R,t$:
$$\min\limits_{R,t} \sum\limits_{i=1}^{N} \| p_i - (R q_i + t) \|_2 $$
这个问题可以用经典的ICP算法求解。其核心是奇异值分解(SVD)。我们将调用OpenCV中的函数求解此问题,所以在此就不细讲ICP的具体步骤了。有兴趣的读者可以参阅1987年PAMI上的一篇文章,也是最原始的ICP方法:Least-squares fitting of two 3-D point sets。
那么从这个数学问题上来讲,我们的关键就是要获取一组一一对应的空间点,这可以通过图像的特征匹配来完成。
提示:由于OpenCV中没有提供ICP,我们在实现中使用PnP进行求解。
图像配准 编程实现
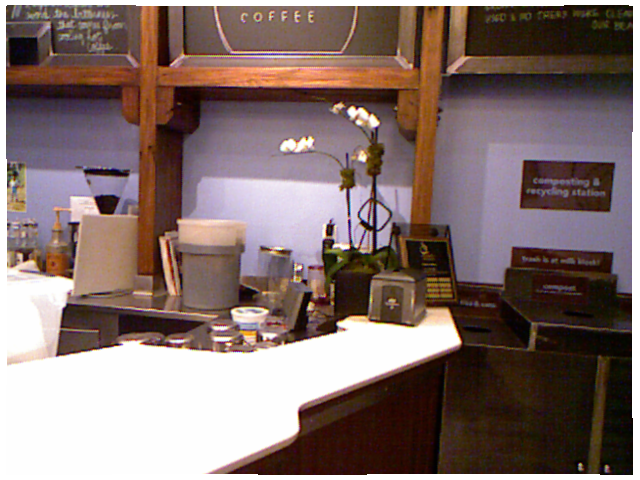
本节中,我们要匹配两对图像,并且计算它们的位移关系。它们分别是rgb1,png, rgb2.png, depth1.png, depth2.png. 人眼可以直观地看到第二个图是向左转动了一些。

照例,我们先给出完整的程序代码。读者可以先把代码浏览一遍,我们再加以详细的解释。因为本节的代码比较长,我把它折叠起来,否则排版就太长了。


  1 /*************************************************************************
  2     > File Name: detectFeatures.cpp
  3     > Author: xiang gao
  4     > Mail: gaoxiang12@mails.tsinghua.edu.cn
  5     > 特征提取与匹配
  6     > Created Time: 2015年07月18日 星期六 16时00分21秒
  7  ************************************************************************/
  8
  9 #include<iostream>
 10 #include "slamBase.h"
 11 using namespace std;
 12
 13 // OpenCV 特征检测模块
 14 #include <opencv2/features2d/features2d.hpp>
 15 #include <opencv2/nonfree/nonfree.hpp>
 16 #include <opencv2/calib3d/calib3d.hpp>
 17
 18 int main( int argc, char** argv )
 19 {
 20     // 声明并从data文件夹里读取两个rgb与深度图
 21     cv::Mat rgb1 = cv::imread( "./data/rgb1.png");
 22     cv::Mat rgb2 = cv::imread( "./data/rgb2.png");
 23     cv::Mat depth1 = cv::imread( "./data/depth1.png", -1);
 24     cv::Mat depth2 = cv::imread( "./data/depth2.png", -1);
 25
 26     // 声明特征提取器与描述子提取器
 27     cv::Ptr<cv::FeatureDetector> _detector;
 28     cv::Ptr<cv::DescriptorExtractor> _descriptor;
 29
 30     // 构建提取器,默认两者都为sift
 31     // 构建sift, surf之前要初始化nonfree模块
 32     cv::initModule_nonfree();
 33     _detector = cv::FeatureDetector::create( "GridSIFT" );
 34     _descriptor = cv::DescriptorExtractor::create( "SIFT" );
 35
 36     vector< cv::KeyPoint > kp1, kp2; //关键点
 37     _detector->detect( rgb1, kp1 );  //提取关键点
 38     _detector->detect( rgb2, kp2 );
 39
 40     cout<<"Key points of two images: "<<kp1.size()<<", "<<kp2.size()<<endl;
 41
 42     // 可视化, 显示关键点
 43     cv::Mat imgShow;
 44     cv::drawKeypoints( rgb1, kp1, imgShow, cv::Scalar::all(-1), cv::DrawMatchesFlags::DRAW_RICH_KEYPOINTS );
 45     cv::imshow( "keypoints", imgShow );
 46     cv::imwrite( "./data/keypoints.png", imgShow );
 47     cv::waitKey(0); //暂停等待一个按键
 48
 49     // 计算描述子
 50     cv::Mat desp1, desp2;
 51     _descriptor->compute( rgb1, kp1, desp1 );
 52     _descriptor->compute( rgb2, kp2, desp2 );
 53
 54     // 匹配描述子
 55     vector< cv::DMatch > matches;
 56     cv::FlannBasedMatcher matcher;
 57     matcher.match( desp1, desp2, matches );
 58     cout<<"Find total "<<matches.size()<<" matches."<<endl;
 59
 60     // 可视化:显示匹配的特征
 61     cv::Mat imgMatches;
 62     cv::drawMatches( rgb1, kp1, rgb2, kp2, matches, imgMatches );
 63     cv::imshow( "matches", imgMatches );
 64     cv::imwrite( "./data/matches.png", imgMatches );
 65     cv::waitKey( 0 );
 66
 67     // 筛选匹配,把距离太大的去掉
 68     // 这里使用的准则是去掉大于四倍最小距离的匹配
 69     vector< cv::DMatch > goodMatches;
 70     double minDis = 9999;
 71     for ( size_t i=0; i<matches.size(); i++ )
 72     {
 73         if ( matches[i].distance < minDis )
 74             minDis = matches[i].distance;
 75     }
 76
 77     for ( size_t i=0; i<matches.size(); i++ )
 78     {
 79         if (matches[i].distance < 4*minDis)
 80             goodMatches.push_back( matches[i] );
 81     }
 82
 83     // 显示 good matches
 84     cout<<"good matches="<<goodMatches.size()<<endl;
 85     cv::drawMatches( rgb1, kp1, rgb2, kp2, goodMatches, imgMatches );
 86     cv::imshow( "good matches", imgMatches );
 87     cv::imwrite( "./data/good_matches.png", imgMatches );
 88     cv::waitKey(0);
 89
 90     // 计算图像间的运动关系
 91     // 关键函数:cv::solvePnPRansac()
 92     // 为调用此函数准备必要的参数
 93
 94     // 第一个帧的三维点
 95     vector<cv::Point3f> pts_obj;
 96     // 第二个帧的图像点
 97     vector< cv::Point2f > pts_img;
 98
 99     // 相机内参
100     CAMERA_INTRINSIC_PARAMETERS C;
101     C.cx = 325.5;
102     C.cy = 253.5;
103     C.fx = 518.0;
104     C.fy = 519.0;
105     C.scale = 1000.0;
106
107     for (size_t i=0; i<goodMatches.size(); i++)
108     {
109         // query 是第一个, train 是第二个
110         cv::Point2f p = kp1[goodMatches[i].queryIdx].pt;
111         // 获取d是要小心!x是向右的,y是向下的,所以y才是行,x是列!
112         ushort d = depth1.ptr<ushort>( int(p.y) )[ int(p.x) ];
113         if (d == 0)
114             continue;
115         pts_img.push_back( cv::Point2f( kp2[goodMatches[i].trainIdx].pt ) );
116
117         // 将(u,v,d)转成(x,y,z)
118         cv::Point3f pt ( p.x, p.y, d );
119         cv::Point3f pd = point2dTo3d( pt, C );
120         pts_obj.push_back( pd );
121     }
122
123     double camera_matrix_data[3][3] = {
124         {C.fx, 0, C.cx},
125         {0, C.fy, C.cy},
126         {0, 0, 1}
127     };
128
129     // 构建相机矩阵
130     cv::Mat cameraMatrix( 3, 3, CV_64F, camera_matrix_data );
131     cv::Mat rvec, tvec, inliers;
132     // 求解pnp
133     cv::solvePnPRansac( pts_obj, pts_img, cameraMatrix, cv::Mat(), rvec, tvec, false, 100, 1.0, 100, inliers );
134
135     cout<<"inliers: "<<inliers.rows<<endl;
136     cout<<"R="<<rvec<<endl;
137     cout<<"t="<<tvec<<endl;
138
139     // 画出inliers匹配
140     vector< cv::DMatch > matchesShow;
141     for (size_t i=0; i<inliers.rows; i++)
142     {
143         matchesShow.push_back( goodMatches[inliers.ptr<int>(i)[0]] );
144     }
145     cv::drawMatches( rgb1, kp1, rgb2, kp2, matchesShow, imgMatches );
146     cv::imshow( "inlier matches", imgMatches );
147     cv::imwrite( "./data/inliers.png", imgMatches );
148     cv::waitKey( 0 );
149
150     return 0;
151 }
代码的解释:
第一部分: 18行至52行,特征的检测与描述子的计算。
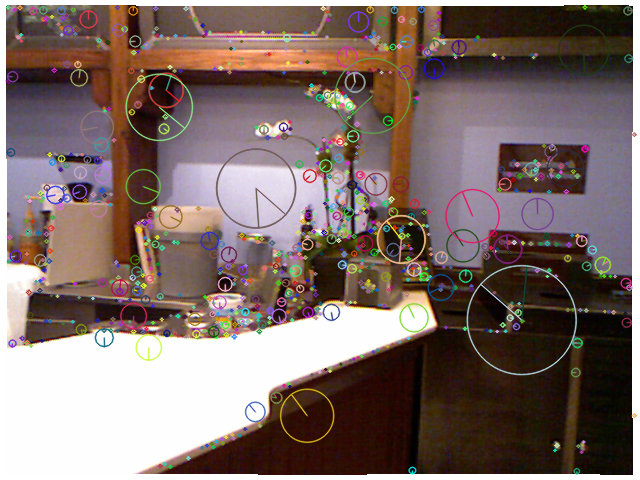
要在一个图像里提取特征,第一步是计算“关键点”,然后,针对这些关键点周围的像素,计算其“描述子”。在OpenCV中,分别由cv::FeatureDetector和cv::DescriptorExtractor来计算。
1 cv::Ptr<cv::FeatureDetector> _detector = cv::FeatureDetector::create( "SIFT" );
2 cv::Ptr<cv::DescriptorExtractor> _descriptor = cv:: DescriptorExtractor::create( "SIFT" );
然后,使用 _detector->detect()函数提取关键点。值得一提的是,_detector和_descriptor的类型可以由字符串指定。如果你想构建FAST, SURF等特征,只需改后面的字符串即可。
关键点是一种cv::KeyPoint的类型。你可以看它的API: http://docs.opencv.org/modules/features2d/doc/common_interfaces_of_feature_detectors.html?highlight=keypoint#KeyPoint 由于比较长我这里就不贴了。可以看到,KeyPoint结构中带有 Point2f pt 这个成员变量,指这个关键点的像素坐标。此外,有的关键点还有半径、角度等参数,画在图里就会像一个个的圆一样。
有了一组KeyPoint之后,就可以调用:
1 _descriptor->compute( image, keypoint, descriptor )
在 keypoint 上计算描述子。描述子是一个cv::Mat的矩阵结构,它的每一行代表一个对应于Keypoint的特征向量。当两个keypoint的描述子越相似,说明这两个关键点也就越相似。我们正是通过这种相似性来检测图像之间的运动的。
第二部分:特征匹配(53行至88行)
接下来,我们对上述的描述子进行匹配。在OpenCV中,你需要选择一个匹配算法,例如粗暴式(bruteforce),近似最近邻(Fast Library for Approximate Nearest Neighbour, FLANN)等等。这里我们构建一个FLANN的匹配算法:
1 vector< cv::DMatch > matches;
2 cv::FlannBasedMatcher matcher;
3 matcher.match( desp1, desp2, matches );
匹配完成后,算法会返回一些 DMatch 结构。该结构含有以下几个成员:
- queryIdx 源特征描述子的索引(也就是第一张图像)。
- trainIdx 目标特征描述子的索引(第二个图像)
- distance 匹配距离,越大表示匹配越差。
有了匹配后,可以用drawMatch函数画出匹配的结果:
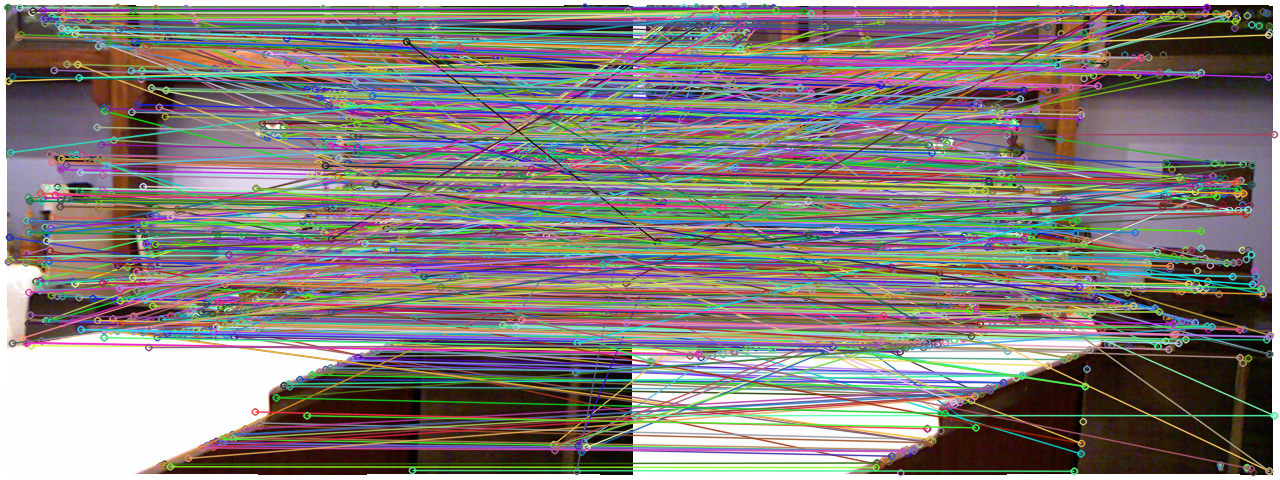
小萝卜:这真是“乱花渐欲迷人眼,浅草才能没马蹄”啊!
师兄:你不是机器人么,怎么开始变得文艺起来了?
不管如何说,仅靠描述子的匹配似乎是太多了些,把许多不相似的东西也匹配起来了。(由于这两个图像只有水平旋转,所以水平的匹配线才是对的,其他的都是误匹配)。因此,需要筛选一下这些匹配,例如,把distance太大的给去掉(源文件69到88行)。
筛选的准则是:去掉大于最小距离四倍的匹配。
小萝卜:为什么是四倍呢?
师兄:这只是个经验数值啦,就像你平时都买一斤半的枣糕呀,为什么不买两斤呢?
小萝卜:我喜欢吃枣糕!等这节讲完我们去吃枣糕吧!
师兄:呃……总、总之,选出来的goodmatch大概是这样的:
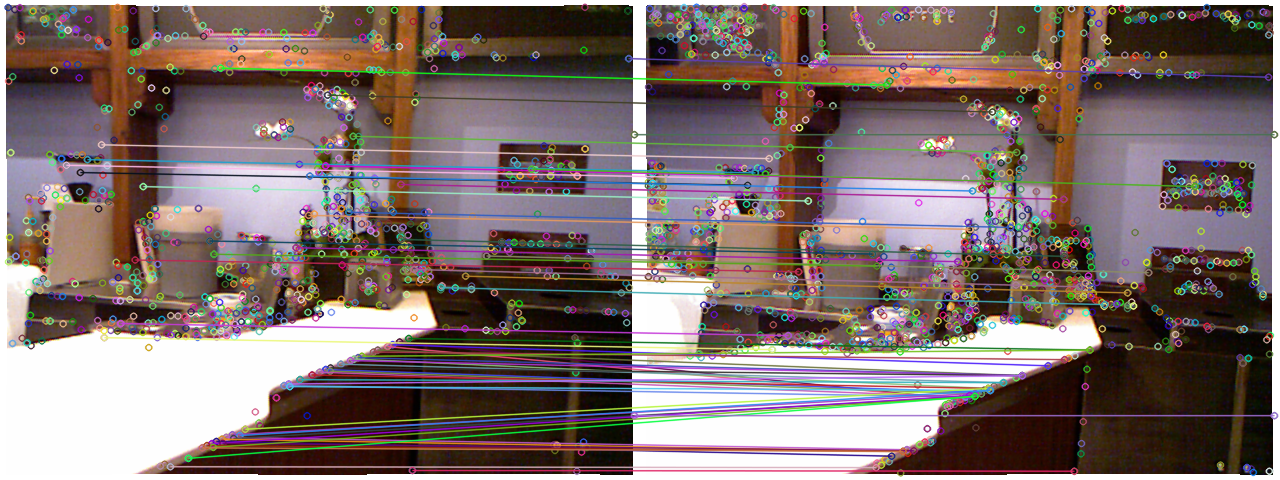
筛选之后,匹配就少了许多了,图像看起来也比较干净。
第三部分 求解PnP
求解PnP的核心是调用OpenCV里的SolvePnPRansac函数。该函数的接口如下(来自OpenCV在线API):
- C++: void solvePnPRansac(InputArray objectPoints, InputArray imagePoints, InputArray cameraMatrix, InputArray distCoeffs, OutputArray rvec, OutputArray tvec, bool useExtrinsicGuess=false, int iterationsCount=100, float reprojectionError=8.0, int minInliersCount=100, OutputArray inliers=noArray(), int flags=ITERATIVE )
- Python: cv2.solvePnPRansac(objectPoints, imagePoints, cameraMatrix, distCoeffs[, rvec[, tvec[, useExtrinsicGuess[, iterationsCount[, reprojectionError[, minInliersCount[, inliers[, flags]]]]]]]]) → rvec, tvec, inliers
-
Parameters: - objectPoints – Array of object points in the object coordinate space, 3xN/Nx3 1-channel or 1xN/Nx1 3-channel, where N is the number of points. vector<Point3f> can be also passed here.
- imagePoints – Array of corresponding image points, 2xN/Nx2 1-channel or 1xN/Nx1 2-channel, where N is the number of points. vector<Point2f> can be also passed here.
- cameraMatrix – Input camera matrix
 .
. - distCoeffs – Input vector of distortion coefficients
![(k_1, k_2, p_1, p_2[, k_3[, k_4, k_5, k_6]])](http://docs.opencv.org/_images/math/94288b7709d10a7ddf286e33db0074512bda0411.png) of 4, 5, or 8 elements. If the vector is NULL/empty, the zero distortion coefficients are assumed.
of 4, 5, or 8 elements. If the vector is NULL/empty, the zero distortion coefficients are assumed. - rvec – Output rotation vector (see Rodrigues() ) that, together with tvec , brings points from the model coordinate system to the camera coordinate system.
- tvec – Output translation vector.
- useExtrinsicGuess – If true (1), the function uses the provided rvec and tvec values as initial approximations of the rotation and translation vectors, respectively, and further optimizes them.
- iterationsCount – Number of iterations.
- reprojectionError – Inlier threshold value used by the RANSAC procedure. The parameter value is the maximum allowed distance between the observed and computed point projections to consider it an inlier.
- minInliersCount – Number of inliers. If the algorithm at some stage finds more inliers than minInliersCount , it finishes.
- inliers – Output vector that contains indices of inliers in objectPoints and imagePoints .
- flags – Method for solving a PnP problem (see solvePnP() ).
可以看到,这个函数需要输入一组匹配好的三维点: objectPoints 和一组二维图像点: imagePoints. 返回的结果是旋转向量 rvec 和平移向量tvec。其他的都是算法中的参数。因此,我们需要想办法构建这两组输入点,它们实际上就是从goodmatches里抽取来的。
由于我们已经提取了KeyPoint,知道了它们的像素坐标。那么,利用上一节提供的库函数,就可以直接转到三维点啦。代码如下:(因为很重要就又贴了一遍)
 1 // 计算图像间的运动关系
 2     // 关键函数:cv::solvePnPRansac()
 3     // 为调用此函数准备必要的参数
 4
 5     // 第一个帧的三维点
 6     vector<cv::Point3f> pts_obj;
 7     // 第二个帧的图像点
 8     vector< cv::Point2f > pts_img;
 9
10     // 相机内参
11     CAMERA_INTRINSIC_PARAMETERS C;
12     C.cx = 325.5;
13     C.cy = 253.5;
14     C.fx = 518.0;
15     C.fy = 519.0;
16     C.scale = 1000.0;
17
18     for (size_t i=0; i<goodMatches.size(); i++)
19     {
20         // query 是第一个, train 是第二个
21         cv::Point2f p = kp1[goodMatches[i].queryIdx].pt;
22         // 获取d是要小心!x是向右的,y是向下的,所以y才是行,x是列!
23         ushort d = depth1.ptr<ushort>( int(p.y) )[ int(p.x) ];
24         if (d == 0)
25             continue;
26         pts_img.push_back( cv::Point2f( kp2[goodMatches[i].trainIdx].pt ) );
27
28         // 将(u,v,d)转成(x,y,z)
29         cv::Point3f pt ( p.x, p.y, d );
30         cv::Point3f pd = point2dTo3d( pt, C );
31         pts_obj.push_back( pd );
32     }
33
34     double camera_matrix_data[3][3] = {
35         {C.fx, 0, C.cx},
36         {0, C.fy, C.cy},
37         {0, 0, 1}
38     };
39
40     // 构建相机矩阵
41     cv::Mat cameraMatrix( 3, 3, CV_64F, camera_matrix_data );
42     cv::Mat rvec, tvec, inliers;
43     // 求解pnp
44     cv::solvePnPRansac( pts_obj, pts_img, cameraMatrix, cv::Mat(), rvec, tvec, false, 100, 1.0, 100, inliers );
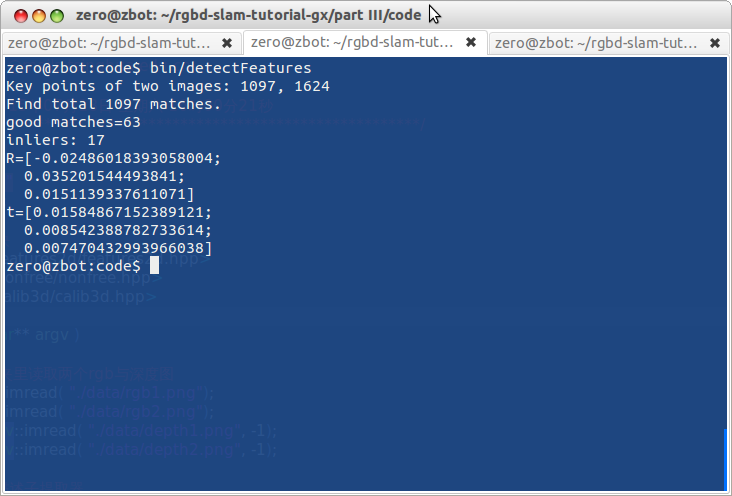
求解完成后,rvec和tvec就含有了位移和旋转的信息,至此,我们已经成功地计算出两个图像的运动啦!
小萝卜:对了,那个Ransac和inlier是什么呢?
师兄:尽管经过了筛选,我们提供的匹配里还是存在误匹配的情况。根据误匹配计算运动是不靠谱的。这时该怎么办呢?OpenCV会利用一种“随机采样一致性”(Random Sample Consensus)的思路(见https://en.wikipedia.org/wiki/RANSAC)。意思即为,在现有的匹配中随机取一部分,估计其运动。因为正确的匹配结果肯定是相似的,而误匹配的结果肯定满天乱飞。只要把收敛的结果取出来即可。
小萝卜:这个就叫做“幸福的家庭都是相似的,不幸的家庭各有各的不幸”吧。
师兄:你这样理解也可以。ransac适用于数据噪声比较大的场合。这对图像的inlier大概是这样的:

小萝卜:似乎仍有一些误差的样子呢。
师兄:是的,不过可以通过调节我们之前的筛选过程以及之后的ransac参数,得到更好的结果。
本节回顾
本节中,我们介绍了如何提取、匹配图像的特征,并通过这些匹配,使用ransac方法估计图像的运动。下一节,我们将介绍如何使用刚得到的平移、旋转向量来拼接点云。至此,我们就完成了一个只有两帧的迷你SLAM程序。
课后作业:
- 请把计算图像运动信息封装成一个函数,放进slamBase库中。
- 由于我们的程序变复杂了,出现了一些内部的参数,如特征点类型,筛选准则,ransac参数等等。如果我们把这些参数值定义在源代码里,那么每修改一次,就要重新编译一遍程序。这非常麻烦。所以,我们希望把参数定义在外部文件中,在程序刚开始时读取此文件。这样一来,只要更改此文件即可完成参数的调节,不必重新编译程序了。因此,请你完成一个读取参数的类,放进slamBase中。
小萝卜:这一讲比前两节难好多啊,师兄。
师兄:是啊,然而我也不得不讲这些东西,不然讲不清楚呢。
小萝卜:嗯,那我回去好好复习啦。大家也要加油!
未完待续

