

Python-Visual Studio Code
官网:https://code.visualstudio.com/
1、基础配置
1.1 常用设置
- 导入导出配置:点击左小角 齿轮设置 -> Profile(Import、Export)
- 关闭VS code更新:Update: Mode = none
- 开启删除终端确认:Window: Confirm Before Close = always
- 开启退出询问:Confirm On Exit = always
- 开启自动保存:Auto Save = afterDelay
1.2 settings.json
作用:VS Code 的用户和工作区设置文件,用于自定义编辑器的所有行为、外观和功能。
- Windows 全局设置:
%APPDATA%\Code\User\settings.json - Linux 全局设置
~/.config/Code/User/settings.json - 项目局部设置:项目根目录下的
.vscode/settings.json
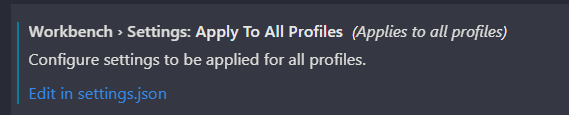


{
    // 自动保存
    "files.autoSave": "afterDelay",
    "files.autoSaveDelay": 1000,

    // 文件排除
    "files.exclude": {
        "**/node_modules": true,
        "**/.git": true,
        "**/dist": true,
        "**/build": true,
        "**/*.js.map": true
    },

    // 搜索排除
    "search.exclude": {
        "**/node_modules": true,
        "**/bower_components": true,
        "**/dist": true
    },

    // 代码格式化
    "editor.formatOnSave": true,
    "editor.formatOnPaste": true,
    "editor.codeActionsOnSave": {
        "source.fixAll": true,
        "source.organizeImports": true
    },

    // 自动补全和建议
    "editor.suggestSelection": "first",
    "editor.wordBasedSuggestions": "allDocuments",
    "editor.quickSuggestions": {
        "other": true,
        "comments": false,
        "strings": true
    }
}
2、核心插件
2.1 常用插件
| Remote - SSH | 远程连接Linux进行运行、调试 |
| Snazzy Operator Plus | 好用的主题 |
| Git Graph | Git 图形化视图 |
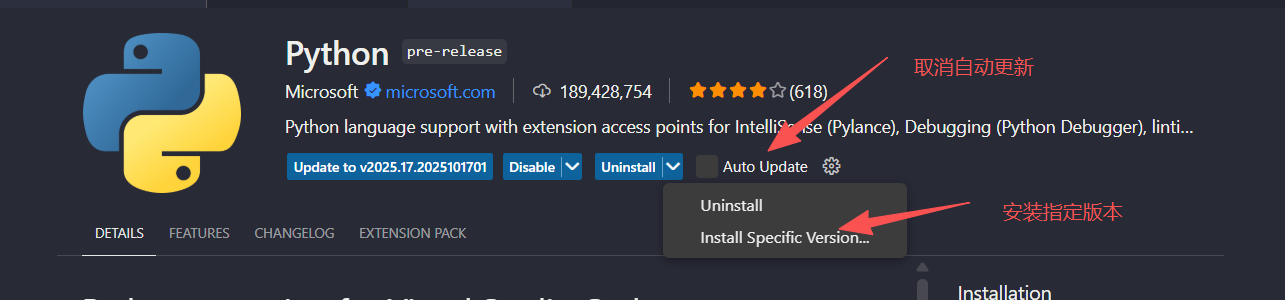
| Python |
安装2022.10.0之前的版本 1、老版本才能进行Debug |
| Pylance |
安装2022.8.10及之前版本 |
2.2 报错处理
- cannot read properties of undefined reading resolveEnvironment
- 原因:2022.10.0之后的Python插件更改了调试API,导致部分旧版调试配置不兼容
- 解决办法:把pylance降到和python插件一样的版本,不使用Python Debugger
3、日常开发流
3.1 常用快捷键
|
放大/缩小
|
注释
代码块注释:Ctrl+Shift+/ 方法或类注释:/**+回车 |
命令面板(万能快捷键)
|
|
当前文件搜索
|
全局搜索
|
搜索设置
|
|
打开终端
|
打开新终端
|
打开新窗口
Ctrl+Shift+N |
|
Go to Definition 跳转到定义位置
Ctrl+鼠标左键 |
Go to References Find All References 查找所有引用 鼠标右键菜单-Find All References |
返回之前\之后位置 Alt+<或> |
3.2 版本控制
-
准备
- 拥有Gitlab仓库权限(Developer才能提交代码)
- 配置Gitlab SSH Keys(本地+远端)
- 克隆仓库
- 修改代码
- 提交:先pull获取最新代码确认是否有冲突、再commit(包含add到暂存区)、最后push
-
忽略版本控制
- 项目根目录创建.gitignore
- .gitignore写入忽略版本控制的内容(支持正则表达式)
-
- Python项目通常应忽略 __pycache__/、*.pyc、.env 等
- 某些文件已被 Git 追踪,修改.gitignore 后不会自动生效,需要手动清除
- 手动清除追踪:git rm --cached <file-name>
-
4、 配置与使用调试器
VS Code 的强大调试功能是其核心优势之一。通过 launch.json 文件,可以精细控制调试行为。
第一步:创建配置文件
-
点击左侧“运行和调试”图标 (Ctrl+Shift+D),然后点击“创建 launch.json 文件”。
-
选择“Python”,VS Code 会自动在
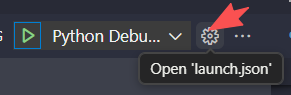
.vscode文件夹下生成launch.json。 - 点击齿轮打开launch.json、修改内容
- 保存路径:路径:.vscode\launch.json
第二步:常用配置项解读
Python 3.6.8配置launch.json示例:
{
    "version": "0.2.0",
    "configurations": [
        {
            "name": "Python: Current File",
            "type": "python",
            "request": "launch",
            "program": "${file}",
            "console": "integratedTerminal",
            "justMyCode": true,
            "cwd":"${fileDirname}",
            "args": [
                "--moduleManager=False",
                "--dut=0000:c2:00.0",
                ],
        }
    ]
}
| name | 显示在调试下拉列表中的名称 | "Python: Current File" |
|
type |
调式器类型,Python 3.7+ 推荐"debugpy", 之前版本推荐使用"python" |
"debugpy" (python-原生调试器、debugpy-三方插件Python Debugger、debugpy-old等) |
|
request |
依赖操作 |
"launch"(启动程序)
|
|
program |
运行的程序文件路径 |
"${file}"(调试当前打开的文件),与"${fileDirname}"配合使用 --适合调试单个脚本 "app.py"(始终调试指定的固定文件),与"${workspaceFolder}"配合使用 --适合项目有固 定入口,需要调试整个应用的启动流程 |
|
console |
控制台类型 |
"integratedTerminal"
|
|
justMyCode |
调试时是否进入源码 | true(不进入源码) |
|
cwd |
工作目录 |
"${fileDirname}"(当前文件所在的目录)
"${workspaceFolder}"(项目根目录)
|
|
args |
传入的命令行参数 |
[
"--moduleManager=False",
"--dut=0000:c2:00.0",
]
|
第三步:开始调试
- 在代码行号左侧单击,设置红色断点。

- 在调试下拉列表中选择你配置的名称(如 Python: Current File)。

- 点击绿色播放按钮(或按 F5)启动调试。
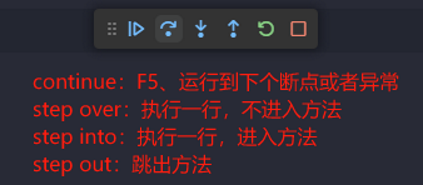
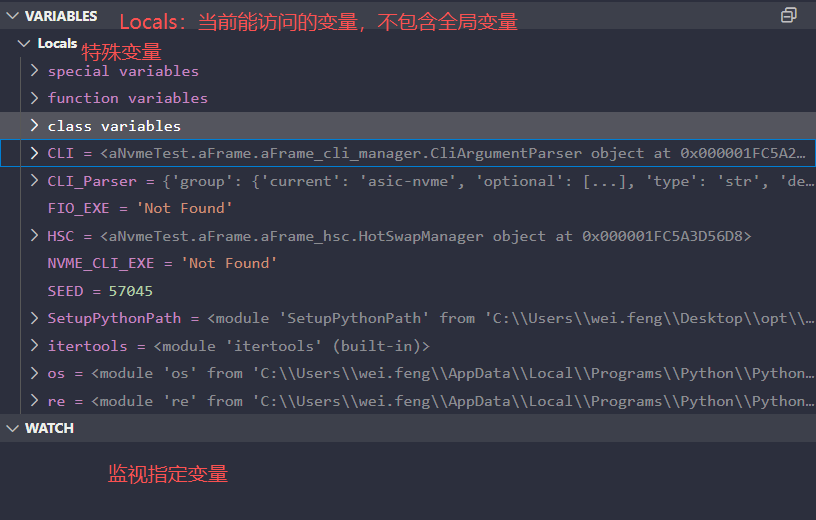
- 程序会在断点处暂停,可以查看左侧“变量”区域的变量值,或在“调试控制台”执行表达式。
- function-函数、class-类
其它-远程调试
- Ctrl+Shift+P打开命名面板,搜索Remote-SSH,先Add New SSH Host,再Connect to Host

- 连接成功后,点击Open Folder,打开远程服务器上的项目

- 安装远程调试使用的相关插件(注意版本要求)
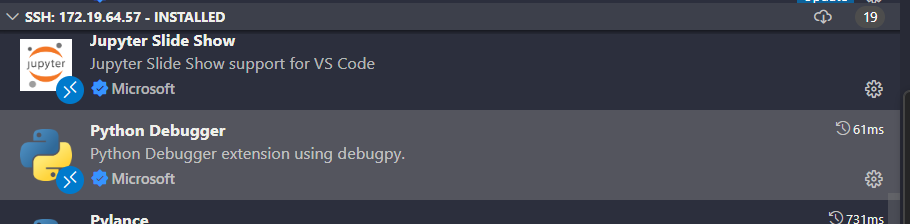
- 配置launch.json,执行调试
5、其它技巧
5.1 查看函数入参和返回值

5.2 多行同时缩进
- 选中多行:选中你想要移动的那些行
- 向右移动:按下键盘上的 Tab 键。选中的所有行会立刻向右移动一个缩进单位 。
- 向左移动:按下 Shift + Tab 组合键。选中的所有行会立刻向左移动一个缩进单位
5.3 窗口内运行
- python .\run_agent.py
本文来自博客园,作者:FengweiTech,转载请注明原文链接:https://www.cnblogs.com/fengwei-blogs/p/19169379

 浙公网安备 33010602011771号