开发集合控件的拖拽流程优化——以TreeView为例
简介
文章不会介绍简单的拖拽开发流程,而是记录如何在已有拖拽控件上进一步优化,提高控件的性能和使用体验。具体的优化内容主要涉及到一下几个方面。代码中使用到的工具类都会在文章末尾给出。
- 虚拟化提高控件加载性能。
- 拖拽操作的防误触。
- 拖拽时鼠标的样式修改
- 在拖拽时的高光显示以及靠近上端或低端时滚动条自动滚动。
- 拖拽结点的位置移动。
虚拟化
很多时候,当我们一次在集合控件中添加大量元素后,会导致程序卡顿甚至停止响应,并且UI的渲染速度也十分缓慢。这时候就需要用到虚拟化技术。
VirtualizingPanel
VirtualizingPanel是WPF中一个特殊的面板抽象基类,它的核心功能是仅渲染当前可见区域内的元素,而非所有数据项。该类中提供了与虚拟化相关的参数设置。
| 参数 | 描述 |
|---|---|
| VirtualizingPanel.CacheLength | 控件需要缓存的项目数。这意味着在视口之外的区域中,面板会保留一定数量的项目以提高滚动平滑度。 |
| VirtualizingPanel.CacheLengthUnit | CacheLengthUnit 属性定义 CacheLength 的单位。其中 Item 表示缓存的长度以项目的数量为单位,Pixel 表示缓存的长度以像素为单位。 |
| VirtualizingPanel.IsContainerVirtualizable | 当元素滚动出可见区域时,面板会尝试回收这些元素的容器(如 ListBoxItem、TreeViewItem)以节省资源。IsContainerVirtualizable 属性用于指定:某个具体的容器元素是否允许被虚拟化面板回收。 |
| VirtualizingPanel.IsVirtualizing | 面板是否启用虚拟化。这是虚拟化的核心设置,设置为 True 表示面板会仅对视口内的项目进行渲染和处理,而不是一次性加载所有项目。 |
| VirtualizingPanel.IsVirtualizingWhenGrouping | 面板在分组时是否继续进行虚拟化。当设置为 True 时,面板在分组数据时仍然会应用虚拟化策略,以保持性能优化。 |
| VirtualizingPanel.ScrollUnit | 定义滚动的单位。可以选择 Item 或 Pixel,其中 Item 表示每次滚动一个项目,Pixel 表示每次滚动一定像素。值:Item 表示每次滚动一个项目的单位,而不是固定像素数,这对于项目高度一致的情况尤其有效。 |
| VirtualizingPanel.VirtualizationMode | 指定虚拟化模式。Recycling 模式表示控件会重用已经不再可见的项目的容器,而不是销毁它们。 |
VirtualizingStackPanel
VirtualizingStackPanel 是 WPF 中最常用的虚拟化面板控件,专为高效处理大量数据项的列表场景 ** 设计,通过 “仅渲染可见区域元素” 的机制显著提升性能。它是 VirtualizingPanel 的子类。WPF中的部分集合控件(ListBox、ListView、DataGrid、TreeView都已经默认使用该控件)。 但对于,TreeView仅针对展开的节点层级生效。 未展开的的一级结点则不会采用虚拟化。
如何使用虚拟化
需要明确一点,如果在控件中没有使用继承VirtualizingPanel的虚拟化控件(如VirtualizingStackPanel),而是仅仅通过VirtualizingPanel设置了相关的虚拟化属性,那么控件是不会具备虚拟化效果的。
通过上面的介绍可知,已经有部分控件完全实现了虚拟化的支持。但对于ItemsControl,由于其使用场景以及作为集合控件的基类,WPF中并未直接支持其虚拟化,需要手动设置其ItemsPanelTemplate,来实现虚拟化。
点击查看代码
 <ScrollViewer Height="300"> <!-- 提供滚动容器 -->
    <ItemsControl ItemsSource="{Binding LargeDataSource}">
        <!-- 替换为虚拟化面板 -->
        <ItemsControl.ItemsPanel>
            <ItemsPanelTemplate>
                <VirtualizingStackPanel
                    IsVirtualizing="True"  <!-- 启用虚拟化(默认True) -->
                    VirtualizationMode="Recycling"/> <!-- 优化容器复用 -->
            </ItemsPanelTemplate>
        </ItemsControl.ItemsPanel>
    </ItemsControl>
</ScrollViewer>
最后,当我们想要实现一些自定义的集合控件效果,在重写控件的ItemsPanel的控件模板时,一定不要忘记把ItemsPanel的模板设置为VirtualizingStackPanel,否则,即便我们应用了虚拟化属性。但由于未使用虚拟化控件,也无法开启虚拟化导致重写后的控件模板性能大大降低影响使用。
点击查看代码
<Setter Property="ItemsPanel">
    <Setter.Value>
        <ItemsPanelTemplate>
            <VirtualizingStackPanel
                Margin="0"
                IsItemsHost="True"
                VirtualizingPanel.IsVirtualizing="True"
                VirtualizingPanel.VirtualizationMode="Recycling" />
        </ItemsPanelTemplate>
    </Setter.Value>
</Setter>
防误触
这个非常好理解,当我们点击TreeViewItem时,可能我们不经意间,碰到鼠标左键一滑就直接开启拖拽。从而导致误操作。
优化方向从两方面考虑。
- 鼠标点击时距离TreeView边缘的距离。
- 当鼠标在按住状态下移动一定距离后,才开启拖拽功能。
思路非常好理解,下面就直接给出对应的代码实现。
在下面的方法中(对于为什么是隧道事件后面会讲),主要完成了两点操作。
- 获取选中项
- 判断点击位置,如果在合理范围就记录点击位置,然后将拖拽标志设置为True。
PreviewMouseLeftButtonDown
private void ModuleTree_PreviewMouseLeftButtonDown(object sender, MouseButtonEventArgs e)
{
    if(ModuleTree.Items.Count==0)
    {
        ModuleTree.Focus();
        return;
    }

    Point pt = e.GetPosition(ModuleTree);

    HitTestResult result= VisualTreeHelper.HitTest(ModuleTree, pt);
    if(result == null)
    {
        return;
    }

    TreeViewItem selectedItem = ElementHelper.FindVisualParent<TreeViewItem>(result.VisualHit);
    if (selectedItem != null) {
        SelectedNode = selectedItem.DataContext as ModuleNode;
        selectedItem.IsSelected = true;

    }

    //靠近滚轮则不执行拖动
    if (ModuleTree.ActualWidth - pt.X > 80)
    {
        if (SelectedNode != null && SelectedNode.IsCategory == false)
        {
            m_MousePressY = pt.Y;
            m_MousePressX = pt.X;
            m_DragModuleName = SelectedNode.Name;
            m_DragMoveFlag = true;
        }
    }
}
ModuleTree_MouseMove
  private void ModuleTree_MouseMove(object sender, MouseEventArgs e)
  {
      if(m_DragMoveFlag == true)
      {
          Point pt = e.GetPosition(ModuleTree);

          // 与点击位置超过10个像素,表示能开始拖动
          if(Math.Abs(pt.Y-m_MousePressY)>10 || Math.Abs(pt.X - m_MousePressX) > 10)
          {
              string showTxt = SelectedNode.Name;
              m_DragCursor = CursorHelper.CreateCursor(200,28,12,ImageHelper.ImageSourceToBitmap(SelectedNode.IconImage),26, showTxt);
              m_DragMoveFlag= false;
              // 启动拖拽
              DragDrop.DoDragDrop(ModuleTree,$"{m_DragModuleName}",DragDropEffects.Move);
          }
      }
  }
鼠标拖拽时的样式修改
在拖拽时实现类似于下面Windows的拖拽效果,从而在拖拽过程中实时给予用户反馈。
GiveFeedback
实现此类功能,首先需要了解这个事件,GiveFeedback是Drop类的一个附加事件。对拖动源进行拖动时,持续引发 GiveFeedback事件。我们需要在这个事件下定义鼠标指针的修改逻辑,从而实现拖拽过程中的鼠标样式变更。还是先给出代码实现,然后介绍。
下面的代码中,每一步都很重要。在方法中我们首先关闭了光标的默认样式,然后将鼠标设置为了一个新的样式(m_DragCursor是我们在当前类中定义的一个字段,类型为Cursor)。然后设置e.Handled = true;。这步很重要,防止因为冒泡事件导致我们的鼠标样式又被修改回去。
GiveFeedback
private void ModuleTree_GiveFeedback(object sender, GiveFeedbackEventArgs e)
{
    // 不用启用默认光标
    e.UseDefaultCursors = false;
    // 设置鼠标样式
    Mouse.SetCursor(m_DragCursor);
    // 防止冒泡事件干扰
    e.Handled = true;
}
接下来,要回到上面介绍的ModuleTree_MouseMove方法中。在这个方法中,一旦我们开启了拖拽就要去设置 m_DragCursor 为我们指定的鼠标样式。所使用的CreateCursor方法,通过在一个Bitmap上使用Graphics去绘制我们传入的图像以及文本内容,然后通过Bitmap创建出一个Cursor并返回。
点击查看代码
private void ModuleTree_MouseMove(object sender, MouseEventArgs e)
{
    if(m_DragMoveFlag == true)
    {
        Point pt = e.GetPosition(ModuleTree);

        // 与点击位置超过10个像素,表示能开始拖动
        if(Math.Abs(pt.Y-m_MousePressY)>10 || Math.Abs(pt.X - m_MousePressX) > 10)
        {
            string showTxt = SelectedNode.Name;
            m_DragCursor = CursorHelper.CreateCursor(200,28,12,ImageHelper.ImageSourceToBitmap(SelectedNode.IconImage),26, showTxt);
            m_DragMoveFlag= false;
            // 启动拖拽
            DragDrop.DoDragDrop(ModuleTree,$"{m_DragModuleName}",DragDropEffects.Move);
        }

    }
}
高光显示和自动滚动
-
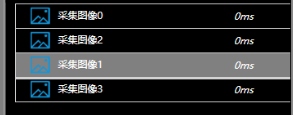
高光显示类似于下面的效果,当我们进行拖拽时当前鼠标悬停的TreeViewItem会有额外的高亮显示效果,告诉用户当前选中的Item。
这个功能关在于,由于我们已经按住了鼠标左键开始进行拖拽,该如何获取鼠标与控件在UI界面上的交点是否有一个TreeViewItem。需要使用VisualTreeHelper.HitTest()方法找到鼠标位置与控件元素的交点上的控件,然后通过VisualTreeHelper.GetParent()寻找指定类型的控件(此处为TreeViewItem)。 -
自动滚动就是,拖拽时鼠标靠近控件下边或上边时,滚动条自动滚动。这里设计的难点在于,如何获取到TreeView当中的自带的滚动条。主要有两种方法:1.通过VisualTreeHelper便利找到指定的滚动条。2.使用自动化对等体(AutomationPeer),通过AutomationPeer控件可以对外完全暴漏自身的信息(包括我们无法直接获取到的内容)。代码中使用的是第二种方法,
下面就给出实现代码,
DragOver
 /// <summary>
 /// 拖拽过程中,改变被选中节点
 /// </summary>
 /// <param name="sender"></param>
 /// <param name="e"></param>
 private void ModuleTree_DragOver(object sender, DragEventArgs e)
 {
     // 获取鼠标位置
     Point pt = e.GetPosition((ModuleTree));
     HitTestResult result = VisualTreeHelper.HitTest(ModuleTree,pt);

     if(result==null)
     {
         return;
     }

     // 获取鼠标位置上的模块节点
     TreeViewItem selectedItem = ElementHelper.FindVisualParent<TreeViewItem>(result.VisualHit);

     if(selectedItem!=null)
     {
         // 设为被选中状态
         selectedItem.IsSelected = true;

         ModuleNode node = selectedItem.DataContext as ModuleNode;
         if(SelectedNode !=null)
         {
             if(SelectedNode.Name!=node.Name)
             {
                 // 下划线加粗
                 SelectedNode.DragOverHeight = 1;
             }
         }

         // 赋值选中节点
         SelectedNode =node;
         // 下划线加粗
         SelectedNode.DragOverHeight = 3;

     }


     //通过TreeViewAutomationPeer获取 控件中的滚动条
    TreeViewAutomationPeer lvap = new TreeViewAutomationPeer(ModuleTree);
    ScrollViewerAutomationPeer svap = lvap.GetPattern(PatternInterface.Scroll) as ScrollViewerAutomationPeer;
    ScrollViewer scroll = svap.Owner as ScrollViewer;
    pt = e.GetPosition((ModuleTree));

    // 鼠标接近底部50个像素的时候,自动往下滚动10个像素
    if (ModuleTree.ActualHeight-pt.Y <=50)
    {
        // 向下
        scroll.ScrollToVerticalOffset(scroll.VerticalOffset+10);
    }
    // 鼠标接近顶部50个像素的时候,自动往上滚动10个像素
    if (Math.Abs(pt.Y) <= 50)
    {
        // 向上
        scroll.ScrollToVerticalOffset(scroll.VerticalOffset - 10);
    }
}
补充
想要开发出一个可用性强的拖拽控件,需要考虑的内容非常多。仅仅只是实现拖拽功能是不够的。
TreeViewItem的事件拦截
在开发TreeView和ListBox等相关功能时,往往需要在集合控件上通过点击事件(MouseLeftButtonDown事件),记录点击位置,获取选中项等操作。
当时,我在写代码时在TreeView使用的是MouseLeftButtonDown,这是一个冒泡事件。然后,我发现当我点击对应的TreeViewItem时,无法触发对应的事件,这个事件只在我点击TreeView的空白部分时才会触发。后来查资料发现,在集合控件中,其本身的Item就已经定义了MouseLeftButtonDown事件(用来修改选中项和变更选中状态等),然后Item会把这个事件截断,导致TreeView无法接收到。
总结一下,就是对于集合控件,想通过鼠标的Down开启拖拽事件,一定要去使用隧道事件PreviewMouseLeftButtonDown。这点很关键而且很细节。
工具类
CursorHelper
using Microsoft.Win32.SafeHandles;
using System;
using System.Drawing;
using System.Runtime.InteropServices;
using System.Security.Permissions;
using System.Windows.Input;
using System.Windows.Interop;


namespace ModuleView
{
    /// <summary>
    /// 光标工具
    /// </summary>
    public class CursorHelper
    {
        /// <summary>
        /// 自定义光标
        /// </summary>
        /// <param name="width">光标宽度</param>
        /// <param name="height">光标高度</param>
        /// <param name="fontSize">光标字体的大小</param>
        /// <param name="ico">显示的图片</param>
        /// <param name="imageSize">图片尺寸</param>
        /// <param name="text">显示的内容</param>
        /// <returns></returns>
        public static Cursor CreateCursor(int width, int height, float fontSize, Bitmap ico, int imageSize, string text)
        {
            Bitmap m_Buff = new Bitmap(width, height);
            using (Graphics graphics = Graphics.FromImage(m_Buff))
            {
                graphics.FillRectangle(new SolidBrush(Color.Transparent), 0, 0, width, height);
                using (System.Drawing.Font font = new System.Drawing.Font("宋体", fontSize, System.Drawing.FontStyle.Regular))
                {
                    using (SolidBrush brush = new SolidBrush(Color.White))
                    {
                        graphics.DrawString(text, font, brush, imageSize + 10, (height - fontSize) / 2);
                    }
                }
                graphics.DrawImage(ico, 0, (height - imageSize) / 2, imageSize, imageSize);
            }
            return CreateCursor(m_Buff, 0, 0);
        }

        private static Cursor CreateCursor(Bitmap bm, uint xHotSpot = 0, uint yHotSpot = 0)
        {
            Cursor ret = null;
            if (bm == null)
            {
                return ret;
            }
            try
            {
                ret = InternalCreateCursor(bm, xHotSpot, yHotSpot);
            }
            catch (Exception)
            {
                ret = null;
            }
            return ret;
        }

        private static Cursor InternalCreateCursor(Bitmap bitmap, uint xHotSpot, uint yHotSpot)
        {
            var iconInfo = new NativeMethods.IconInfo();
            NativeMethods.GetIconInfo(bitmap.GetHicon(), ref iconInfo);
            iconInfo.xHotspot = xHotSpot;
            iconInfo.yHotspot = yHotSpot;
            iconInfo.ficon = false;
            SafeIconHandle cursorHandle = NativeMethods.CreateIconIndirect(ref iconInfo);
            return CursorInteropHelper.Create(cursorHandle);
        }

    }

    [SecurityPermission(SecurityAction.LinkDemand, UnmanagedCode = true)]
    public class SafeIconHandle : SafeHandleZeroOrMinusOneIsInvalid
    {
        public SafeIconHandle() : base(true)
        {

        }

        /// <summary>
        /// 释放资源
        /// </summary>
        /// <returns></returns>
        protected override bool ReleaseHandle()
        {
            return NativeMethods.DestroyIcon(handle);
        }

    }

    public static class NativeMethods
    {
        public struct IconInfo
        {
            public bool ficon;
            public uint xHotspot;
            public uint yHotspot;
            public IntPtr hbmMask;
            public IntPtr hbmColor;
        }

        [DllImport("user32.dll")]
        public static extern SafeIconHandle CreateIconIndirect(ref IconInfo icon);

        [DllImport("user32.dll")]
        public static extern bool DestroyIcon(IntPtr hIcon);

        [DllImport("user32.dll")]
        [return: MarshalAs(UnmanagedType.Bool)]
        public static extern bool GetIconInfo(IntPtr hIcon, ref IconInfo pIconInfo);
    }

}
ImageHelper
using System;
using System.Windows.Media.Imaging;
using System.Windows.Media;
using System.Windows;

namespace ModuleView
{
    public class ImageHelper
    {
        public static System.Drawing.Bitmap ImageSourceToBitmap(ImageSource imageSource)
        {
            try
            {
                if (imageSource != null)
                {
                    BitmapSource m = (BitmapSource)imageSource;
                    System.Drawing.Bitmap bmp = new System.Drawing.Bitmap(m.PixelWidth, m.PixelHeight, System.Drawing.Imaging.PixelFormat.Format32bppArgb);// 坑点:选Format32bppRgb将不带透明度
                    System.Drawing.Imaging.BitmapData data = bmp.LockBits(
                        new System.Drawing.Rectangle(System.Drawing.Point.Empty, bmp.Size),
                        System.Drawing.Imaging.ImageLockMode.WriteOnly,
                        System.Drawing.Imaging.PixelFormat.Format32bppPArgb);
                    m.CopyPixels(Int32Rect.Empty, data.Scan0, data.Height * data.Stride, data.Stride);
                    bmp.UnlockBits(data);
                    return bmp;
                }
                else
                {
                    return new System.Drawing.Bitmap(1, 1);
                }
            }
            catch (Exception)
            {
                return new System.Drawing.Bitmap(1, 1);
            }
        }
    }
}
ElementHelper
using System.Windows;
using System.Windows.Media;

namespace ModuleView
{
    /// <summary>
    /// 查询依赖对象的属性
    /// </summary>
    public class ElementHelper
    {
        /// <summary>
        /// 查询依赖对象的属性
        /// </summary>
        /// <typeparam name="T"></typeparam>
        /// <param name="obj"></param>
        /// <returns></returns>
        public static T FindVisualParent<T>(DependencyObject obj) where T : class
        {
            while (obj != null)
            {
                if (obj is T)
                {
                    return obj as T;
                }
                obj = VisualTreeHelper.GetParent(obj);
            }
            return null;
        }

    }
}

 浙公网安备 33010602011771号