Python - opencv(三)轮廓检测
一. findCounters轮廓检测
OpenCV-Python接口中使用cv2.findContours()函数来查找检测物体的轮廓。
参数
第一个参数是寻找轮廓的图像;
第二个参数表示轮廓的检索模式,有四种(本文介绍的都是新的cv2接口):
cv2.RETR_EXTERNAL表示只检测外轮廓
cv2.RETR_LIST检测的轮廓不建立等级关系
cv2.RETR_CCOMP建立两个等级的轮廓,上面的一层为外边界,里面的一层为内孔的边界信息。如果内孔内还有一个连通物体,这个物体的边界也在顶层。
cv2.RETR_TREE建立一个等级树结构的轮廓。
第三个参数method为轮廓的近似办法
cv2.CHAIN_APPROX_NONE存储所有的轮廓点,相邻的两个点的像素位置差不超过1,即max(abs(x1-x2),abs(y2-y1))==1 (Freeman炼码)
cv2.CHAIN_APPROX_SIMPLE压缩水平方向,垂直方向,对角线方向的元素,只保留该方向的终点坐标,例如一个矩形轮廓只需4个点来保存轮廓信息
cv2.CHAIN_APPROX_TC89_L1,CV_CHAIN_APPROX_TC89_KCOS使用teh-Chinl chain 近似算法
返回值
cv2.findContours()函数返回两个值,一个是轮廓本身,还有一个是每条轮廓对应的属性。
cv2.drawContours用来画轮廓,参数:
第一个参数是指明在哪幅图像上绘制轮廓;image为三通道才能显示轮廓
第二个参数是轮廓本身,在Python中是一个list;
第三个参数指定绘制轮廓list中的哪条轮廓,如果是-1,则绘制其中的所有轮廓。后面的参数很简单。其中thickness表明轮廓线的宽度,如果是-1(cv2.FILLED),则为填充模式。
example:
代码:
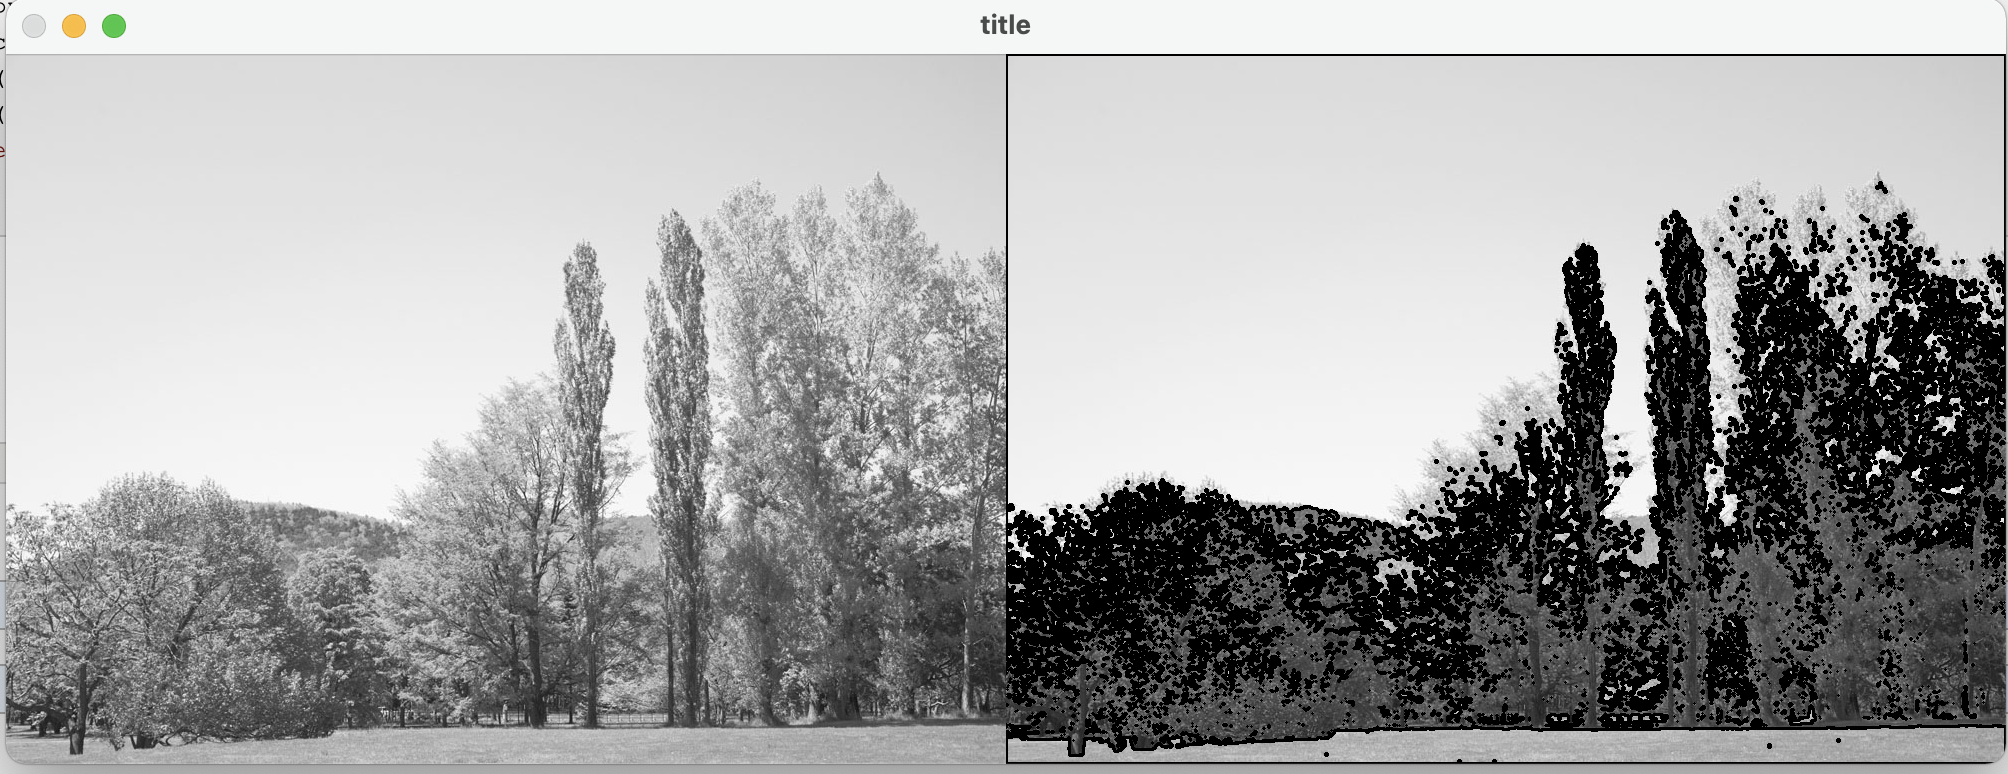
 1 import cv2
 2 import numpy as np
 3
 4 if __name__ == '__main__':
 5     img = cv2.imread('../pics/5.jpg', cv2.IMREAD_GRAYSCALE)
 6     ret, thresh = cv2.threshold(img, 140, 220, cv2.THRESH_BINARY)
 7
 8     img_cpy = img.copy()
 9     contours, hierarchy = cv2.findContours(thresh, cv2.RETR_TREE, cv2.CHAIN_APPROX_NONE)
10     cv2.drawContours(img_cpy, contours, -1, (0, 0, 255), 2)
11     res = np.hstack((img, img_cpy))
12     cv2.imshow('title', res)
13     cv2.waitKey()
二. 轮廓方法
1.求面积和周长
1 cnt = contours[0]
2 cv2.contourArea(cnt)    #求面积
3 cv2.arcLength(cnt, True)    #周长
2.轮廓近似
cv2.approxPolyDP(curve, epsilon, closed)
| curve | 需要进行近似的轮廓 |
| epsilon | 指定近似精度的参数ε,这是原始曲线与其近似值之间的最大距离。参数越小,两直线越接近 |
| closed | 若为true,曲线第一个点与最后一个点连接形成闭合曲线,若为false,曲线不闭合。 |
3.外接矩形和外接圆
参考:https://blog.csdn.net/li_l_il/article/details/87808795
cv2.rectangle(img, (x, y), (x + w, y + h), color, thickness)  #矩形
cv2.boundingRect(cnt)   #圆
示例代码:
 1 import cv2 as cv
 2 import numpy as np
 3
 4 # 读入图片
 5 src = cv.imread('contours.png')
 6 # 转换成灰度图
 7 gray = cv.cvtColor(src, cv.COLOR_BGR2GRAY)
 8 # 二值化
 9 ret, thresh = cv.threshold(gray, 129, 255, cv.THRESH_BINARY)
10
11 # 查找轮廓
12 # binary-二值化结果,contours-轮廓信息,hierarchy-层级
13 binary, contours, hierarchy = cv.findContours(thresh, cv.RETR_TREE, cv.CHAIN_APPROX_NONE)
14 # 显示轮廓,tmp为黑色的背景图
15 tmp = np.zeros(src.shape, np.uint8)
16 res = cv.drawContours(tmp, contours, -1, (250, 255, 255), 1)
17 cv.imshow('Allcontours', res)
18
19 cnt = contours[8]
20 tmp2 = np.zeros(src.shape, np.uint8)
21 res2 = cv.drawContours(tmp2, cnt, -1, (250, 255, 255), 2)
22 cv.imshow('cnt', res2)
23
24 # 轮廓特征
25 # 面积
26 print(cv.contourArea(cnt))
27 # 周长,第二个参数指定图形是否闭环,如果是则为True, 否则只是一条曲线.
28 print(cv.arcLength(cnt, True))
29
30 # 轮廓近似,epsilon数值越小,越近似
31 epsilon = 0.08 * cv.arcLength(cnt, True)
32 approx = cv.approxPolyDP(cnt, epsilon, True)
33 tmp2 = np.zeros(src.shape, np.uint8)
34 # 注意,这里approx要加中括号
35 res3 = cv.drawContours(tmp2, [approx], -1, (250, 250, 255), 1)
36 cv.imshow('approx', res3)
37
38 # 外接图形
39 x, y, w, h = cv.boundingRect(cnt)
40 # 直接在图片上进行绘制,所以一般要将原图复制一份,再进行绘制
41 tmp3 = src.copy()
42 res4 = cv.rectangle(tmp3, (x, y), (x + w, y + h), (0, 0, 255), 2)
43 cv.imshow('rectangle', res4)
44
45 cv.waitKey()
46 cv.destroyAllWindows()

 浙公网安备 33010602011771号