使用PAC file结合ATS控制访问
介绍:前面已经介绍了ATS的安装和PAC文件的写法格式,现在把nginx端口转发,pac file访问控制和ATS代理结合起来分别控制不同的机器访问不同URL权限的目的
效果如下

一、使用nginx端口转发
在机器192.168.43.85使用yum安装nginx
1.1 配置upstream
[root@localhost ~]# vim /etc/nginx/nginx.conf
user nginx;
worker_processes auto;
error_log /var/log/nginx/error.log;
pid /run/nginx.pid;
events {
    worker_connections 1024;
}

http {
    log_format  main  '$remote_addr - $remote_user [$time_local] "$request" '
                      '$status $body_bytes_sent "$http_referer" '
                      '"$http_user_agent" "$http_x_forwarded_for"';

    access_log  /var/log/nginx/access.log  main;

    sendfile            on;
    tcp_nopush          on;
    tcp_nodelay         on;
    keepalive_timeout   65;
    types_hash_max_size 2048;

    include             /etc/nginx/mime.types;
    default_type        application/octet-stream;
    include /etc/nginx/conf.d/ngx_http/http.conf.*;
}

stream {
        # Module ngx_stream_core_module
        preread_buffer_size         128k;       # Keep default value.
        preread_timeout             180s;
        proxy_protocol_timeout      180s;
        tcp_nodelay                 on;         # Enables the use of the TCP_NODELAY option.
        variables_hash_bucket_size  128;        # Keep default value.
        variables_hash_max_size     1024;       # Keep default value.

        # Module ngx_stream_log_module
        log_format           stream '[$time_iso8601] '
                                    '$remote_addr '
                                    '$protocol '
                                    '"Status-Code: $status" '
                                    '"Bytes-Sent: $bytes_sent" '
                                    '"Bytes-Reveived: $bytes_received" '
                                    '"Session-Time: $session_time" '
                                    '"Upstream-Addr: $upstream_addr" '
                                    '"Upstream-Bytes-Sent: $upstream_bytes_sent" '
                                    '"Upstream-Bytes-Received: $upstream_bytes_received" '
                                    '"Upstream-Connect-Time: $upstream_connect_time"';
        access_log           /var/log/nginx/stream.acc stream;
error_log            /var/log/nginx/stream.err;
        open_log_file_cache  max=10240;

        # Module ngx_stream_proxy_module
        proxy_buffer_size            128k;      # Keep default value.
        proxy_connect_timeout        180s;
        proxy_download_rate          0;         # Keep default value.
        proxy_next_upstream          on;        # Keep default value.
        proxy_next_upstream_timeout  1;         # Keep default value.
        proxy_next_upstream_tries    2;         # Keep default value.
        proxy_protocol               off;       # Enables the PROXY protocol for connections to a proxied server.
        proxy_timeout                180s;
        proxy_upload_rate            0;         # Keep default value.

        # Module ngx_stream_upstream_module

        include  /etc/nginx/include/stream.upstream;        #配置upstrean的路径
        include  /etc/nginx/conf.d/ngx_stream/Proxy/stream.conf.*;     #限制访问upstream的路径
1.2 配置转发
[root@localhost ~]# vim /etc/nginx/conf.d/ngx_stream/Proxy/stream.conf.proxy10001
server {
#       include  conf.d/ngx_stream/Proxy/include/http.ipallow.10001;

        # Module ngx_stream_core_module
        listen      8000;       #监听80端口,

        # Module ngx_stream_log_module
        access_log  /var/log/nginx/stream.proxy.10001.acc stream;
        error_log   /var/log/nginx/stream.proxy.10001.err;

        # Module ngx_http_proxy_module
        proxy_pass  proxy10001;   #转发
}
1.3 配置upstream的文件
[root@localhost ~]# vim /etc/nginx/include/stream.upstream
# Module ngx_stream_upstream_module
upstream proxy10001 {
        server 45.77.246.61:10001;
}
1.4 重启nginx
[root@localhost ~]# nginx -s reload
[root@localhost ~]# netstat -ntlp |grep 8000
tcp 0 0 0.0.0.0:8000 0.0.0.0:* LISTEN 1279/nginx: master
关闭防火墙和selinx
1.5 客户端配置查看

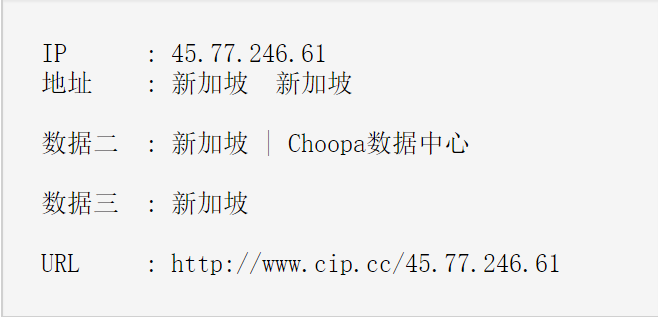
查看IP

二 结合pacfile
写一个PAC file,可以使用http下载
2.1 把PAC file 放在nginx的一个访问目录下
[root@localhost html]# pwd
/usr/share/nginx/html
[root@localhost html]# ll
-rw-r--r--. 1 root root 8846 Jun 9 09:14 proxy10001.pac
2.2 配置文件
server {
        # Module ngx_http_core_module
        listen      80;
        # Module ngx_http_charset_module
        charset     utf-8;

        # Module ngx_http_log_module
        access_log  /var/log/nginx/ngx_http/http.pacfiles.acc main;
        error_log   /var/log/nginx/ngx_http/http.pacfiles.err;

        location / {
                expires 0;
                root  /usr/share/nginx/html;
        }
}
2.3 检测脚本
[root@localhost ~]# vim /etc/nginx/nginx.conf

查看
使用nginx的访问控制,控制pac文件可以被那些IP访问
2.4 从80口控制
[root@localhost ~]# vim /etc/nginx/conf.d/ngx_http/http.conf.pacfiles
server {
        # Core functionality
       include     conf.d/ngx_http/include/http.ipallow.10001;   #添加此配置
        # Module ngx_http_core_module
        listen      80;
        # Module ngx_http_charset_module
        charset     utf-8;

        # Module ngx_http_log_module
        access_log  /var/log/nginx/ngx_http/http.pacfiles.acc main;
        error_log   /var/log/nginx/ngx_http/http.pacfiles.err;

        location / {
                expires 0;
                root  /usr/share/nginx/html;
        }
}
[root@localhost ~]# vim /etc/nginx/conf.d/ngx_http/include/http.ipallow.10001
#allow 192.168.43.0/24;   #禁止本地访问
deny all;
查看IP
pacfile没有生效
[root@localhost ~]# vim /etc/nginx/conf.d/ngx_http/include/http.ipallow.10001
allow 192.168.43.0/24;   #允许本地访问
deny all;
但是,由于有缓存,导致每次在禁止访问后,但是依然可以访问到代理上
2.5 禁止浏览器缓存
配置
[root@localhost ~]# vim /etc/nginx/nginx.conf
user nginx;
worker_processes auto;
error_log /var/log/nginx/error.log;
pid /run/nginx.pid;
events {
    worker_connections 1024;
}

http {
    log_format  main  '$remote_addr - $remote_user [$time_local] "$request" '
                      '$status $body_bytes_sent "$http_referer" '
                      '"$http_user_agent" "$http_x_forwarded_for"';

    access_log  /var/log/nginx/access.log  main;

    sendfile            on;
    tcp_nopush          on;
    tcp_nodelay         on;
    keepalive_timeout   65;
    types_hash_max_size 2048;
    add_header Cache-Control no-store;   #禁止缓存
    add_header Cache-Control no-cache;    #禁止缓存
    include             /etc/nginx/mime.types;
    default_type        application/octet-stream;
    include /etc/nginx/conf.d/ngx_http/http.conf.*;
}
则每次更改权限后,不会有缓存,可立即生效!
---------------------------------------------------------------------------
个性签名:我以为我很颓废,今天我才知道,原来我早报废了。
如果觉得本篇文章最您有帮助,欢迎转载,且在文章页面明显位置给出原文链接!记得在右下角点个“推荐”,博主在此感谢!

 浙公网安备 33010602011771号