linux驱动移植-SPI控制器驱动
----------------------------------------------------------------------------------------------------------------------------
内核版本:linux 5.2.8
根文件系统:busybox 1.25.0
u-boot:2016.05
----------------------------------------------------------------------------------------------------------------------------
在Mini2440裸机开发之SPI(OLED SSD1306)我们介绍了S3C2440这款SoC的SPI结构,其内部有两个SPI控制器:S3C2440 SPI相关引脚定义:
| SPI | SCLK | MOSI | MISO | SS |
| SPI0 | GPE13 | GPE12 | GPE11 | GPG2 |
| SPI1 | GPG7 | GPG6 | GPG5 | GPG3 |
这一节我们将研究S3C2440的SPI控制器驱动,或者说SPI Master驱动。
SPI控制器驱动是基于platform模型的,主要提供一个SPI片选以及SPI协议的收发函数。在platform driver中probe函数:
- 动态分配spi_controller,并进行成员初始化,包括设置prepare_transfer_hardware 、unprepare_transfer_hardware 、transfer_one 、set_cs ;
- 获取资源信息,并注册SPI中断处理函数;
- 初始化S3C2440 SPI相关的寄存器,设置S3C2410_SPCON、S3C2410_SPPIN;
- 初始化SPI总线所使用的的GPIO复用为SPI,取消片选;
- 最后将spi_controller注册到spi_bus_type总线,并且注册时会调用spi_match_controller_to_boardinfo,扫描borad_list链表并使用spi_new_device注册SPI从设备。
一、 platform设备注册(s3c2410-spi)
1.1 s3c_device_spi1
我们定位到arch/arm/plat-samsung/devs.c文件,可以发现定义了platform设备s3c_device_spi1,并且已经在头文件arch/arm/plat-samsung/include/plat/devs.h导出s3c_device_spi1 :
static struct resource s3c_spi1_resource[] = {
        [0] = DEFINE_RES_MEM(S3C24XX_PA_SPI1, SZ_32),
        [1] = DEFINE_RES_IRQ(IRQ_SPI1),
};

struct platform_device s3c_device_spi1 = {    // platform设备信息
        .name           = "s3c2410-spi",
        .id             = 1,
        .num_resources  = ARRAY_SIZE(s3c_spi1_resource),
        .resource       = s3c_spi1_resource,
        .dev            = {
                .dma_mask               = &samsung_device_dma_mask,
                .coherent_dma_mask      = DMA_BIT_MASK(32),
        }
};
我们重点关注一下platform设备资源定义,这里定义了2个资源,第1个是内存资源、第2个是中断资源:
- 第一个资源是IO内存资源,起始地址是SPI1寄存器基地址,即0x59000020,大小位32字节;
- 第二个资源是中断资源,中断号为IRQ_SPI1,即29;
此外dma_mask设置为:
#define samsung_device_dma_mask (*((u64[]) { DMA_BIT_MASK(32) }))
1.2 注册s3c_device_spi1
1.2.1 设置s3c_device_spi1.dev.platform_data
我们定位到arch/arm/mach-s3c24xx/mach-smdk2440.c,smdk2440_init_machine中保存的是开发板资源注册的初始化代码。
static void __init smdk2440_machine_init(void)
{
        s3c24xx_fb_set_platdata(&smdk2440_fb_info);
        s3c_i2c0_set_platdata(NULL);   // 初始化s3c_device_i2c0->dev.platform_data

        platform_add_devices(smdk2440_devices, ARRAY_SIZE(smdk2440_devices));  // s3c2440若干个platform设备注册 usb host controller、lcd、wdt等
        smdk_machine_init();  // s3c24x0系列若干个platform设备注册(通用)
}
我们修改smdk2440_machine_init添加如下代码:
s3c_spi1_set_platdata(&s3c2440_spi1_data);
同时需要在该文件定义s3c2440_spi1_data、s3c_spi1_set_platdata,并引入头文件linux/platform_data/spi-s3c2410.h、linux/spi/s3c24xx.h、mach/gpio-samsung.h :
#include <linux/platform_data/spi-s3c2410.h>
#include <linux/spi/s3c24xx.h>
#include <mach/gpio-samsung.h>

struct s3c2410_spi_info s3c2440_spi1_data = {  // 用于初始化s3c_device_spi1.dev.platform_data
        .pin_cs         = S3C2410_GPG(3),      // 这里我们使用GPG3作为SPI从设备的片选引脚,宏定义在arch/arm/mach-s3c24xx/include/mach/gpio-samsung.h
        .num_cs         = 1,                   // 片选数量
        .bus_num       = 1,                   // SPI控制器编号
        .use_fiq       = 0,                   // 这里我们关闭fip,使用irq即可
        .gpio_setup = s3c24xx_spi1_cfg_gpio   // 用于配置GPG5、6、7引脚功能复用为SPI  定义在include/linux/platform_data/spi-s3c2410.h
};

void __init s3c_spi1_set_platdata(struct s3c2410_spi_info *pd)  // 用于设置s3c_device_spi1.dev.platform_data
{
        struct s3c2410_spi_info *npd;

        npd = s3c_set_platdata(pd, sizeof(*npd), &s3c_device_spi1);

        if (!npd){
                printk(KERN_ERR "no memory for SPI platform data\n");
        }
}
修改文件arch/arm/mach-s3c24xx/setup-spi.c添加如下代码,并添加头文件mach/gpio-samsung.h 、linux/spi/s3c24xx.h、:
#include <linux/spi/s3c24xx.h>
#include <mach/gpio-samsung.h>

void s3c24xx_spi1_cfg_gpio(struct s3c2410_spi_info *spi, int enable)
{
    s3c_gpio_cfgpin(S3C2410_GPG(5), S3C2410_GPG5_SPIMISO1);   // 定义在arch/arm/mach-s3c24xx/include/mach/regs-gpio.h   2<<10
    s3c_gpio_cfgpin(S3C2410_GPG(6), S3C2410_GPG6_SPIMOSI1);   // 2<<12
    s3c_gpio_cfgpin(S3C2410_GPG(7), S3C2410_GPG7_SPICLK1);   // 2<<14
}
修改文件arch/arm/mach-s3c24xx/Makefile,添加如下代码:
#obj-$(CONFIG_S3C2443_SETUP_SPI)                += setup-spi.o
obj-$(CONFIG_ARCH_S3C24XX)              += setup-spi.o
创建include/linux/platform_data/spi-s3c2410.h文件,添加如下代码:
/* SPDX-License-Identifier: GPL-2.0-only */
/*
 * Copyright 2004-2009 Simtec Electronics
 *      Ben Dooks <ben@simtec.co.uk>
 *
 * S3C - I2C Controller platform_device info
*/

#ifndef __SPI_S3C2410_H
#define __SPI_S3C2410_H __FILE__
extern void s3c24xx_spi1_cfg_gpio(struct s3c2410_spi_info *spi, int enable);
#endif /* __SPI_S3C2410_H */
1.2.2 注册设备
smdk2440_machine_init函数内部platform_add_devices函数通过调用platform_device_register实现platform设备注册。
static struct platform_device *smdk2440_devices[] __initdata = {
        &s3c_device_ohci,
        &s3c_device_lcd,
        &s3c_device_wdt,
        &s3c_device_i2c0,
        &s3c_device_iis,
        &smdk2440_device_eth,
};
我们需要在smdk2440_devices数组添加&s3c_device_spi1(platform设备s3c_device_spi1是通过plat/devs.h头文件引入的)。
二、platform驱动注册(s3c2410-spi)
SPI控制器platform驱动定义位于drivers/spi/spi-s3c24xx.c文件中。
2.1 入口和出口函数
我们在spi-s3c24xx.c文件定位到驱动模块的入口和出口:
MODULE_ALIAS("platform:s3c2410-spi");
static struct platform_driver s3c24xx_spi_driver = {
        .probe          = s3c24xx_spi_probe,
        .remove         = s3c24xx_spi_remove,
        .driver         = {
                .name   = "s3c2410-spi",
                .pm     = S3C24XX_SPI_PMOPS,
        },
};
module_platform_driver(s3c24xx_spi_driver);
在plaftrom总线设备驱动模型中,我们知道当内核中有platform设备platform驱动匹配,会调用到platform_driver里的成员.probe,在这里就是s3c24xx_spi_probe函数。
2.2 SPI相关数据结构
2.2.1 s3c24xx_spi
在介绍s3c24xx_spi_probe之前,先来看一下s3c24xx_spi结构体定义,这个结构体是s3c24xx_spi_probe函数使用的,保存S3C2440 SPI控制器相关的信息,其定义在drivers/spi/spi-s3c24xx.c文件:
struct s3c24xx_spi {           // 用来表示SoC的一个SPI控制器
        /* bitbang has to be first */
        struct spi_bitbang       bitbang;   // 很重要的一个结构,用来初始化spi控制器的部分成员,比如:
                                               prepare_transfer_hardware 、unprepare_transfer_hardware 、transfer_one 、set_cs
        struct completion        done;      // 同步机制,在SPI数据传输中使用

        void __iomem            *regs;      // SPI控制器寄存器基地址
        int                      irq;       // SPI中断号
        int                      len;       // 发送/接收缓冲区长度
        int                      count;     // 当前需要发送/接收的字节在发送缓冲区的索引  由于是全双工通信,发送接收长度一样

        struct fiq_handler       fiq_handler;
        enum spi_fiq_mode        fiq_mode;
        unsigned char            fiq_inuse;
        unsigned char            fiq_claimed;

        void                    (*set_cs)(struct s3c2410_spi_info *spi,    // 设置片选/取消片选
                                          int cs, int pol);

        /* data buffers */
        const unsigned char     *tx;    // 传输缓冲区
        unsigned char           *rx;    // 接收缓冲区

        struct clk              *clk;   // SPI时钟
        struct spi_master       *master;   // SPI控制器
        struct spi_device       *curdev;   // 当前SPI从设备
        struct device           *dev;      / 存储platform设备的dev成员
        struct s3c2410_spi_info *pdata;    // 私有数据  默认初始化为&default_spi_data
};
2.2.2 s3c2410_spi_info
s3c2410_spi_info这个结构体的成员是用来初始化s3c24xx_spi成员的, s3c2410_spi_info定义在include/linux/spi/s3c24xx.h:
struct s3c2410_spi_info {
        int                      pin_cs;        /* simple gpio cs 片选引脚 */
        unsigned int             num_cs;        /* total chipselects 片选数量,也就是说当前SPI控制前连接了多少个SPI从设备 */
        int                      bus_num;       /* bus number to use.  SPI控制器编号 */

        unsigned int             use_fiq:1;     /* use fiq,是否使用快中断,默认是使用 */

        void (*gpio_setup)(struct s3c2410_spi_info *spi, int enable);     //  这个需要我们提供 用来初始化SPI GPIO口, 功能复用SPI
        void (*set_cs)(struct s3c2410_spi_info *spi, int cs, int pol);    //  这个也不用提供  s3c24xx_spi_probe中使用默认函数s3c24xx_spi_gpiocs初始化s3c24xx_spi成员set_cs
};
2.2.3 s3c24xx_spi_devstate
s3c24xx_spi_devstate用于保存当前SPI控制器寄存器的信息:
/**
 * s3c24xx_spi_devstate - per device data
 * @hz: Last frequency calculated for @sppre field.
 * @mode: Last mode setting for the @spcon field.
 * @spcon: Value to write to the SPCON register.
 * @sppre: Value to write to the SPPRE register.
 */
struct s3c24xx_spi_devstate {
        unsigned int    hz;     // 时钟频率
        unsigned int    mode;   // struct spi_device模式字段
        u8              spcon;  // SPI控制寄存器的值
        u8              sppre;  // SPI波特率预分频寄存器的值
};
2.3 s3c24xx_spi_probe
s3c24xx_spi_probe定义在drivers/spi/spi-s3c24xx.c文件:
static int s3c24xx_spi_probe(struct platform_device *pdev)
{
        struct s3c2410_spi_info *pdata;
        struct s3c24xx_spi *hw;
        struct spi_master *master;
        struct resource *res;
        int err = 0;

        master = spi_alloc_master(&pdev->dev, sizeof(struct s3c24xx_spi));   // 动态分配spi_controller,额外分配空间大小为s3c24xx_spi,并赋值给master->dev.driver_data
        if (master == NULL) {
                dev_err(&pdev->dev, "No memory for spi_master\n");
                return -ENOMEM;
        }

        hw = spi_master_get_devdata(master);   // 获取master->dev.driver_data

        hw->master = master;                   // 设置SPI控制器
        hw->pdata = pdata = dev_get_platdata(&pdev->dev);   // 获取pdev->dev.platform_data
        hw->dev = &pdev->dev;

        if (pdata == NULL) {   // 没有设置平台数据
                dev_err(&pdev->dev, "No platform data supplied\n");
                err = -ENOENT;
                goto err_no_pdata;
        }

        platform_set_drvdata(pdev, hw);  // 设置驱动数据 pdev.dev.plat_data = hw
        init_completion(&hw->done);      // 初始化completion

        /* initialise fiq handler */

        s3c24xx_spi_initfiq(hw);        // 初始化hw成员fiq_handler

        /* setup the master state. */

        /* the spi->mode bits understood by this driver: */
        master->mode_bits = SPI_CPOL | SPI_CPHA | SPI_CS_HIGH;    // 时钟极性、时钟相位、高片选

        master->num_chipselect = hw->pdata->num_cs;     // 片选数量
        master->bus_num = pdata->bus_num;               // SPI控制器编号
        master->bits_per_word_mask = SPI_BPW_MASK(8);   // 设置bit_per_world的掩码,等于bits_per_word-1,比如这里就是7

        /* setup the state for the bitbang driver */

        hw->bitbang.master         = hw->master;              // 设置SPI控制器
        hw->bitbang.setup_transfer = s3c24xx_spi_setupxfer;   // 根据通信频率transfer->speed_hz,计算SPI通道1波特率预分频寄存器的值,并设置SPPRE寄存器
        hw->bitbang.chipselect     = s3c24xx_spi_chipsel;     // 实现了SPI从设备片选/取消片选
        hw->bitbang.txrx_bufs      = s3c24xx_spi_txrx;        // 实现了SPI数据收发功能

        hw->master->setup  = s3c24xx_spi_setup;               // 根据spi->mode、以及 spi->max_speed_hz去计算SPCON、SPPRE寄存器的值,同时取消片选; 在SPI从设备注册时执行

        dev_dbg(hw->dev, "bitbang at %p\n", &hw->bitbang);

        /* find and map our resources */
        res = platform_get_resource(pdev, IORESOURCE_MEM, 0);   // 获取第一个IO内存资源
        hw->regs = devm_ioremap_resource(&pdev->dev, res);      // 物理地址->虚拟地址映射 映射是SPI控制器1寄存器地址
        if (IS_ERR(hw->regs)) {
                err = PTR_ERR(hw->regs);
                goto err_no_pdata;
        }
        hw->irq = platform_get_irq(pdev, 0);             // 获取中断资源
        if (hw->irq < 0) {                               // 未指定中断 异常
                dev_err(&pdev->dev, "No IRQ specified\n");
                err = -ENOENT;
                goto err_no_pdata;
        }

        err = devm_request_irq(&pdev->dev, hw->irq, s3c24xx_spi_irq, 0,  // 注册中断服务
                                pdev->name, hw);
        if (err) {
                dev_err(&pdev->dev, "Cannot claim IRQ\n");
                goto err_no_pdata;
        }

        hw->clk = devm_clk_get(&pdev->dev, "spi");     // 获取spi时钟
        if (IS_ERR(hw->clk)) {
                dev_err(&pdev->dev, "No clock for device\n");
                err = PTR_ERR(hw->clk);
                goto err_no_pdata;
        }

        /* setup any gpio we can */

        if (!pdata->set_cs) {                  // 如果s3c2410_spi_info中未设置片选/取消片选函数
                if (pdata->pin_cs < 0) {       // 片选引脚无效
                        dev_err(&pdev->dev, "No chipselect pin\n");
                        err = -EINVAL;
                        goto err_register;
                }

                err = devm_gpio_request(&pdev->dev, pdata->pin_cs,   // 为片选引脚申请GPIO资源
                                        dev_name(&pdev->dev));
                if (err) {
                        dev_err(&pdev->dev, "Failed to get gpio for cs\n");
                        goto err_register;
                }

                hw->set_cs = s3c24xx_spi_gpiocs;            // 设置片选/取消片选函数
                gpio_direction_output(pdata->pin_cs, 1);    // 设置GPIO为输出,输出高电平
        } else
                hw->set_cs = pdata->set_cs;

        s3c24xx_spi_initialsetup(hw);              // SPI控制器相关寄存器初始化

        /* register our spi controller */

        err = spi_bitbang_start(&hw->bitbang);     // 初始化spi_controller成员
        if (err) {
                dev_err(&pdev->dev, "Failed to register SPI master\n");
                goto err_register;
        }

        return 0;

 err_register:
        clk_disable(hw->clk);

 err_no_pdata:
        spi_master_put(hw->master);
        return err;
}
这段代码属实有点长了,让人一眼看过去,就有点想放弃去读的想法,既然都学习到了这一步,我们还是耐着性去分析吧。这里代码理解起来还是比较简单的,主要流程如下:
- 动态分配spi_controller,并进行参数初始化:
- 设置dev.driver_data为s3c24xx_spi;
- 设置mode_bits为SPI_CPOL | SPI_CPHA | SPI_CS_HIGH;
- 设置num_chipselect 为s3c2440_spi1_data.num_cs;
- 设置bus_num为s3c2440_spi1_data.bus_num;
- 设置bit_per_word_mask为7;
- 设置setup为s3c24xx_spi_setup;s3c24xx_spi_setup函数在SPI从设备注册的时候调用,会根据SPI从设备信息比如spi->mode、以及 spi->max_speed_hz去计算S3C2410_SPCON、S3C2410_SPPRE寄存器的值,但是并没有初始化SPI相关寄存器,只是保存了下了,此外该函数会取消片选;
- 通过spi_bitbang_start初始化成员:
- 设置prepare_transfer_hardware为spi_bitbang_prepare_hardware;
- 设置unprepare_transfer_hardware为spi_bitbang_unprepare_hardware;
- 设置transfer_one为 spi_bitbang_transfer_one;内部调用了itbang->setup_transfer(即函数s3c24xx_spi_setupxfer)、 bitbang->txrx_bufs(即s3c24xx_spi_txrx函数);
- 设置set_cs为spi_bitbang_set_cs;内部调用是是bitbang->chipselect,即s3c24xx_spi_chipsel函数;需要注意的是这个函数还会重新配置S3C2410_SPCON寄存器;
- 调用devm_request_irq注册SPI中断,中断处理服务函数为s3c24xx_spi_irq;
- 调用devm_gpio_request为SPI从设备片选引脚申请GPIO资源,并设置片选引脚为输出,输出高电平;
- 调用s3c24xx_spi_initialsetup使能SPI时钟,初始化S3C2440 SPI1控制器相关的寄存器:
- 调用s3c24xx_i2c_init初始化S3C2440 SPI相关的寄存器,设置S3C2410_SPCON、S3C2410_SPPIN;
- 调用s3c_spi1_cfg_gpio配置SPI1总线所使用的GPIO引脚,即配置GPG5、GPG6、GPG7为SPI功能;
- 调用spi_register_master注册spi_controller适配器;
通过上面的分析我们大概了解到了SPI数据传输的细节,以一个spi_transfer传输为例:
- SPI控制器发出片选信号:调用s3c24xx_spi_chipsel,该函数会配置S3C2410_SPCON寄存器,并进行片选;
- SPI控制器发送/接收数据:调用s3c24xx_spi_setupxfer设置S3C2410_SPPRE寄存器,调用s3c24xx_spi_txrx开始第一个字节数据传输(剩余字节通过中断服务程序实现);线程进入睡眠,等待中断服务程序完成数据传输,唤醒线程;
- SPI控制器发出取消片选信号:调用了s3c24xx_spi_chipsel,该函数会配置S3C2410_SPCON寄存器,并取消片选;
三、s3c24xx_spi_probe调用栈
由于s3c24xx_spi_probe函数中调用较多其它函数,这里我们单独介绍各个函数。
3.1 s3c24xx_spi_setup
hw->master->setup设置为了s3c24xx_spi_setup,在SPI从设备注册时(调用spi_new_device函数)会执行该函数,该函数会:
- 根据spi->mode、spi->max_speed_hz,计算SPCON、SPPRE寄存器的值,并保存在 spi->controller_state中;
- 取消片选;
函数定义在drivers/spi/spi-s3c24xx.c文件:
static int s3c24xx_spi_setup(struct spi_device *spi)
{
        struct s3c24xx_spi_devstate *cs = spi->controller_state;
        struct s3c24xx_spi *hw = to_hw(spi);
        int ret;

        /* allocate settings on the first call */
        if (!cs) {      // 初始化cs
                cs = devm_kzalloc(&spi->dev,
                                  sizeof(struct s3c24xx_spi_devstate),
                                  GFP_KERNEL);
                if (!cs)
                        return -ENOMEM;

                cs->spcon = SPCON_DEFAULT;            //  主机模式、中断模式  1<<5 | 1<<3
                cs->hz = -1;
                spi->controller_state = cs;
        }

        /* initialise the state from the device */
        ret = s3c24xx_spi_update_state(spi, NULL);   // 这个函数主要就是根据spi->mode、以及 spi->max_speed_hz去计算SPCON、SPPRE寄存器的值
        if (ret)
                return ret;

        mutex_lock(&hw->bitbang.lock);
        if (!hw->bitbang.busy) {
                hw->bitbang.chipselect(spi, BITBANG_CS_INACTIVE);   // 取消片选
                /* need to ndelay for 0.5 clocktick ? */
        }
        mutex_unlock(&hw->bitbang.lock);

        return 0;
}
3.2 片选/取消片选
3.2.1 devm_gpio_request
调用devm_gpio_request函数为SPI片选引脚申请GPIO资源,函数定义在drivers/gpio/gpiolib-devres.c文件:
/**
 *      devm_gpio_request - request a GPIO for a managed device
 *      @dev: device to request the GPIO for
 *      @gpio: GPIO to allocate
 *      @label: the name of the requested GPIO
 *
 *      Except for the extra @dev argument, this function takes the
 *      same arguments and performs the same function as
 *      gpio_request().  GPIOs requested with this function will be
 *      automatically freed on driver detach.
 *
 *      If an GPIO allocated with this function needs to be freed
 *      separately, devm_gpio_free() must be used.
 */

int devm_gpio_request(struct device *dev, unsigned gpio, const char *label)
{
        unsigned *dr;
        int rc;

        dr = devres_alloc(devm_gpio_release, sizeof(unsigned), GFP_KERNEL);
        if (!dr)
                return -ENOMEM;

        rc = gpio_request(gpio, label);
        if (rc) {
                devres_free(dr);
                return rc;
        }

        *dr = gpio;
        devres_add(dev, dr);

        return 0;
}
3.2.2 s3c24xx_spi_gpiocs
s3c24xx_spi_gpiocs提供了片选和取消片选的功能,实际上就是调用gpio_set_value来设置输出高、低电平,定义在drivers/spi/spi-s3c24xx.c文件:
static void s3c24xx_spi_gpiocs(struct s3c2410_spi_info *spi, int cs, int pol)
{
        gpio_set_value(spi->pin_cs, pol);
}
3.2.3 s3c24xx_spi_chipsel
s3c24xx_spi_chipsel提供了片选和取消片选的功能,实际上就是调用s3c24xx_spi_gpiocs来设置输出高、低电平,此外这个函数还会重新配置重新配置S3C2410_SPCON寄存器,定义在drivers/spi/spi-s3c24xx.c文件:
static void s3c24xx_spi_chipsel(struct spi_device *spi, int value)
{
        struct s3c24xx_spi_devstate *cs = spi->controller_state;        // cs中保存SPI控制器寄存器的值、mode等
        struct s3c24xx_spi *hw = to_hw(spi);
        unsigned int cspol = spi->mode & SPI_CS_HIGH ? 1 : 0;          // 高电平片选 返回1,否则返回0

        /* change the chipselect state and the state of the spi engine clock */

        switch (value) {
        case BITBANG_CS_INACTIVE:                              // 0
                hw->set_cs(hw->pdata, spi->chip_select, cspol^1);  // 绕了一大圈还是调用了s3c24xx_spi_gpiocs
                writeb(cs->spcon, hw->regs + S3C2410_SPCON);       // 设置SPI通道1控制寄存器
                break;

        case BITBANG_CS_ACTIVE:                                    // 1
                writeb(cs->spcon | S3C2410_SPCON_ENSCK,          // 使能SCK
                       hw->regs + S3C2410_SPCON);                // 设置SPI通道1控制寄存器
                hw->set_cs(hw->pdata, spi->chip_select, cspol);  // 绕了一大圈还是调用了s3c24xx_spi_gpiocs
                break;
        }
}
3.3 s3c24xx_spi_initialsetup
s3c24xx_spi_initialsetup用于使能SPI时钟,初始化S3C2440 SPI相关的寄存器,设置S3C2410_SPPIN、S3C2410_SPCON,定义在drivers/spi/spi-s3c24xx.c文件:
static void s3c24xx_spi_initialsetup(struct s3c24xx_spi *hw)
{
        /* for the moment, permanently enable the clock */

        clk_enable(hw->clk);

        /* program defaults into the registers */

        writeb(0xff, hw->regs + S3C2410_SPPRE);
        writeb(SPPIN_DEFAULT, hw->regs + S3C2410_SPPIN);
        writeb(SPCON_DEFAULT, hw->regs + S3C2410_SPCON);   // 主机模式、中断查询 1<<5 || 1<<3

        if (hw->pdata) {
                if (hw->set_cs == s3c24xx_spi_gpiocs)     // 默认走这里
                        gpio_direction_output(hw->pdata->pin_cs, 1);   // 设置片选引脚GPIO为输出,输出高电平

                if (hw->pdata->gpio_setup)               // 初始化SPI GPIO功能复用为SPI
                        hw->pdata->gpio_setup(hw->pdata, 1);
        }
}
3.4 spi_bitbang_start
spi_bitbang_start定义在drivers/spi/spi-bitbang.c文件中:
/**
 * spi_bitbang_start - start up a polled/bitbanging SPI master driver
 * @bitbang: driver handle
 *
 * Caller should have zero-initialized all parts of the structure, and then
 * provided callbacks for chip selection and I/O loops.  If the master has
 * a transfer method, its final step should call spi_bitbang_transfer; or,
 * that's the default if the transfer routine is not initialized.  It should
 * also set up the bus number and number of chipselects.
 *
 * For i/o loops, provide callbacks either per-word (for bitbanging, or for
 * hardware that basically exposes a shift register) or per-spi_transfer
 * (which takes better advantage of hardware like fifos or DMA engines).
 *
 * Drivers using per-word I/O loops should use (or call) spi_bitbang_setup,
 * spi_bitbang_cleanup and spi_bitbang_setup_transfer to handle those spi
 * master methods.  Those methods are the defaults if the bitbang->txrx_bufs
 * routine isn't initialized.
 *
 * This routine registers the spi_master, which will process requests in a
 * dedicated task, keeping IRQs unblocked most of the time.  To stop
 * processing those requests, call spi_bitbang_stop().
 *
 * On success, this routine will take a reference to master. The caller is
 * responsible for calling spi_bitbang_stop() to decrement the reference and
 * spi_master_put() as counterpart of spi_alloc_master() to prevent a memory
 * leak.
 */
int spi_bitbang_start(struct spi_bitbang *bitbang)
{
        struct spi_master *master = bitbang->master;
        int ret;

        ret = spi_bitbang_init(bitbang);
        if (ret)
                return ret;

        /* driver may get busy before register() returns, especially
         * if someone registered boardinfo for devices
         */
        ret = spi_register_master(spi_master_get(master));    // 注册SPI控制器
        if (ret)
                spi_master_put(master);

        return ret;
}
该函数在进行SPI控制器注册之前,调用了spi_bitbang_init初始化spi_controller的成员变量。
3.4.1 spi_bitbang_init
spi_bitbang_init函数内部实际上就是对spi_controller的一些成员进行初始化,比如prepare_transfer_hardware 、unprepare_transfer_hardware 、transfer_one 、set_cs 。
int spi_bitbang_init(struct spi_bitbang *bitbang)
{
        struct spi_master *master = bitbang->master;  // 获取SPI控制器

        if (!master || !bitbang->chipselect)          // 参数校验
                return -EINVAL;

        mutex_init(&bitbang->lock);               // 初始化互斥锁

        if (!master->mode_bits)
                master->mode_bits = SPI_CPOL | SPI_CPHA | bitbang->flags;

        if (master->transfer || master->transfer_one_message)
                return -EINVAL;

        master->prepare_transfer_hardware = spi_bitbang_prepare_hardware;
        master->unprepare_transfer_hardware = spi_bitbang_unprepare_hardware;
        master->transfer_one = spi_bitbang_transfer_one;
        master->set_cs = spi_bitbang_set_cs;

        if (!bitbang->txrx_bufs) {           // 不会走这里
                bitbang->use_dma = 0;
                bitbang->txrx_bufs = spi_bitbang_bufs;
                if (!master->setup) {
                        if (!bitbang->setup_transfer)
                                bitbang->setup_transfer =
                                         spi_bitbang_setup_transfer;
                        master->setup = spi_bitbang_setup;
                        master->cleanup = spi_bitbang_cleanup;
                }
        }

        return 0;
}
3.4.2 spi_bitbang_set_cs
spi_bitbang_set_cs函数实现了SPI片选/取消片选功能,函数内部调用了chipselect,其在s3c24xx_spi_probe函数中被初始化为了s3c24xx_spi_chipsel:
static void spi_bitbang_set_cs(struct spi_device *spi, bool enable)
{
        struct spi_bitbang *bitbang = spi_master_get_devdata(spi->master);

        /* SPI core provides CS high / low, but bitbang driver
         * expects CS active
         * spi device driver takes care of handling SPI_CS_HIGH
         */
        enable = (!!(spi->mode & SPI_CS_HIGH) == enable);

        ndelay(SPI_BITBANG_CS_DELAY);
        bitbang->chipselect(spi, enable ? BITBANG_CS_ACTIVE :
                            BITBANG_CS_INACTIVE);
        ndelay(SPI_BITBANG_CS_DELAY);
}
3.4.3 spi_bitbang_transfer_one
spi_bitbang_transfer_one函数实现了spi_transfer的数据传输:
static int spi_bitbang_transfer_one(struct spi_master *master,     // SPI控制器
                                    struct spi_device *spi,         // SPI从设备
                                    struct spi_transfer *transfer)   // 读写缓冲对
{
        struct spi_bitbang *bitbang = spi_master_get_devdata(master);
        int status = 0;

        if (bitbang->setup_transfer) {   // 在s3c24xx_spi_probe函数中初始化为s3c24xx_spi_setupxfer
                status = bitbang->setup_transfer(spi, transfer);
                if (status < 0)
                        goto out;
        }

        if (transfer->len)    // 缓冲区长度
                status = bitbang->txrx_bufs(spi, transfer);  // 在s3c24xx_spi_probe函数中初始化为s3c24xx_spi_txrx,返回传输的数据长度

        if (status == transfer->len)   // 传输长度无误
                status = 0;
        else if (status >= 0)
                status = -EREMOTEIO;

out:
        spi_finalize_current_transfer(master);  // 传输完成调用spi_finalize_current_transfer

        return status;
}
该函数首先:
- 调用s3c24xx_spi_setupxfer根据通信频率transfer->speed_hz,计算SPI通道1波特率预分频寄存器的值,并设置SPPRE寄存器;
- 调用s3c24xx_spi_txrx进行1个字节数据的收发;
- 数据传输完成,调用spi_finalize_current_transfer。
3.4.4 s3c24xx_spi_setupxfer
该函数用来设置SPI通道1波特率预分频寄存器的值:
static int s3c24xx_spi_setupxfer(struct spi_device *spi,
                                 struct spi_transfer *t)
{
        struct s3c24xx_spi_devstate *cs = spi->controller_state;  // cs中保存SPI1控制器寄存器的值、mode等
        struct s3c24xx_spi *hw = to_hw(spi);
        int ret;

        ret = s3c24xx_spi_update_state(spi, t);    // 这个函数主要就是根据spi->mode、以及t->hz去计算SPCON、SPPRE寄存器的值
        if (!ret)
                writeb(cs->sppre, hw->regs + S3C2410_SPPRE);  // 设置SPI通道1波特率预分频寄存器

        return ret;
}
2.4.5 s3c24xx_spi_txrx
static int s3c24xx_spi_txrx(struct spi_device *spi, struct spi_transfer *t)    // 返回传输的数据长度
{
        struct s3c24xx_spi *hw = to_hw(spi);

        hw->tx = t->tx_buf;       // 发送缓冲区
        hw->rx = t->rx_buf;       // 接收缓冲区
        hw->len = t->len;         // 数据长度
        hw->count = 0;

        init_completion(&hw->done);

        hw->fiq_inuse = 0;
        if (s3c24xx_spi_usefiq(hw) && t->len >= 3)  //因为我们关闭了FIQ,所以不会进入这里
                s3c24xx_spi_tryfiq(hw);

        /* send the first byte */
        writeb(hw_txbyte(hw, 0), hw->regs + S3C2410_SPTDAT);   // 向SPTDAT寄存器写入要发送的数据

        wait_for_completion(&hw->done);  // 这里会使当前线程进入睡眠等待状态
        return hw->count;
}
s3c24xx_spi_txrx函数会进行第一个字节的数据发送,第一个字节发送之后,将会进入睡眠状态。
当第一个字节发送完成,将会触发中断,进入中断处理子程序:
- 读取SPI状态寄存器,检查状态寄存器SPSTA1发送就绪标志位(REDY=1);如果未就绪,直接抛出中断异常;
- 传输计数+1;
- 如果接收缓冲区不为空,则从读取SPRDAT寄存器读取数据,并保存到接收缓冲区;
- 如果数据未传输完成,继续发送缓冲区中下一个字节 ,需要注意的是,如果缓冲区为空,这里发送的数据将会是0;这表明我们实际上只关注接收的数据;
- 当数据发送/接收完成,会再次触发中断,重复上面的流程;
- 当数据传输完成,则会调用complete唤醒睡眠的进程;
3.4.6 s3c24xx_spi_irq
static irqreturn_t s3c24xx_spi_irq(int irq, void *dev)
{
        struct s3c24xx_spi *hw = dev;
        unsigned int spsta = readb(hw->regs + S3C2410_SPSTA);  // 读取SPI状态寄存器
        unsigned int count = hw->count;                        // 当前需要发送的字节在发送缓冲区的索引

        if (spsta & S3C2410_SPSTA_DCOL) {         // 发生冲突错误  终止
                dev_dbg(hw->dev, "data-collision\n");
                complete(&hw->done);
                goto irq_done;
        }

        if (!(spsta & S3C2410_SPSTA_READY)) {    // 收发未就绪,出现了异常 终止
                dev_dbg(hw->dev, "spi not ready for tx?\n");
                complete(&hw->done);            // 唤醒等待线程
                goto irq_done;
        }

        if (!s3c24xx_spi_usingfiq(hw)) {   // 由于我们关闭了FIQ,所以走这里
                hw->count++;               // 传输计数+1

                if (hw->rx)                // 接收缓冲区不为空
                        hw->rx[count] = readb(hw->regs + S3C2410_SPRDAT);  // 读取SPRDAT寄存器值

                count++;                   // 已发送/接收字节数

                if (count < hw->len)        // 数据未传输完,继续发送缓冲区中下一个字节  需要注意的是,如果缓冲区为空,这里发送的是0
                        writeb(hw_txbyte(hw, count), hw->regs + S3C2410_SPTDAT);
                else                        // 全部发送完,唤醒等待线程
                        complete(&hw->done);
        } else {
                hw->count = hw->len;
                hw->fiq_inuse = 0;

                if (hw->rx)
                        hw->rx[hw->len-1] = readb(hw->regs + S3C2410_SPRDAT);

                complete(&hw->done);
        }

 irq_done:
        return IRQ_HANDLED;
}
四、烧录开发板
4.1 内核配置
进行内核配置:
root@zhengyang:/work/sambashare/linux-5.2.8# make menuconfig
我们需要配置内核支持S3C24XX SPI控制器驱动:
Device Drivers --->
   [*] SPI support -->
       [*] Samsung S3C24XX series SPI
这样我们内核才会支持S3C24XX SPI控制器驱动。修改完配置后,保存文件,输入文件名s3c2440_defconfig,在当前路径下生成s3c2440_defconfig:存档:
mv s3c2440_defconfig ./arch/arm/configs/
4.2 编译内核
编译内核:
make s3c2440_defconfig
make V=1 uImage
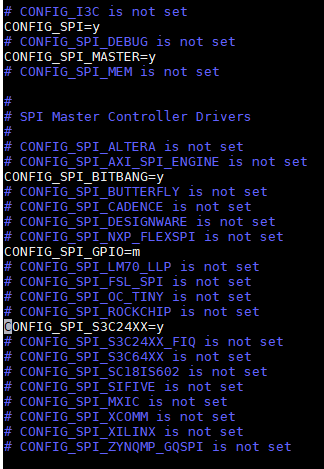
由于配置了Samsung S3C24XX series SPI之后,配置文件.config中会包含如下项:
将uImage复制到tftp服务器路径下:
root@zhengyang:/work/sambashare/linux-5.2.8# cp /work/sambashare/linux-5.2.8/arch/arm/boot/uImage /work/tftpboot/
4.3 烧录内核
开发板uboot启动完成后,内核启动前,按下任意键,进入uboot,可以通过print查看uboot中已经设置的环境变量。
设置开发板ip地址,从而可以使用网络服务:
SMDK2440 # set ipaddr 192.168.0.105
SMDK2440 # save
Saving Environment to NAND...
Erasing NAND...

Erasing at 0x40000 -- 100% complete.
Writing to NAND... OK
SMDK2440 # ping 192.168.0.200
dm9000 i/o: 0x20000000, id: 0x90000a46
DM9000: running in 16 bit mode
MAC: 08:00:3e:26:0a:5b
operating at unknown: 0 mode
Using dm9000 device
host 192.168.0.200 is alive
设置tftp服务器地址,也就是我们ubuntu服务器地址:
set serverip 192.168.0.200
save
下载内核到内存,并写入NAND FLASH:
SMDK2440 # tftp 30000000 uImage
dm9000 i/o: 0x20000000, id: 0x90000a46
DM9000: running in 16 bit mode
MAC: 08:00:3e:26:0a:5b
operating at unknown: 0 mode
Using dm9000 device
TFTP from server 192.168.0.200; our IP address is 192.168.0.188
Filename 'uImage'.
Load address: 0x30000000
Loading: #################################################################
         #################################################################
         #################################################################
         #################################################################
         #######
         440.4 KiB/s
done
Bytes transferred = 3907680 (3ba060 hex)
SMDK2440 # nand erase.part kernel

NAND erase.part: device 0 offset 0x60000, size 0x400000
Erasing at 0x440000 -- 100% complete.
OK
SMDK2440 # nand write 30000000 kernel

NAND write: device 0 offset 0x60000, size 0x400000
 4194304 bytes written: OK
SMDK2440 # bootm
## Booting kernel from Legacy Image at 30000000 ...
4.4 测试
给开发板上电NAND启动,内核会输出如下信息:
s3c2410-spi s3c2410-spi.1: No clock for device
s3c2410-spi: probe of s3c2410-spi.1 failed with error -2
从这错误,我们大概也猜到了SPI时钟有问题,我们定位到devm_clk_get函数,在linux驱动移植-通用时钟框架子系统我们分析过S3C2440时钟子系统的框架。
这里我们需要修改drivers/clk/samsung/clk-s3c2410.c文件,在s3c2410_common_aliases数组(这个数组定义了时钟别名)最后一行添加:
ALIAS(PCLK_SPI, NULL, "spi"),
修改drivers/spi/spi-s3c24xx.c文件s3c24xx_spi_probe函数,在devm_clk_get后面添加:
        /* initialise the spi controller */
        err = clk_prepare_enable(hw->clk);   // 使能时钟  CLKCON寄存器的bit[8]对应着SPI模块
        if (err) {
                dev_err(&pdev->dev, "SPI clock enable failed\n");
                goto err_no_pdata;
        }
修改完之后,重新编译内核,烧录程序,给开发板上电NAND启动。
由于SPI控制器驱动是基于platform模型的,因此在/sys/bus/platform设备链表和驱动链表可以看到spi相关的文件夹:
[root@zy:/]#  ls -l /sys/bus/platform/drivers/s3c2410-spi/ -l
total 0
--w-------    1 0        0             4096 Jan  1 00:01 bind
lrwxrwxrwx    1 0        0                0 Jan  1 00:01 s3c2410-spi.1 -> ../../../../devices/platform/s3c2410-spi.1
--w-------    1 0        0             4096 Jan  1 00:01 uevent
--w-------    1 0        0             4096 Jan  1 00:01 unbind
[root@zy:/]#  ls -l /sys/bus/platform/devices/s3c2410-spi.1/ -l
total 0
lrwxrwxrwx    1 0        0                0 Jan  1 00:03 driver -> ../../../bus/platform/drivers/s3c2410-spi
-rw-r--r--    1 0        0             4096 Jan  1 00:03 driver_override
-r--r--r--    1 0        0             4096 Jan  1 00:03 modalias
drwxr-xr-x    2 0        0                0 Jan  1 00:03 power
drwxr-xr-x    3 0        0                0 Jan  1 00:00 spi_master
lrwxrwxrwx    1 0        0                0 Jan  1 00:03 subsystem -> ../../../bus/platform
-rw-r--r--    1 0        0             4096 Jan  1 00:03 uevent
在注册spi_controller时,spi_controller设备模型dev.class设置为了spi_master_class(name=为spi_master),dev.name设置为了spi%d,所以当注册了SPI控制器后,我们可以查看/sys/class/spi_master文件夹,在该文件夹下可以看到spi1文件夹:
[root@zy:/]# ls -l /sys/class/spi_master/
total 0
lrwxrwxrwx    1 0        0                0 Jan  1 00:00 spi1 -> ../../devices/platform/s3c2410-spi.1/spi_master/spi1
参考文章

 浙公网安备 33010602011771号