spring-boot-2.0.3启动源码篇二 - run方法(一)之SpringApplicationRunListener
前言
Springboot启动源码系列还只写了一篇,已经过去一周,又到了每周一更的时间了(是不是很熟悉?),大家有没有很期待了?我会尽量保证启动源码系列每周一更,争取不让大家每周的期望落空。一周之中可能会插入其他内容的博文,可能和springboot启动源码有关,也可能和启动源码无关。
前情回顾
这篇是在设计模式之观察者模式,事件机制的底层原理和spring-boot-2.0.3启动源码篇一 - SpringApplication构造方法这两篇的基础上进行的,没看的小伙伴可以先去看看这两篇。如果大家不想去看,这里我帮大家简单回顾下。
SpringApplication的构造方法主要做了以下3件事:
1、推测web应用类型,并赋值到属性webApplicationType
2、设置属性List<ApplicationContextInitializer<?>> initializers和List<ApplicationListener<?>> listeners
中途读取了类路径下所有META-INF/spring.factories的属性,并缓存到了SpringFactoriesLoader的cache缓存中,而这个cache会在本文中用到
3、 推断主类,并赋值到属性mainApplicationClass
spring-boot-2.0.3启动源码篇一 - SpringApplication构造方法
事件机制是基于观察者模式实现的。主要包括几下4个角色:
事件源:触发事件的主体
事件:事件本身,指的是EventObject中的source,具体可以是任何数据(包括事件源),用来传递数据
事件监听器:当事件发生时,负责对事件的处理
事件环境:整个事件所处的上下文,对整个事件提供支持
SpringApplicationRunListener
run方法的源代码如下


/**
 * Run the Spring application, creating and refreshing a new
 * {@link ApplicationContext}.
 * @param args the application arguments (usually passed from a Java main method)
 * @return a running {@link ApplicationContext}
 */
public ConfigurableApplicationContext run(String... args) {
    // 秒表,用于记录启动时间;记录每个任务的时间,最后会输出每个任务的总费时
    StopWatch stopWatch = new StopWatch();
    stopWatch.start();
    // spring应用上下文,也就是我们所说的spring根容器
    ConfigurableApplicationContext context = null;
    // 自定义SpringApplication启动错误的回调接口
    Collection<SpringBootExceptionReporter> exceptionReporters = new ArrayList<>();
    // 设置jdk系统属性java.awt.headless,默认情况为true即开启;更多java.awt.headless信息大家可以去查阅资料,这不是本文重点
    configureHeadlessProperty();
    // 获取启动时监听器
    SpringApplicationRunListeners listeners = getRunListeners(args)
    // 触发启动事件,相应的监听器会被调用,这是本文重点
    listeners.starting();
    try {
        ApplicationArguments applicationArguments = new DefaultApplicationArguments(
                args);
        ConfigurableEnvironment environment = prepareEnvironment(listeners,
                applicationArguments);
        configureIgnoreBeanInfo(environment);
        Banner printedBanner = printBanner(environment);
        context = createApplicationContext();
        exceptionReporters = getSpringFactoriesInstances(
                SpringBootExceptionReporter.class,
                new Class[] { ConfigurableApplicationContext.class }, context);
        prepareContext(context, environment, listeners, applicationArguments,
                printedBanner);
        refreshContext(context);
        afterRefresh(context, applicationArguments);
        stopWatch.stop();
        if (this.logStartupInfo) {
            new StartupInfoLogger(this.mainApplicationClass)
                    .logStarted(getApplicationLog(), stopWatch);
        }
        listeners.started(context);
        callRunners(context, applicationArguments);
    }
    catch (Throwable ex) {
        handleRunFailure(context, ex, exceptionReporters, listeners);
        throw new IllegalStateException(ex);
    }

    try {
        listeners.running(context);
    }
    catch (Throwable ex) {
        handleRunFailure(context, ex, exceptionReporters, null);
        throw new IllegalStateException(ex);
    }
    return context;
}
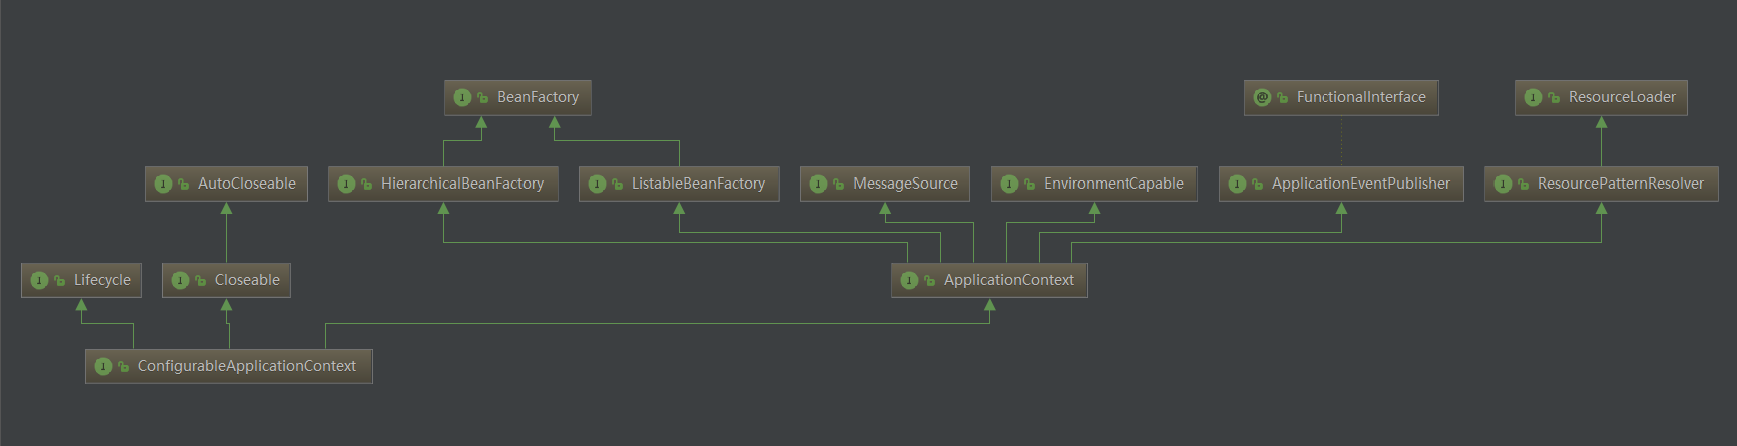
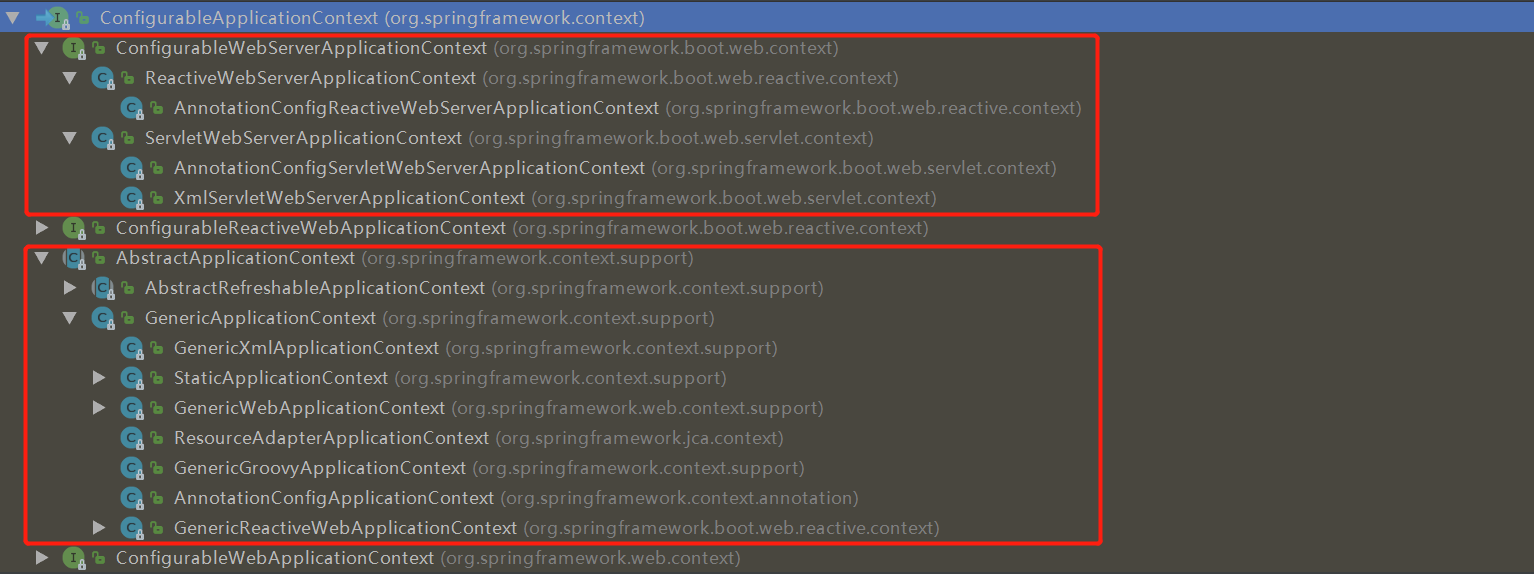
再讲今天的主角之前,我们先来看看ConfigurableApplicationContext,从名字来看就是:配置应用上下文,会根据class路径下的类初始化配置合适的应用上下文,比如是普通的spring应用(非web应用),还是web应用上下文。类图和类继承图如下
ConfigurableApplicationContext类图
ConfigurableApplicationContext类继承图
ConfigurableApplicationContext不会在本文详解,他的创建会在后续的博文中讲到,这里只是一个提醒。今天的主角是以下两行代码
SpringApplicationRunListeners listeners = getRunListeners(args)
listeners.starting();
我们今天的目的就是看看这两行代码到底做了些什么
getRunListeners
我们先看看SpringApplicationRunListeners和SpringApplicationRunListener。
SpringApplicationRunListeners的类注释很简单:
一个存SpringApplicationRunListener的集合,里面有些方法,后续都会讲到;
SpringApplicationRunListener的接口注释也简单:
监听SpringApplication的run方法。通过SpringFactoriesLoader加载SpringApplicationRunListener(一个或多个),SpringApplicationRunListener的实现类必须声明一个接收SpringApplication实例和String[]数组的公有构造方法。
接下来我们看看getRunListeners方法,源代码如下
private SpringApplicationRunListeners getRunListeners(String[] args) {
        Class<?>[] types = new Class<?>[] { SpringApplication.class, String[].class };
        return new SpringApplicationRunListeners(logger, getSpringFactoriesInstances(
                SpringApplicationRunListener.class, types, this, args));
    }
初略来看的话,就是返回一个新的SpringApplicationRunListeners实例对象;
细看的话,发现有个getSpringFactoriesInstances方法的调用,这个方法大家还记得吗?(详情请看spring-boot-2.0.3启动源码篇一 - SpringApplication构造方法)getSpringFactoriesInstances在SpringApplication的构造方法中调用了两次,分别用来设置属性List<ApplicationContextInitializer<?>> initializers和List<ApplicationListener<?>> listeners。getSpringFactoriesInstances在第一次被调用时会将类路径下所有的META-INF/spring.factories的文件中的属性进行加载并缓存到SpringFactoriesLoader的缓存cache中,下次被调用的时候就直接从SpringFactoriesLoader的cache中取数据了。这次就是从SpringFactoriesLoader的cache中取SpringApplicationRunListener类型的类(全限定名),然后实例化后返回。我们来跟下这次getSpringFactoriesInstances获取的的内容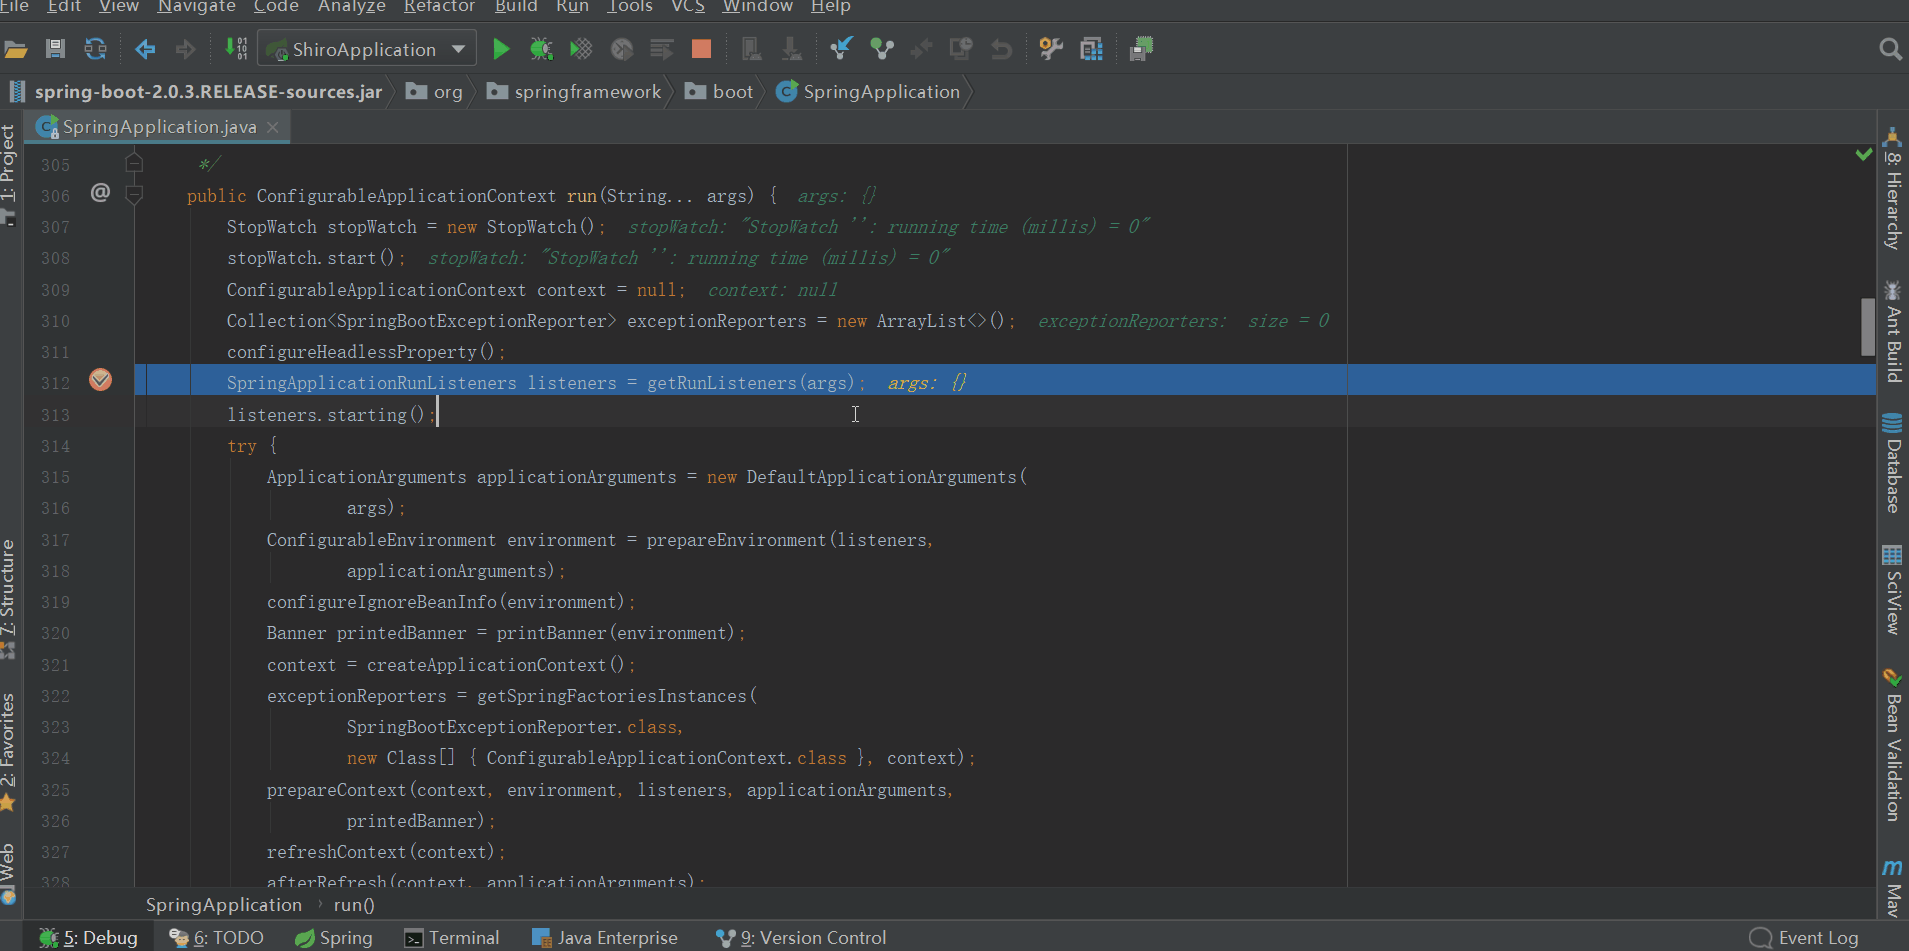
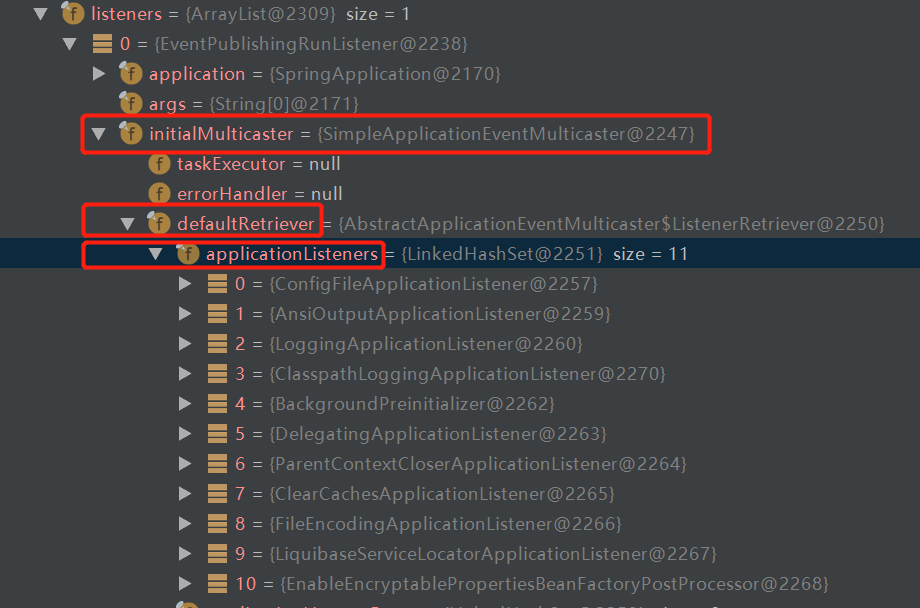
EventPublishingRunListener的构造方法中,构造了一个SimpleApplicationEventMulticaster对象,并将SpringApplication的listeners中的全部listener赋值到SimpleApplicationEventMulticaster对象的属性defaultRetriever(类型是ListenerRetriever)的applicationListeners集合中,如下图
总的来说,getRunListeners做了什么事呢?就是获取SpringApplicationRunListener类型的实例(EventPublishingRunListener对象),并封装进SpringApplicationRunListeners对象,然后返回这个SpringApplicationRunListeners对象。说的再简单点,getRunListeners就是准备好了运行时监听器EventPublishingRunListener。
listeners.starting()
我们看看starting方法做了些什么事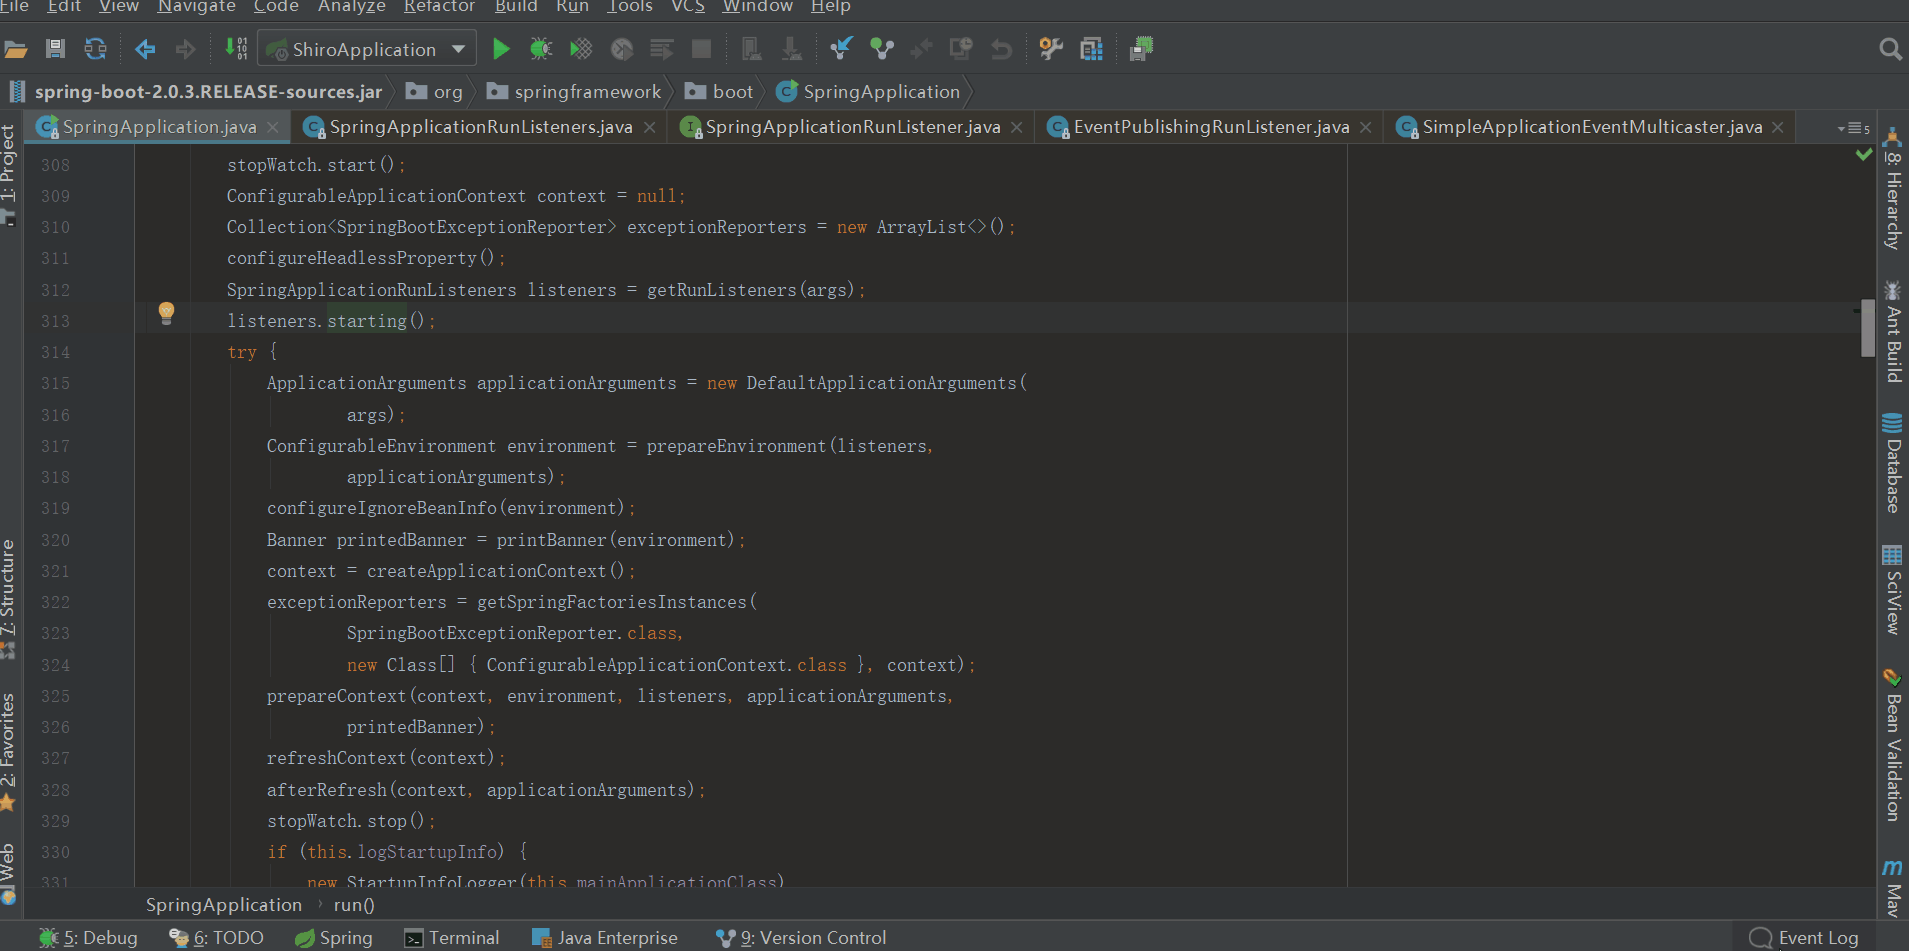
构建了一个ApplicationStartingEvent事件,并将其发布出去,其中调用了resolveDefaultEventType方法,该方法返回了一个封装了事件的默认类型(ApplicationStartingEvent)的ResolvableType对象。我们接着往下看,看看这个发布过程做了些什么
multicastEvent
源代码如下
@Override
public void multicastEvent(final ApplicationEvent event, @Nullable ResolvableType eventType) {
    ResolvableType type = (eventType != null ? eventType : resolveDefaultEventType(event));
    for (final ApplicationListener<?> listener : getApplicationListeners(event, type)) {
        Executor executor = getTaskExecutor();
        if (executor != null) {
            executor.execute(() -> invokeListener(listener, event));
        }
        else {
            invokeListener(listener, event);
        }
    }
}
初略的看,就是遍历getApplicationListeners(event, type),然后对每个listener进行invokeListener(listener, event)
getApplicationListeners
根据其注释可知,该方法作用:返回与给定事件类型匹配的ApplicationListeners集合,非匹配的侦听器会被提前排除;允许根据缓存的匹配结果来返回。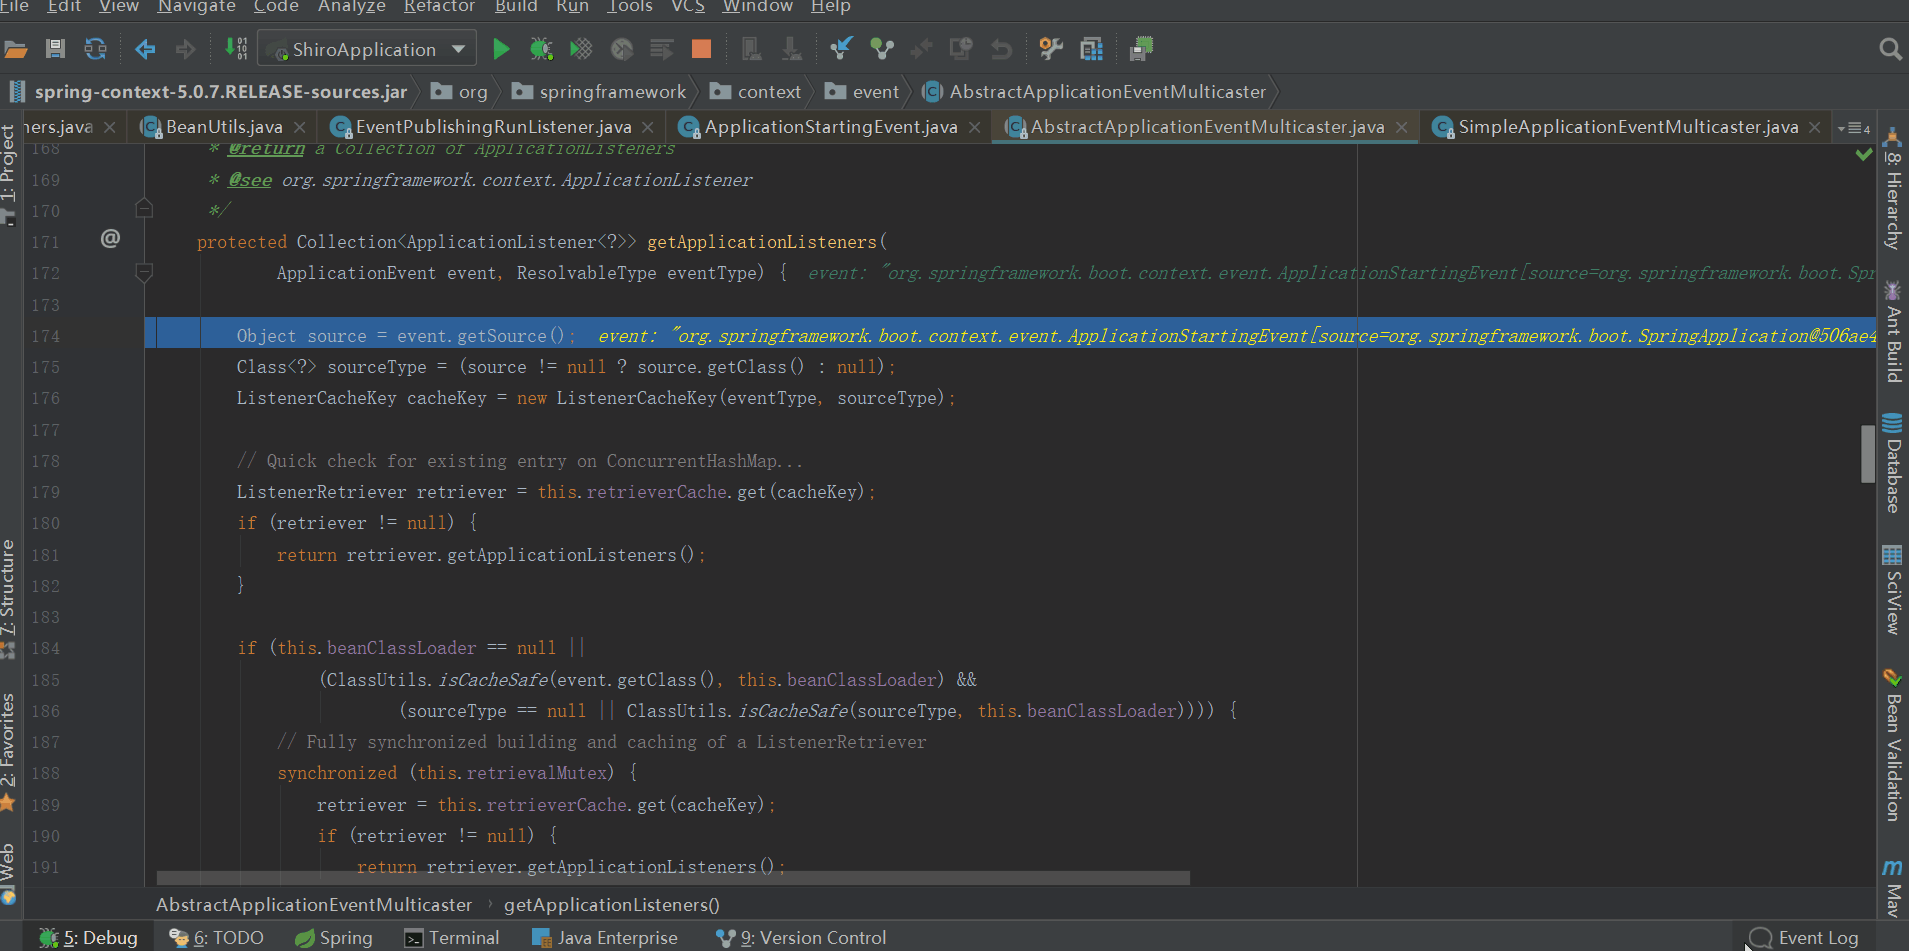
从上图可知,主要涉及到3个点:缓存retrieverCache、retrieveApplicationListeners已经retrieveApplicationListeners中调用的supportsEvent方法。流程是这样的:
1、缓存中是否有匹配的结果,有则返回
2、若缓存中没有匹配的结果,则从this.defaultRetriever.applicationListeners中过滤,这个this表示的EventPublishingRunListener对象的属性initialMulticaster(也就是SimpleApplicationEventMulticaster对象,而defaultRetriever.applicationListeners的值也是在EventPublishingRunListener构造方法中初始化的)
3、过滤过程,遍历defaultRetriever.applicationListeners集合,从中找出ApplicationStartingEvent匹配的listener,具体的匹配规则需要看各个listener的supportsEventType方法(有两个重载的方法)
4、将过滤的结果缓存到retrieverCache
5、将过滤出的结果返回回去
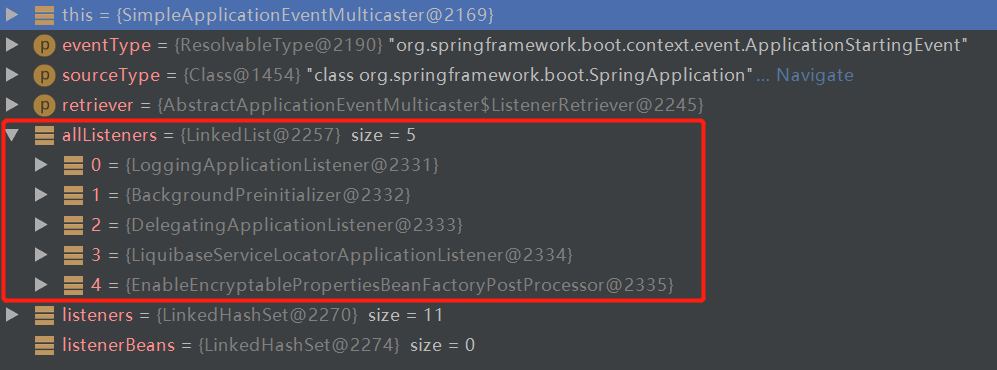
我们看看,过滤出的listener对象有哪些
invokeListener
其注释:使用给定的事件调用给定的监听器
getApplicationListeners方法过滤出的监听器都会被调用,过滤出来的监听器包括LoggingApplicationListener、BackgroundPreinitializer、DelegatingApplicationListener、LiquibaseServiceLocatorApplicationListener、EnableEncryptablePropertiesBeanFactoryPostProcessor五种类型的对象。这五个对象的onApplicationEvent都会被调用。
那么这五个监听器的onApplicationEvent都做了些什么了,我这里大概说下,细节的话大家自行去跟源码
LoggingApplicationListener:检测正在使用的日志系统,默认是logback,支持3种,优先级从高到低:logback > log4j > javalog。此时日志系统还没有初始化
BackgroundPreinitializer:另起一个线程实例化Initializer并调用其run方法,包括验证器、消息转换器等等
DelegatingApplicationListener:此时什么也没做
LiquibaseServiceLocatorApplicationListener:此时什么也没做
EnableEncryptablePropertiesBeanFactoryPostProcessor:此时仅仅打印了一句日志,其他什么也没做
总结
事件机制要素
这里和大家一起把事件4要素找出来
事件源:SpringApplication
事件:ApplicationStartingEvent
监听器:过滤后的监听器,具体5个上文中已经说过
事件环境:EventPublishingListener,提供环境支持事件,并且发布事件(starting方法)
监听器数量
项目中集成的功能的多少的不同,从spring.factories加载的属性数量也不同,自然监听器数量也会有所不同;如果大家看源码的时候发现比我的多或者少,不要惊慌,这是很正常的,因为我们集成的功能有所差别。
友情提醒
博文中有些地方分析的不是特别细,需要大家自行去跟源码,没涉及到复杂的模式,相信大家也都能看懂。过滤监听器的时候用到了supportsEvent方法,这个方法里面涉及到了适配器模式,改天我结合session共享给大家分析下适配器模式。
高光时刻
有时候,不是对手有多强大,只是我们不敢去尝试;勇敢踏出第一步,你会发现自己比想象中更优秀!诚如海因斯第一次跑进人类10s大关时所说:上帝啊,原来那扇门是虚掩着的!
参考
springboot源码

 浙公网安备 33010602011771号