babylon.js 学习笔记(4)
按上回继续,上节知道了如何用 『方块+三棱柱+贴图』结合起来,画一个简单的小房子,实际应用中可以把这3个打包在一起,组成1个house对象,这样更方便一些
const buildHouse = () => {
    const box1 = buildBox();
    const roof1 = buildRoof();
    const house1 = BABYLON.Mesh.MergeMeshes([box1, roof1]);
    house1.position.x = -0.4;

    const box2 = buildBox();
    const roof2 = buildRoof();
    const house2 = BABYLON.Mesh.MergeMeshes([roof2, box2]);
    house2.position.x = 0.4;

    return [house1, house2];
}
关键在于BABYLON.Mesh.MergeMeshes 这个方法,可以把几个mesh对象组合成1个新mesh对象,来看看效果:
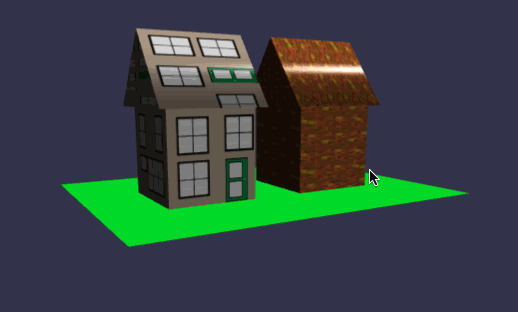
在线地址:https://yjmyzz.github.io/babylon_js_study/day04/01.html
贴图效果并不符合预期,[obj1, obj2...] 最终排在第1个位置的对象,其贴图应用到了整个对象上。好在MergeMeshes方法,还有其它扩展参数,其完整方法签名如下:
改成这样就可以了:
const buildHouse = () => {
    const box = buildBox();
    const roof = buildRoof();

    //将box与roof组合
    // MergeMeshes(meshes: Mesh[], disposeSource?: boolean, allow32BitsIndices?: boolean, meshSubclass?: Mesh, subdivideWithSubMeshes?: boolean, multiMultiMaterials?: boolean): Nullable<Mesh>
    return BABYLON.Mesh.MergeMeshes([box, roof], true, false, null, true, true);
}
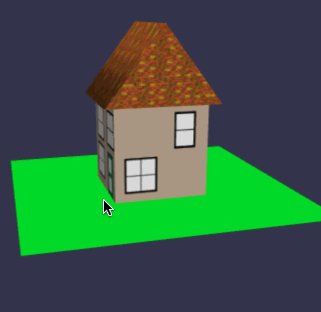
在线地址:https://yjmyzz.github.io/babylon_js_study/day04/02.html
在进入下面的内容前,先把代码再整理下:
//创建屋顶
const buildRoof = (width) => {
    const roofMat = new BABYLON.StandardMaterial("roofMat");
    roofMat.diffuseTexture = new BABYLON.Texture("../assets/img/roof.jpg");
    const roof = BABYLON.MeshBuilder.CreateCylinder("roof", { diameter: 0.7, height: 0.6, tessellation: 3 });
    roof.scaling.x = 0.75;
    roof.scaling.y = width;
    roof.rotation.z = Math.PI / 2;
    roof.position.y = 0.63;
    roof.material = roofMat;
    return roof;
}


//创建屋身
const buildBox = (width) => {
    const boxMat = new BABYLON.StandardMaterial("boxMat");

    const faceUV = [];
    if (width == 1) {
        boxMat.diffuseTexture = new BABYLON.Texture("../assets/img/cubehouse.png")
        faceUV[0] = new BABYLON.Vector4(0.5, 0.0, 0.75, 1.0); //后面
        faceUV[1] = new BABYLON.Vector4(0.0, 0.0, 0.25, 1.0); //前面
        faceUV[2] = new BABYLON.Vector4(0.25, 0, 0.5, 1.0); //右面
        faceUV[3] = new BABYLON.Vector4(0.75, 0, 1.0, 1.0); //左面
    }
    else {
        boxMat.diffuseTexture = new BABYLON.Texture("../assets/img/semihouse.png")
        faceUV[0] = new BABYLON.Vector4(0.6, 0.0, 1.0, 1.0); //后面
        faceUV[1] = new BABYLON.Vector4(0.0, 0.0, 0.4, 1.0); //前面
        faceUV[2] = new BABYLON.Vector4(0.4, 0, 0.6, 1.0); //右面
        faceUV[3] = new BABYLON.Vector4(0.4, 0, 0.6, 1.0); //左面
    }

    const box = BABYLON.MeshBuilder.CreateBox("box", { size: 0.5, width: 0.5 * width, faceUV: faceUV, wrap: true });
    box.material = boxMat;
    box.position.y = 0.25;

    return box;
}

//根据传入的参数width,生成2种不同风格的房屋
const buildHouse = (width) => {
    const box = buildBox(width);
    const roof = buildRoof(width);
    return BABYLON.Mesh.MergeMeshes([box, roof], true, false, null, true, true);
}


//在这里添加自己的核心代码
const createScene = function () {
    const scene = new BABYLON.Scene(engine);

    const camera = new BABYLON.ArcRotateCamera("camera", -Math.PI / 2, Math.PI / 2.5, 3, new BABYLON.Vector3(0, 0, 0));
    camera.attachControl(canvas, true);
    const light = new BABYLON.HemisphericLight("light", new BABYLON.Vector3(0.5, 0.5, 0));

    const ground = buildGround();

    //创建房子
    const house1 = buildHouse(1);
    const house2 = buildHouse(2);

    house1.position.x = -0.5
    house2.position.x = 0.5

    return scene;
};
这样buildHouse(width)方法,根据width值的不同,可以生成2种不同风格的房屋
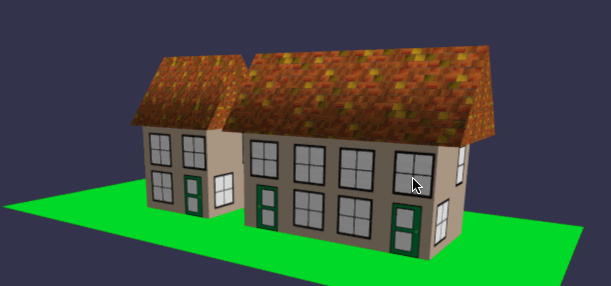
在线地址:https://yjmyzz.github.io/babylon_js_study/day04/03.html
接下来,我们画1片住宅区(也就是要有一堆房屋),这里就要用到createInstance 这个方法:
//创建一片住宅区
const buildDwellings = () => {
    const ground = buildGround();

    const detached_house = buildHouse(1);
    detached_house.rotation.y = -Math.PI / 16;
    detached_house.position.x = -6.8;
    detached_house.position.z = 2.5;

    const semi_house = buildHouse(2);
    semi_house.rotation.y = -Math.PI / 16;
    semi_house.position.x = -4.5;
    semi_house.position.z = 3;

    //定义房子的[风格/位置]列表 [house type, rotation, x, z]
    const places = [];
    places.push([1, -Math.PI / 16, -6.8, 2.5]);
    places.push([2, -Math.PI / 16, -4.5, 3]);
    places.push([2, -Math.PI / 16, -1.5, 4]);
    places.push([2, -Math.PI / 3, 1.5, 6]);
    places.push([2, 15 * Math.PI / 16, -6.4, -1.5]);
    places.push([1, 15 * Math.PI / 16, -4.1, -1]);
    places.push([2, 15 * Math.PI / 16, -2.1, -0.5]);
    places.push([1, 5 * Math.PI / 4, 0, -1]);
    places.push([1, Math.PI + Math.PI / 2.5, 0.5, -3]);
    places.push([2, Math.PI + Math.PI / 2.1, 0.75, -5]);
    places.push([1, Math.PI + Math.PI / 2.25, 0.75, -7]);
    places.push([2, Math.PI / 1.9, 4.75, -1]);
    places.push([1, Math.PI / 1.95, 4.5, -3]);
    places.push([2, Math.PI / 1.9, 4.75, -5]);
    places.push([1, Math.PI / 1.9, 4.75, -7]);
    places.push([2, -Math.PI / 3, 5.25, 2]);
    places.push([1, -Math.PI / 3, 6, 4]);

    //根据places建一堆房子
    const houses = [];
    for (let i = 0; i < places.length; i++) {
        if (places[i][0] === 1) {
            houses[i] = detached_house.createInstance("house" + i);
        }
        else {
            houses[i] = semi_house.createInstance("house" + i);
        }
        houses[i].rotation.y = places[i][1];
        houses[i].position.x = places[i][2];
        houses[i].position.z = places[i][3];
    }
}

在线地址:https://yjmyzz.github.io/babylon_js_study/day04/04.html
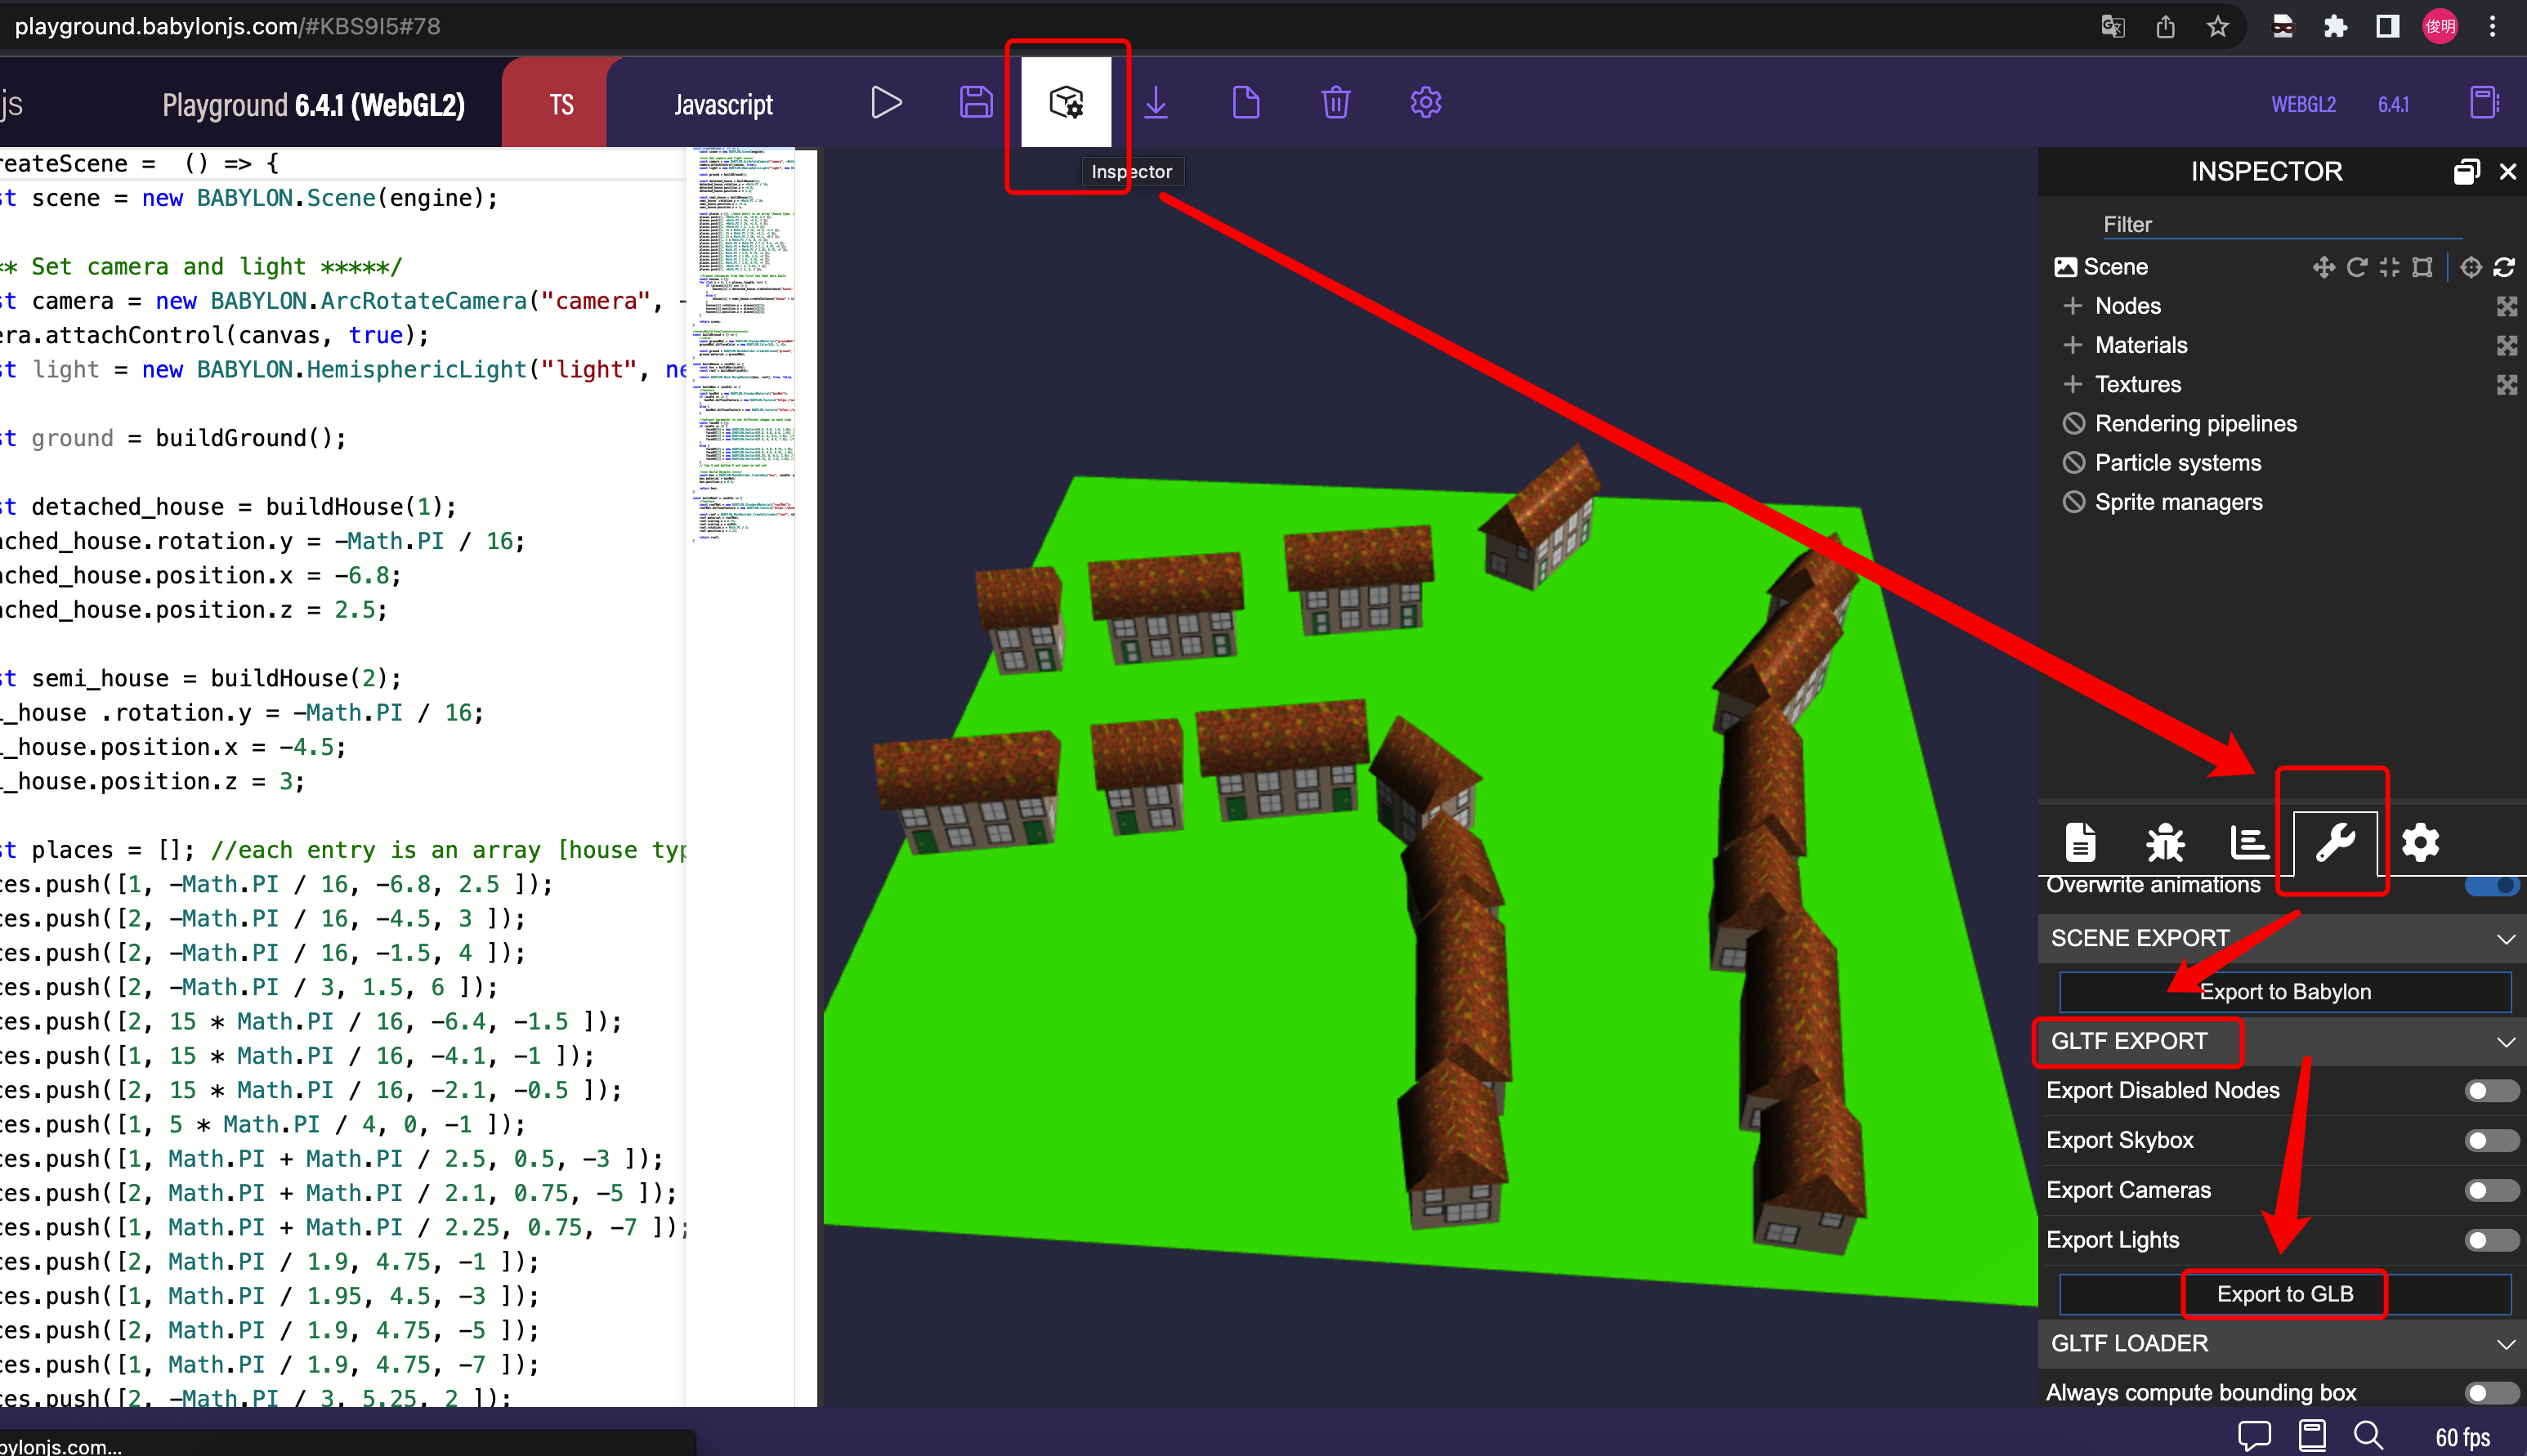
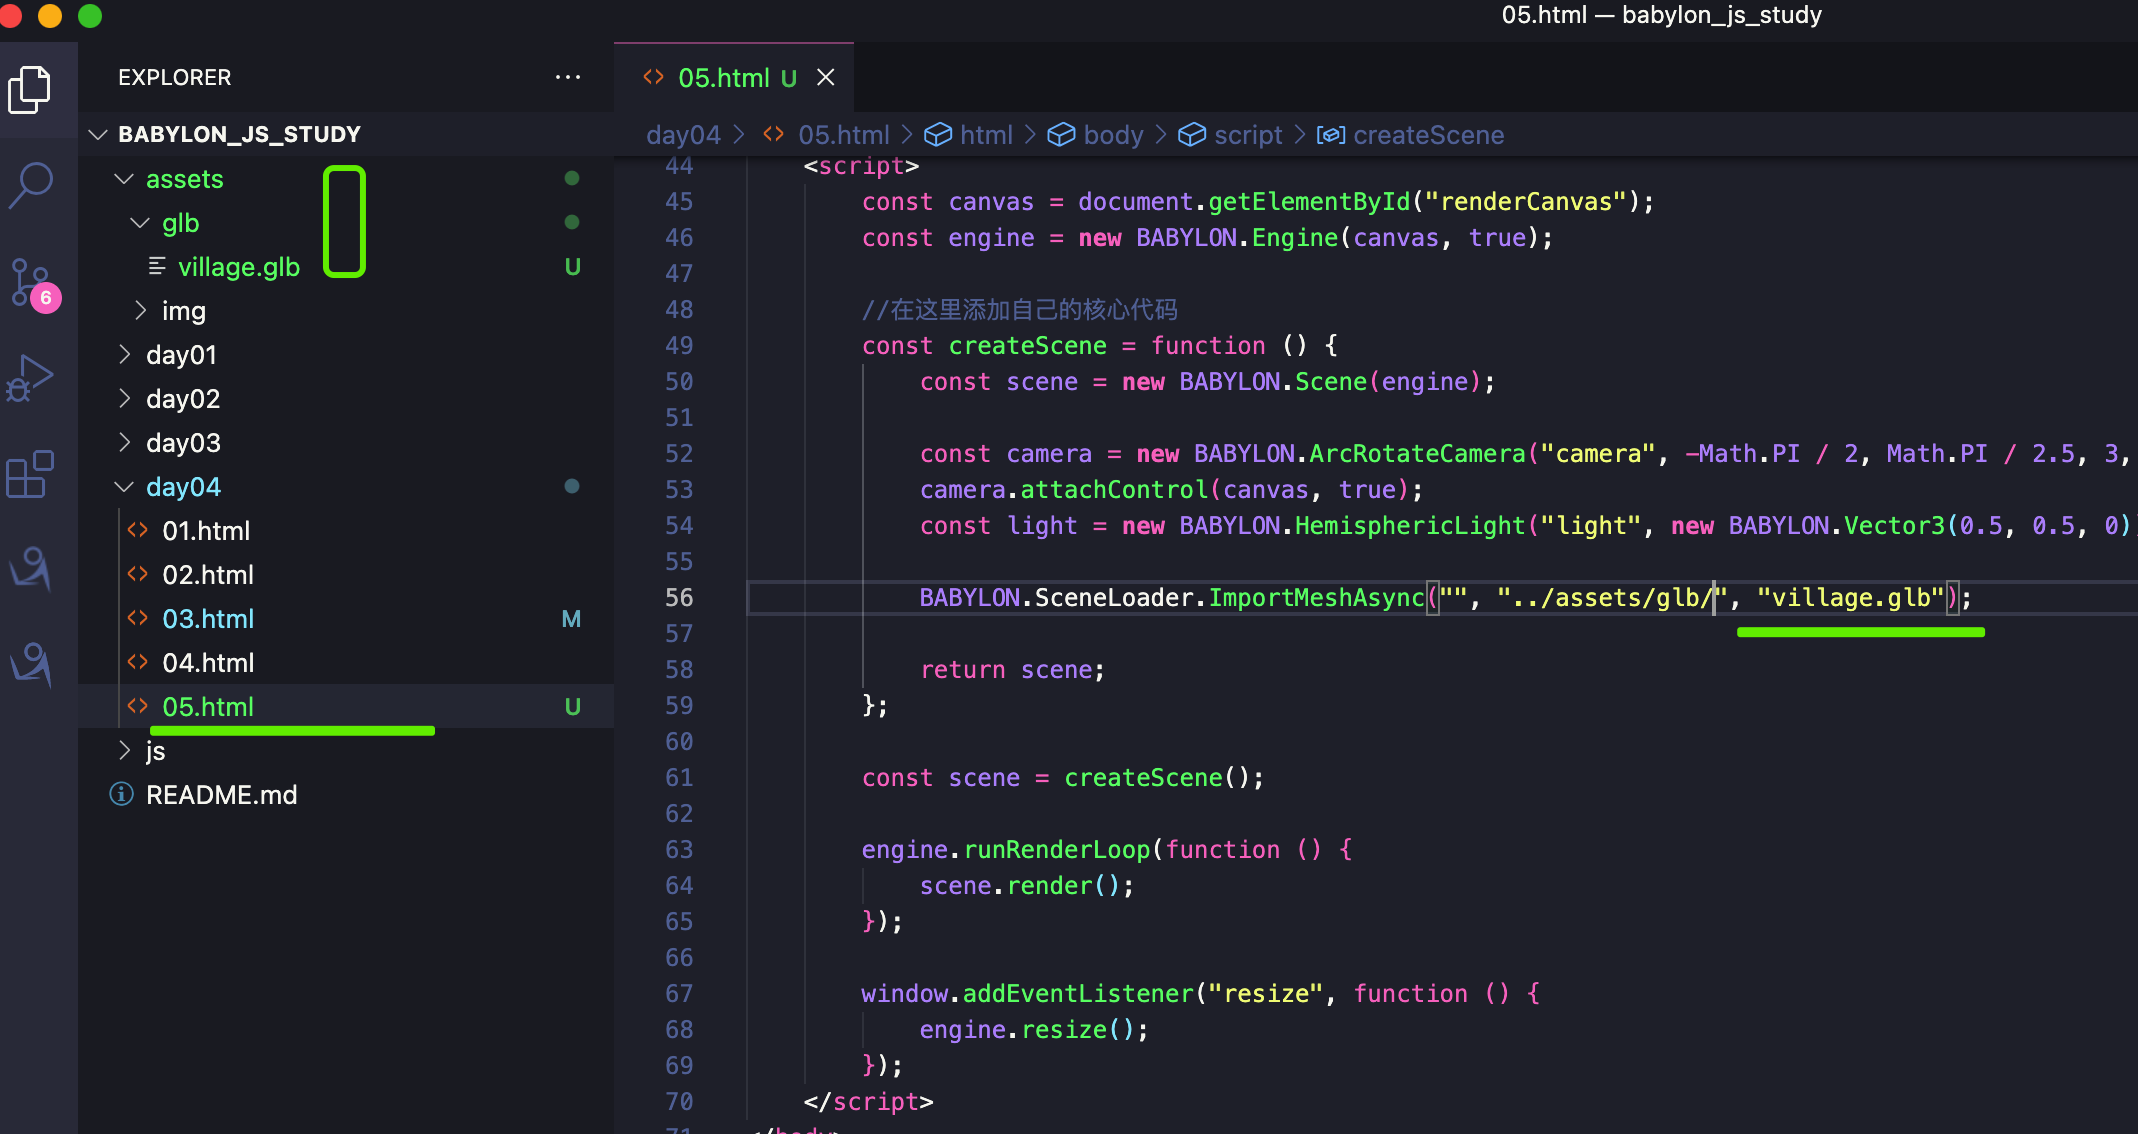
可以借助playground把这片住宅区的所有对象都导出,方便后续复用,也能简化代码,参考下图:
代码可以简化为:
BABYLON.SceneLoader.ImportMeshAsync("", "../assets/glb/", "village.glb");
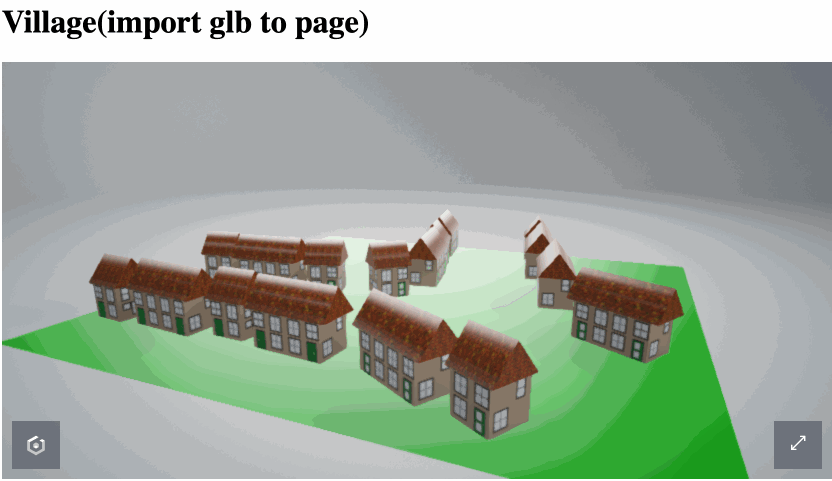
注意glb的目录位置,参考下图:
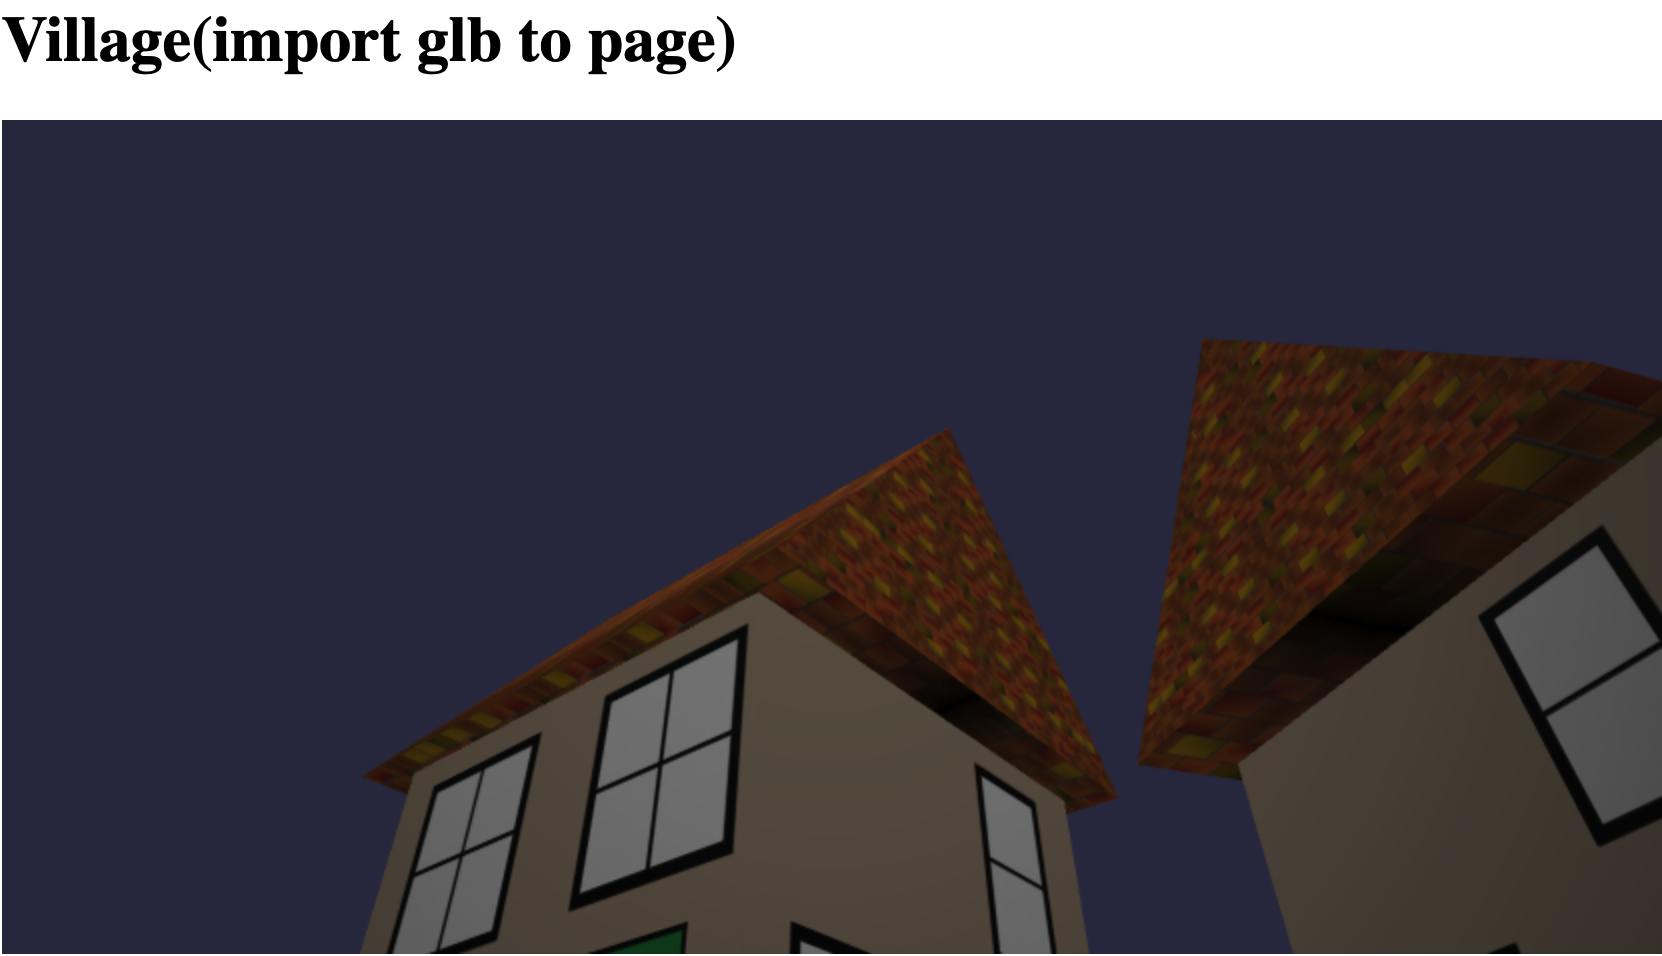
前面我们还学习过,可以直接用<babylon />将model嵌入网页:
<div id="renderCanvas">
    <h1>Village(import glb to page)</h1>
    <babylon model="../assets/glb/village.glb"></babylon>
</div>
在线地址:https://yjmyzz.github.io/babylon_js_study/day04/06.html
发现1个问题:绿色的ground一直在不停闪烁。要解决这个问题,可以加上extends="minimal"
<babylon model="../assets/glb/village.glb" extends="minimal"></babylon>
这回到是不闪了,但是页面刚打开时,摄像机的视角比较奇怪,参考下图:
在线地址:https://yjmyzz.github.io/babylon_js_study/day04/07.html
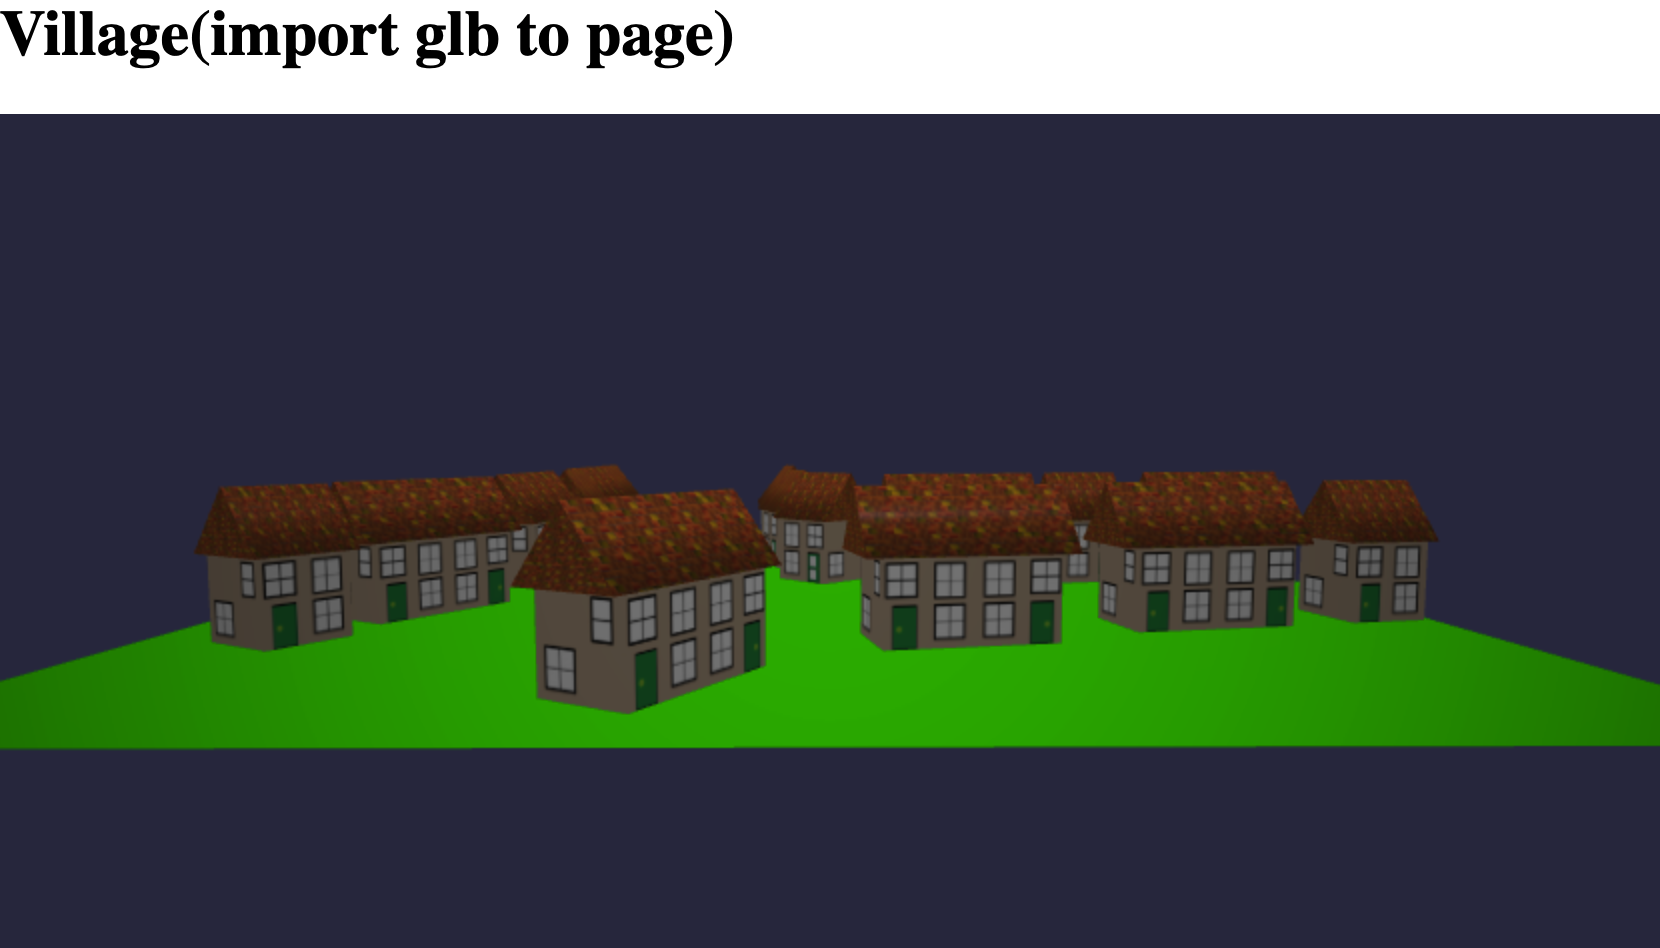
可以再加一段脚本校正:
<div id="renderCanvas">
    <h1>Village(import glb to page)</h1>
    <babylon extends="minimal" id="myViewer"></babylon>
</div>

<script>
    BabylonViewer.viewerManager.getViewerPromiseById('myViewer').then((viewer) => {
        viewer.onSceneInitObservable.add(() => {
            viewer.sceneManager.camera.radius = 15;
            viewer.sceneManager.camera.beta = Math.PI / 2.2;
        });
        viewer.onEngineInitObservable.add((scene) => {
            viewer.loadModel({
                url: "../assets/glb/village.glb"
            });
        });
    });
</script>
效果如下:
在线地址:https://yjmyzz.github.io/babylon_js_study/day04/08.html
参考文档:
https://doc.babylonjs.com/features/introductionToFeatures/chap2/copies
https://doc.babylonjs.com/features/introductionToFeatures/chap2/viewer2
出处:http://yjmyzz.cnblogs.com
本文版权归作者和博客园共有,欢迎转载,但未经作者同意必须保留此段声明,且在文章页面明显位置给出原文连接,否则保留追究法律责任的权利。

 浙公网安备 33010602011771号