
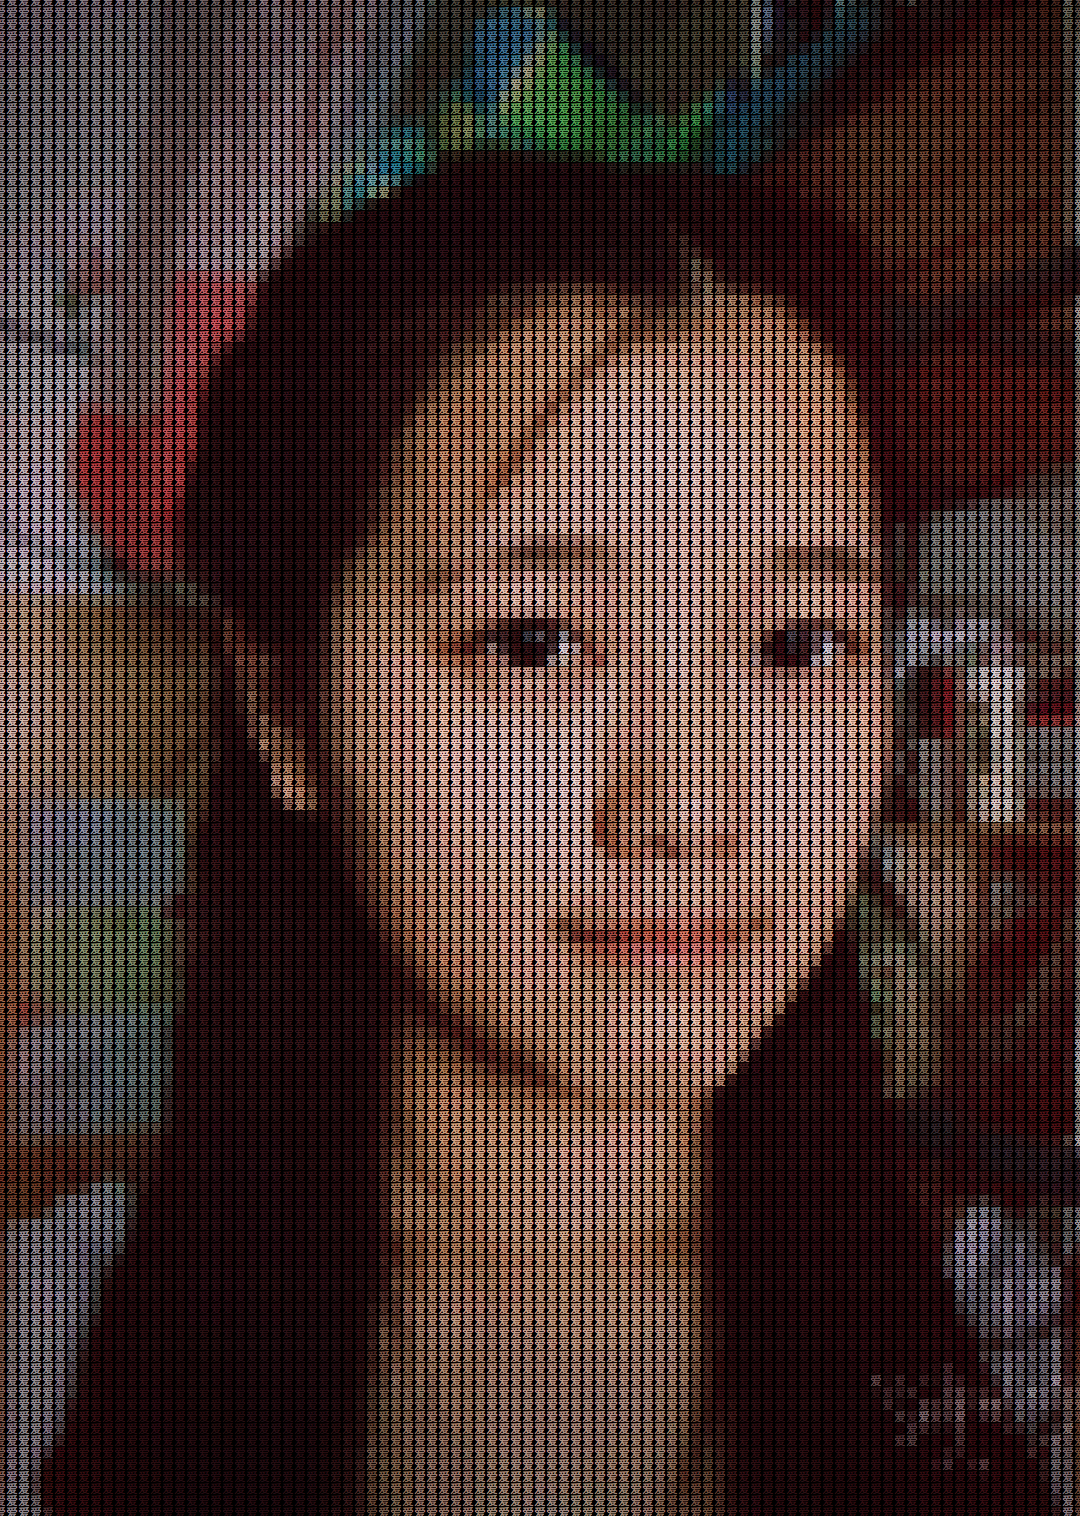
用带颜色字符填充图片
创意来源
这个题目是一天刷知乎看到的,<你写过什么有趣的代码>,作者的仓库是
img2html ,功能是将图片转换成静态html,其中基本元素为 爱爱爱
qml的实现方案
import QtQuick 2.9
import QtQuick.Window 2.2

Window {
    visible: true
    id: win
    width: 100
    height: 100
    color: "black"
    Text {
        width: font.pixelSize
        height:  font.pixelSize
        id: label
        text: qsTr("爱")
        font.bold: false
        color: Qt.rgba(1,1,1,1)
        font.family: "Courier"
        verticalAlignment: Text.AlignVCenter
        horizontalAlignment: Text.AlignHCenter
        font.pixelSize: 12
        layer.enabled: true
        layer.smooth: true
        layer.format: ShaderEffectSource.RGB
    }
    Rectangle{
        visible: false

        color: Qt.rgba(0.0,0.0,.0,1.0)
        Image{
            visible: false
            id: image
            fillMode: Image.PreserveAspectFit
            source: "file://Users/user/Downloads/before.png"
            onWidthChanged: parent.width = width
            onHeightChanged: {
                parent.height = height
            }
        }
        ShaderEffect {
            anchors.fill: parent
            property size pSize: Qt.size(width / label.width , height / label.height);
            property variant pattern: label
            property variant tex: image
            fragmentShader:
                "
                uniform highp vec2 pSize;
                varying highp vec2 qt_TexCoord0;
                uniform sampler2D pattern;
                uniform sampler2D tex;
                void main() {
                    float alpha = length(texture2D(pattern,fract(qt_TexCoord0*pSize)).rgb);
                    vec2 oft = qt_TexCoord0 - fract(qt_TexCoord0*pSize)/pSize;
                    vec2 blk = 0.125/pSize;
                    vec4 i = vec4(.0,.0,.0,.0);
                    for(int x = 0; x <= 8; x++)
                        for(int y = 0; y <= 8; y++)
                            i += texture2D(tex,oft + blk*vec2(float(x),float(y)));
                    gl_FragColor.rgb = i.rgb*alpha/81.0;
                }
                "
        }
        Component.onCompleted: {
            grabToImage(function(result){
                result.saveToFile("/Users/user/Downloads/myafter.png");
            });
        }
    }


}
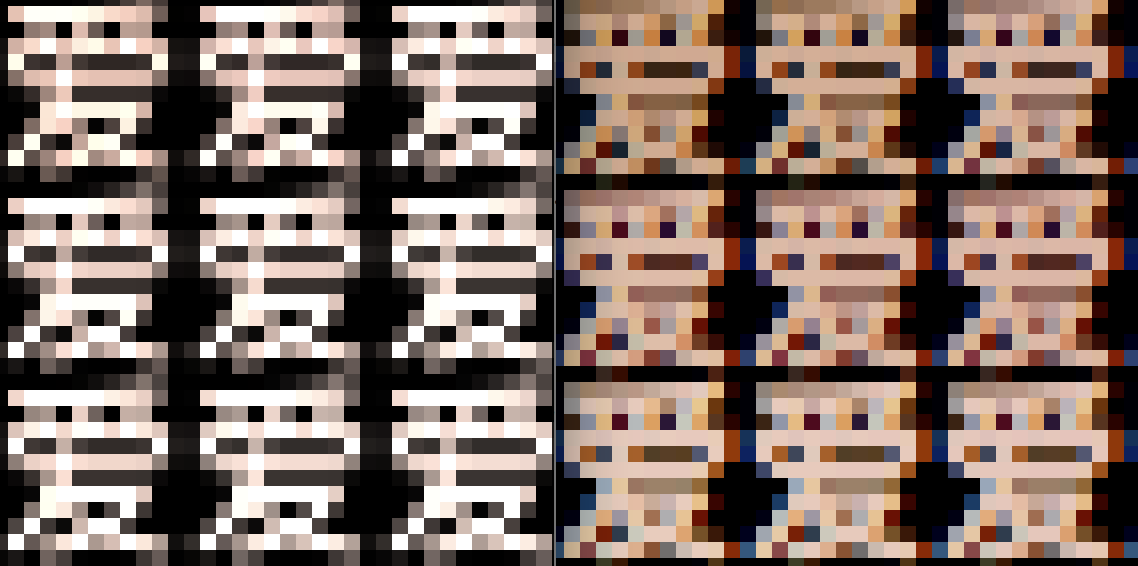
实验对比
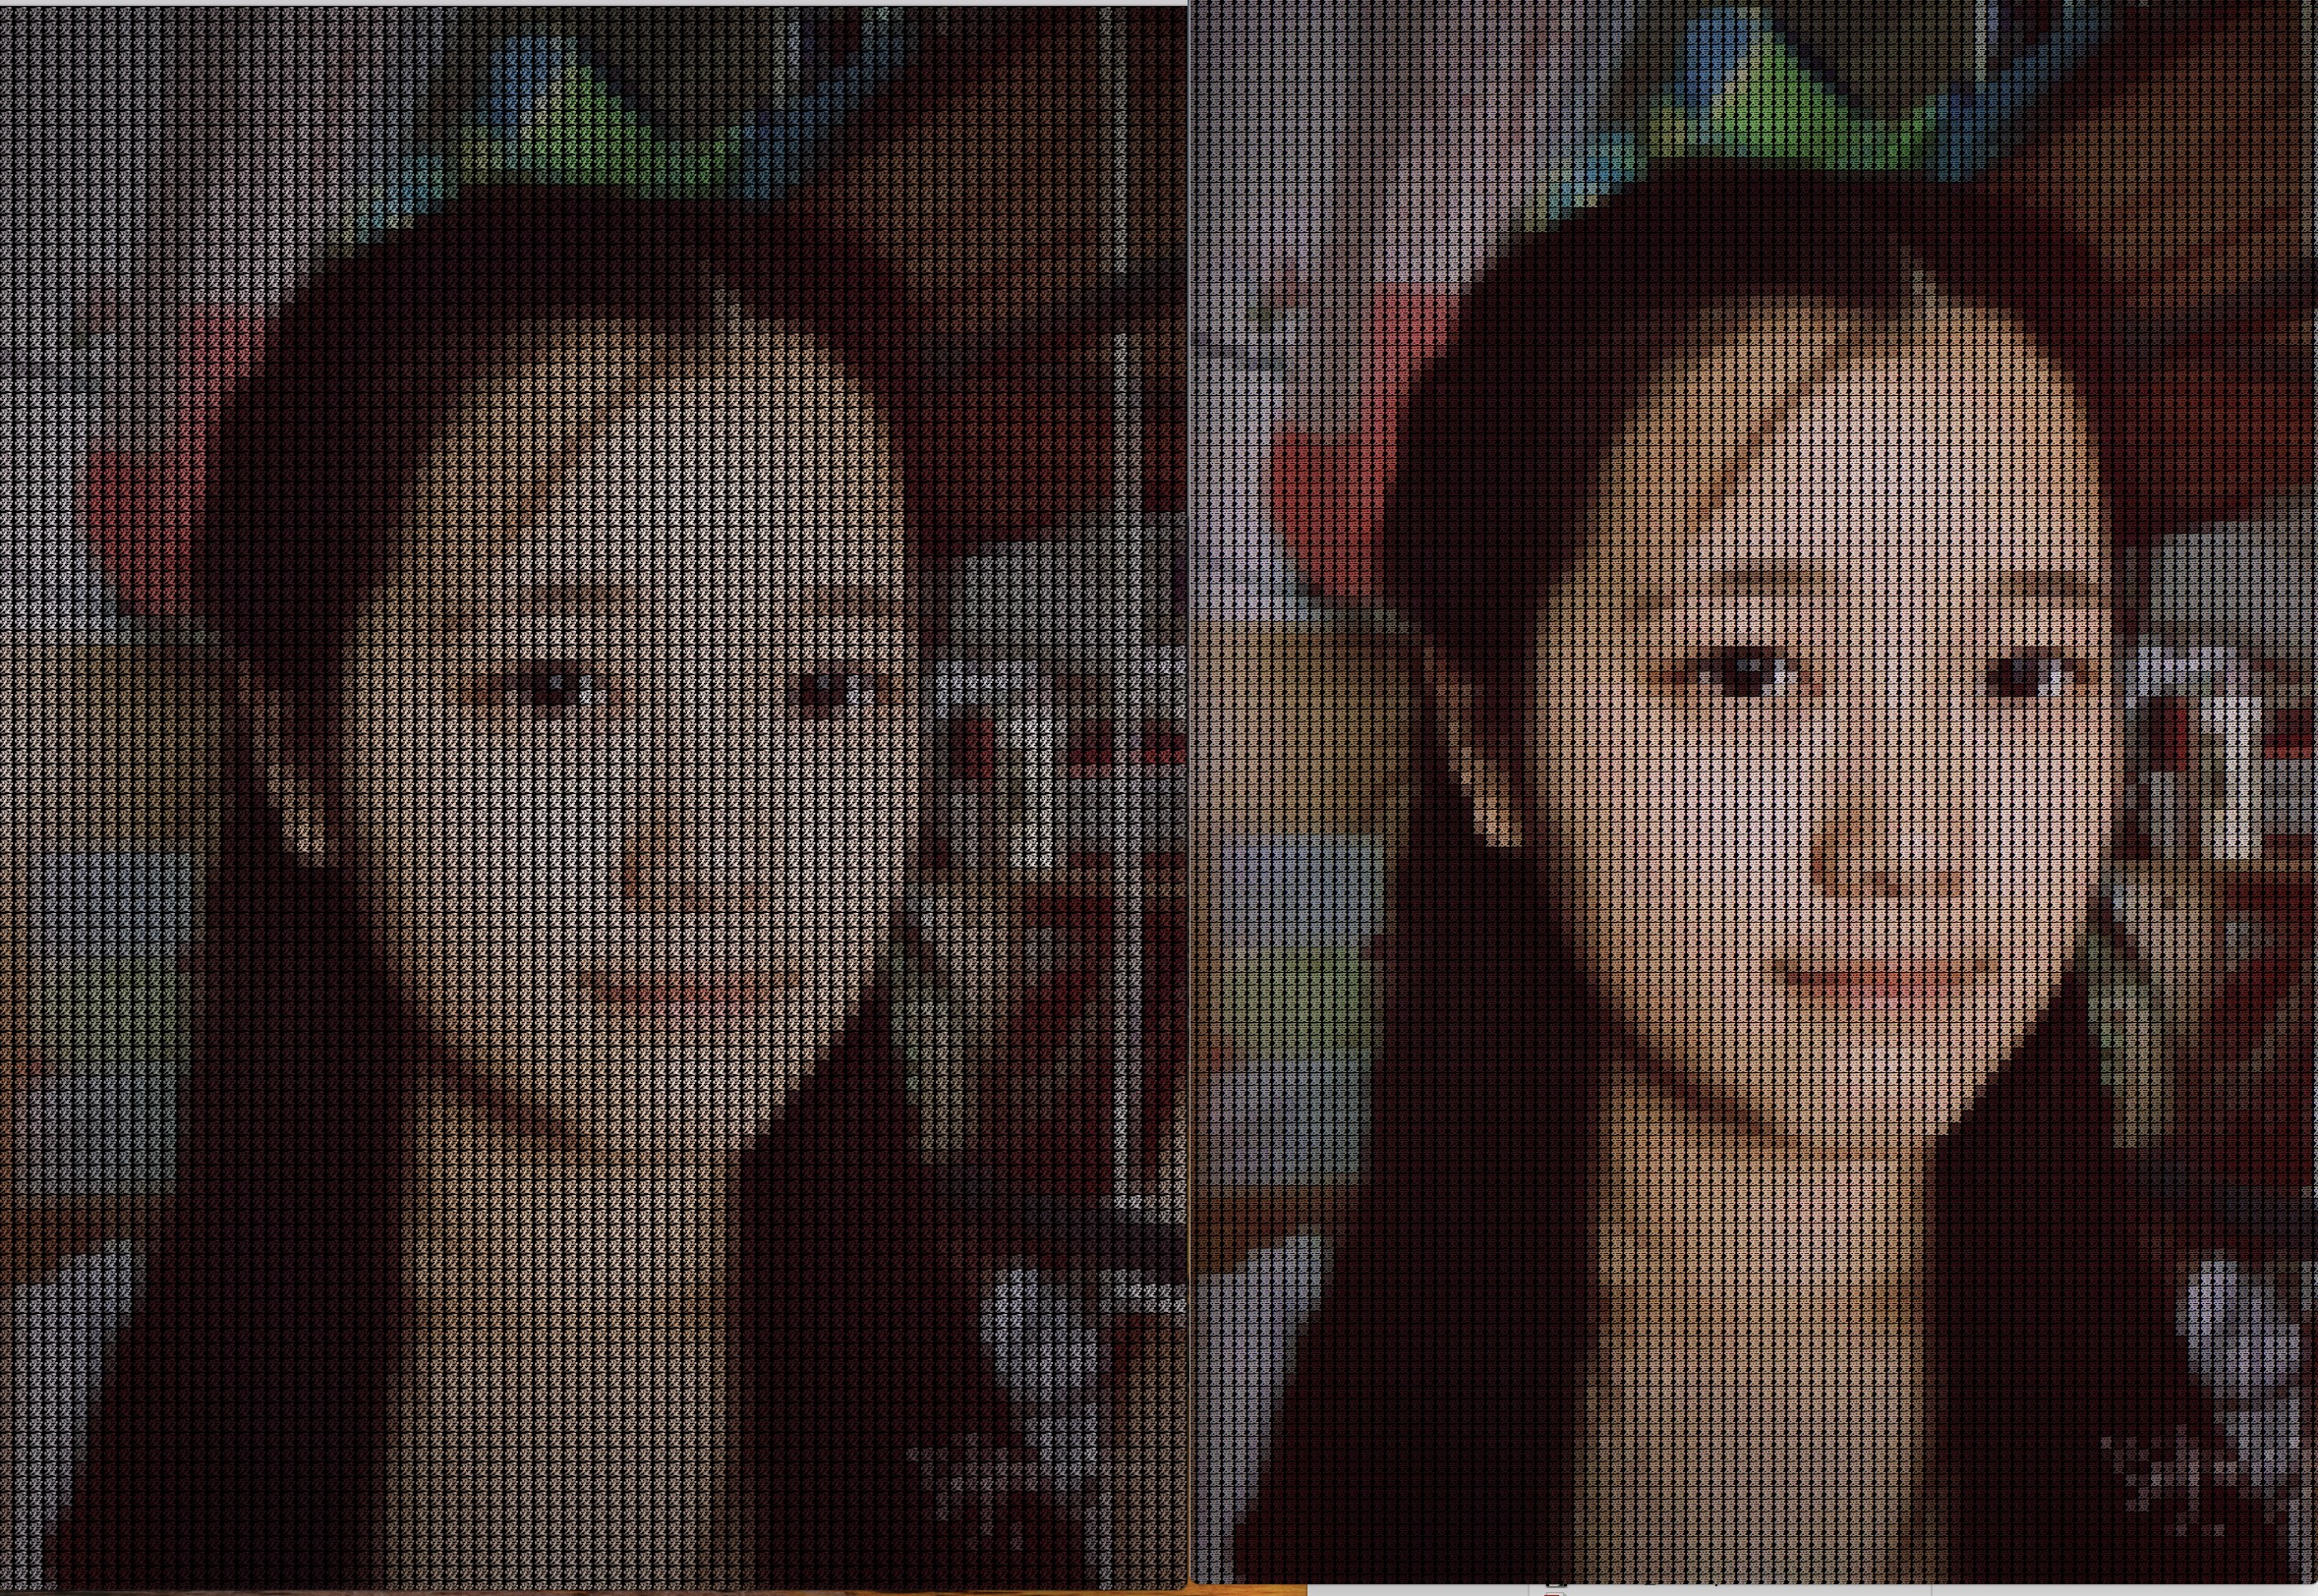
左侧为上面QML的代码效果,右侧为img2html的输出,整体上效果存在差异,img2html的实现更饱满。进一步分析确认到差异来源在于基本模板,img2html的更加饱满,归结为反走样算法的差异。具体如下图所示

 浙公网安备 33010602011771号