
Windows 下noinstall方式安装 mysql-5.7.5-m15-winx64
下载解压不说
我解压在:E:\DBFiles\mysql-5.7.15-winx64\mysql-5.7.15-winx64
添加配置文件E:\DBFiles\mysql-5.7.15-winx64\mysql-5.7.15-winx64\my.ini
####################配置文件开始###################

 [client]
 default-character-set=utf8


 [mysqld]
 port=3306
 basedir  ="E:\DBFiles\mysql-5.7.15-winx64\mysql-5.7.15-winx64"
 datadir  ="E:\DBFiles\mysql-5.7.15-winx64\mysql-5.7.15-winx64/data/"
 tmpdir   ="E:\DBFiles\mysql-5.7.15-winx64\mysql-5.7.15-winx64/data/"
 socket   ="E:\DBFiles\mysql-5.7.15-winx64\mysql-5.7.15-winx64/data/mysql.sock"
 log-error="E:\DBFiles\mysql-5.7.15-winx64\mysql-5.7.15-winx64/data/mysql_error.log"
 #skip-grant-tables=1
 #server_id = 2
 #skip-locking


 max_connections=100
 table_open_cache=256
 query_cache_size=1M
 tmp_table_size=32M
 thread_cache_size=8
 innodb_data_home_dir="E:\DBFiles\mysql-5.7.15-winx64\mysql-5.7.15-winx64/data/"
 innodb_flush_log_at_trx_commit =1
 innodb_log_buffer_size=128M
 innodb_buffer_pool_size=128M
 innodb_log_file_size=10M
 innodb_thread_concurrency=16
 innodb-autoextend-increment=1000
 join_buffer_size = 128M
 sort_buffer_size = 32M
 read_rnd_buffer_size = 32M
 max_allowed_packet = 32M
 explicit_defaults_for_timestamp=true
 sql-mode="STRICT_TRANS_TABLES,NO_AUTO_CREATE_USER,NO_ENGINE_SUBSTITUTION"
 #sql_mode=NO_ENGINE_SUBSTITUTION,STRICT_TRANS_TABLES

####################配置文件结束###################
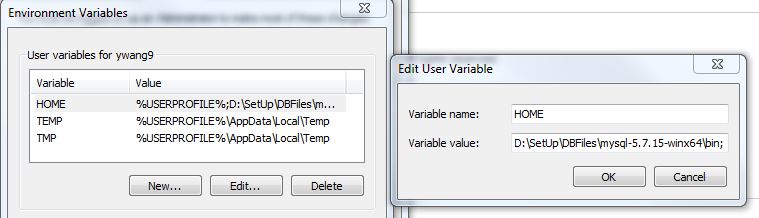
配置mysql的bin为环境变量
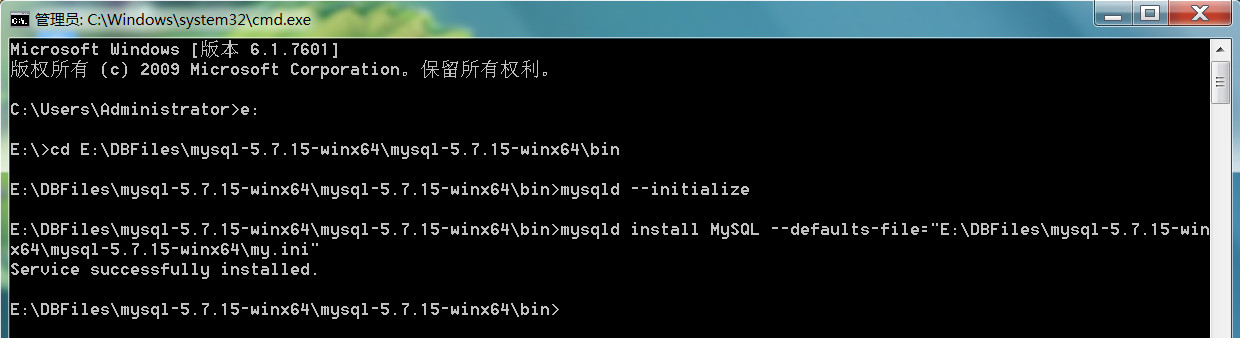
在zip包中已经不含data目录,需要初始化一下:mysqld --initialize
然后进行服务注册:E:\DBFiles\mysql-5.7.15-winx64\mysql-5.7.15-winx64\bin>mysqld install MySQL --defaults-file="E:\DBFiles\mysql-5.7.15-winx64\mysql-5.7.15-winx64\my.ini"
提示安装成功
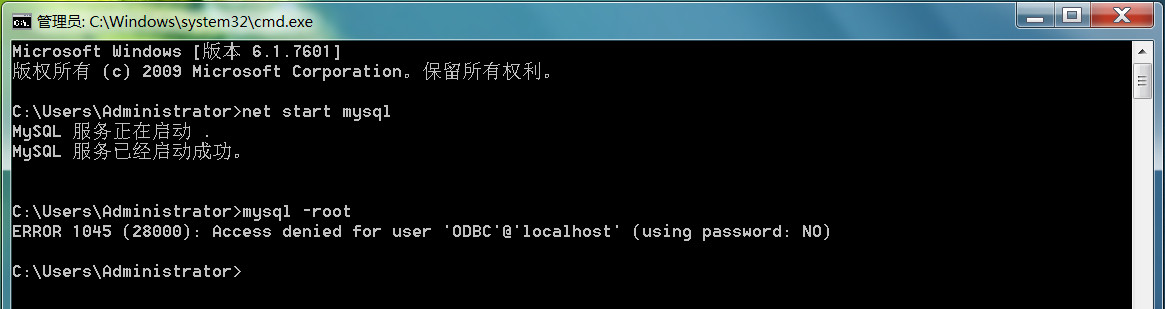
启动MySQL服务,MySQL服务可以成功启动,可以用root用户登录的时候提示要求输入密码,此时还没有设置root密码
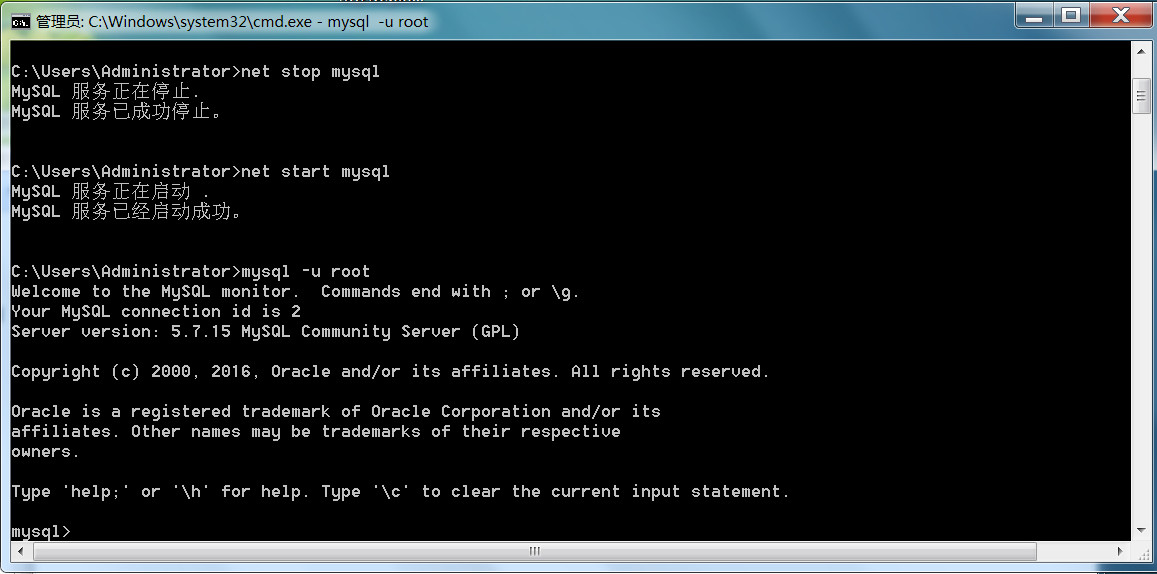
停止服务,在my.ini中加一个skip-grant-tables=1的配置,允许跳过密码,修改过后重启MySQL服务,root用户可以正常登录
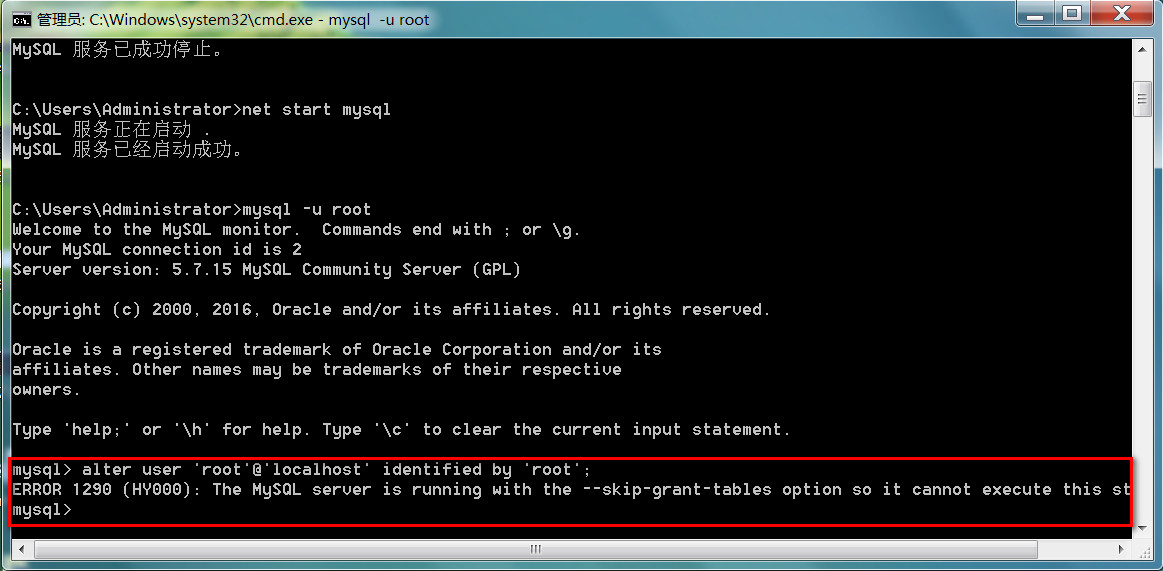
登录之后修改密码,利用alter user root identitied by 'root'的方式修改
提示:The MySQL server is running with the --skip-grant-tables option so it cannot execute this statement
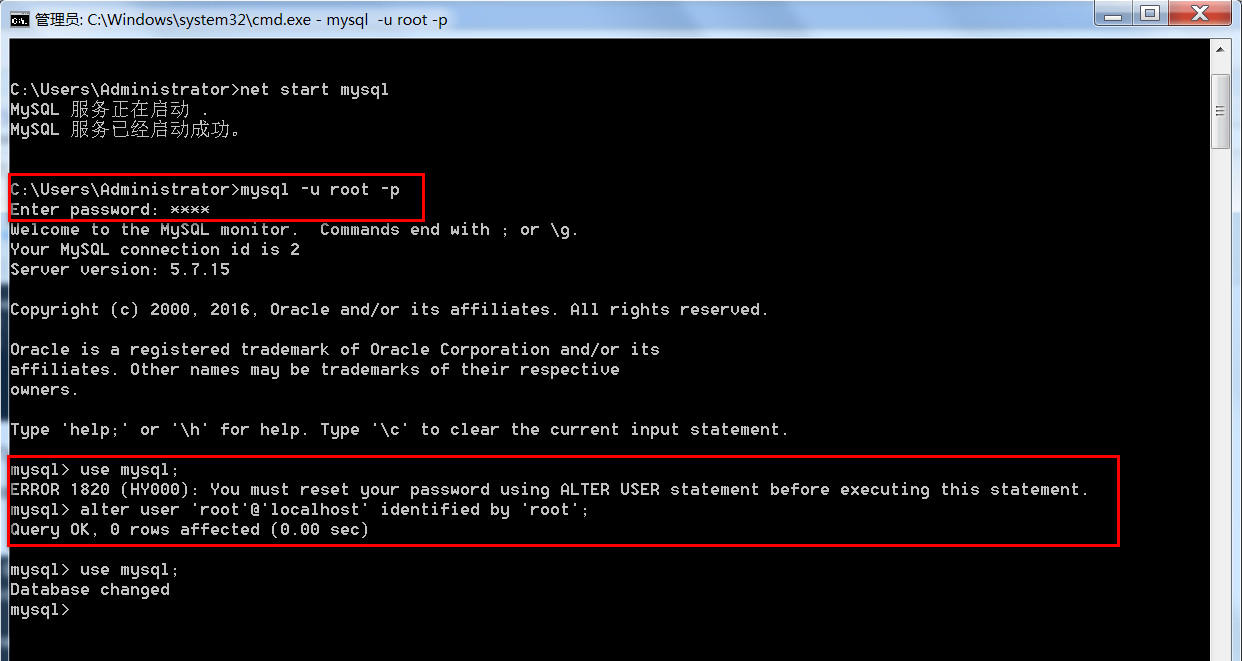
然后参考网上,用:update user set authentication_string=PASSWORD('root') where User='root';可以修改成功
通过update user set authentication_string=password('root') where user ='root'的方式修改密码,提示成功

修改密码之后,remove掉上面配置的skip-grant-tables=1,用root用户和刚才设置的密码root登录,没问题,
但是当我use mysql切换数据的时候,又提示我修改密码?
然后我有执行:alter user 'root'@'localhost' identified by 'root';
这下终于好了
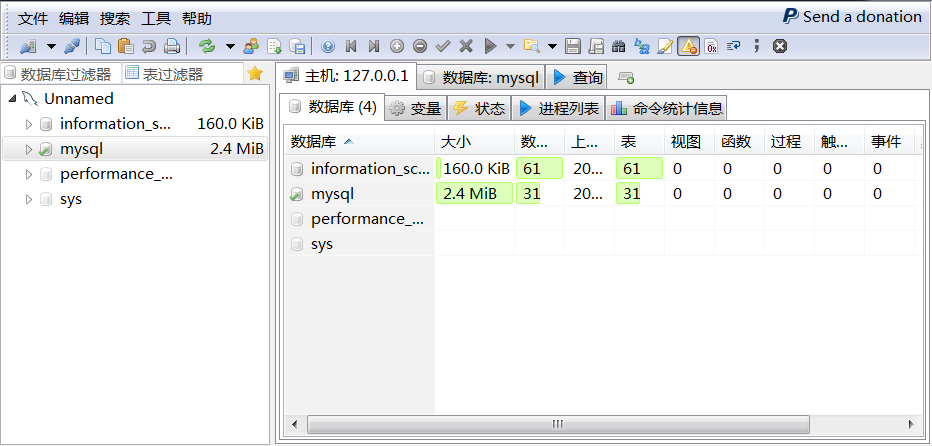
然后用HeidiSQL管理工具可以正常连接:
中间修改密码的时候,用的是:alter user 'root'@'localhost' identified by 'root';
提示:The MySQL server is running with the --skip-grant-tables option so it cannot execute this statement
然后参考网上,用:update user set authentication_string=PASSWORD('root') where User='root';可以修改成功
但是重启中又让修改密码,用的是:alter user 'root'@'localhost' identified by 'root';这样就完成了root密码的修改。
之前都是下一步下一步的方式安装的,这次通过uninstall的方式安装mysql,由于是反复测试,中间遇到了不少问题,折腾可三遍才成功。
参考:
http://www.cnblogs.com/Alex-Zeng/p/5508766.html
http://www.cnblogs.com/wenthink/p/MySQLInstall.html
http://blog.csdn.net/a379039233/article/details/46819877

 浙公网安备 33010602011771号