Angular 任务列表页
新建一个任务Module
$ ng g m task
功能:项目列表显示,增加,修改,删除项目。邀请其它人员加入项目。
单一性原则:希望搭建多个组件,每个组件负责自己的功能。
一、task相关组件
task-home是顶级容器包含了所有内容,task-home中有多个task-list,每个task-list包含一个task-header和一堆task-item,还有若干dialog组件。
$ ng g c task/task-home
$ ng g c task/task-list
$ ng g c task/task-item
$ ng g c task/task-header
$ ng g c task/new-task
$ ng g c task/copy-task
$ ng g c task/new-task-list
需要把NewTaskComponent和CopyTaskComponent放在entryComponents中。
@NgModule({
  declarations: [
    TaskHomeComponent,
    TaskListComponent,
    TaskItemComponent,
    TaskHeaderComponent,
    NewTaskComponent,
    CopyTaskComponent
  ],
  imports: [SharedModule, TaskRoutingModule],
  entryComponents:[NewTaskComponent,CopyTaskComponent]
})
三、TaskHome
<div class="task-list">
  <app-task-list *ngFor="let list of lists" class="list-container">
    <app-task-header [header]="list.name"> </app-task-header>
    <app-task-item *ngFor="let task of list.tasks"> </app-task-item>
  </app-task-list>
</div>

<button
  class="ab-buttonmad-fab fab-button"
  mat-fab
  type="button"
  (click)="openNewProjectDialog()"
>
  <mat-icon>add</mat-icon>
</button>
TaskHome中处理新建任务,修改任务,移动任务,删除任务列表:
<app-task-header [header]="list.name"
(newTask)="lauchNewTaskDialog()"
(moveAll)="lauchCopyTaskDialog()"
(deleteList)="lauchConfirmDialog()"
> </app-task-header>

  lauchNewTaskDialog() {
    // this.dialog.open(NewTaskComponent);
    const dialogRef = this.dialog.open(NewTaskComponent,{data:{title:'新建任务'}});
  }
  lauchCopyTaskDialog(){
    const dialogRef = this.dialog.open(CopyTaskComponent,{data:{lists:this.lists}});
  }

  launchUpdateTaskDialog(task){
    const dialogRef = this.dialog.open(NewTaskComponent,{data:{title:'修改任务',task:task}});
  }

  lauchConfirmDialog(){
    const dialogRef = this.dialog.open(ConfirmDialogComponent,{data:{title:'删除任务列表',content:'您确定要删除该任务列表吗?'}});
  }
四、TaskList
app-task-list组件里面是可以放内容的。
<mat-list>
  <ng-content>
  </ng-content>
</mat-list>
list里面内容不去管。留给其他组件添进来。
五、Header


<div mat-subheader class="fill">
  <div class="header-container">
    <h3>{{header}}</h3>
  </div>
  <div>
    <div class="fill">
      <button mat-button>
        <mat-icon>add_circle_outine</mat-icon>
        <span>新任务</span>
      </button>
    </div>
  </div>

  <div>
    <button mat-icon-button [matMenuTriggerFor]="menu">
      <mat-icon>keyboard_arrow_down</mat-icon>
    </button>
  </div>
</div>

<mat-menu #menu="matMenu">
  <button mat-menu-item>
    <mat-icon>
      mode_edit
    </mat-icon>
    <span>
      修改列表名称
    </span>
  </button>
  <button mat-menu-item>
    <mat-icon svgIcon="move">
    </mat-icon>
    <span>
      移动列表所有内容
    </span>
  </button>
  <button mat-menu-item>
    <mat-icon>
      delete_forever
    </mat-icon>
    <span>
      删除列表
    </span>
  </button>
</mat-menu>

删除列表可参考删除project,在taskHome中
lauchConfirmDialog(){
    const dialogRef = this.dialog.open(ConfirmDialogComponent,{data:{title:'删除任务列表',content:'您确定要删除该任务列表吗?'}});
}
六、ListItem
1、通过优先级不同让任务有一个不同颜色的边框。
  .priority-normal {
    border-left: 3px solid #A6A6A6;
  }
  .priority-important {
    border-left: 3px solid #FFAF38;
  }
  .priority-emergency {
    border-left: 3px solid red;
  }
<mat-list-item class="container"
[ngClass]="{
  'priority-normal':item.priority===3,
  'priority-important':item.priority===2,
  'priority-emergency':item.priority===1
}">

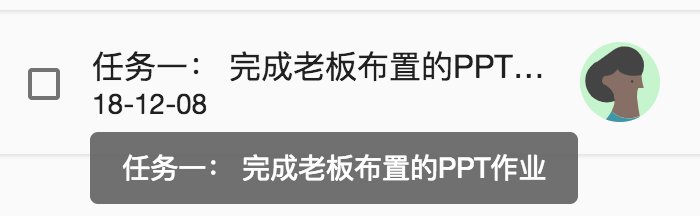
2、list超出后显示...,鼠标移上去后给出提示。
从
    <div class="content" mat-line [ngClass]="{'completed':item.completed}">
      {{item.desc}}
    </div>
改为:
    <div class="content" mat-line [ngClass]="{'completed':item.completed}">
      <span [matTooltip]="item.desc">{{item.desc}}</span>
    </div>
全部布局
<mat-list-item class="container" [ngClass]="{
        'priority-normal':item.priority===3,
        'priority-important':item.priority===2,
        'priority-emergency':item.priority===1
    }">
    <mat-checkbox [checked]="item.completed" class="status"></mat-checkbox>
    <div class="content" mat-line [ngClass]="{'completed': item.completed}">
        <span [matTooltip]="item.desc">{{item.desc}}</span>
    </div>
    <div class="bottom-bar" mat-line>
        <span class="duedate" *ngIf="item.dueDate">
            {{item.dueDate | date: "yy-MM-dd"}}
        </span>
        <mat-icon *ngIf="item.reminder" class="alarm">alarm</mat-icon>
    </div>
    <mat-icon [svgIcon]="avatar" class="avatar" md-list-avatar></mat-icon>
</mat-list-item>
mat-icon.avatar {
  overflow: hidden;
  width: 64px;
  height: 64px;
  border-radius: 50%;
  margin: 12px;
  order: 3;
}

.completed {
  opacity: 0.64;
  color: #d9d9d9;
  text-decoration: line-through;
}

.priority-normal {
  border-left: 3px solid #a6a6a6;
}

.priority-important {
  border-left: 3px solid #ffaf38;
}

.priority-emergency {
  border-left: 3px solid red;
}

.checkbox-section {
  border: 0 solid #a6a6a6;
}

.duedate {
  background-color: #ff4f3e;
  color: #fff;
}

.alarm {
  font-size: 18px;
}

.bottom-bar {
  margin-top: 3px;
  margin-bottom: 2px;
  font-size: 10px;
  width: 100%;
  order: 1;
}

.status {
  order: -1;
}

.content {
  order: 1;
  width: 100%;
  padding: 5px;
}

.container {
  width: 100%;
  border-radius: 3px;
  box-shadow: 0 1px 2px rgba(0, 0, 0, 0.1);
}

.drag-start {
  opacity: 0.5;
  border: #ff525b dashed 2px;
}

:host {
  width: 100%;
}
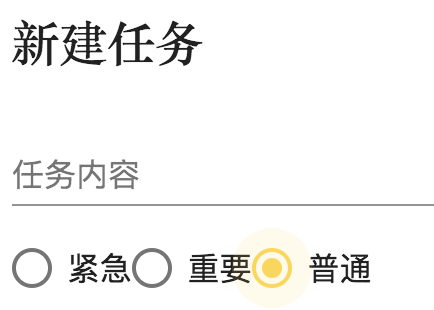
七、NewTask
1、任务优先级:
<mat-radio-group>
      <mat-radio-button *ngFor="let priority of priorities" [value]="priority.value">
        {{priority.label}}
      </mat-radio-button>
</mat-radio-group>
export class NewTaskComponent implements OnInit {
  priorities = [
    {
      label: '紧急',
      value: 1
    },
    {
      label: '重要',
      value: 2
    },
    {
      label: '普通',
      value: 3
    }
  ];
  constructor() { }

  ngOnInit() {
  }
}
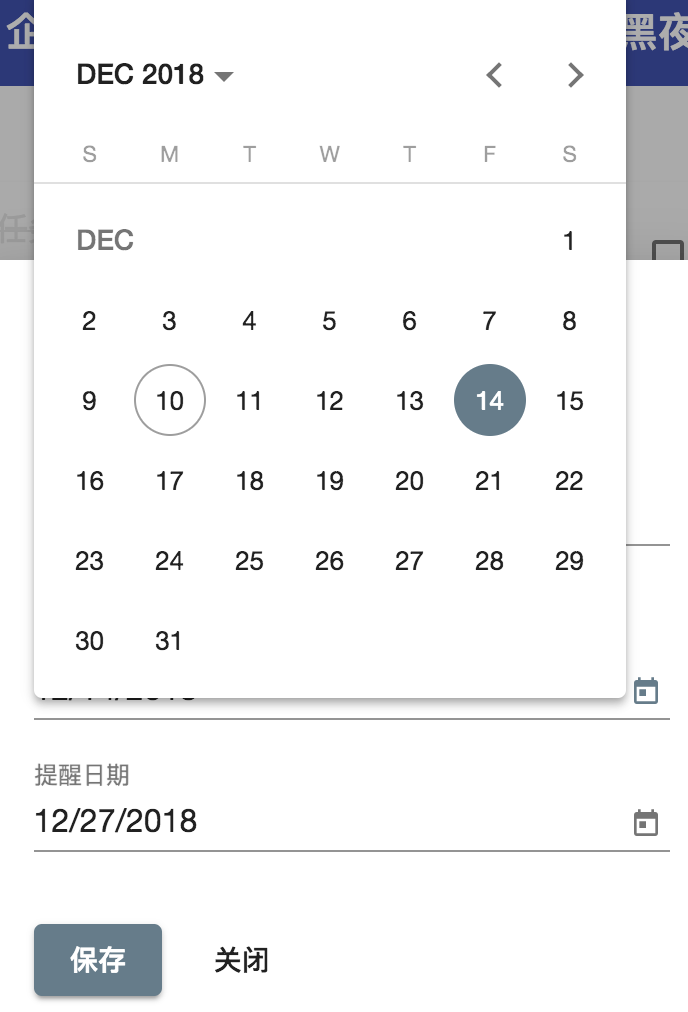
2、任务截止日期
    <mat-form-field class="full-width">
      <input type="text" [matDatepicker]="dueDatepicker" matInput placeholder="任务截止日期">
      <mat-datepicker-toggle matSuffix [for]="dueDatepicker"></mat-datepicker-toggle>
    </mat-form-field>
    <mat-datepicker #dueDatepicker></mat-datepicker>
3、调起NewTask组件
在header中把新建任务的事件发射出来
<button mat-button (click)="onNewTaskClick()">
        <mat-icon>add_circle_outine</mat-icon>
        <span>新任务</span>
</button>

  @Output() newTask= new EventEmitter<void>() ;
  onNewTaskClick(){
    this.newTask.emit();
  }
在TaskHome中监听
<app-task-header [header]="list.name" (newTask)="lauchNewTaskDialog()"> </app-task-header>

  lauchNewTaskDialog() {
    this.dialog.open(NewTaskComponent);
  }
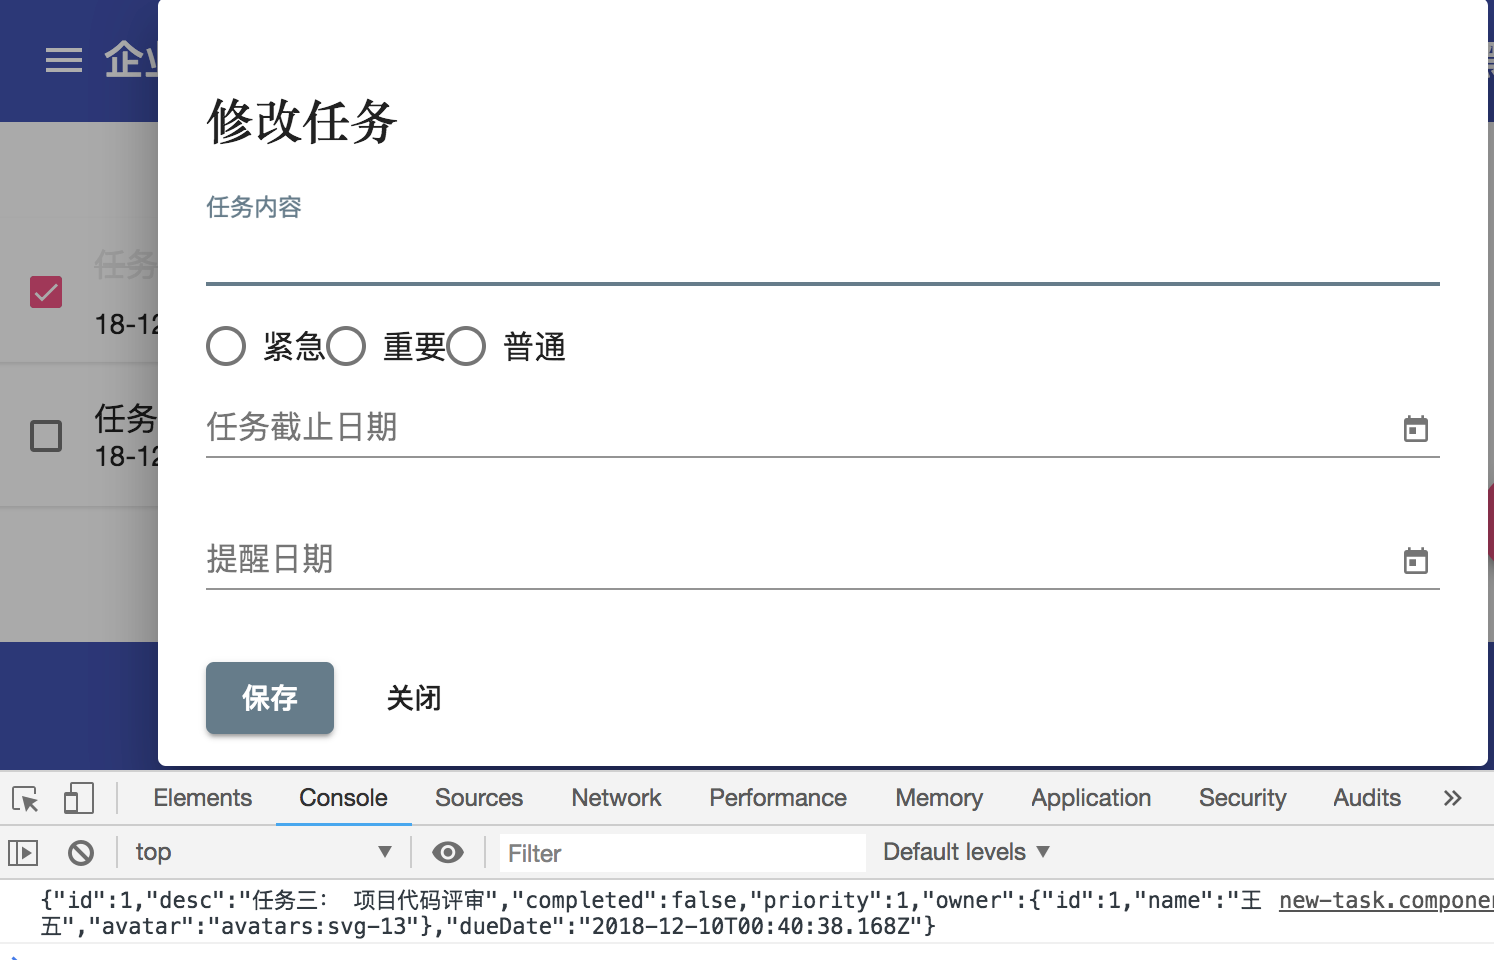
4、修改任务
修改任务和新建任务共用一个NewTask组件。在taskHome中去监听taskItem的click事件
    <app-task-item *ngFor="let task of list.tasks" [item]="task" (taskClick)="launchUpdateTaskDialog(task)"> </app-task-item>

  launchUpdateTaskDialog(task){
    const dialogRef = this.dialog.open(NewTaskComponent,{data:{title:'修改任务',task:task}});
  }
修改NewTask组件,首先需要有一个title
title:'';
constructor(@Inject(MAT_DIALOG_DATA) private data: any) {
    this.title = this.data.title;
    console.log(JSON.stringify(this.data.task));
}

  <h2 md-dialog-title>{{title}}</h2>
在新建任何和修改任务时候都会传入title,新建任务时候不会传入task
  lauchNewTaskDialog() {
    // this.dialog.open(NewTaskComponent);
    const dialogRef = this.dialog.open(NewTaskComponent,{data:{title:'新建任务'}});
  }

  launchUpdateTaskDialog(task){
    const dialogRef = this.dialog.open(NewTaskComponent,{data:{title:'修改任务',task:task}});
  }
问题:点击checkbox的时候也会弹出修改任务对话框。
解决:
  <mat-checkbox [checked]="item.completed" class="status" (click)="onCheckBoxClick($event)"> </mat-checkbox>

  onCheckBoxClick(event: Event): void {
    event.stopPropagation();
  }
八、移动内容
<mat-select placeholder="请选择目标列表">
      <mat-option *ngFor="let list of lists" [value]="list">{{list.name}}</mat-option>
</mat-select>

export class CopyTaskComponent implements OnInit {
  lists: any[];
  constructor(@Inject(MAT_DIALOG_DATA) private data: any,
  public dialogRef: MatDialogRef<CopyTaskComponent>) { }

  ngOnInit() {
    this.lists = this.data.lists;
  }

}
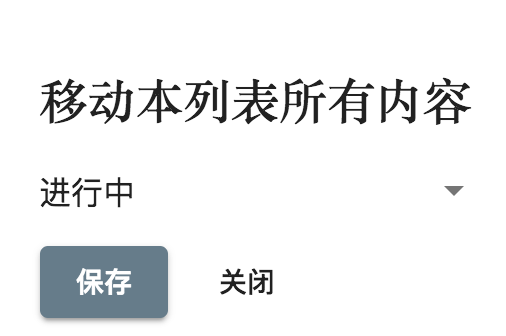
九、新建,修改任务列表
新建任务列表和修改任务列表名字用的同一个Component
<form>
  <h2 md-dialog-title>新建项目列表</h2>
    <div mat-dialog-content>
      <mat-form-field class="full-width">
        <input type="text" matInput placeholder="列表名称">
      </mat-form-field>
    </div>
    <div mat-dialog-actions>
      <button type="button" mat-raised-button color="primary" (click)="onSave()">保存</button>
      <button type="button" mat-button mat-dialog-close>关闭</button>
    </div>
</form>
import { Component, OnInit, Inject } from '@angular/core';
import { MAT_DIALOG_DATA, MatDialogRef } from '@angular/material';

@Component({
  selector: 'app-new-task-list',
  templateUrl: './new-task-list.component.html',
  styleUrls: ['./new-task-list.component.scss']
})
export class NewTaskListComponent implements OnInit {
  title='';

  constructor(@Inject(MAT_DIALOG_DATA) private data,
  private dialogRef: MatDialogRef<NewTaskListComponent>) { }

  ngOnInit() {
  }

  onSave(){
    this.dialogRef.close(this.title);
  }
}
在TaskHome组件中去处理事件
  launchEditListDialog() {
    const dialogRef = this.dialog.open(NewTaskListComponent, {
      data: { title: "更改列表名称" }
    });
    dialogRef.afterClosed().subscribe(result => console.log(result));
  }
  launchNewListDialog() {
    const dialogRef = this.dialog.open(NewTaskListComponent, {
      data: { title: "新建列表名称" }
    });
    dialogRef.afterClosed().subscribe(result => console.log(result));
  }
十、数据结构的演变
1、
lists=[
    {
      "id":1,
      "name": "待办",
      "tasks" :[
        {
          id:1,
          desc: '任务一: 去星巴克买咖啡',
          owner:{
            id:1,
            name:'张三',
            avatar:'avatars:svg-11'
          },
          dueDate: new Date()
        },
        {
          id:2,
          desc: '任务一: 完成老板布置的PPT作业',
          owner:{
            id:2,
            name:'李四',
            avatar:'avatars:svg-12'
          },
          dueDate: new Date()
        }
      ]
    },
    {
      "id":2,
      "name": "进行中",
      "tasks" :[
        {
          id:1,
          desc: '任务三: 项目代码评审',
          owner:{
            id:1,
            name:'王五',
            avatar:'avatars:svg-13'
          },
          dueDate: new Date()
        },
        {
          id:2,
          desc: '任务一: 制定项目计划',
          owner:{
            id:2,
            name:'李四',
            avatar:'avatars:svg-12'
          },
          dueDate: new Date()
        }
      ]
    }
  ]
2、每一个任务Item都加一个完成状态completed
lists = [
    {
      id: 1,
      name: "待办",
      tasks: [
        {
          id: 1,
          desc: "任务一: 去星巴克买咖啡",
          completed: true,
          owner: {
            id: 1,
            name: "张三",
            avatar: "avatars:svg-11"
          },
          dueDate: new Date()
        },
        {
          id: 2,
          desc: "任务一: 完成老板布置的PPT作业",
          completed: false,
          owner: {
            id: 2,
            name: "李四",
            avatar: "avatars:svg-12"
          },
          dueDate: new Date()
        }
      ]
    },
    {
      id: 2,
      name: "进行中",
      tasks: [
        {
          id: 1,
          desc: "任务三: 项目代码评审",
          completed: false,
          owner: {
            id: 1,
            name: "王五",
            avatar: "avatars:svg-13"
          },
          dueDate: new Date()
        },
        {
          id: 2,
          desc: "任务一: 制定项目计划",
          completed: false,
          owner: {
            id: 2,
            name: "李四",
            avatar: "avatars:svg-12"
          },
          dueDate: new Date()
        }
      ]
    }
  ];
3、有些任务加reminder
import { Component, OnInit } from "@angular/core";

@Component({
  selector: "app-task-home",
  templateUrl: "./task-home.component.html",
  styleUrls: ["./task-home.component.scss"]
})
export class TaskHomeComponent implements OnInit {
  constructor() {}

  ngOnInit() {}

  lists = [
    {
      id: 1,
      name: "待办",
      tasks: [
        {
          id: 1,
          desc: "任务一: 去星巴克买咖啡",
          completed: true,
          owner: {
            id: 1,
            name: "张三",
            avatar: "avatars:svg-11"
          },
          dueDate: new Date(),
          reminder: new Date()
        },
        {
          id: 2,
          desc: "任务一: 完成老板布置的PPT作业",
          completed: false,
          owner: {
            id: 2,
            name: "李四",
            avatar: "avatars:svg-12"
          },
          dueDate: new Date()
        }
      ]
    },
    {
      id: 2,
      name: "进行中",
      tasks: [
        {
          id: 1,
          desc: "任务三: 项目代码评审",
          completed: false,
          owner: {
            id: 1,
            name: "王五",
            avatar: "avatars:svg-13"
          },
          dueDate: new Date()
        },
        {
          id: 2,
          desc: "任务一: 制定项目计划",
          completed: false,
          owner: {
            id: 2,
            name: "李四",
            avatar: "avatars:svg-12"
          },
          dueDate: new Date()
        }
      ]
    }
  ];
}
4、为每个任务添加优先级priority
lists = [
    {
      id: 1,
      name: "待办",
      tasks: [
        {
          id: 1,
          desc: "任务一: 去星巴克买咖啡",
          completed: true,
          priority: 3,
          owner: {
            id: 1,
            name: "张三",
            avatar: "avatars:svg-11"
          },
          dueDate: new Date(),
          reminder: new Date()
        },
        {
          id: 2,
          desc: "任务一: 完成老板布置的PPT作业",
          completed: false,
          priority: 2,
          owner: {
            id: 2,
            name: "李四",
            avatar: "avatars:svg-12"
          },
          dueDate: new Date()
        }
      ]
    },
    {
      id: 2,
      name: "进行中",
      tasks: [
        {
          id: 1,
          desc: "任务三: 项目代码评审",
          completed: false,
          priority: 1,
          owner: {
            id: 1,
            name: "王五",
            avatar: "avatars:svg-13"
          },
          dueDate: new Date()
        },
        {
          id: 2,
          desc: "任务一: 制定项目计划",
          completed: false,
          priority: 2,
          owner: {
            id: 2,
            name: "李四",
            avatar: "avatars:svg-12"
          },
          dueDate: new Date()
        }
      ]
    }
  ];
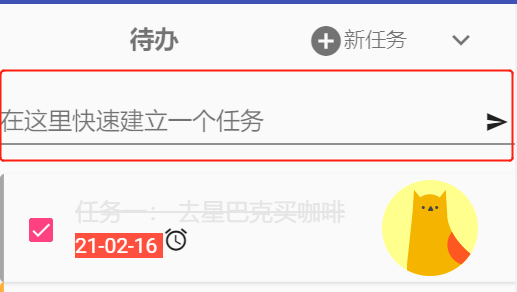
十一、创建一个快速创建任务的模块
$ ng g c task/quick-task
<mat-form-field class="full-width">
    <input [(ngModel)]="desc" type="text" matInput placeholder="在这里快速简历一个任务" style="text-align: right" name="desc">
    <button matSuffix mat-icon-button type="button" (click)="sendQuickTask()">
        <mat-icon>send</mat-icon>
    </button>
</mat-form-field>
 @HostListener('keyup.enter')
  sendQuickTask() {
    if (!this.desc || this.desc.length === 0 || !this.desc.trim()) {
      return;
    }
    this.quickTask.emit(this.desc);
    this.desc = '';
  }
按下回车键可以快速创建任务
如果觉得本文对您有帮助~可以微信支持一下:


 浙公网安备 33010602011771号