Angular 项目列表页
$ ng g m project
功能:项目列表显示,增加,修改,删除项目。邀请其它人员加入项目。
单一性原则:希望搭建多个组件,每个组件负责自己的功能。
一、project相关组件
$ ng g c project/project-list 【项目列表组件】
$ ng g c project/project-item 【卡片组件】
$ ng g c project/new-project【新建项目组件,新建项目,或者修改项目时候会有一个对话框。】
$ ng g c project/invite 【邀请组件,邀请其它成员的对话框。】
此时这些组件都会在declarations中。
declarations: [ProjectListComponent, ProjectItemComponent, NewProjectComponent, InviteComponent],
我们希望对话框组件出现在entryComponent中。
import { NgModule } from '@angular/core';
import { SharedModule } from '../shared/shared.module';
import { ProjectListComponent } from './project-list/project-list.component';
import { ProjectItemComponent } from './project-item/project-item.component';
import { NewProjectComponent } from './new-project/new-project.component';
import { InviteComponent } from './invite/invite.component';
import { ProjectRoutingModule } from './project-routing.module';

@NgModule({
  declarations: [ProjectListComponent, ProjectItemComponent, NewProjectComponent, InviteComponent],
  entryComponents: [NewProjectComponent, InviteComponent],
  imports: [

    SharedModule,
    ProjectRoutingModule
  ]
})
export class ProjectModule { }
从支持 Ivy 的 9.0.0 开始,entryComponents 属性就不再需要了,参见弃用指南。
二、ProjectList
循环输出每个项目的item,有一个新增项目item的快速响应的按钮。
<app-project-item *ngFor="let project of projects" [item]="project">
</app-project-item>
<button mad-fab type="button" (click)="openNewProjectDialog()">
  <mat-icon>add</mat-icon>
</button>
project-item里的内容应该是projectList项目决定的。
export class ProjectListComponent implements OnInit {
  projects = [
    {
      "name": "企业协作平台",
      "desc": "这是一个企业内部项目",
      "coverImg": "assets/images/covers/0.jpg"
    },
    {
      "name": "自动化测试项目",
      "desc": "这是一个企业内部项目",
      "coverImg": "assets/images/covers/2.jpg"
    }

  ];
  constructor(private dialog: MatDialog) { }

  ngOnInit() {
  }

  openNewProjectDialog() {
    this.dialog.open(NewProjectComponent);
  }
}
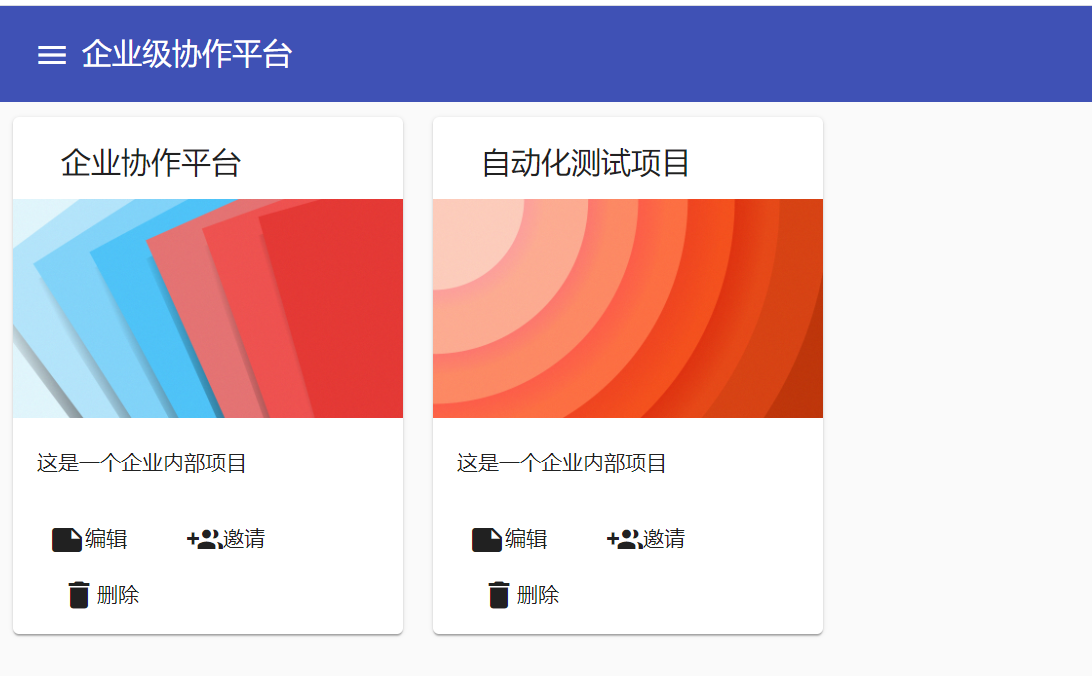
三、ProjectItem
应该是卡片类型的。
<mat-card class="example-card">
  <mat-card-header>
    <mat-card-title>每日佳句</mat-card-title>

  </mat-card-header>
  <img mat-card-image [src]="item.coverImg" alt="项目封面">
  <mat-card-content>
    {{item.desc}}
  </mat-card-content>
  <mat-card-actions>
    <button>
      <mat-icon>note</mat-icon>
      <span>编辑</span>
    </button>
    <button>
      <mat-icon>group_add</mat-icon>
      <span>邀请</span>
    </button>
    <button>
      <mat-icon>delete</mat-icon>
      <span>删除</span>
    </button>
  </mat-card-actions>
</mat-card>
1、邀请
希望这个组件越笨越好,只负责显示,不做逻辑处理。
所以projectItem中点击 邀请 按钮,只负责把事件发射出去,让父组件知道,不做处理。
<button mat-button type="button" (click)="onInviteClick()">
      <mat-icon>group_add</mat-icon>
      <span>邀请</span>
</button>


 @Output() onInvite = new EventEmitter<void>();
  onInviteClick() {
    this.onInvite.emit();
  }
2、编辑
编辑和新建共用一套组件。
ListItem把编辑事件发射出去。
<button mat-button type="button" (click)="onEditClick()">
      <mat-icon>note</mat-icon>
      <span>编辑</span>
</button>

@Output() onEdit = new EventEmitter<void>();
onEditClick() {
    this.onEdit.emit();
}
ProjectList得到编辑事件后lauch新建项目组件,传入title。
<app-project-item *ngFor="let project of projects" [item]="project"
class="card"
(onInvite)="lauchInviteDialog()"
(onEdit)="lauchUpdateDialog()">
</app-project-item>

  lauchUpdateDialog() {
    const dialogRef = this.dialog.open(NewProjectComponent, {
      data: { title: '编辑项目' }
    });
  }
NewProject组件中处理新建和编辑。


import { Component, OnInit, Inject } from '@angular/core';
import { MAT_DIALOG_DATA, MatDialogRef } from '@angular/material';
import { OverlayContainer } from '@angular/cdk/overlay';

@Component({
  selector: 'app-new-project',
  templateUrl: './new-project.component.html',
  styleUrls: ['./new-project.component.scss']
})
export class NewProjectComponent implements OnInit {
  title = '';
  theme: string = 'myapp-dark-theme';
  constructor(@Inject(MAT_DIALOG_DATA) private data: any,
    public dialogRef: MatDialogRef<NewProjectComponent>,
    private oc: OverlayContainer) { }


  ngOnInit() {
    console.log(JSON.stringify(this.data));
    this.title = this.data.title;
    // this.oc.themeClass = this.data.dark ? 'myapp-dark-theme' : 'null';
    this.oc.getContainerElement().classList.add(this.theme);
  }
  onSave() {
    this.dialogRef.close('I received your message');
  }
}
3,删除
前面过程一样,在Project List中lauch确认对话框
<app-project-item *ngFor="let project of projects" [item]="project"
class="card"
(onInvite)="lauchInviteDialog()"
(onEdit)="lauchUpdateDialog()"
(onDelete)="lauchConfimDialog()">
</app-project-item>
三、路由
  {
    path: '', redirectTo: '/login', pathMatch: 'full'
  },
  {
    path:'login',loadChildren:'./login/login.module#LoginModule'
  },
  {
    path:'project',loadChildren:'./project/project.module#ProjectModule'
  }
];
四、NewProject
mat-dialog和card非常像,都是有title,content和action
<form>
  <h2 mat-dialog-title>新建项目</h2>
  <div mat-dialog-content>
    <mat-form-field class="example-full-width" class="full-width">
      <input type="text" matInput placeholder="您的email" style="text-align: right">
    </mat-form-field>
    <mat-form-field class="example-full-width" class="full-width">
      <input type="password" matInput placeholder="您的密码" style="text-align: right">
    </mat-form-field>
  </div>
  <div mat-dialog-actions>
    <button type="button" mat-raised-button color="primary">保存</button>
    <button type="button" mat-button mat-dialog-close>关闭</button>
  </div>
</form>
关闭用的mat-dialog-close指令,具体业务逻辑通过dialog弹框,及数据交互,可参考
https://www.cnblogs.com/starof/p/9074333.html#dialog
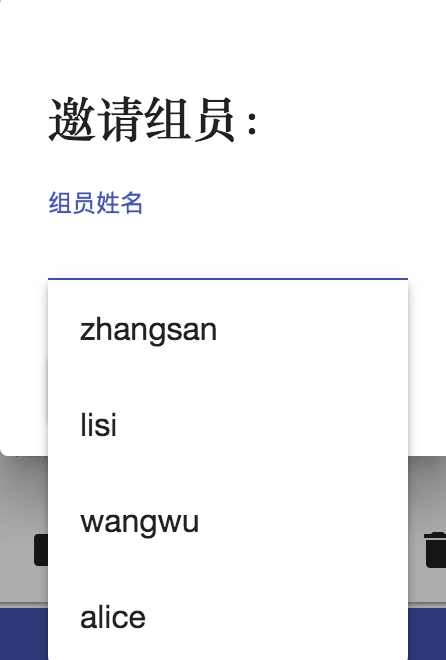
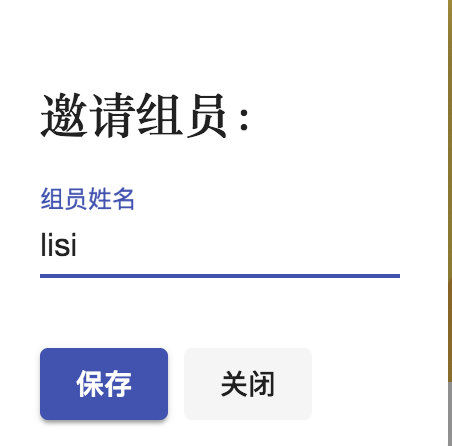
五、Invite
用AutoComplete完成邀请组员的布局。
<form>
  <h2 md-dialog-title>邀请组员:</h2>
  <div mat-dialog-content>
    <mat-form-field class="example-full-width" class="full-width">
      <input type="text" matInput placeholder="组员姓名" [matAutocomplete]="autoMembers" >
      <mat-autocomplete #autoMembers="matAutocomplete" [displayWith]="displayUser">
        <mat-option *ngFor="let option of filteredOptions" [value]="option">
          {{option.name}}
        </mat-option>
      </mat-autocomplete>
    </mat-form-field>

  </div>
  <div mat-dialog-actions>
    <button type="button" mat-raised-button color="primary" (click)="onSave()">保存</button>
    <button type="button" mat-button mat-dialog-close>关闭</button>
  </div>
</form>
  displayUser(user: { id: string; name: string }) {
    return user ? user.name : ''
  }
希望这个组件越笨越好,只显示,不做逻辑处理,涉及逻辑了逻辑代码会非常分散。调试的时候更改的地方会非常多。
所以projectItem中点击 邀请 按钮,只负责把事件发射出去,让父组件知道,不做处理。
所以projectList来处理邀请事件,调起Invite组件。
  lauchInviteDialog(){
    const dialogRef = this.dialog.open(InviteComponent);
  }
如果觉得本文对您有帮助~可以微信支持一下:


 浙公网安备 33010602011771号