
【尚硅谷Nginx教程】一、nginx基本使用-安装及映射
虚机安装linux镜像可参考文章
VMware安装镜像
1.1 、nginx版本介绍
常用版本分为四大阵营Nginx开源版
介绍:干净版本纯粹的
http://nginx.org/
Nginx plus 商业版
介绍:封装了很多东西的升级版
https://www.nginx.com
openresty
介绍:开源的,基于nginx和lua的高性能Web平台
http://openresty.org/cn/
Tengine
http://tengine.taobao.org/
1.2 安装Nginx开源版
给linux安装wget用于网上下载nginx
yum install -y wget
下载Nginx,我这边下载到~目录下
wget http://nginx.org/download/nginx-1.24.0.tar.gz
解压tar.gz到当前目录并进入解压后的目录
tar -xvf nginx-1.24.0.tar.gz
cd nginx-1.24.0
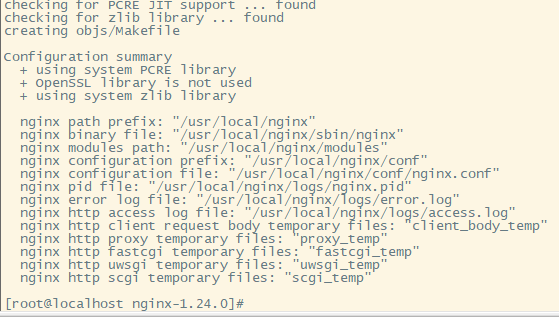
指定安装目录并编译,注:安装目录/usr/local/nginx
./configure --prefix=/usr/local/nginx
此处报错缺少依赖的话,可以看本文最下面的问题汇总
出现下面提示就代表编译成功
然后执行make,make install,两个命令分别执行
make
make install
编译完成就代表安装成功了。
1.3 测试nginx
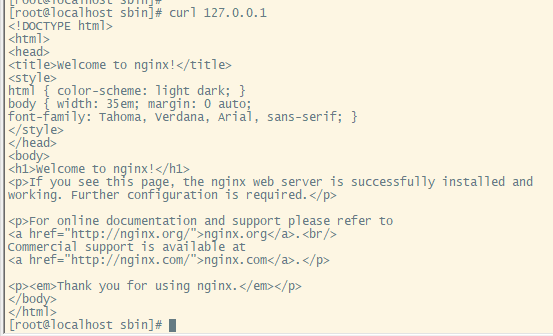
进入安装目录/usr/local/nginx下面的sbin下面执行:./nginx
./nginx
然后curl 127.0.0.1 就可以打印出nginx的还原页面源码,代表安装启动成功
nginx命令详情
./nginx 启动nginx服务
./nginx -s stop  快速停止
./nginx -s quit  优雅关闭,在退出前完成已经接受的链接请求
./nginx -s reload 重新加载配置
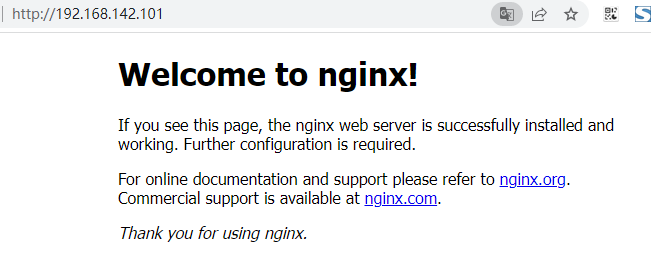
1.3 开启宿主机访问
现在宿主机访问虚机镜像ip是不能通的,因为被防火墙拦截了。因为这个虚机是在VMware里面,所以不用担心安全问题,直接关闭防火墙即可。
//关闭防火墙 虚拟机服务器不用担心安全,直接关闭
systemctl stop firewalld.service
关闭后就可以直接访问了
//禁止防火墙开机启动
systemctl disable firewalld.service
1.4 安装系统服务及开机自启
编写nginx服务脚本,
vi /usr/lib/systemd/system/nginx.service
内容如下(需要注意的是nginx的安装目录):
[Unit]
Description=nginx - web server
After=network.target remote-fs.target nss-lookup.target
[Service]
Type=forking
PIDFile=/usr/local/nginx/logs/nginx.pid
ExecStartPre=/usr/local/nginx/sbin/nginx -t -c /usr/local/nginx/conf/nginx.conf
ExecStart=/usr/local/nginx/sbin/nginx -c /usr/local/nginx/conf/nginx.conf
ExecReload=/usr/local/nginx/sbin/nginx -s reload
ExecStop=/usr/local/nginx/sbin/nginx -s stop
ExecQuit=/usr/local/nginx/sbin/nginx -s quit
PrivateTmp=true
[Install]
WantedBy=multi-user.target
//重新加载系统服务
systemctl daemon-reload
然后关闭nginx使用服务启动nginx
./nginx -s stop
//启动服务
systemctl start nginx.service
配置开机自启
//开机启动
systemctl enable nginx.service
然后重启服务器,在宿主机访问地址正常开机自启
1.5 配置域名映射
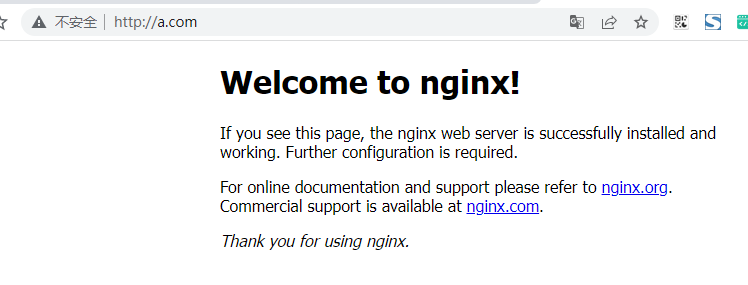
1.5.1 可以直接更改win系统的hosts文件,映射
左边时候映射的ip,右边是域名

配置后直接访问a.com就可以访问到我们虚拟机里面的nginx
1.5.2 配置阿里云域名映射
登陆阿里云域名管理 操作里面的解析 添加新的解析
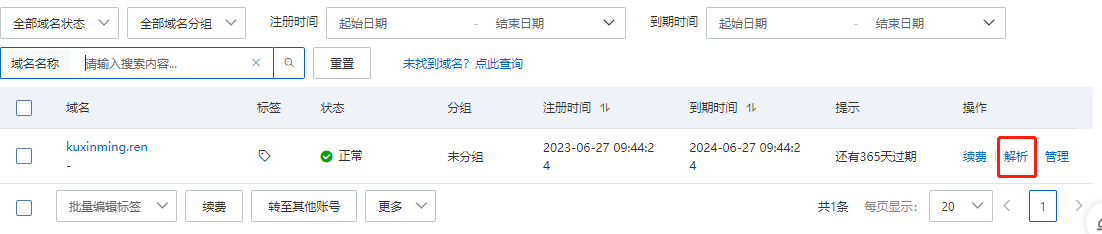
添加一条记录,注:主机记录里面的*代表的是匹配任意值,例如:www.kuxinming.ren或者w.kuxinming.ren都可以访问
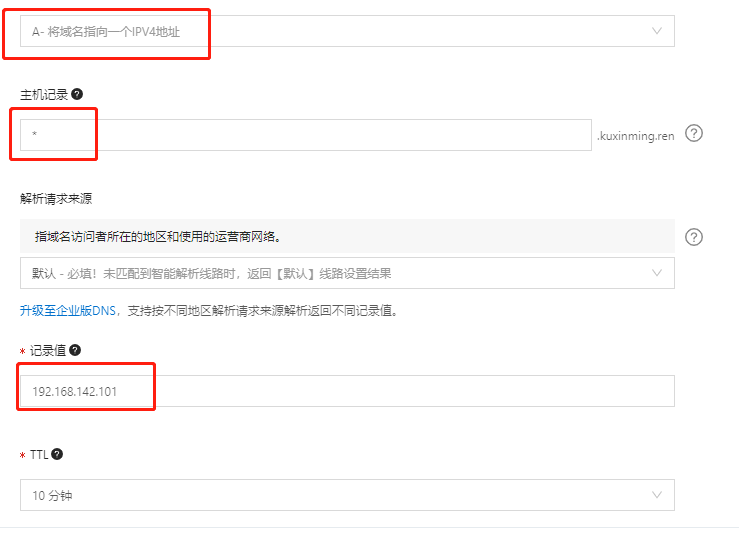
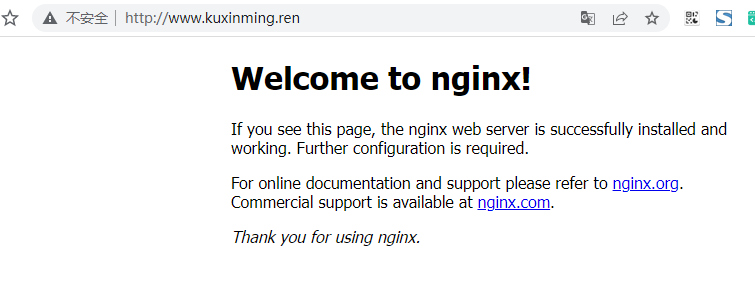
填写后保存,然后直接访问阿里云域名就可以映射到本机的虚机
不需要写端口是因为默认是80,如果是88端口只需要域名后面拼接:端口即可。例如我新复制了一个server是88端口,只要访问下面地址就可以了。
http://www.kuxinming.ren:88/
问题汇总
1、./configure: error: C compiler cc is not found
缺少C语言编译器
解决方法:
yum install -y gcc
2、./configure: error: the HTTP rewrite module requires the PCRE library.
解决方法:
yum install -y pcre pcre-devel
3、./configure: error: the HTTP gzip module requires the zlib library.
解决方法:
yum install -y zlib zlib-devel
4、配置nginx命令
步骤如下:
1、编辑/etc/profile
vim /etc/profile
2、在最后一行添加配置,:wq保存
PATH=$PATH:/usr/local/nginx/sbin
export PATH
3、使配置立即生效
source /etc/profile

 浙公网安备 33010602011771号