

centos7.2下caffe的安装及编译
1、前期准备
安装依赖
sudo yum install protobuf-devel leveldb-devel snappy-devel opencv-devel boost-devel hdf5-devel
sudo yum install gflags-devel glog-devel lmdb-devel
sudo yum atlas-devel cmake glibc-devel gcc-gfortran autoconf automake gcc gcc-c++ git libtool make pkgconfig zlib-devel SDL* yasm* python-devel cmake* git ncurses* *freetype2 nasm nasm*
安装Boost
安装glog
安装protobuf
安装lmdb
安装leveldb
安装gflags
安装hdf5
***切记,上述依赖需要安装到/usr/local下面的目录,否则编译时会提示找不到相关库文件。
安装ffmpeg
安装opencv
安装cuda
查看cuda版本:cat /usr/local/cuda/version.txt
安装cudnn
如果将来要采用python调用caffe的话,必须将numpy提前装好:
pip install numpy
pip install pandas
pip install ipython
2、使用安Makefile.config装及编译caffe
下载caffe并移动到想存放的路径:
修改Makefile.config文件:
进入caffe目录
cp Makefile.config.example Makefile.config
vim Makefile.config
文件的修改需要根据自己的具体情况,下面是一个示例:
## Refer to http://caffe.berkeleyvision.org/installation.html
# Contributions simplifying and improving our build system are welcome!

# cuDNN acceleration switch (uncomment to build with cuDNN).
# USE_CUDNN := 1
"CuDNN是NVIDIA专门针对Deep Learning框架设计的一套GPU计算加速库,用于实现高性能的并行计算,在有GPU并且安装CuDNN的情况下可以打开即将注释去掉。"

# CPU-only switch (uncomment to build without GPU support).
#CPU_ONLY := 1
"表示是否用GPU,如果只有CPU这里要打开"

# uncomment to disable IO dependencies and corresponding data layers
USE_OPENCV := 1
"因为要用到OpenCV库所以要打开,下面这两个选项表示是选择Caffe的数据管理第三方库,两者都不打开 Caffe默认用的是LMDB,这两者均是嵌入式数据库管理系统编程库。"
# USE_LEVELDB := 0
# USE_LMDB := 0

# uncomment to allow MDB_NOLOCK when reading LMDB files (only if necessary)
#   You should not set this flag if you will be reading LMDBs with any
#   possibility of simultaneous read and write
# ALLOW_LMDB_NOLOCK := 1
"当需要读取LMDB文件时可以取消注释,默认不打开。"

# Uncomment if you're using OpenCV 3
OPENCV_VERSION := 2.4.10
"用pkg-config --modversion opencv命令查看opencv版本"

# To customize your choice of compiler, uncomment and set the following.
# N.B. the default for Linux is g++ and the default for OSX is clang++
# CUSTOM_CXX := g++
"linux系统默认使用g++编译器,OSX则是clang++。"

# CUDA directory contains bin/ and lib/ directories that we need.
CUDA_DIR := /usr/local/cuda
"CUDA的安装目录"
# On Ubuntu 14.04, if cuda tools are installed via
# "sudo apt-get install nvidia-cuda-toolkit" then use this instead:
# CUDA_DIR := /usr

# CUDA architecture setting: going with all of them.
# For CUDA < 6.0, comment the *_50 lines for compatibility.
CUDA_ARCH := -gencode arch=compute_20,code=sm_20 \
        -gencode arch=compute_20,code=sm_21 \
        -gencode arch=compute_30,code=sm_30 \
        -gencode arch=compute_35,code=sm_35 \
        -gencode arch=compute_50,code=sm_50 \
        -gencode arch=compute_50,code=compute_50
"这些参数需要根据GPU的计算能力
(http://blog.csdn.net/jiajunlee/article/details/52067962)来进行设置,6.0以下的版本不支持×_50的计算能力。"

# BLAS choice:
# atlas for ATLAS (default)
# mkl for MKL
# open for OpenBlas
BLAS := open
"如果用的是ATLAS计算库则赋值atlas,MKL计算库则用mkl赋值,OpenBlas则赋值open。"

# Custom (MKL/ATLAS/OpenBLAS) include and lib directories.
# Leave commented to accept the defaults for your choice of BLAS
# (which should work)!
BLAS_INCLUDE := /usr/local/OpenBlas/include
BLAS_LIB := /usr/local/OpenBlas/lib
"blas库安装目录"

# Homebrew puts openblas in a directory that is not on the standard search path
# BLAS_INCLUDE := $(shell brew --prefix openblas)/include
# BLAS_LIB := $(shell brew --prefix openblas)/lib
"如果不是安装在标准路径则要指明"

# This is required only if you will compile the matlab interface.
# MATLAB directory should contain the mex binary in /bin.
# MATLAB_DIR := /usr/local
# MATLAB_DIR := /Applications/MATLAB_R2012b.app
"matlab安装库的目录"

# NOTE: this is required only if you will compile the python interface.
# We need to be able to find Python.h and numpy/arrayobject.h.
# 这里特别要注意,使用python -c "import numpy; print numpy.__file__"查看numpy的路径
PYTHON_INCLUDE := /usr/include/python2.7 \
        /usr/lib64/python2.7/site-packages/numpy/core/include
#		/usr/lib/python2.7/dist-packages/numpy/core/include
"python安装目录"
# Anaconda Python distribution is quite popular. Include path:
# Verify anaconda location, sometimes it's in root.
# ANACONDA_HOME := $(HOME)/anaconda
# PYTHON_INCLUDE := $(ANACONDA_HOME)/include \
        # $(ANACONDA_HOME)/include/python2.7 \
        # $(ANACONDA_HOME)/lib/python2.7/site-packages/numpy/core/include \

# Uncomment to use Python 3 (default is Python 2)
# PYTHON_LIBRARIES := boost_python3 python3.5m
# PYTHON_INCLUDE := /usr/include/python3.5m \
#                 /usr/lib/python3.5/dist-packages/numpy/core/include

# We need to be able to find libpythonX.X.so or .dylib.
PYTHON_LIB := /usr/lib
<font color="green">python库位置</font>
# PYTHON_LIB := $(ANACONDA_HOME)/lib

# Homebrew installs numpy in a non standard path (keg only)
# PYTHON_INCLUDE += $(dir $(shell python -c 'import numpy.core; print(numpy.core.__file__)'))/include
# PYTHON_LIB += $(shell brew --prefix numpy)/lib

# Uncomment to support layers written in Python (will link against Python libs)
WITH_PYTHON_LAYER := 1

# Whatever else you find you need goes here.
INCLUDE_DIRS := $(PYTHON_INCLUDE) /usr/local/include
LIBRARY_DIRS := $(PYTHON_LIB) /usr/local/lib /usr/lib

# If Homebrew is installed at a non standard location (for example your home directory) and you use it for general dependencies
# INCLUDE_DIRS += $(shell brew --prefix)/include
# LIBRARY_DIRS += $(shell brew --prefix)/lib

# Uncomment to use `pkg-config` to specify OpenCV library paths.
# (Usually not necessary -- OpenCV libraries are normally installed in one of the above $LIBRARY_DIRS.)
# USE_PKG_CONFIG := 1

# N.B. both build and distribute dirs are cleared on `make clean`
BUILD_DIR := build
DISTRIBUTE_DIR := distribute

# Uncomment for debugging. Does not work on OSX due to https://github.com/BVLC/caffe/issues/171
# DEBUG := 1

# The ID of the GPU that 'make runtest' will use to run unit tests.
TEST_GPUID := 0
"所用的GPU的ID编号"

# enable pretty build (comment to see full commands)
Q ?= @
编译:
make clean #如果是第一次编译,则不需要执行这一步骤
make all -j16 #-j16表示开16个线程并行编译,可以大大减少编译时间,但是线程数不要超过cpu核数
make test -j16
make runtest
编译pycaffe:
#编译
make pycaffe -j16
#添加环境变量
vim ~/.bashrc
将export PYTHONPATH=/home/wanghh/caffe/python:$PYTHONPATH添加到文件中。
source ~/.bashrc 使更改生效。
这样,在其他地方打开python,也可以import caffe了。
3、使用cmake安装及编译caffe
(1)进入caffe根目录:cd xxx/xxx/caffe
(2)创建build文件夹并配置
mkdir build
cd build
cmake ..
cmake ..如果报错,则使用cmake -D xxx=xxxxxx ..来修改参数(例如:cmake -D BLAS=open ..)
(3)编译
make -j32 # -j后面为cpu核数,可小于或等于实际cpu核数
4、测试
进入caffe目录
sh data/mnist/get_mnist.sh
sh examples/mnist/create_mnist.sh
sh examples/mnist/train_lenet.sh
出现下图所示结果:
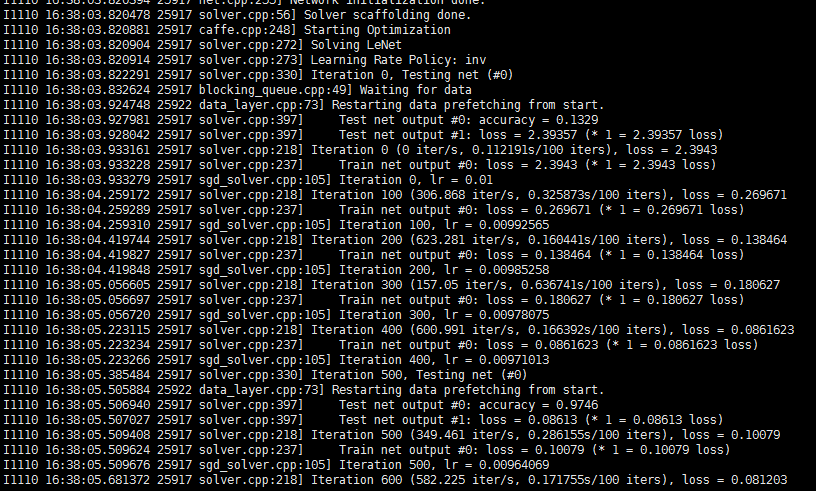
至此,caffe安装成功
5、可能出现的问题
python/caffe/_caffe.cpp:10:31: fatal error: numpy/arrayobject.h: No such file or directory(make pycaffe -j16 时)
原因:numpy路径设置错误。
解决方案:使用python -c "import numpy; print numpy.__file__"查看numpy的路径,修改Makefile.config,如示例:
PYTHON_INCLUDE := /usr/include/python2.7 \
        /usr/lib64/python2.7/site-packages/numpy/core/include
#		/usr/lib/python2.7/dist-packages/numpy/core/include
./build/tools/caffe: error while loading shared libraries: libcudart.so.8.0: cannot open shared object file: No such file or directory(./examples/mnist/train_lenet.sh时)
原因:
解决方案:
sudo cp /usr/local/cuda-8.0/lib64/libcudart.so.8.0 /usr/local/lib/libcudart.so.8.0 && sudo ldconfig
sudo cp /usr/local/cuda-8.0/lib64/libcublas.so.8.0 /usr/local/lib/libcublas.so.8.0 && sudo ldconfig
sudo cp /usr/local/cuda-8.0/lib64/libcurand.so.8.0 /usr/local/lib/libcurand.so.8.0 && sudo ldconfig
make -j24时 :
/usr/bin/ld: /usr/local/lib/libpython2.7.a(object.o): relocation R_X86_64_32 against `.rodata.str1.1' can not be used when making a shared object; recompile with -fPIC
或:
/usr/bin/ld: /usr/local/lib/libpython2.7.a(abstract.o): relocation R_X86_64_32S against `_Py_NotImplementedStruct' can not be used when making a shared object; recompile with -fPIC
/usr/local/lib/libpython2.7.a: could not read symbols: Bad value
原因:
解决方案:
make all -j16时:
error -- unsupported GNU version! gcc versions later than 5 are not supported!
原因:
解决方案:

 浙公网安备 33010602011771号