rsync数据备份解决方案
rsync命令是一个远程数据同步工具,可通过LAN/WAN快速同步多台主机间的文件。rsync使用所谓的“rsync算法”来使本地和远程两个主机之间的文件达到同步,这个算法只传送两个文件的不同部分,而不是每次都整份传送,因此速度相当快。
一、项目规则:
1、系统环境
[root@zabbix-client ~]# cat /etc/redhat-release
CentOS Linux release 7.2.1511 (Core)
[root@zabbix-client ~]# uname -r
3.10.0-327.el7.x86_64
2、更改主机名和/etc/hosts文件 (客户端和服务端同时操作)
[root@zabbix-server etc]# tail -2 /etc/hosts
192.168.30.137 zabbix-server
192.168.30.136 zabbix-client
测试:
[root@rsync-server ~]# ping rsync-node1
PING rsync-node1 (192.168.30.142) 56(84) bytes of data.
64 bytes from rsync-node1 (192.168.30.142): icmp_seq=1 ttl=64 time=0.788 ms
64 bytes from rsync-node1 (192.168.30.142): icmp_seq=2 ttl=64 time=0.392 ms
二、安装rsync软件
1、 安装rsync软件(客户端和服务端同时操作)
[root@zabbix-client ~]# yum install rsync -y
[root@zabbix-client ~]#  rpm -qa rsync
rsync-3.0.9-17.el7.x86_64
2、修改配置文件,设置备份模块 (服务端操作)
[root@zabbix-server ~]# cat /etc/rsyncd.conf
sync server
#created by nulige 2017-7-9
##rsyncd.conf start##
uid = rsync
gid = rsync
use chroot = no
max connections = 2000
timeout = 600
pid file = /var/run/rsyncd.pid
lock file = /var/run/rsync.lock
log file = /var/log/rsyncd.log
ignore errors
read only = false
list = false
hosts allow = 10.0.100.1/24
hosts deny = 0.0.0.0/32
auth users = rsync_backup
secrets file = /etc/rsync.password
##################################################
[backup]
comment = backup server by nulige at 207-7-9
path = /data
3、编写服务启动脚本
[root@rsync-server ~]# vi /etc/init.d/rsync
#!/bin/bash
#author:nulige
#this script for start|stop rsync daemon service
#date:2017/7/8

status1=$(ps -ef | egrep "rsync --daemon.*rsyncd.conf" | grep -v 'grep')
pidfile="/var/run/rsyncd.pid"
start_rsync="rsync --daemon --config=/etc/rsyncd.conf"

function rsyncstart() {

    if [ "${status1}X" == "X" ];then

        rm -f $pidfile

        ${start_rsync}

        status2=$(ps -ef | egrep "rsync --daemon.*rsyncd.conf" | grep -v 'grep')

        if [  "${status2}X" != "X"  ];then

            echo "rsync service start.......OK"

        fi

    else

        echo "rsync service is running !"

    fi
}

function rsyncstop() {

    if [ "${status1}X" != "X" ];then

        kill -9 $(cat $pidfile)

        status2=$(ps -ef | egrep "rsync --daemon.*rsyncd.conf" | grep -v 'grep')

        if [ "${statusw2}X" == "X" ];then

            echo "rsync service stop.......OK"
        fi
    else

        echo "rsync service is not running !"

    fi
}


function rsyncstatus() {


    if [ "${status1}X" != "X" ];then

        echo "rsync service is running !"

    else

         echo "rsync service is not running !"

    fi

}

function rsyncrestart() {

    if [ "${status1}X" == "X" ];then

               echo "rsync service is not running..."

               rsyncstart
        else

               rsyncstop

               rsyncstart

        fi
}

case $1 in

        "start")
               rsyncstart
                ;;

        "stop")
               rsyncstop
                ;;

        "status")
               rsyncstatus
               ;;

        "restart")
               rsyncrestart
               ;;

        *)
          echo
                echo  "Usage: $0 start|stop|restart|status"
          echo
esac
#给脚本添加执行权限
[root@rsync-server ~]# chmod a+x /etc/init.d/rsync
4、启动rsync
[root@rsync-server ~]# service rsync start
rsync service start.......OK
5、检查端口是否启动
#检查用户配置文件
[root@rsync-server ~]# ss -lntup|grep rsync
tcp    LISTEN     0      5         *:873       *:*                   users:(("rsync",pid=2344,fd=3))
tcp    LISTEN     0      5        :::873       :::*                  users:(("rsync",pid=2344,fd=5))

[root@rsync-server ~]# ps -ef|grep rsync|grep -v grep
root       2344      1  0 06:40 ?        00:00:00 rsync --daemon --config=/etc/rsyncd.conf
6、添加用户并授权
[root@rsync-server ~]# useradd rsync -s /sbin/nologin -M
[root@rsync-server ~]# id rsync
uid=1000(rsync) gid=1000(rsync) groups=1000(rsync)
[root@rsync-server ~]# mkdir -p /backup
[root@rsync-server ~]# chown -R rsync /backup
[root@rsync-server ~]# ls -ld /backup/
drwxr-xr-x 2 rsync root 6 Jul 10 06:44 /backup/
7、添加认证的密码
[root@rsync-server ~]# echo "rsync_backup:nulige" >/etc/rsync.password
[root@rsync-server ~]# cat /etc/rsync.password
rsync_backup:nulige   #nulige指的是认证的密码
8、修改权限
[root@rsync-server ~]# chmod 600 /etc/rsync.password
[root@rsync-server ~]# ll /etc/rsync.password
-rw------- 1 root root 20 Jul 10 06:47 /etc/rsync.password
9、添加开机启动项
[root@rsync-server ~]# echo "rsync --daemon" >>/etc/rc.local
[root@rsync-server ~]# tail -1 /etc/rc.local
rsync --daemon
三、客户端配置
1、添加密码并授权
[root@rsync-node1 ~]# echo "nulige" >/etc/rsync.password
[root@rsync-node1 ~]# chmod 600 /etc/rsync.password
[root@rsync-node1 ~]# cat /etc/rsync.password
nulige
四、配置mailx发送邮件
1、进入目录,下载软件
cd /home/nulige/tools/

wget ftp://ftp.iij.ad.jp/pub/linux/centos-vault/6.2/os/x86_64/Packages/mailx-12.4-6.el6.x86_64.rpm
2、安装mailx
rpm -ivh mailx-12.4-6.el6.x86_64.rpm
3、查看版本
[root@git-node1 script]# mailx -V
12.4 7/29/08
4、配置mailx,添加发送邮件账号和密码。
示例1
vi /etc/mail.rc
#添加在结尾
#send mail
set from=*****@hotdoor.cn
set smtp=mail.gxycloud.com
set smtp-auth-user=******@hotdoor.cn
set smtp-auth-password=*******
set smtp-auth=login
示例2
#send mail
set from=zhhotdoor@163.com
set smtp=smtp.163.com
set smtp-auth-user=zhhotdoor@163.com
set smtp-auth-password=hotdoor123
set smtp-auth=login
5、发送邮件测试
echo Gitlab data backup successful! | mailx -v -s " gitlab data backup" ****@hotdoor.cn
6、编写备份脚本,备份完发送邮件
[root@rsync-node1 ~]# mkdir -p /server/script

[root@git-node1 script]# cat send_gitlab_backup.sh
#!/bin/sh
#author:nulige
#date:2017-7-10
#gitlab data backup script
/usr/bin/rsync -avz /data/gitlab_backup rsync_backup@10.0.100.208::backup --password-file=/etc/rsync.password
sleep 3000
echo Gitlab data backup successful! | mailx -v -s " gitlab data backup" huzh@hotdoor.cn,zhouw@hotdoor.cn
给脚本授可执行权限
chmod a+x send_gitlab_backup.sh
7、测试是否能备份和发送邮件
sh send_gitlab_backup.sh
8、查看备份结果
[root@zabbix-server gitlab_backup]# cd /data/gitlab_backup

[root@zabbix-server gitlab_backup]# ll
总用量 12537924
-rw------- 1 rsync rsync      40960 6月  27 19:52 1498564341_gitlab_backup.tar
-rw------- 1 rsync rsync      40960 6月  29 08:41 1498696909_gitlab_backup.tar
-rw------- 1 rsync rsync   43601920 6月  30 14:00 1498802413_gitlab_backup.tar
-rw------- 1 rsync rsync 1198592000 7月   1 14:00 1498888815_gitlab_backup.tar
-rw------- 1 rsync rsync 1198592000 7月   2 14:00 1498975214_gitlab_backup.tar
-rw------- 1 rsync rsync  621619200 7月   3 14:00 1499061614_gitlab_backup.tar
-rw------- 1 rsync rsync  998338560 7月   4 14:00 1499148015_gitlab_backup.tar
-rw------- 1 rsync rsync 1457510400 7月   5 14:01 1499234416_gitlab_backup.tar
-rw------- 1 rsync rsync 1463951360 7月   6 14:01 1499320874_gitlab_backup.tar
-rw------- 1 rsync rsync 1463951360 7月   7 14:00 1499407215_gitlab_backup.tar
-rw------- 1 rsync rsync 1463971840 7月   8 14:00 1499493615_gitlab_backup.tar
-rw------- 1 rsync rsync 1463971840 7月   9 14:03 1499580087_gitlab_backup.tar
-rw------- 1 rsync rsync 1464616960 7月  10 14:03 1499666550_gitlab_backup.tar
-rw-r--r-- 1 rsync rsync       9837 7月   1 22:11 gitlab_configure_file.tar.gz
-rw-r--r-- 1 rsync rsync        142 7月   1 22:11 nginx_configure_file.tar.gz
-rw-r--r-- 1 rsync rsync       9436 7月   1 22:11 postfix_configure_file.tar.gz
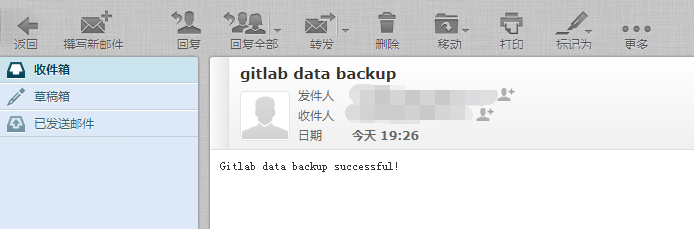
9、查看邮件
10、加入定时任务
[root@git-node1 tools]# crontab -l

#gitlab data backup script
0 3 * * * /bin/sh /server/script/send_gitlab_backup.sh >/dev/null 2>&1
11、只保留15天gitlab备份数据
[root@git-node1 script]#vi del_gitlab_backup.sh
#!/bin/bash
#del 15 day gitlab backup
find /data/gitlab_backup -type f -name "*.tar" -mtime +15|xargs rm -f
#加入定时任务中
[root@git-node1 script]# crontab -l
#times sync by lee at 2017-06-28
*/5 * * * * /usr/sbin/ntpdate 10.0.100.208 >/dev/null 2>&1

#gitlab_backup_nulige_2017-6-27
0 2 * * * /bin/gitlab-rake gitlab:backup:create

#gitlab data backup script
0 3 * * * /bin/sh /server/script/send_gitlab_backup.sh >/dev/null 2>&1

#del 15 day gitlab backup
0 4 * * * /bin/sh /server/script/del_gitlab_backup.sh >/dev/null 2>&1

#gitstaticstics script
#0 4 * * 1 /usr/local/bin/gitstatistics.sh &

 浙公网安备 33010602011771号