
一、下载nacos
可通过gitHub或者nacos.io下载
gitHub:https://github.com/alibaba/nacos 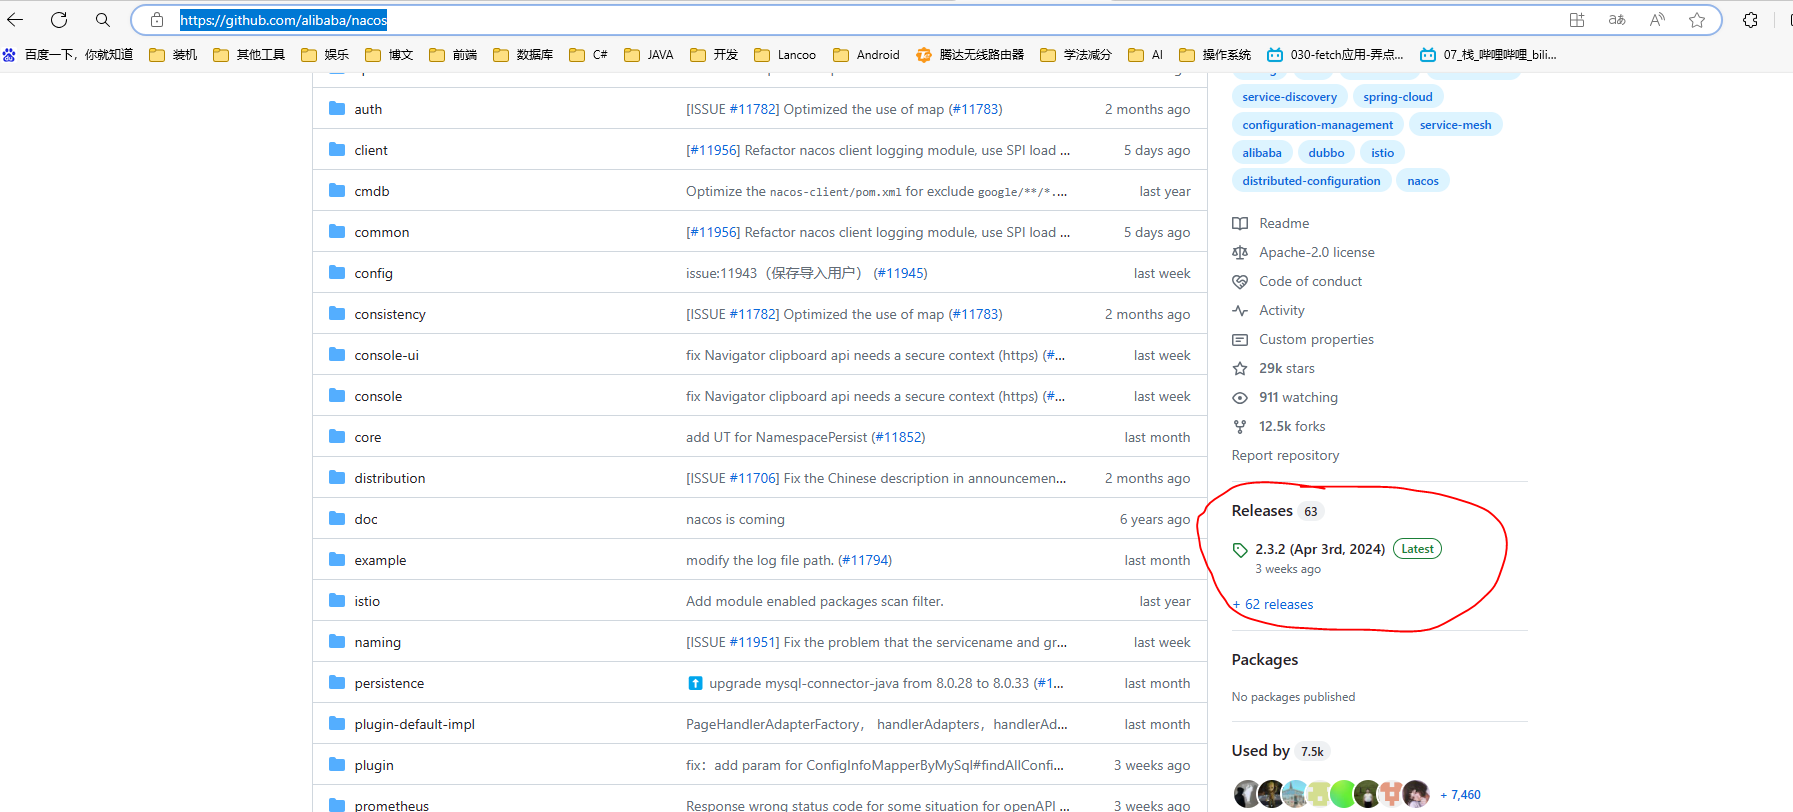

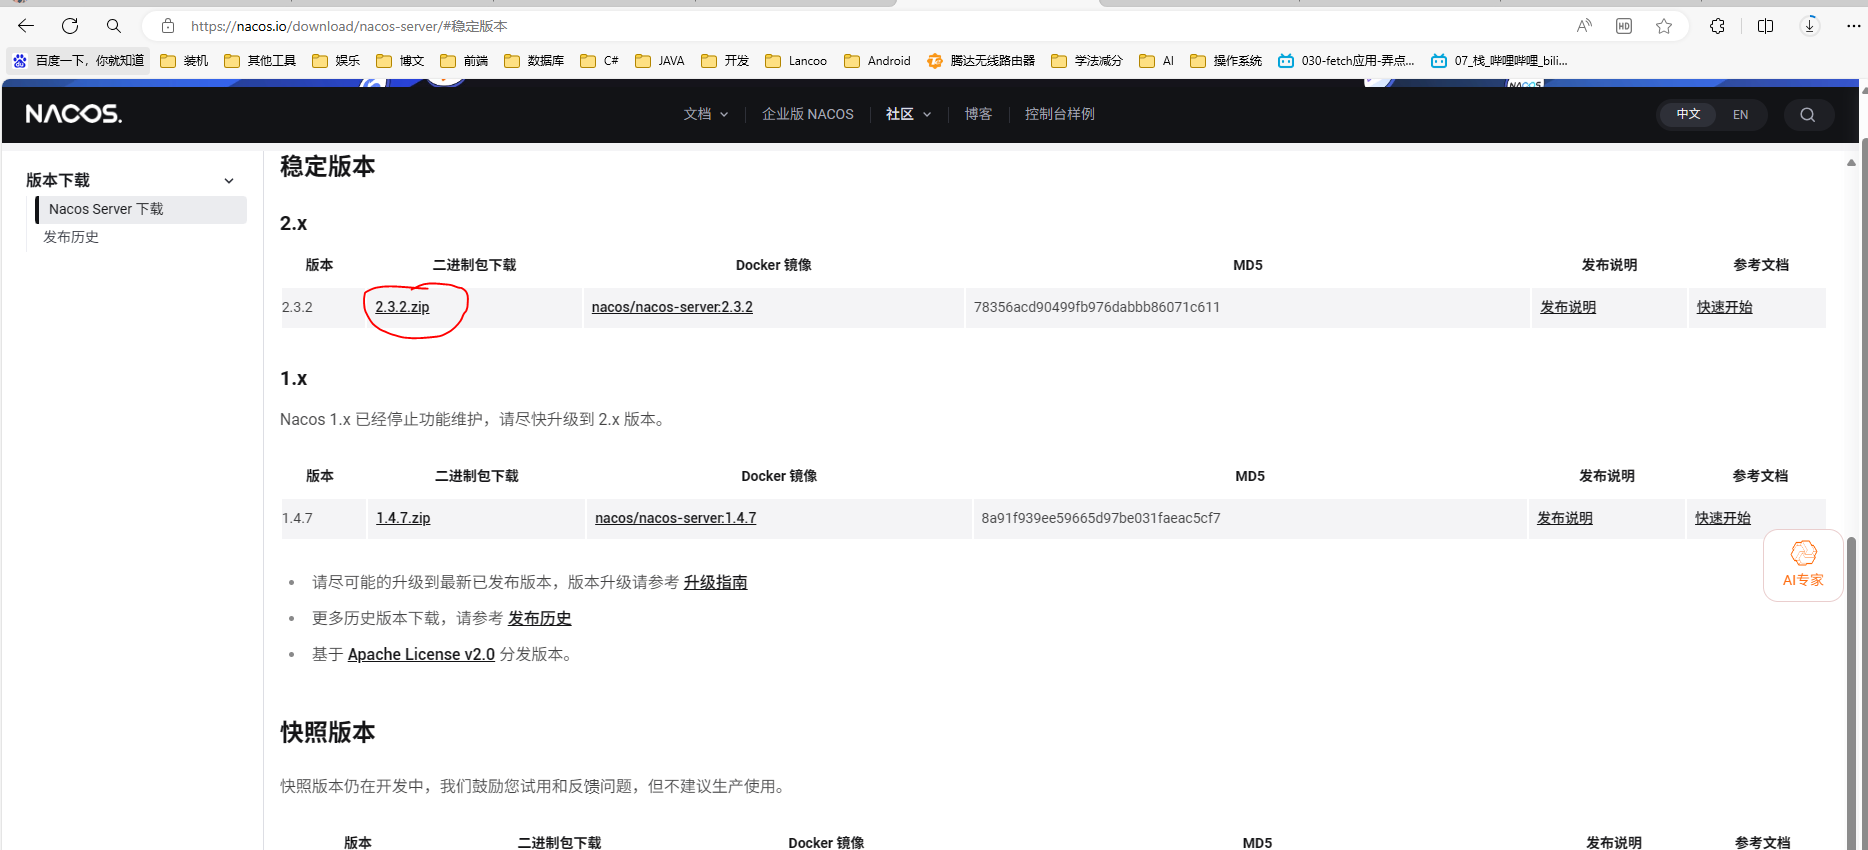
nacos.io:Nacos Server 下载 | Nacos
二、相关配置
./conf/application.properties
server.prot=8848  # 配置nacos的端口号


# 开启权限验证
### If turn on auth system:
nacos.core.auth.enabled=true
### Since 1.4.1, worked when nacos.core.auth.enabled=true and nacos.core.auth.enable.userAgentAuthWhite=false.
### The two properties is the white list for auth and used by identity the request from other server.
nacos.core.auth.server.identity.key=nacos
nacos.core.auth.server.identity.value=nacos
......
.....
### The default token (Base64 String):
# Ihaveasmallandbeautifulbedroomtjr 进行转换base64的结果
nacos.core.auth.plugin.nacos.token.secret.key=SWhhdmVhc21hbGxhbmRiZWF1dGlmdWxiZWRyb29tdGpy
.....
.....
开启权限遇到的问题
问题一:开启nacos.core.auth.enabled如果不配置nacos.core.auth.server.identity.key/nacos.core.auth.server.identity.value会值报错。

问题二:报org.springframework.context.ApplicationContextException: Unable to start web server; nested exception is org.springframework.boot.web.server.WebServerException: Unable to start embedded Tomcat
原因是因为没有配置nacos.core.auth.plugin.nacos.token.secret.key,该值需要长度为32位字符串并且需要转换为base64位加密处理。
注:另外开启后,pom.xml的注册中心/配置中心都需要加如下配置;
另注:后台登录密码就是配置的nacos;
# Nacos服务注册中心地址 spring.cloud.nacos.discovery.server-addr=127.0.0.1:8848 spring.cloud.nacos.discovery.username=nacos spring.cloud.nacos.discovery.password=nacos # 配置中心 # 配置中心服务地址 spring.cloud.nacos.config.server-addr=127.0.0.1:8848 spring.cloud.nacos.config.username=nacos spring.cloud.nacos.config.password=nacos
三、启动
1.启动文件
方式一:双击启动文件 ./bin/startup.cmd
方式二:使用window窗口启动,启动命令:startup.cmd -m standalone
注:-m表示启动的模式,standalone表示单机启动
2.登录
nacos首页/登录的网址:localhost:8848或http://127.0.0.1:8848/nacos/index.html
注:默认的账号密码都是naocs
四、nacos的(spring cloud)代码使用
1.pom.xml
      <!--nacos服务注册 -->
        <dependency>
            <groupId>com.alibaba.cloud</groupId>
            <artifactId>spring-cloud-starter-alibaba-nacos-discovery</artifactId>
    </dependency>
2.application.properties
spring.application.name=项目名称
spring.cloud.nacos.discovery.server-addr=127.0.0.1:8848  # 服务器IP+端口号
注:详情请查看Spring colud的构建 - 闪电龟龟 - 博客园 (cnblogs.com)中“二、Nacos配件”这一块
五、Nacos集群配置
nacos高可用配置请参照,本文仅作笔记记录:Nacos高可用集群搭建与使用 - AlwaysZmx - 博客园 (cnblogs.com)
1.创建nacos集群使用的数据库
注:在Linux系统下,执行的是“nacos\conf”下的nacos-mysql.sql,而在window系统中,执行的是“nacos\conf”下的mysql-schema.sql

2.在"nacos\conf"文件夹下的application.properties配置文件中配置Nacos数据库信息
### Count of DB:
db.num=1

### Connect URL of DB:
db.url.0=jdbc:mysql://127.0.0.1:3306/nacos?characterEncoding=utf8&connectTimeout=1000&socketTimeout=3000&autoReconnect=true&useUnicode=true&useSSL=false&serverTimezone=UTC
db.user.0=nacos_oychz
db.password.0=nacos_oychz_Pwd

问题一:如果存在
Constructor threw exception; nested exception is java.lang.RuntimeException: java.lang.RuntimeException: [db-load-error]load jdbc.properties error
请考虑是不是缺少放开db.num=1
问题二:如果出现
failure :errCode: 102, errMsg: dataSource or tableName is null
请考虑开放spring.datasource.platform=mysql
#*************** Config Module Related Configurations ***************#
### If use MySQL as datasource:
### Deprecated configuration property, it is recommended to use `spring.sql.init.platform` replaced.
# spring.datasource.platform=mysql
spring.datasource.platform=mysql
# spring.sql.init.platform=mysql

3.模拟多个机子处理(没有多个机子只能这么搞了,来自钱包的干瘪)
将Nacos复制为多份,并且为每一份配置对于的port端口假装多个机子

将“nacos\conf”文件夹下的"cluster.conf.example"修改为"cluster.conf"并配置如下信息
#
# Copyright 1999-2021 Alibaba Group Holding Ltd.
#
# Licensed under the Apache License, Version 2.0 (the "License");
# you may not use this file except in compliance with the License.
# You may obtain a copy of the License at
#
#      http://www.apache.org/licenses/LICENSE-2.0
#
# Unless required by applicable law or agreed to in writing, software
# distributed under the License is distributed on an "AS IS" BASIS,
# WITHOUT WARRANTIES OR CONDITIONS OF ANY KIND, either express or implied.
# See the License for the specific language governing permissions and
# limitations under the License.
#

#it is ip
#example
#2024-04-25T10:14:10.588
192.168.129.131:30221
192.168.129.131:30222
192.168.129.131:30223
192.168.129.131:8848
修改nacos1/nacos2/nacos3的conf文件夹下的application.properties文件中的server.port=30211/30222/30223为对应端口
4.分别启动NAacos,如果出现下面(红色部分)信息即可表示成功
PS D:\Nacos\nacos\bin> .\startup.cmd
"nacos is starting with cluster"

         ,--.
       ,--.'|
   ,--,:  : |                                           Nacos 2.3.2
,`--.'`|  ' :                       ,---.               Running in cluster mode, All function modules
|   :  :  | |                      '   ,'\   .--.--.    Port: 8848
:   |   \ | :  ,--.--.     ,---.  /   /   | /  /    '   Pid: 2668
|   : '  '; | /       \   /     \.   ; ,. :|  :  /`./   Console: http://192.168.129.131:8848/nacos/index.html
'   ' ;.    ;.--.  .-. | /    / ''   | |: :|  :  ;_
|   | | \   | \__\/: . ..    ' / '   | .; : \  \    `.      https://nacos.io
'   : |  ; .' ," .--.; |'   ; :__|   :    |  `----.   \
|   | '`--'  /  /  ,.  |'   | '.'|\   \  /  /  /`--'  /
'   : |     ;  :   .'   \   :    : `----'  '--'.     /
;   |.'     |  ,     .-./\   \  /            `--'---'
'---'        `--`---'     `----'

2024-04-25 09:50:19,190 INFO The server IP list of Nacos is [192.168.129.131:30221, 192.168.129.131:30222, 192.168.129.131:30223, 192.168.129.131:8848]

2024-04-25 09:50:20,206 INFO Nacos is starting...

...
...
2024-04-25 09:50:51,693 INFO Nacos is starting...
2024-04-25 09:50:52,708 INFO Nacos is starting...
2024-04-25 09:50:52,958 INFO Nacos started successfully in cluster mode. use external storage
注:本人配置过程中发现30222这个启动导致31222端口占用异常,而这个占用来自与java(就是30221这个启动的占用了),为了避免这个问题,建议不使用相近的端口,如:8848/30101/30201/30301。
5.启动后,登录nacos即可在集群管理的节点列表中查看

权重编辑:可解决网站发布时的问题。这里有个bug就是我这边启动的是3各服务,但是只显示了两个,但是浏览器却能够正常访问到3个

待续。。。

 浙公网安备 33010602011771号