从零开始实现放置游戏(十)——实现战斗挂机(1)hessian服务端搭建
前面实现RMS系统时,我们让其直接访问底层数据库。后面我们在idlewow-game模块实现游戏逻辑时,将不再直接访问底层数据,而是通过hessian服务暴露接口给表现层。
本章,我们先把hessian服务搭好,并做一个简单的测试,这里以用户注册接口为例。
先简单介绍下,实现hessian接口,只需要在facade模块暴露接口,然后在core模块实现接口,最后在hessain模块配置好接口路由,将其启动即可。
实现步骤
idlewow-facade
新建包com.idlewow.user.model,在此包下添加模型类:


package com.idlewow.user.model;

import com.idlewow.common.model.BaseModel;
import lombok.Data;

import java.io.Serializable;

@Data
public class UserAccount extends BaseModel implements Serializable {
    private String username;
    private String password;
    private String mail;
    private String phone;
    private String realName;
    private String idNo;
    private Integer status;
    private String remark;
    private String registerIp;
}
新建包com.idlewow.user.service,在此包下添加接口类:
package com.idlewow.user.service;

import com.idlewow.common.model.CommonResult;

public interface UserService {
    CommonResult register(String username, String password, String ip);

    CommonResult login(String username, String password);
}
idlewow-core
新建包com.idlewow.user.mapper,添加mapper文件:
package com.idlewow.user.mapper;

import com.idlewow.user.model.UserAccount;

public interface UserAccountMapper {
    int register(UserAccount userAccount);

    UserAccount login(UserAccount userAccount);

    UserAccount findByUsername(String username);
}
<?xml version="1.0" encoding="UTF-8"?> <!DOCTYPE mapper PUBLIC "-//mybatis.org//DTD Mapper 3.0//EN" "http://mybatis.org/dtd/mybatis-3-mapper.dtd"> <mapper namespace="com.idlewow.user.mapper.UserAccountMapper"> <resultMap id="BaseResultMap" type="com.idlewow.user.model.UserAccount"> <result column="id" property="id"/> <result column="username" property="username"/> <result column="password" property="password"/> <result column="mail" property="mail"/> <result column="phone" property="phone"/> <result column="real_name" property="realName"/> <result column="id_no" property="idNo"/> <result column="status" property="status"/> <result column="remark" property="remark"/> <result column="register_ip" property="registerIp"/> <result column="create_user" property="createUser"/> <result column="update_user" property="updateUser"/> <result column="create_time" property="createTime"/> <result column="update_time" property="updateTime"/> <result column="is_delete" property="isDelete"/> <result column="version" property="version"/> </resultMap> <!-- 注册 --> <insert id="register"> insert into user_account (username, password, register_ip, create_user) values (#{username}, #{password}, #{registerIp}, #{createUser}) </insert> <!-- 登陆 --> <select id="login" resultMap="BaseResultMap"> select * from user_account where username = #{username} and password = #{password} and is_delete = 0 </select> <!-- id查询 --> <select id="find" resultMap="BaseResultMap"> select * from user_account where id = #{id} and is_delete = 0 </select> <!-- 根据用户名查找用户 --> <select id="findByUsername" resultMap="BaseResultMap"> select * from user_account where username = #{username} and is_delete = 0 </select> <!-- 列表查询总数 --> <select id="count" resultType="int"> select count(1) from map_mob <where> is_delete = 0 <if test="mapId != null"> and map_id = #{mapId} </if> <if test="faction != null"> and faction = #{faction} </if> <if test="mobClass != null"> and mob_class = #{mobClass} </if> <if test="mobType != null"> and mob_type = #{mobType} </if> <if test="levelStart != null"> and level >= #{levelStart} </if> <if test="levelEnd != null"> and level <= #{levelEnd} </if> <if test="name != null and name != ''"> and name like concat('%', #{name}, '%') </if> </where> </select> <!-- 列表查询 --> <select id="list" resultMap="BaseResultMap"> select * from map_mob <where> is_delete = 0 <if test="mapId != null"> and map_id = #{mapId} </if> <if test="faction != null"> and faction = #{faction} </if> <if test="mobClass != null"> and mob_class = #{mobClass} </if> <if test="mobType != null"> and mob_type = #{mobType} </if> <if test="levelStart != null"> and level >= #{levelStart} </if> <if test="levelEnd != null"> and level <= #{levelEnd} </if> <if test="name != null and name != ''"> and name like concat('%', #{name}, '%') </if> </where> <if test="pageParam != null"> limit ${(pageParam.pageIndex - 1) * pageParam.pageSize}, ${pageParam.pageSize} </if> </select> </mapper>
新建com.idlewow.user.manager包,添加manager类:
package com.idlewow.user.manager;

import com.idlewow.user.mapper.UserAccountMapper;
import com.idlewow.user.model.UserAccount;
import org.springframework.beans.factory.annotation.Autowired;
import org.springframework.stereotype.Component;

@Component
public class UserAccountManager {
    @Autowired
    UserAccountMapper userAccountMapper;

    public UserAccount findByUsername(String username) {
        return userAccountMapper.findByUsername(username);
    }

    public void register(String username, String password, String ip) {
        UserAccount userAccount = new UserAccount();
        userAccount.setUsername(username);
        userAccount.setPassword(password);
        userAccount.setRegisterIp(ip);
        userAccount.setCreateUser("idlewow");
        int effected = userAccountMapper.register(userAccount);
        if (effected == 0) {
            throw new RuntimeException("sql effected 0 rows");
        }
    }

    public UserAccount login(String username, String password) {
        UserAccount userAccount = new UserAccount();
        userAccount.setUsername(username);
        userAccount.setPassword(password);
        return userAccountMapper.login(userAccount);
    }
}
新建com.idlewow.user.service.impl包,添加接口的实现类:
package com.idlewow.user.service.impl;

import com.idlewow.common.model.CommonResult;
import com.idlewow.user.manager.UserAccountManager;
import com.idlewow.user.model.UserAccount;
import com.idlewow.user.service.UserService;
import org.apache.logging.log4j.LogManager;
import org.apache.logging.log4j.Logger;
import org.springframework.beans.factory.annotation.Autowired;
import org.springframework.stereotype.Service;

@Service("userService")
public class UserServiceImpl implements UserService {
    private final Logger logger = LogManager.getLogger(this.getClass().getName());
    @Autowired
    UserAccountManager userAccountManager;

    public CommonResult register(String username, String password, String ip) {
        try {
            UserAccount userAccount = userAccountManager.findByUsername(username);
            if (userAccount != null) {
                return CommonResult.fail("此用户名已被注册!");
            }

            userAccountManager.register(username, password, ip);
            return CommonResult.success();
        } catch (Exception ex) {
            logger.error("用户注册失败:" + ex.getMessage(), ex);
            return CommonResult.fail("用户注册失败");
        }
    }

    @Override
    public CommonResult login(String username, String password) {
        try {
            UserAccount userAccount = userAccountManager.login(username, password);
            if (userAccount == null) {
                return CommonResult.fail("用户名或密码错误!");
            }

            if (userAccount.getStatus() == 1) {
                return CommonResult.fail("账号已冻结!");
            }

            return CommonResult.success("", userAccount);
        } catch (Exception ex) {
            logger.error("用户登录失败:" + ex.getMessage(), ex);
            return CommonResult.fail("用户登录失败");
        }
    }
}
注意,这里ServiceImple类上面有个注解 @Service("userService")。后面我们再添加这种对外的服务类时,都要加这个注解。
idlewow-hessian
hessian用于服务(器)间通信,实际上也是由一个DispatherServlet接收请求,并转发到各个Service中处理,和springmvc差不多,只不过返回的是二进制数据,而不是视图。我们在pom下添加下列依赖,可以发现依赖的包和mvc差不多。另外,作为启动项目,在plugins节点下,我们配置了启动插件tomcat7以及启动端口20000。
<?xml version="1.0" encoding="UTF-8"?>
<project xmlns="http://maven.apache.org/POM/4.0.0"
         xmlns:xsi="http://www.w3.org/2001/XMLSchema-instance"
         xsi:schemaLocation="http://maven.apache.org/POM/4.0.0 http://maven.apache.org/xsd/maven-4.0.0.xsd">
    <parent>
        <artifactId>idlewow</artifactId>
        <groupId>idlewow</groupId>
        <version>1.0-SNAPSHOT</version>
    </parent>
    <modelVersion>4.0.0</modelVersion>

    <artifactId>idlewow-hessian</artifactId>
    <packaging>war</packaging>

    <dependencies>
        <dependency>
            <groupId>idlewow</groupId>
            <artifactId>idlewow-facade</artifactId>
            <version>1.0-SNAPSHOT</version>
        </dependency>
        <dependency>
            <groupId>idlewow</groupId>
            <artifactId>idlewow-core</artifactId>
            <version>1.0-SNAPSHOT</version>
        </dependency>
        <dependency>
            <groupId>com.caucho</groupId>
            <artifactId>hessian</artifactId>
            <version>4.0.60</version>
        </dependency>
        <dependency>
            <groupId>org.springframework</groupId>
            <artifactId>spring-context</artifactId>
            <version>5.1.6.RELEASE</version>
        </dependency>
        <dependency>
            <groupId>org.springframework</groupId>
            <artifactId>spring-context-support</artifactId>
            <version>5.1.6.RELEASE</version>
        </dependency>
        <dependency>
            <groupId>org.springframework</groupId>
            <artifactId>spring-core</artifactId>
            <version>5.1.6.RELEASE</version>
        </dependency>
        <dependency>
            <groupId>org.springframework</groupId>
            <artifactId>spring-web</artifactId>
            <version>5.1.6.RELEASE</version>
        </dependency>
        <dependency>
            <groupId>org.springframework</groupId>
            <artifactId>spring-webmvc</artifactId>
            <version>5.1.6.RELEASE</version>
        </dependency>
        <dependency>
            <groupId>org.springframework</groupId>
            <artifactId>spring-aop</artifactId>
            <version>5.1.6.RELEASE</version>
        </dependency>
        <dependency>
            <groupId>org.springframework</groupId>
            <artifactId>spring-jdbc</artifactId>
            <version>5.1.6.RELEASE</version>
        </dependency>
        <dependency>
            <groupId>org.springframework</groupId>
            <artifactId>spring-tx</artifactId>
            <version>5.1.6.RELEASE</version>
        </dependency>
        <dependency>
            <groupId>javax.servlet</groupId>
            <artifactId>javax.servlet-api</artifactId>
            <version>4.0.1</version>
            <scope>provided</scope>
        </dependency>
        <dependency>
            <groupId>org.aspectj</groupId>
            <artifactId>aspectjweaver</artifactId>
            <version>1.9.3</version>
        </dependency>
        <dependency>
            <groupId>org.mybatis</groupId>
            <artifactId>mybatis-spring</artifactId>
            <version>2.0.1</version>
        </dependency>
        <dependency>
            <groupId>org.apache.commons</groupId>
            <artifactId>commons-dbcp2</artifactId>
            <version>2.6.0</version>
        </dependency>
    </dependencies>
    <build>
        <plugins>
            <plugin>
                <groupId>org.apache.maven.plugins</groupId>
                <artifactId>maven-compiler-plugin</artifactId>
                <configuration>
                    <source>1.8</source>
                    <target>1.8</target>
                </configuration>
            </plugin>
            <plugin>
                <groupId>org.apache.tomcat.maven</groupId>
                <artifactId>tomcat7-maven-plugin</artifactId>
                <version>2.2</version>
                <configuration>
                    <uriEncoding>UTF-8</uriEncoding>
                    <port>20000</port>
                    <path>/</path>
                </configuration>
            </plugin>
            <plugin>
                <groupId>org.apache.maven.plugins</groupId>
                <artifactId>maven-war-plugin</artifactId>
                <version>2.6</version>
            </plugin>
        </plugins>
    </build>
</project>
然后,我们需要在web.xml中配置hessian的servlet,以及添加一个字符编码的filter等等,如下:
<?xml version="1.0" encoding="UTF-8"?>
<web-app xmlns:xsi="http://www.w3.org/2001/XMLSchema-instance" xmlns="http://java.sun.com/xml/ns/javaee"
         xsi:schemaLocation="http://java.sun.com/xml/ns/javaee http://java.sun.com/xml/ns/javaee/web-app_3_0.xsd"
         version="3.0">
    <context-param>
        <param-name>contextConfigLocation</param-name>
        <param-value>classpath:spring/applicationContext.xml</param-value>
    </context-param>
    <listener>
        <listener-class>org.springframework.web.context.ContextLoaderListener</listener-class>
    </listener>
    <filter>
        <filter-name>CharacterEncodingFilter</filter-name>
        <filter-class>org.springframework.web.filter.CharacterEncodingFilter</filter-class>
        <init-param>
            <param-name>encoding</param-name>
            <param-value>utf-8</param-value>
        </init-param>
    </filter>
    <filter-mapping>
        <filter-name>CharacterEncodingFilter</filter-name>
        <url-pattern>/remoting/*</url-pattern>
    </filter-mapping>
    <servlet>
        <servlet-name>remoting</servlet-name>
        <servlet-class>org.springframework.web.servlet.DispatcherServlet</servlet-class>
        <init-param>
            <param-name>contextConfigLocation</param-name>
            <param-value>classpath:spring/hessian-servlet.xml</param-value>
        </init-param>
        <load-on-startup>2</load-on-startup>
    </servlet>
    <servlet-mapping>
        <servlet-name>remoting</servlet-name>
        <url-pattern>/remoting/*</url-pattern>
    </servlet-mapping>
</web-app>
在/resource/spring目录下,新建hessian服务的配置文件hessian-servlet.xml。这个xml主要配置对外暴露的hessian服务。现在我们只配置了UserService,后面每次添加对外的服务接口时,都需要在这里添加配置。
<beans xmlns="http://www.springframework.org/schema/beans"
       xmlns:xsi="http://www.w3.org/2001/XMLSchema-instance"
       xmlns:mvc="http://www.springframework.org/schema/mvc"
       xsi:schemaLocation="
        http://www.springframework.org/schema/beans
        http://www.springframework.org/schema/beans/spring-beans-3.1.xsd
        http://www.springframework.org/schema/mvc
        http://www.springframework.org/schema/mvc/spring-mvc-3.1.xsd
        ">

    <mvc:annotation-driven/>

    <bean name="/UserService" class="org.springframework.remoting.caucho.HessianServiceExporter">
        <property name="service" ref="userService"/>
        <property name="serviceInterface" value="com.idlewow.user.service.UserService"/>
    </bean>
</beans>
除了这3个配置外,还需要配置applicationContext.xml, jdbc.propetries, dataSource.xml, log4j2.xml,和RMS系统大体一致,这里就不再重复了。具体可在源码中查看。
全部搞定后,只要把hessian项目启动,即可调用hessian接口了。启动步骤和rms一样,maven命令也是tomcat7:run,工作目录切换到hessian目录下即可。
运行效果
在game模块中调用hessian时,也是通过在xml中配置注入的方式调用。这里我们还没开始写game模块,为了测试,先简单写一个入口类(即带main函数的类)调用。类似于C#中写控制台程序调用。
在/src/test/java包下新建一个类HessianTest.java如下:
import com.caucho.hessian.client.HessianProxyFactory;
import com.idlewow.common.model.CommonResult;
import com.idlewow.user.service.UserService;
import org.apache.logging.log4j.LogManager;
import org.apache.logging.log4j.Logger;


public class HessianTest {
    protected static final Logger logger = LogManager.getLogger(HessianTest.class);

    public static void main(String[] args) {
        String url = "http://localhost:20000/remoting/UserService";
        HessianProxyFactory factory = new HessianProxyFactory();
        try {
            UserService userService = (UserService) factory.create(UserService.class, url);
            CommonResult commonResult = userService.register("testuser", "123456", "127.0.0.1");
            logger.info(commonResult);
        } catch (Exception e) {
            logger.error(e.getMessage(), e);
            e.printStackTrace();
        }
    }
}
在这个类中,我们指定hessian服务地址,并利用代理工厂创建一个服务代理。然后调用用户注册方法。测试的时候,先把hessian项目启动。然后执行这个main方法即可。
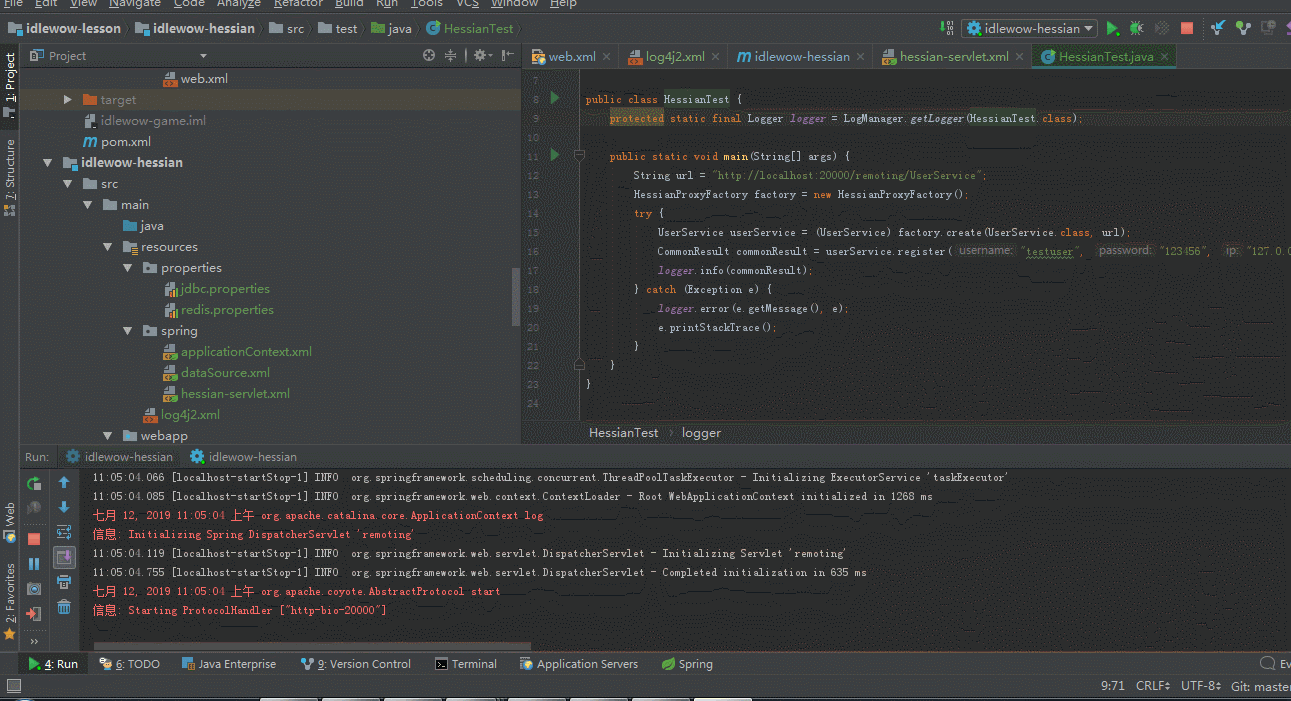
运行效果如下图,可以看到,接口调用成功,并把执行结果在日志中打印了出来。
小结
本节把hessian服务搭建运行起来,并实现了用户注册登录的接口。后面game模块凡是访问底层数据,均需调用hessian服务。
本章源码下载:https://idlestudio.ctfile.com/fs/14960372-387256708
本文原文地址:https://www.cnblogs.com/lyosaki88/p/idlewow_10.html
项目交流群:329989095

 浙公网安备 33010602011771号