
二次开发:API调用
一、API介绍
Zabbix提供了一个丰富的API,Zabbix提供的API有2种功能。
一个是管理
一个是查询 
请求方法 POST
我们可以进行访问查看
无法打开,我们需要进行POST请求才可以。
官方说明文档:https://www.zabbix.com/documentation/3.0/manual/api
|
1
2
3
4
5
6
7
8
9
10
|
curl -s -X POST -H 'Content-Type:application/json-rpc' -d'{"jsonrpc": "2.0","method": "user.login","params": {"user": "zhangsan","password": "123456"},"id": 1}' http://192.168.56.11/zabbix/api_jsonrpc.php | python -m json.tool |
-d 请求的内容 -H 类型 id 名字,类似一个标识 user 我们登陆用的是zhangsan 默认是Admin password 默认是zabbix,我们修改为123456了
|
1
2
3
4
5
6
7
8
9
10
11
12
13
14
15
16
17
|
[root@linux-node1 ~]# curl -s -X POST -H 'Content-Type:application/json-rpc' -d'> {> "jsonrpc": "2.0",> "method": "user.login",> "params": {> "user": "zhangsan",> "password": "123456"> },> "id": 1> }' http://192.168.56.11/zabbix/api_jsonrpc.php | python -m json.tool--------------------------分割线------------------------下面是返回的结果!!!!!!!!!!!!!!!!!!!!!!{"id": 1,"jsonrpc": "2.0","result": "d8286f586348b96b6b0f880db3db8a02"} |
例如:我们获取所有主机的列表
官方文档:https://www.zabbix.com/documentation/3.0/manual/api/reference/host/get
|
1
2
3
4
5
6
7
8
9
10
|
curl -s -X POST -H 'Content-Type:application/json-rpc' -d'{"jsonrpc": "2.0","method": "host.get","params": {"output": ["host"]},"auth": "d8286f586348b96b6b0f880db3db8a02","id": 1}' http://192.168.56.11/zabbix/api_jsonrpc.php | python -m json.tool |
提示: auth里面填写的是我们刚刚返回的result里面的值,如果我们在["hostid"]加上id就会显示id。想全显示主机名就直接写host
|
1
2
3
4
5
6
7
8
9
10
11
12
13
14
15
16
17
18
19
20
21
22
23
24
25
26
27
28
29
30
31
32
|
[root@linux-node1 ~]# curl -s -X POST -H 'Content-Type:application/json-rpc' -d'{"jsonrpc": "2.0","method": "host.get","params": {"output": ["host"]},"auth": "d8286f586348b96b6b0f880db3db8a02","id": 1}' http://192.168.56.11/zabbix/api_jsonrpc.php | python -m json.tool{"id": 1,"jsonrpc": "2.0","result": [{"host": "Zabbix server","hostid": "10084"},{"host": "linux-node1.example.com","hostid": "10105"},{"host": "linux-node1.example.com1","hostid": "10107"},{"host": "linux-node2.example.com","hostid": "10117"}]} |
对比图 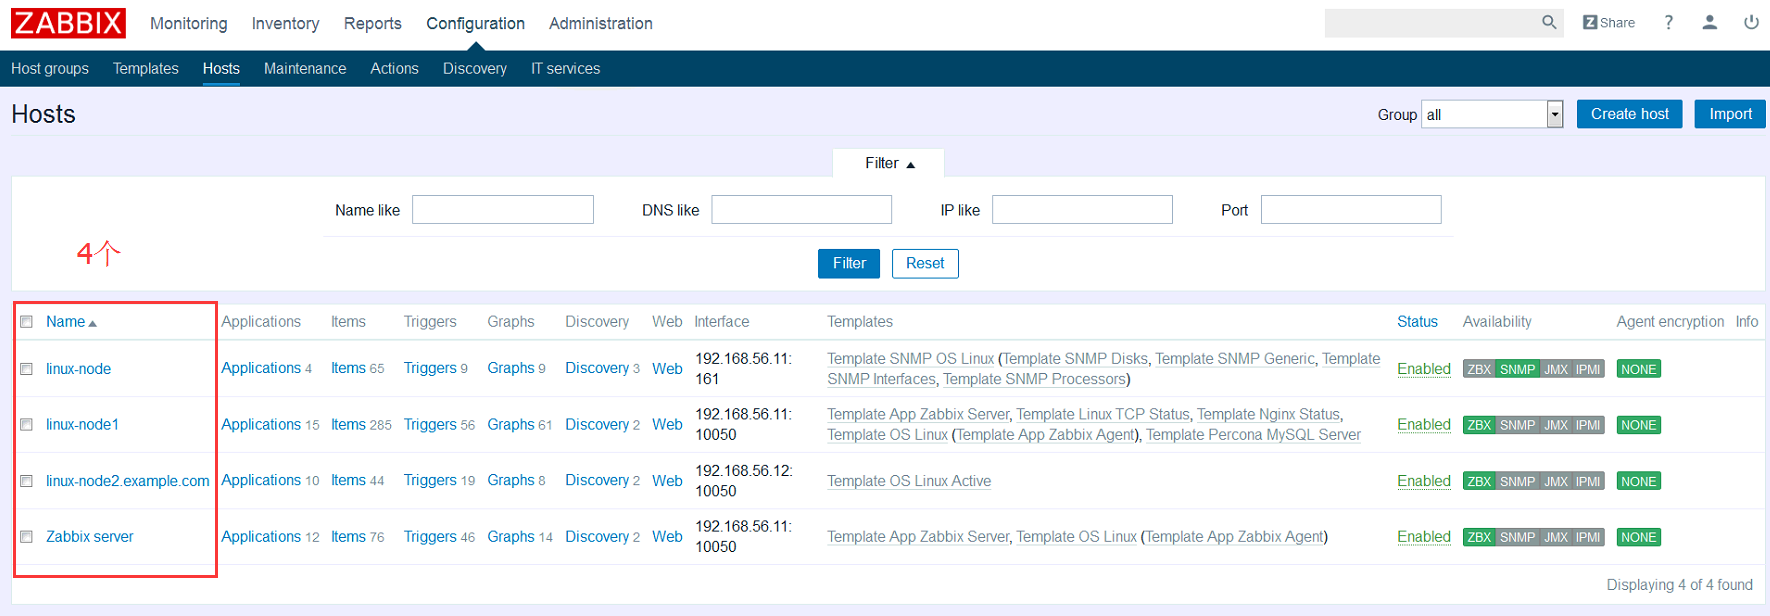
例如:如何获取模板
官方文档:https://www.zabbix.com/documentation/3.0/manual/api/reference/template/get
|
1
2
3
4
5
6
7
8
9
10
|
curl -s -X POST -H 'Content-Type:application/json-rpc' -d'{"jsonrpc": "2.0","method": "template.get","params": {"output": "extend"},"auth": "d8286f586348b96b6b0f880db3db8a02","id": 1}' http://192.168.56.11/zabbix/api_jsonrpc.php | python -m json.tool |
默认太多不发了,看图! 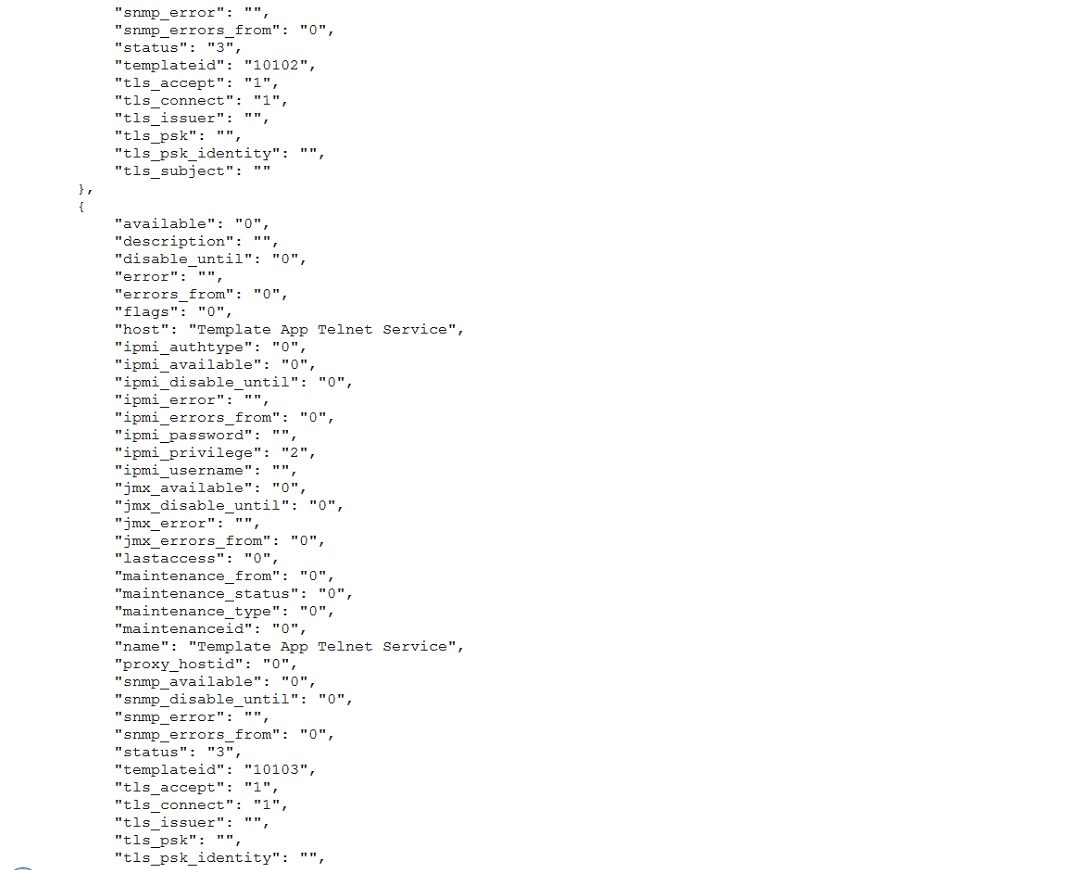
过滤
过滤主机有OS LINUX的模板
|
1
2
3
4
5
6
7
8
9
10
11
12
13
14
15
|
curl -s -X POST -H 'Content-Type:application/json-rpc' -d'{"jsonrpc": "2.0","method": "template.get","params": {"output": "extend","filter": {"host": ["Template OS Linux"]}},"auth": "d8286f586348b96b6b0f880db3db8a02","id": 1}' http://192.168.56.11/zabbix/api_jsonrpc.php | python -m json.tool |
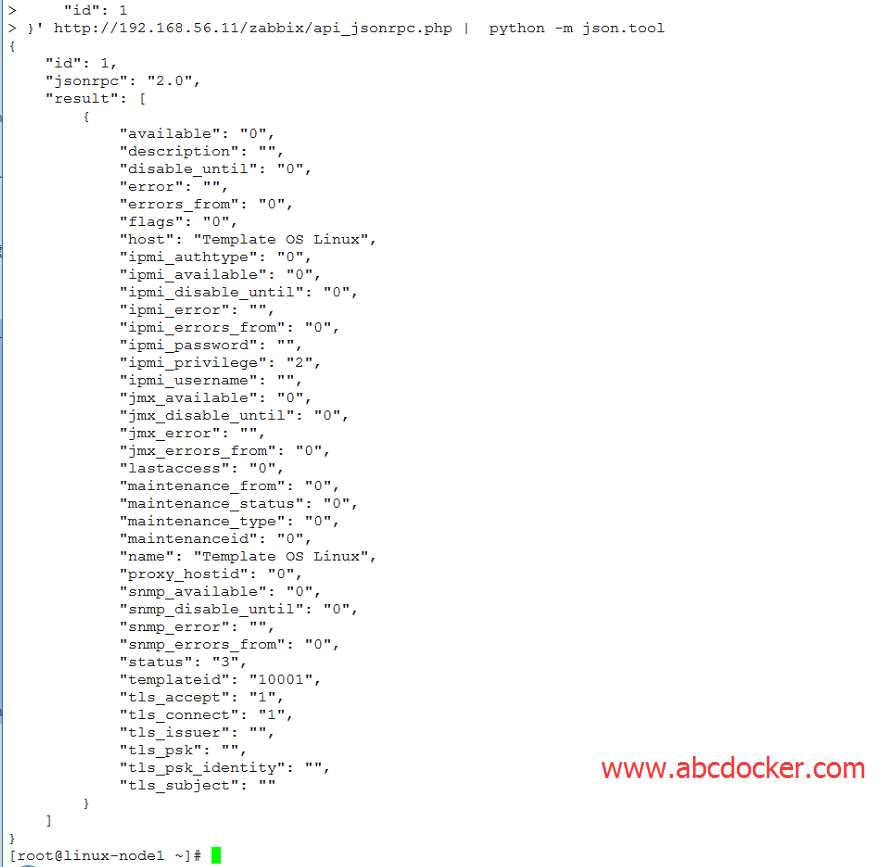
效果图如下!
我们提供一个快速认证的Python脚本
链接:http://pan.baidu.com/s/1gf0pQwF 密码:m7dq
脚本内容如下
|
1
2
3
4
5
6
7
8
9
10
11
12
13
14
15
16
17
18
19
20
21
22
|
[root@linux-node1 ~]# cat zabbix_auth.py#!/usr/bin/env python# -*- coding:utf-8 -*-import requestsimport jsonurl = 'http://192.168.56.11/zabbix/api_jsonrpc.php'post_data = {"jsonrpc": "2.0","method": "user.login","params": {"user": "zhangsan","password": "123123"},"id": 1}post_header = {'Content-Type': 'application/json'}ret = requests.post(url, data=json.dumps(post_data), headers=post_header)zabbix_ret = json.loads(ret.text)if not zabbix_ret.has_key('result'):print 'login error'else:print zabbix_ret.get('result') |
我们可以执行一下进行查看
提示: 需要修改里面的用户名和密码!
|
1
2
3
4
5
6
7
8
9
10
11
12
13
14
15
16
|
#安装python环境[root@linux-node1 ~]# yum install python-pip -y[root@linux-node1 ~]# pip install requestsYou are using pip version 7.1.0, however version 8.1.2 is available.You should consider upgrading via the 'pip install --upgrade pip' command.Collecting requestsDownloading requests-2.11.1-py2.py3-none-any.whl (514kB)100% |████████████████████████████████| 516kB 204kB/sInstalling collected packages: requestsSuccessfully installed requests-2.11.1################################################################################################################################################执行结果[root@linux-node1 ~]# python zabbix_auth.py5b21317186f2a47404214556c5c1d846 |
二、案例:使用API进行自动添加主机
首先我们需要删除主机和自动发现
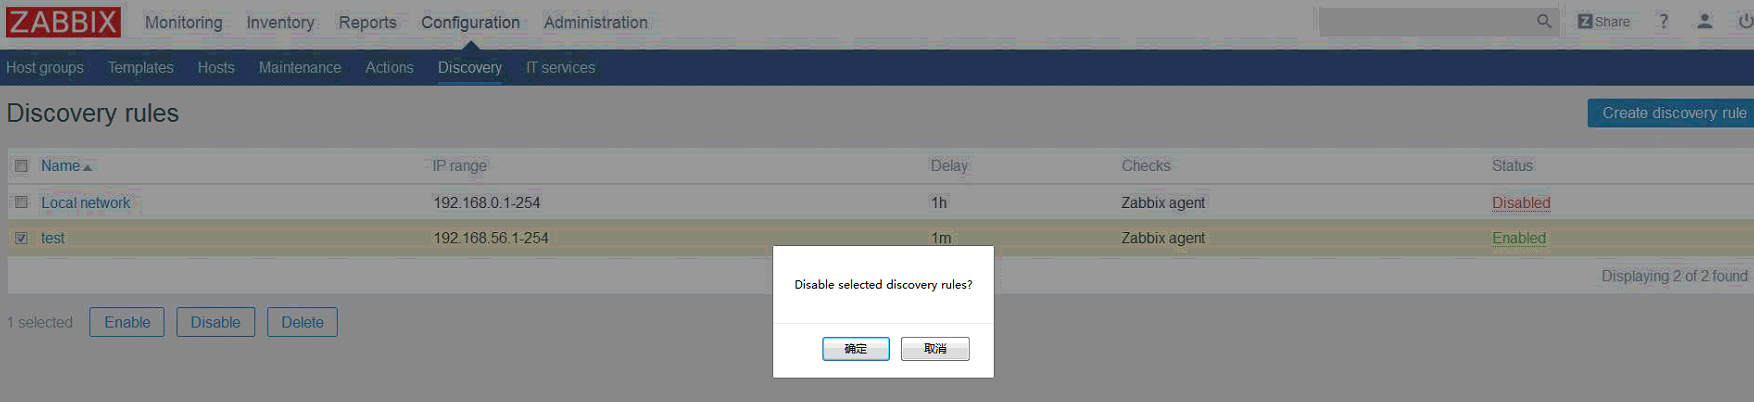
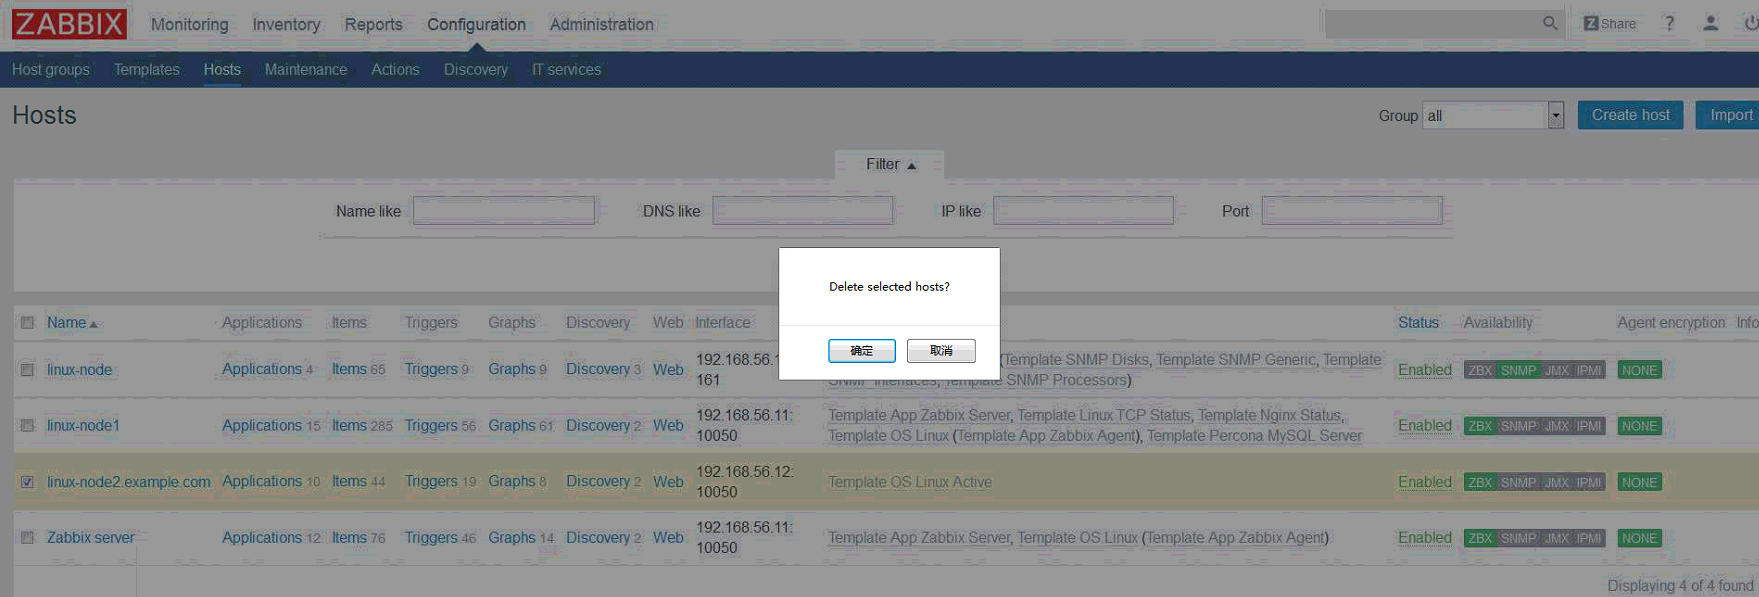
我们使用API来实现自动添加监控主机
使用API添加主机:https://www.zabbix.com/documentation/3.0/manual/api/reference/host/create
|
1
2
3
4
5
6
7
8
9
10
11
12
13
14
15
16
17
18
19
20
21
22
23
24
25
26
27
28
29
30
|
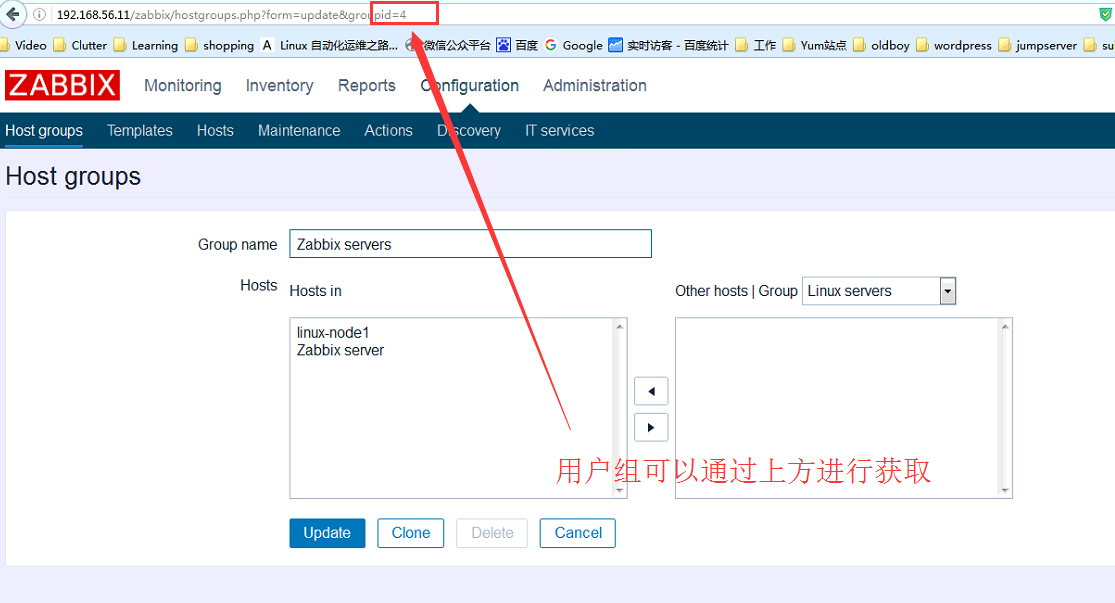
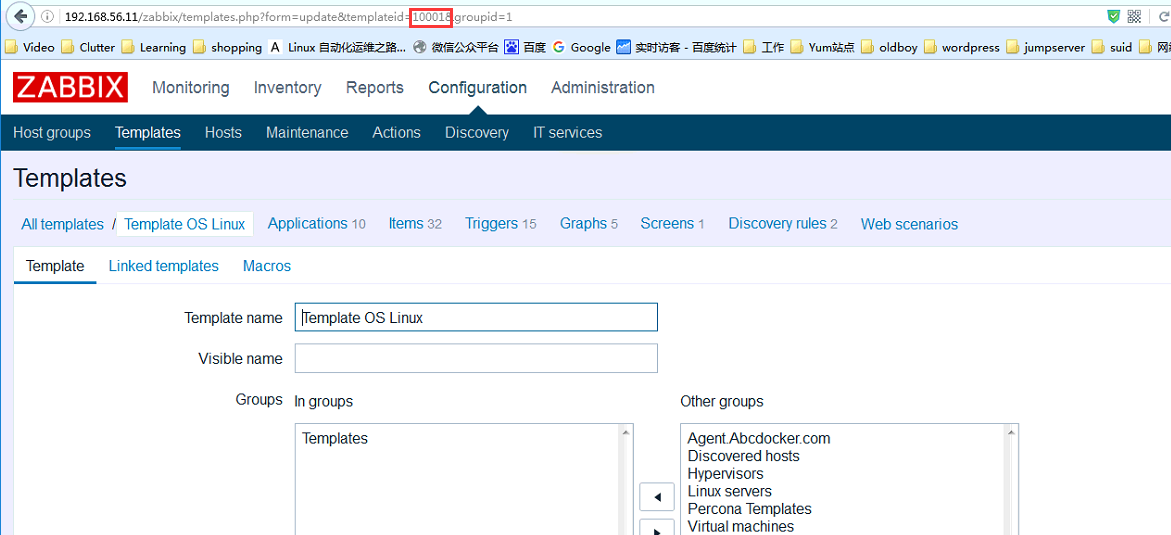
curl -s -X POST -H 'Content-Type:application/json-rpc' -d'{"jsonrpc": "2.0","method": "host.create","params": {"host": "Zabbix agent 192","interfaces": [{"type": 1,"main": 1,"useip": 1,"ip": "192.168.56.12","dns": "","port": "10050"}],"groups": [{"groupid": "8"}],"templates": [{"templateid": "10001"}]},"auth": "5b21317186f2a47404214556c5c1d846","id": 1}' http://192.168.56.11/zabbix/api_jsonrpc.php | python -m json.tool |
用户组ID获取方法
模板IP查看方法
执行结果如下:
|
1
2
3
4
5
6
7
8
9
10
11
12
13
14
15
16
17
18
19
20
21
22
23
24
25
26
27
28
29
30
31
32
33
34
35
36
37
38
39
|
[root@linux-node1 ~]# curl -s -X POST -H 'Content-Type:application/json-rpc' -d'> {> "jsonrpc": "2.0",> "method": "host.create",> "params": {> "host": "Zabbix agent 192",> "interfaces": [> {> "type": 1,> "main": 1,> "useip": 1,> "ip": "192.168.56.12",> "dns": "",> "port": "10050"> }> ],> "groups": [> {> "groupid": "8"> }> ],> "templates": [> {> "templateid": "10001"> }> ]> },> "auth": "5b21317186f2a47404214556c5c1d846",> "id": 1> }' http://192.168.56.11/zabbix/api_jsonrpc.php | python -m json.tool{"id": 1,"jsonrpc": "2.0","result": {"hostids": ["10118"]}} |
查看Zabbix 页面 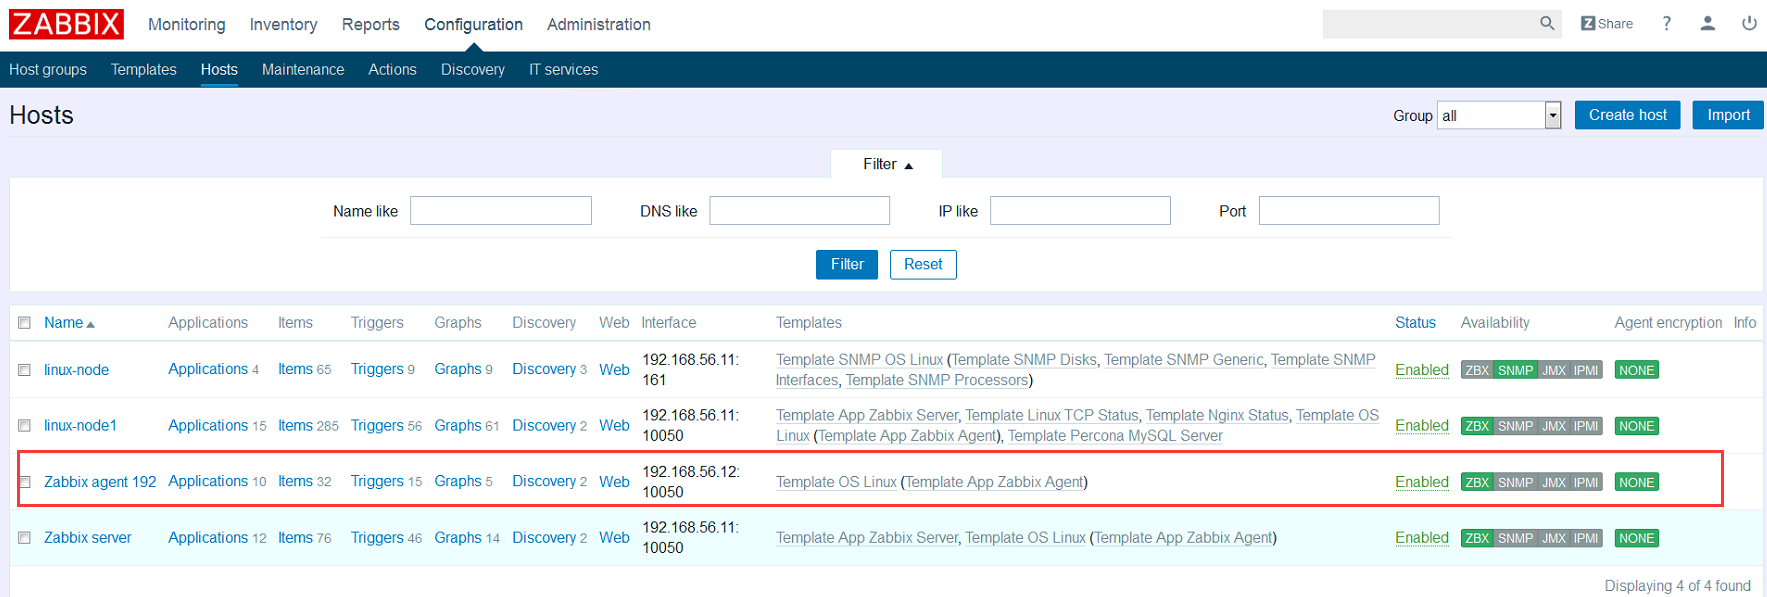
提示: 里面的主机名/模板 都是我们设置好的
Zabbix完!

 浙公网安备 33010602011771号