

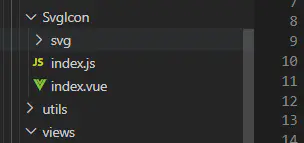
1.文件下新建SvgIcon文件夹以及子文件index.js,index.vue,svg文件夹(用于存放svg图片)
2.编写index.vue组件
<template>
  <svg :class="svgClass"  aria-hidden="true">
    <use :xlink:href="iconName"/>
  </svg>
</template>

<script>
export default {
  name: 'SvgIcon',
  props: {
    iconClass: {
      type: String,
      required: true,
    },
    className: {
      type: String,
      default: '',
    },
  },
  computed: {
    iconName () {
      return `#icon-${this.iconClass}`
    },
    svgClass () {
      console.log('this.className')
      console.log(this.className)
      if (this.className) {
        return 'svg-icon ' + this.className
      } else {
        return 'svg-icon'
      }
    },
  },
}
</script>

<style scoped>
.svg-icon {
  width: 1em;
  height: 1em;
  vertical-align: -0.15em;
  fill: currentColor;
  overflow: hidden;
  color:#333;
  /* fill: currentColor; */
  /* background-color:#6EC1FA !important; */
  padding:0px 5px 0px 8px;
}
</style>
3.index.js
//下面这个是导入svgIcon/svg下的所有svg文件

const requireAll = requireContext => requireContext.keys().map(requireContext)

 const req = require.context('./svg', false, /\.svg$/)

 console.log("REQ", requireAll(req))

/*

   第一个参数是:'./svg' => 需要检索的目录,

   第二个参数是:false => 是否检索子目录,

   第三个参数是: /\.svg$/ => 匹配文件的正则

  */

requireAll(req);
4.main.js中引入并全局注册
import '@/SvgIcon/index.js'

import SvgIcon from '@/SvgIcon/index.vue'// svg组件


app.component('svg-icon', SvgIcon);
5..安装svg-sprite-loader
npm install svg-sprite-loader --save-dev
6.配置vue.congfig.js
    chainWebpack: (config) => {

        //配置 svg-sprite-loader
        // 第一步:让其他svg loader不要对src/icons进行操作
        config.module
        .rule('svg')
        .exclude.add(resolve('src/SvgIcon/svg'))//注意:路径要具体到存放的svg的路径下,不然会报错
        .end() // 第二步:使用svg-sprite-loader 对 src/icons下的svg进行操作
        config.module
        .rule('icons')
        .test(/\.svg$/)
        .include.add(resolve('src/SvgIcon/svg'))//注意:路径要具体到存放的svg的路径下,不然会报错
        .end()
        .use('svg-sprite-loader')
        .loader('svg-sprite-loader')
        //定义规则 使用时 <svg class="icon"> <use xlink:href="#icon-svg文件名"></use>  </svg>
        .options({
          symbolId: 'icon-[name]'
        })
        .end()
    },
7.在页面内直接使用 svg-icon
<svg-icon icon-class="d" />
d:svg文件名称
finally
转载:https://www.jianshu.com/p/e82a85e2e04d

 浙公网安备 33010602011771号