Flink源码阅读(一)——Per-job之Yarn的作业调度(一)
1、前言
Flink作业提交到Yarn上之后,后续的AM的生成、Job的处理过程和Flink基本没什么关系了,但是为大致了解Flink on yarn的Per-Job模式的整体过程,这里还是将这系列博客归到Flink源码阅读系列了,本系列博客计划三篇。
本文着重分析submitApplication之后,Yarn的ResourceManager为任务的ApplicationMater分配container的过程。
说明:文中源码是从Flink 1.9中跳转过去,主要涉及hadoop-yarn-server-resourcemanager-2.4.1.jar、flink-shaded-hadoop-2-2.4.1-7.0.jar。
博主水平有限,欢迎大伙留言交流。
涉及的重要概念【1】:
1)RMApp:每个application是一个RMApp对象,其包含了application的各种信息,实现类为RMAppImpl;
2)RMAppAttempt:RMApp可以有多个app attempt,即对应着多个RMAppAttempt对象,也就是任务状态的变化的过程。具体对应着那个,取决于前面的RMAppAttempt是否执行成功,如果不成功,会启动另外一个,直到运行成功;
3)Dispatcher:中央事件调度器,各个状态机的事件调度器会在中央事件调度器中注册。该调度器维护了一个事件队列,其会不断扫描整个队列,取出事件并检查事件类型,然后交给相应的事件调度器处理。其实现类为AsyncDispatcher和MultiThreadedDispatcher,后者是创建一个list用于放AsyncDispatcher
2、事件的提交到调度
1、在Flink on yarn的Per-job模式源码解析一文中提到,client提交的报文被封装成request后被ClientRMService.submitApplication()方法处理。其过程如下:
1)在该方法中会先检查与Yarn RM相互独立的配置,比如applicationId、提交到的资源对列名、任务名等;
2)调用RMAppManager.submitApplication()提交任务。
代码如下:


 1 public SubmitApplicationResponse submitApplication(
 2       SubmitApplicationRequest request) throws YarnException {
 3     ApplicationSubmissionContext submissionContext = request
 4         .getApplicationSubmissionContext();
 5     ApplicationId applicationId = submissionContext.getApplicationId();
 6
 7     // ApplicationSubmissionContext needs to be validated for safety - only
 8     // those fields that are independent of the RM's configuration will be
 9     // checked here, those that are dependent on RM configuration are validated
10     // in RMAppManager.
11
12     String user = null;
13     try {
14       // Safety
15       user = UserGroupInformation.getCurrentUser().getShortUserName();
16     } catch (IOException ie) {
17       LOG.warn("Unable to get the current user.", ie);
18       RMAuditLogger.logFailure(user, AuditConstants.SUBMIT_APP_REQUEST,
19           ie.getMessage(), "ClientRMService",
20           "Exception in submitting application", applicationId);
21       throw RPCUtil.getRemoteException(ie);
22     }
23     //开始检查applicationId是否已存在,检查对列是否设置等
24     // Check whether app has already been put into rmContext,
25     // If it is, simply return the response
26     if (rmContext.getRMApps().get(applicationId) != null) {
27       LOG.info("This is an earlier submitted application: " + applicationId);
28       return SubmitApplicationResponse.newInstance();
29     }
30
31     if (submissionContext.getQueue() == null) {
32       submissionContext.setQueue(YarnConfiguration.DEFAULT_QUEUE_NAME);
33     }
34     if (submissionContext.getApplicationName() == null) {
35       submissionContext.setApplicationName(
36           YarnConfiguration.DEFAULT_APPLICATION_NAME);
37     }
38     if (submissionContext.getApplicationType() == null) {
39       submissionContext
40         .setApplicationType(YarnConfiguration.DEFAULT_APPLICATION_TYPE);
41     } else {
42       if (submissionContext.getApplicationType().length() > YarnConfiguration.APPLICATION_TYPE_LENGTH) {
43         submissionContext.setApplicationType(submissionContext
44           .getApplicationType().substring(0,
45             YarnConfiguration.APPLICATION_TYPE_LENGTH));
46       }
47     }
48
49     try {
50     //提交application
51       // call RMAppManager to submit application directly
52       rmAppManager.submitApplication(submissionContext,
53           System.currentTimeMillis(), user);
54
55       LOG.info("Application with id " + applicationId.getId() +
56           " submitted by user " + user);
57       RMAuditLogger.logSuccess(user, AuditConstants.SUBMIT_APP_REQUEST,
58           "ClientRMService", applicationId);
59     } catch (YarnException e) {
60       LOG.info("Exception in submitting application with id " +
61           applicationId.getId(), e);
62       RMAuditLogger.logFailure(user, AuditConstants.SUBMIT_APP_REQUEST,
63           e.getMessage(), "ClientRMService",
64           "Exception in submitting application", applicationId);
65       throw e;
66     }
67
68     SubmitApplicationResponse response = recordFactory
69         .newRecordInstance(SubmitApplicationResponse.class);
70     return response;
71   }
2、在RMAppManager.submitApplication()中主要干两件事:一是启动状态机;二是根据是否开启安全认证(Yarn的配置)走不同的分支去调度,代码如下:
 1 protected void submitApplication(
 2       ApplicationSubmissionContext submissionContext, long submitTime,
 3       String user) throws YarnException {
 4     ApplicationId applicationId = submissionContext.getApplicationId();
 5
 6     //创建application,在构造函数中会启动状态机,此外,会根据设置决定是否保存记录
 7     RMAppImpl application =
 8         createAndPopulateNewRMApp(submissionContext, submitTime, user);
 9     ApplicationId appId = submissionContext.getApplicationId();
10     //开启安全认证
11     if (UserGroupInformation.isSecurityEnabled()) {
12       Credentials credentials = null;
13       try {
14         credentials = parseCredentials(submissionContext);
15         this.rmContext.getDelegationTokenRenewer().addApplicationAsync(appId,
16           credentials, submissionContext.getCancelTokensWhenComplete());
17       } catch (Exception e) {
18         LOG.warn("Unable to parse credentials.", e);
19         // Sending APP_REJECTED is fine, since we assume that the
20         // RMApp is in NEW state and thus we haven't yet informed the
21         // scheduler about the existence of the application
22         assert application.getState() == RMAppState.NEW;
23         this.rmContext.getDispatcher().getEventHandler()
24           .handle(new RMAppRejectedEvent(applicationId, e.getMessage()));
25         throw RPCUtil.getRemoteException(e);
26       }
27     } else {
28       //Dispatcher不会立即启动,事件会被塞进对列
29       //启动RMApp的状态机,等待dispathcer调用对应的事件调度器
30       // Dispatcher is not yet started at this time, so these START events
31       // enqueued should be guaranteed to be first processed when dispatcher
32       // gets started.
33       this.rmContext.getDispatcher().getEventHandler()
34         .handle(new RMAppEvent(applicationId, RMAppEventType.START));
35     }
36   }
3、Resourcemanager中有AsyncDispatcher来调度事件,各种事件对应的调度器可以看看ResourceManager类。
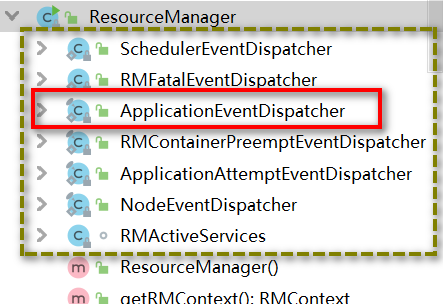
这里仅给出其部分结构图,在这里我们主要关注ApplicationEventDispatcher。
 1 public static final class ApplicationEventDispatcher implements
 2       EventHandler<RMAppEvent> {
 3
 4     private final RMContext rmContext;
 5
 6     public ApplicationEventDispatcher(RMContext rmContext) {
 7       this.rmContext = rmContext;
 8     }
 9
10     @Override
11     public void handle(RMAppEvent event) {
12       ApplicationId appID = event.getApplicationId();
13       RMApp rmApp = this.rmContext.getRMApps().get(appID);
14       if (rmApp != null) {
15         try {
16         //调用RMApp的状态机
17           rmApp.handle(event);
18         } catch (Throwable t) {
19           LOG.error("Error in handling event type " + event.getType()
20               + " for application " + appID, t);
21         }
22       }
23     }
24   }
这里的handle(...)方法比较简单,就不贴源码分析了。下面我们着重分析application状态的变化过程。
3、Application状态的变化
1、从NEW->NEW_SAVING
1)在RMAppImpl.java类中
 1 private static final StateMachineFactory<RMAppImpl,
 2                                            RMAppState,
 3                                            RMAppEventType,
 4                                            RMAppEvent> stateMachineFactory
 5                                = new StateMachineFactory<RMAppImpl,
 6                                            RMAppState,
 7                                            RMAppEventType,
 8                                            RMAppEvent>(RMAppState.NEW)
 9
10      //这里仅给出部分
11      // Transitions from NEW state
12     .addTransition(RMAppState.NEW, RMAppState.NEW,
13         RMAppEventType.NODE_UPDATE, new RMAppNodeUpdateTransition())
14     //把RMApp的状态从NEW变成NEW_SAVING
15     .addTransition(RMAppState.NEW, RMAppState.NEW_SAVING,
16         RMAppEventType.START, new RMAppNewlySavingTransition())
17     .addTransition(RMAppState.NEW, EnumSet.of(RMAppState.SUBMITTED,
18             RMAppState.ACCEPTED, RMAppState.FINISHED, RMAppState.FAILED,
19             RMAppState.KILLED, RMAppState.FINAL_SAVING),
20         RMAppEventType.RECOVER, new RMAppRecoveredTransition())
21         .........
2)我们沿着new RMAppNewlySavingTransition()分析,其源码如下:
 1  private static final class RMAppNewlySavingTransition extends RMAppTransition {
 2     @Override
 3     public void transition(RMAppImpl app, RMAppEvent event) {
 4
 5       // If recovery is enabled then store the application information in a
 6       // non-blocking call so make sure that RM has stored the information
 7       // needed to restart the AM after RM restart without further client
 8       // communication
 9       LOG.info("Storing application with id " + app.applicationId);
10       app.rmContext.getStateStore().storeNewApplication(app);
11     }
12   }
3)从其注释,我们可以清晰的得到的,这里主要是保存application的信息,其主要调用的是RMStateStore.storeNewApplication(),代码如下:
 1   /**
 2    * Non-Blocking API
 3    * ResourceManager services use this to store the application's state
 4    * This does not block the dispatcher threads
 5    * RMAppStoredEvent will be sent on completion to notify the RMApp
 6    */
 7   @SuppressWarnings("unchecked")
 8   public synchronized void storeNewApplication(RMApp app) {
 9     ApplicationSubmissionContext context = app
10                                             .getApplicationSubmissionContext();
11     assert context instanceof ApplicationSubmissionContextPBImpl;
12     ApplicationState appState =
13         new ApplicationState(app.getSubmitTime(), app.getStartTime(), context,
14           app.getUser());
15     dispatcher.getEventHandler().handle(new RMStateStoreAppEvent(appState));     //下面重点说明
16   }
4)从上面代码的15行(标有重点说明),我们可以看到storeAppEvent的动作又交给Dispatcher去调度了,在类RMStateStore中的下面部分(266~277)
 1      //定义
 2    AsyncDispatcher dispatcher;
 3
 4   @Override
 5   protected void serviceInit(Configuration conf) throws Exception{
 6     // create async handler
 7     dispatcher = new AsyncDispatcher();
 8     dispatcher.init(conf);
 9     //ForwardingEventHandler是具体实施动作的类
10     dispatcher.register(RMStateStoreEventType.class,
11                         new ForwardingEventHandler());
12     dispatcher.setDrainEventsOnStop();
13     initInternal(conf);
14   }
2、从NEW_SAVING ->SUBMIT
1)进去内部类ForwardingEventHandler,我们发现其主要是重写了handle()方法,调用RMStateStore.handleStoreEvent(),跟进这个方法,代码如下:
 1 //代码太多没贴全,详细可以看看RMStateStore类的598~699行
 2 // Dispatcher related code
 3   protected void handleStoreEvent(RMStateStoreEvent event) {
 4     if (event.getType().equals(RMStateStoreEventType.STORE_APP)
 5         || event.getType().equals(RMStateStoreEventType.UPDATE_APP)) {
 6       ApplicationState appState = null;
 7       if (event.getType().equals(RMStateStoreEventType.STORE_APP)) {
 8         appState = ((RMStateStoreAppEvent) event).getAppState();
 9       } else {
10         assert event.getType().equals(RMStateStoreEventType.UPDATE_APP);
11         appState = ((RMStateUpdateAppEvent) event).getAppState();
12       }
13
14       Exception storedException = null;
15       ApplicationStateDataPBImpl appStateData =
16           (ApplicationStateDataPBImpl) ApplicationStateDataPBImpl
17             .newApplicationStateData(appState.getSubmitTime(),
18               appState.getStartTime(), appState.getUser(),
19               appState.getApplicationSubmissionContext(), appState.getState(),
20               appState.getDiagnostics(), appState.getFinishTime());
21
22       ApplicationId appId =
23           appState.getApplicationSubmissionContext().getApplicationId();
24
25       LOG.info("Storing info for app: " + appId);
26       try {
27         if (event.getType().equals(RMStateStoreEventType.STORE_APP)) {
28         //状态的保存可以保存在ZooKeeper、内存和文件系统中(整个过程未细看)
29           storeApplicationStateInternal(appId, appStateData);
30          //将event的状态修改为APP_NEW_SAVED,然后进入RMAppImpl类的状态机进行下一步转换
31           notifyDoneStoringApplication(appId, storedException);
32         } else {
33           assert event.getType().equals(RMStateStoreEventType.UPDATE_APP);
34           updateApplicationStateInternal(appId, appStateData);
35           notifyDoneUpdatingApplication(appId, storedException);
36         }
37       } catch (Exception e) {
38         LOG.error("Error storing/updating app: " + appId, e);
39         notifyStoreOperationFailed(e);
40       }
41     } else if{......}
42     }
2)这里给出RMAppImpl类的关键代码(152~156),如下:
1 // Transitions from NEW_SAVING state
2     .addTransition(RMAppState.NEW_SAVING, RMAppState.NEW_SAVING,
3         RMAppEventType.NODE_UPDATE, new RMAppNodeUpdateTransition())
4     .addTransition(RMAppState.NEW_SAVING, RMAppState.SUBMITTED,
5         RMAppEventType.APP_NEW_SAVED, new AddApplicationToSchedulerTransition())  //关键
3、SUBMIT - >ACCEPTED
1)沿着代码,我们看一下AddApplicationToSchedulerTransition类
 1 private static final class AddApplicationToSchedulerTransition extends
 2       RMAppTransition {
 3     @Override
 4     public void transition(RMAppImpl app, RMAppEvent event) {
 5       if (event instanceof RMAppNewSavedEvent) {
 6         RMAppNewSavedEvent storeEvent = (RMAppNewSavedEvent) event;
 7         // For HA this exception needs to be handled by giving up
 8         // master status if we got fenced
 9         if (((RMAppNewSavedEvent) event).getStoredException() != null) {
10           LOG.error(
11             "Failed to store application: " + storeEvent.getApplicationId(),
12             storeEvent.getStoredException());
13           ExitUtil.terminate(1, storeEvent.getStoredException());
14         }
15       }
16       //这里会调用yarn的scheduler去处理,这里我们分析目前社区推荐的CapacityScheduler
17       app.handler.handle(new AppAddedSchedulerEvent(app.applicationId,
18         app.submissionContext.getQueue(), app.user));
19     }
20   }
2)在CapacityScheduler中的882~887行,
1 case APP_ADDED:
2     {
3       AppAddedSchedulerEvent appAddedEvent = (AppAddedSchedulerEvent) event;
4       //这里主要是对queue做一些检查,然后将Event提交到queue,
5       //事件的状态又为APP_ACCEPTED,从而重新触发RMAppImpl中的状态机
6       //感兴趣的可以去看一下511~546行
7       addApplication(appAddedEvent.getApplicationId(),
8         appAddedEvent.getQueue(), appAddedEvent.getUser());
9     }
3)重新回到RMAppImpl类中
1     .addTransition(RMAppState.SUBMITTED, RMAppState.ACCEPTED,
2         RMAppEventType.APP_ACCEPTED, new StartAppAttemptTransition())
4、RMAppAttempt状态变化
1、NEW -> SUBMIT
1)我们这里跟进去StartAppAttemptTransition,看看其干了什么,经过跟踪代码,代码如下(657~679):
1 private void
2       createAndStartNewAttempt(boolean transferStateFromPreviousAttempt) {
3       //这里会记录同一个application的重试次数
4     createNewAttempt();
5     //在新建RMAppStartAttemptEvent对象时会触发RMAppAttemptEventType.START事件,
6     handler.handle(new RMAppStartAttemptEvent(currentAttempt.getAppAttemptId(),
7       transferStateFromPreviousAttempt));
8   }
2)在类RMAppAttemptImpl的状态机中,我们可以看到RMAppAttemptState的状态从NEW变为SUBMITTED
1        // Transitions from NEW State
2       .addTransition(RMAppAttemptState.NEW, RMAppAttemptState.SUBMITTED,
3           RMAppAttemptEventType.START, new AttemptStartedTransition())
2、SUBMITTED -> SCHEDULED
1)和上面的流程一样,我们跟进AttemptStartedTransition类,发现其主要是重写了transtition方法,具体代码如下:
 1 private static final class AttemptStartedTransition extends BaseTransition {
 2     @Override
 3     public void transition(RMAppAttemptImpl appAttempt,
 4         RMAppAttemptEvent event) {
 5
 6         boolean transferStateFromPreviousAttempt = false;
 7       if (event instanceof RMAppStartAttemptEvent) {
 8         transferStateFromPreviousAttempt =
 9             ((RMAppStartAttemptEvent) event)
10               .getTransferStateFromPreviousAttempt();
11       }
12       appAttempt.startTime = System.currentTimeMillis();
13
14       // Register with the ApplicationMasterService
15       appAttempt.masterService
16           .registerAppAttempt(appAttempt.applicationAttemptId);
17
18       if (UserGroupInformation.isSecurityEnabled()) {
19         appAttempt.clientTokenMasterKey =
20             appAttempt.rmContext.getClientToAMTokenSecretManager()
21               .createMasterKey(appAttempt.applicationAttemptId);
22       }
23
24       // create AMRMToken
25       AMRMTokenIdentifier id =
26           new AMRMTokenIdentifier(appAttempt.applicationAttemptId);
27       appAttempt.amrmToken =
28           new Token<AMRMTokenIdentifier>(id,
29             appAttempt.rmContext.getAMRMTokenSecretManager());
30
31       // Add the applicationAttempt to the scheduler and inform the scheduler
32       // whether to transfer the state from previous attempt.
33       //触发scheduler的APP_ATTEMPT_ADDED事件,这里分析CapacityScheduler
34       appAttempt.eventHandler.handle(new AppAttemptAddedSchedulerEvent(
35         appAttempt.applicationAttemptId, transferStateFromPreviousAttempt));
36     }
37   }
2)在CapacityScheduler中,我们分析其分支代码如下:
 1    case APP_ATTEMPT_ADDED:
 2     {
 3       AppAttemptAddedSchedulerEvent appAttemptAddedEvent =
 4           (AppAttemptAddedSchedulerEvent) event;
 5       addApplicationAttempt(appAttemptAddedEvent.getApplicationAttemptId(),
 6         appAttemptAddedEvent.getTransferStateFromPreviousAttempt());
 7     }
 8     break;
 9
10 //--------------------------------------------------
11     private synchronized void addApplicationAttempt(
12       ApplicationAttemptId applicationAttemptId,
13       boolean transferStateFromPreviousAttempt) {
14     SchedulerApplication application =
15         applications.get(applicationAttemptId.getApplicationId());
16     CSQueue queue = (CSQueue) application.getQueue();
17
18     FiCaSchedulerApp attempt =
19         new FiCaSchedulerApp(applicationAttemptId, application.getUser(),
20           queue, queue.getActiveUsersManager(), rmContext);
21     if (transferStateFromPreviousAttempt) {
22       attempt.transferStateFromPreviousAttempt(application
23         .getCurrentAppAttempt());
24     }
25     application.setCurrentAppAttempt(attempt);
26
27     queue.submitApplicationAttempt(attempt, application.getUser());
28     LOG.info("Added Application Attempt " + applicationAttemptId
29         + " to scheduler from user " + application.getUser() + " in queue "
30         + queue.getQueueName());
31     //这里重新触发RMAppAttemptImpl的状态机,RMAppAttemptState从SUBMITTED变为SCHEDULED
32     rmContext.getDispatcher().getEventHandler() .handle(
33         new RMAppAttemptEvent(applicationAttemptId,
34           RMAppAttemptEventType.ATTEMPT_ADDED));
35   }
3)重新回到RMAppAttemptImpl类中,分析状态机是如何处理事件类型为ATTEMPT_ADDED的,代码如下:
 1 // Transitions from SUBMITTED state
 2       .addTransition(RMAppAttemptState.SUBMITTED,
 3           EnumSet.of(RMAppAttemptState.LAUNCHED_UNMANAGED_SAVING,
 4                      RMAppAttemptState.SCHEDULED),
 5           RMAppAttemptEventType.ATTEMPT_ADDED,
 6           new ScheduleTransition())
 7     //---------------------------------------------------
 8
 9     private static final class ScheduleTransition
10       implements
11       MultipleArcTransition<RMAppAttemptImpl, RMAppAttemptEvent, RMAppAttemptState> {
12     @Override
13     public RMAppAttemptState transition(RMAppAttemptImpl appAttempt,
14         RMAppAttemptEvent event) {
15         //没有对应的ApplicationMater
16       if (!appAttempt.submissionContext.getUnmanagedAM()) {
17         // Request a container for the AM.
18         //申请一个container,容器大小由我们设定
19         ResourceRequest request =
20             BuilderUtils.newResourceRequest(
21                 AM_CONTAINER_PRIORITY, ResourceRequest.ANY, appAttempt
22                     .getSubmissionContext().getResource(), 1);
23
24         // SchedulerUtils.validateResourceRequests is not necessary because
25         // AM resource has been checked when submission
26         //根据心跳信息找到有资源的节点,分配一个container作为AM,后面代码的逻辑比较清楚了
27         Allocation amContainerAllocation = appAttempt.scheduler.allocate(
28             appAttempt.applicationAttemptId,
29             Collections.singletonList(request), EMPTY_CONTAINER_RELEASE_LIST, null, null);
30         if (amContainerAllocation != null
31             && amContainerAllocation.getContainers() != null) {
32           assert (amContainerAllocation.getContainers().size() == 0);
33         }
34         return RMAppAttemptState.SCHEDULED;
35       } else {
36         // save state and then go to LAUNCHED state
37         appAttempt.storeAttempt();
38         return RMAppAttemptState.LAUNCHED_UNMANAGED_SAVING;
39       }
40     }
41   }
Ref:
【1】https://www.iteye.com/blog/humingminghz-2326608

 浙公网安备 33010602011771号