

Unity 自己使用顶点描绘圆形UI图片
2020-09-10
在游戏的UI中,圆形图片的需求是很高的,但是,在Unity中想要实现圆形UI,一般的做法是是使用圆形Mask(遮罩),但是使用Mask的缺点很明显,主要有三点:
1.比较麻烦,使游戏对象管理变得更复杂
2.效果不佳(质量难以把控),比如说有锯齿
3.性能问题
那么来实现自己的圆形UI效果是很重要的
效果:


步骤:
在Canvas上创建一个空物体

新建脚本 CircleImage.cs 将CircleImage类继承Image类
然后接下来则是具体的思路:
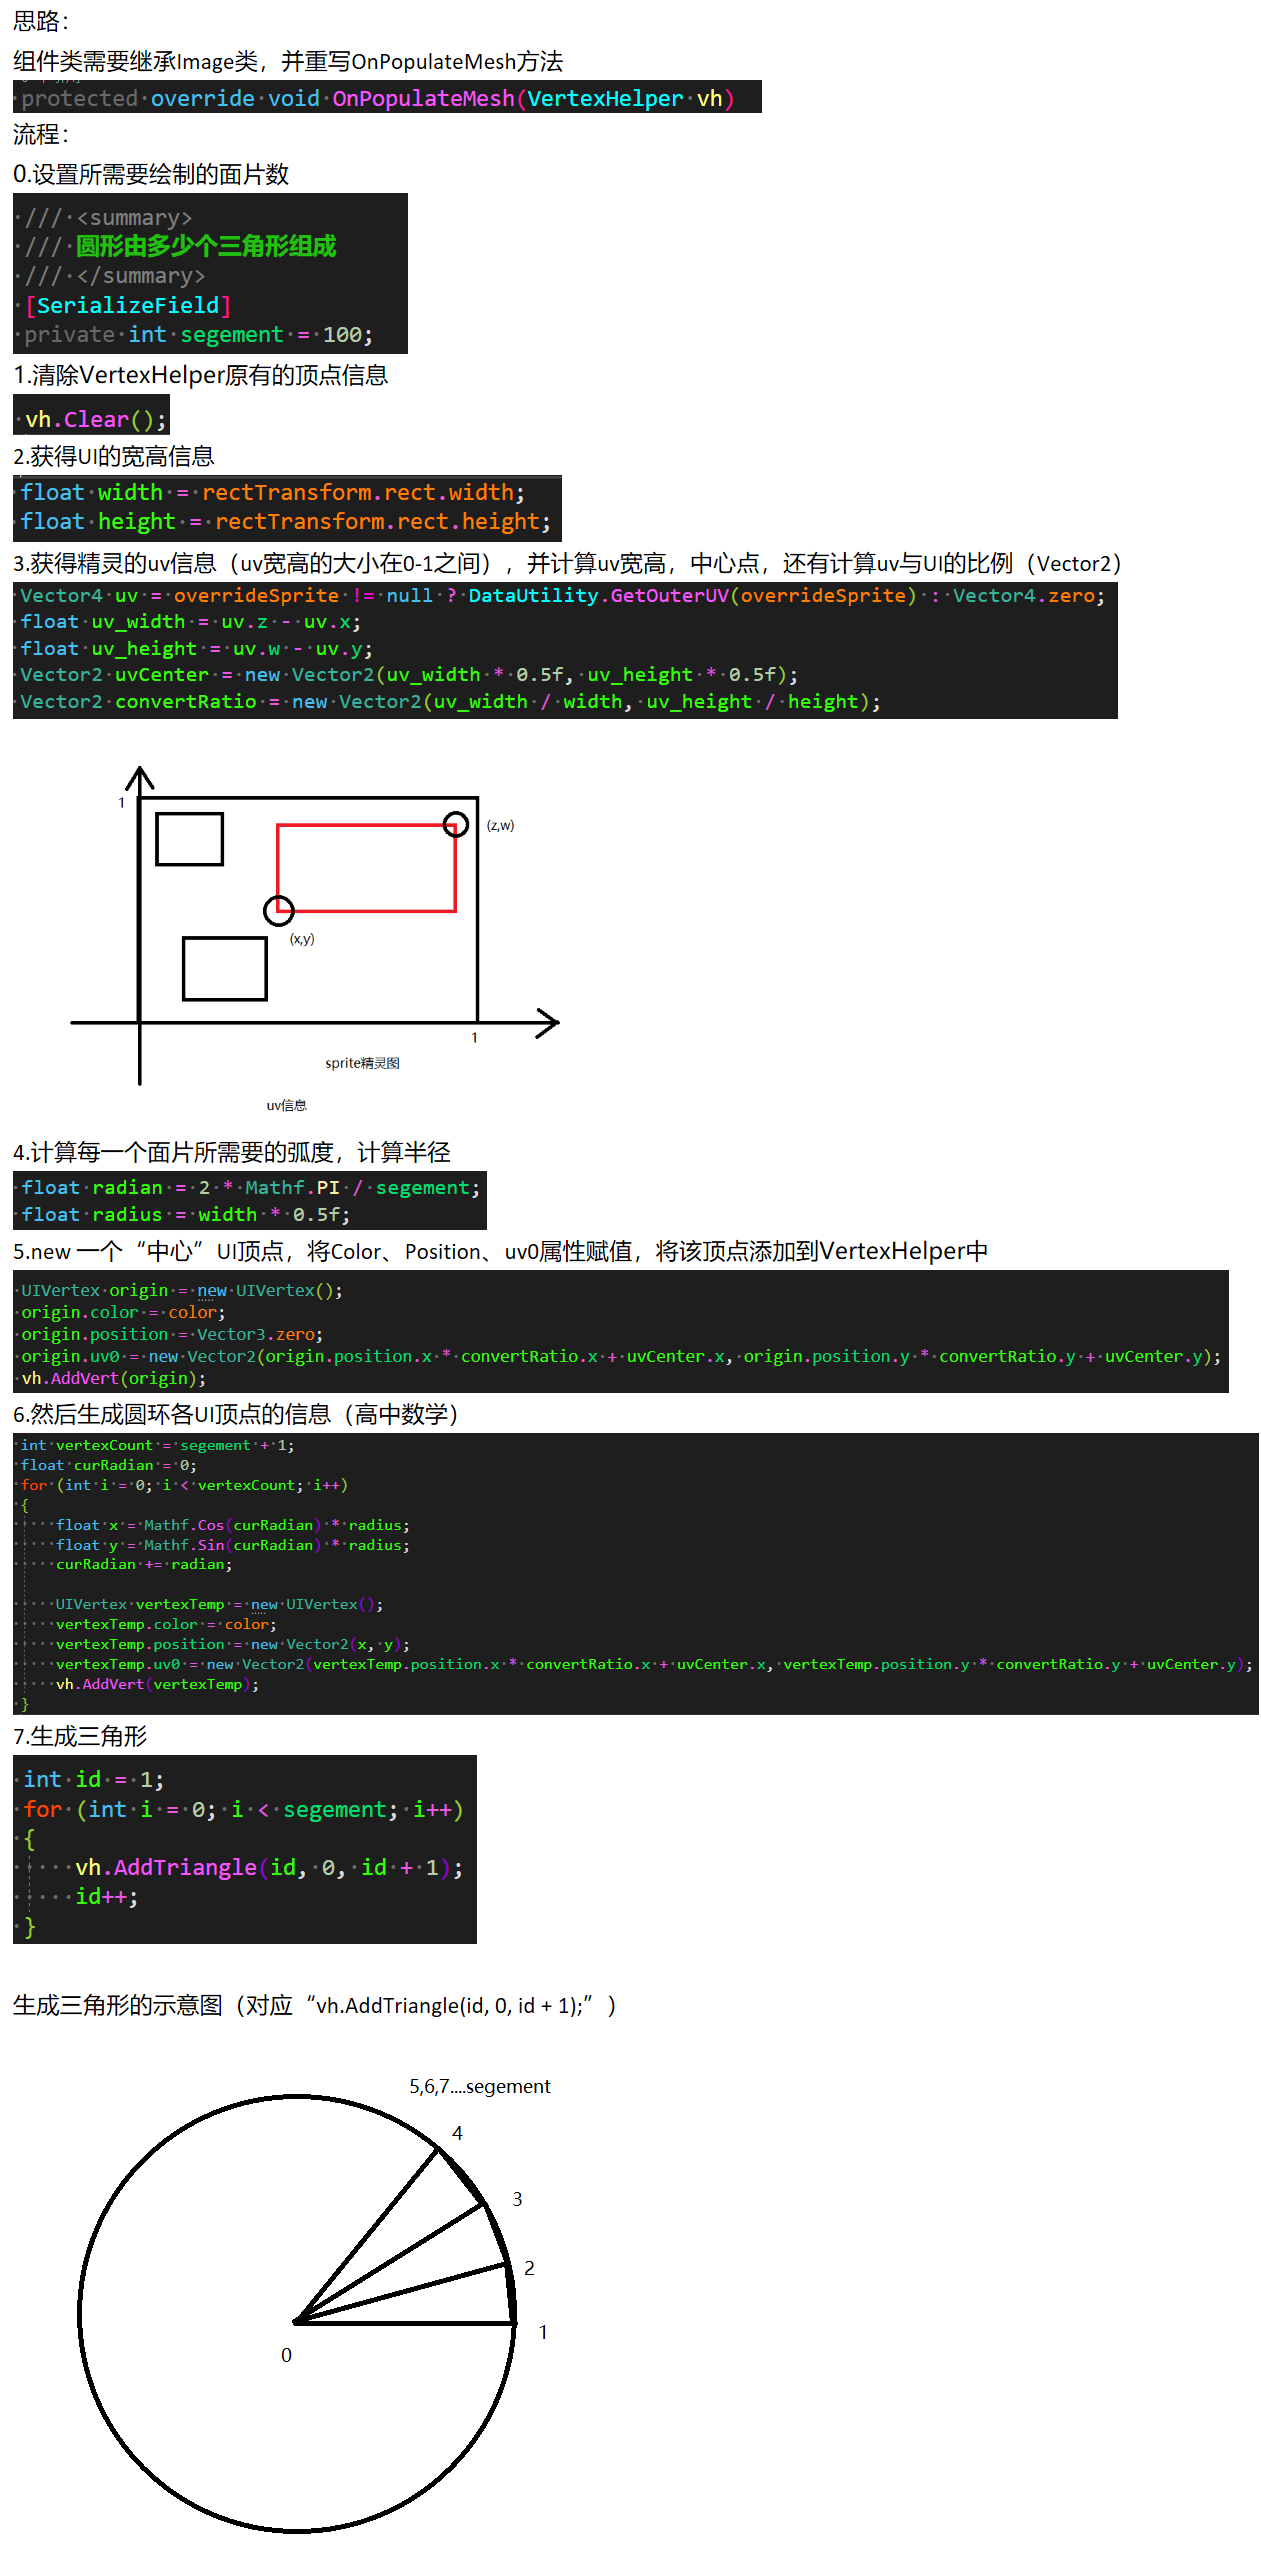
完成!将组件添加到空对象上,并添加想要看的精灵图片,效果如开头所示。
完整脚本CircleImage.cs(代替Image):
 1 using UnityEngine;
 2 using UnityEngine.Sprites;
 3 using UnityEngine.UI;
 4
 5 public class CircleImage : Image
 6 {
 7     /// <summary>
 8     /// 圆形由多少个三角形组成
 9     /// </summary>
10     private int segement = 100;
11
12     protected override void OnPopulateMesh(VertexHelper vh)
13     {
14         vh.Clear();
15
16         float width = rectTransform.rect.width;
17         float height = rectTransform.rect.height;
18
19         Vector4 uv = overrideSprite != null ? DataUtility.GetOuterUV(overrideSprite) : Vector4.zero;
20         float uv_width = uv.z - uv.x;
21         float uv_height = uv.w - uv.y;
22         Vector2 uvCenter = new Vector2(uv_width * 0.5f, uv_height * 0.5f);
23         Vector2 convertRatio = new Vector2(uv_width / width, uv_height / height);
24
25         float radian = 2 * Mathf.PI / segement;
26         float radius = width * 0.5f;
27
28         UIVertex origin = new UIVertex();
29         origin.color = color;
30         origin.position = Vector3.zero;
31         origin.uv0 = new Vector2(origin.position.x * convertRatio.x + uvCenter.x, origin.position.y * convertRatio.y + uvCenter.y);
32         vh.AddVert(origin);
33
34         int vertexCount = segement + 1;
35         float curRadian = 0;
36         for (int i = 0; i < vertexCount; i++)
37         {
38             float x = Mathf.Cos(curRadian) * radius;
39             float y = Mathf.Sin(curRadian) * radius;
40             curRadian += radian;
41
42             UIVertex vertexTemp = new UIVertex();
43             vertexTemp.color = color;
44             vertexTemp.position = new Vector2(x, y);
45             vertexTemp.uv0 = new Vector2(vertexTemp.position.x * convertRatio.x + uvCenter.x, vertexTemp.position.y * convertRatio.y + uvCenter.y);
46             vh.AddVert(vertexTemp);
47         }
48
49         int id = 1;
50         for (int i = 0; i < segement; i++)
51         {
52             vh.AddTriangle(id, 0, id + 1);
53             id++;
54         }
55     }
56 }

 浙公网安备 33010602011771号