基于 WebSocket 的 MQTT
视频说明:https://www.bilibili.com/video/BV1qf4y1n7js/?p=4
一般情况下客户端使用TCP方式连接服务端,现在想使用浏览器作为客户端连接服务端,需要使用WebSocket方式。
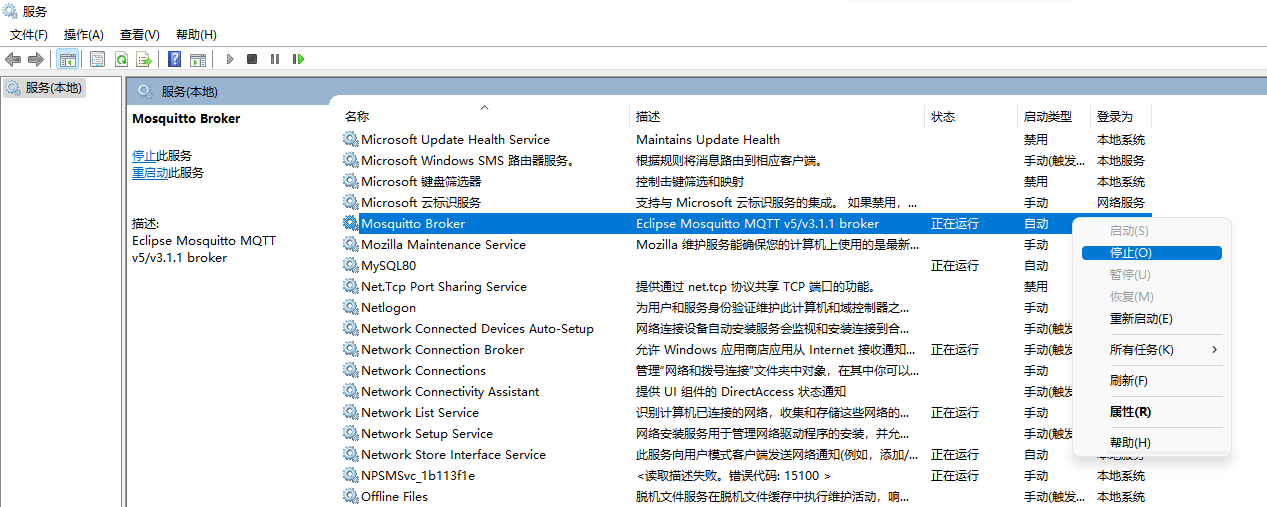
Windows 上 Mosquitto 设置支持WebSocket
先暂停Mosquitto服务:【服务】 -> 【Mosquitto Broker】停止
配置文件位置:"C:\Program Files\Mosquitto\mosquitto.conf"
配置语句
bind_address 0.0.0.0

listener 8083
protocol websockets

allow_anonymous true
配置语句说明
🟣
bind_address 0.0.0.0:表示允许任意网址访问,(如果设置成 127.0.0.1,则表示只允许本机访问,修改了 listener 后需要配置)🟠
listener 8083:表示监听 8083 端口,(只写 listener,protocol 则默认是mqtt,mqtt协议没有建议websocket的端口,emq建议8083,好多人使用9001)
🟠protocol websockets:表示开放WebSocket协议连接,(listener 和 protocol 是成对出现的,只有 protocol 会报错)🟡
allow_anonymous true:表示允许匿名访问,(windwos上,默认不配置任何listener,是true,配置了listener默认是false,所以要设置成true)修改
mosquitto.conf配置文件,会提示不允许修改,可以先复制出来,修改后再粘贴替换原文件。
CentOS7上 Mosquitto 设置支持WebSocket
修改配置文件 /etc/mosquitto/mosquitto.conf
bind_address 0.0.0.0

listener 8083
protocol websockets
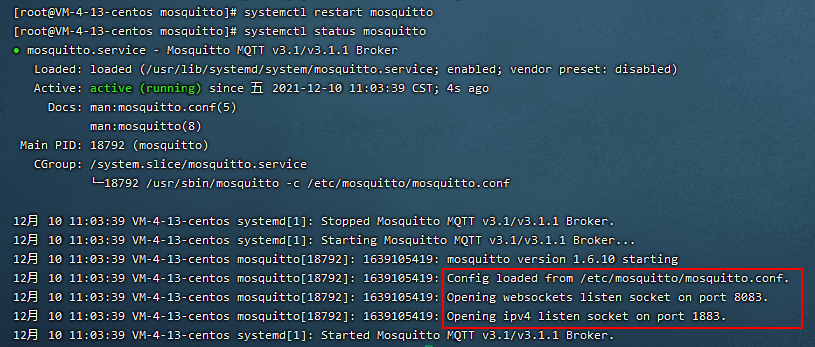
重启 Moqquitto
systemctl restart mosquitto
查看 Moqquitto 状态
systemctl status mosquitto
防火墙开放相关端口:1883、8083
Mosquitto 配置:ubuntu
发现 mosquitto 新版本(2.0.15),安装完后不能直接匿名登录了。
添加配置
vi /etc/mosquitto/mosquitto.conf
添加配置,
💦 默认不允许匿名登录
💦 原来默认的 1883 端口还要手动添加
allow_anonymous true

listener 1883
protocol mqtt

listener 9001
protocol websockets
# Place your local configuration in /etc/mosquitto/conf.d/
#
# A full description of the configuration file is at
# /usr/share/doc/mosquitto/examples/mosquitto.conf.example

persistence true
persistence_location /var/lib/mosquitto/

log_dest file /var/log/mosquitto/mosquitto.log

include_dir /etc/mosquitto/conf.d

allow_anonymous true

listener 1883
protocol mqtt

listener 9001
protocol websockets
多端口机制
说明:
listener 和 protocol 是成对出现的,表示:【端口-协议】
当然可以增加多组【端口-协议】,比如
listener 8084

listener 8085
protocol websockets

listener 8086
protocol websockets

listener 8087
protocol mqtt

listener 8088
可以看到相关的提示

多端口作用
服务端(linux)配置多端口,可以实现一端是TCP连接,一端是WebSocket连接的互通,因为服务端维护的是一个订阅树。
- mosquitto:只有一个订阅树的服务端
- 开发板:TCP连接的客户端
- 浏览器:WebSocket连接的客户端
多端口可以配置不同策略,以应对不同场景,例如:
- 让端口A使用mqtt并且不启用tls,
- 让端口B使用mqtt协议并且启用tls,
- 让端口C使用websocket协议并且不启用tls,
- 让端口D使用websocket并且启用tls等等
当然也可以不配置它们(mosquitto使用默认参数,例如默认的协议为mqtt,默认不开启tls等)。
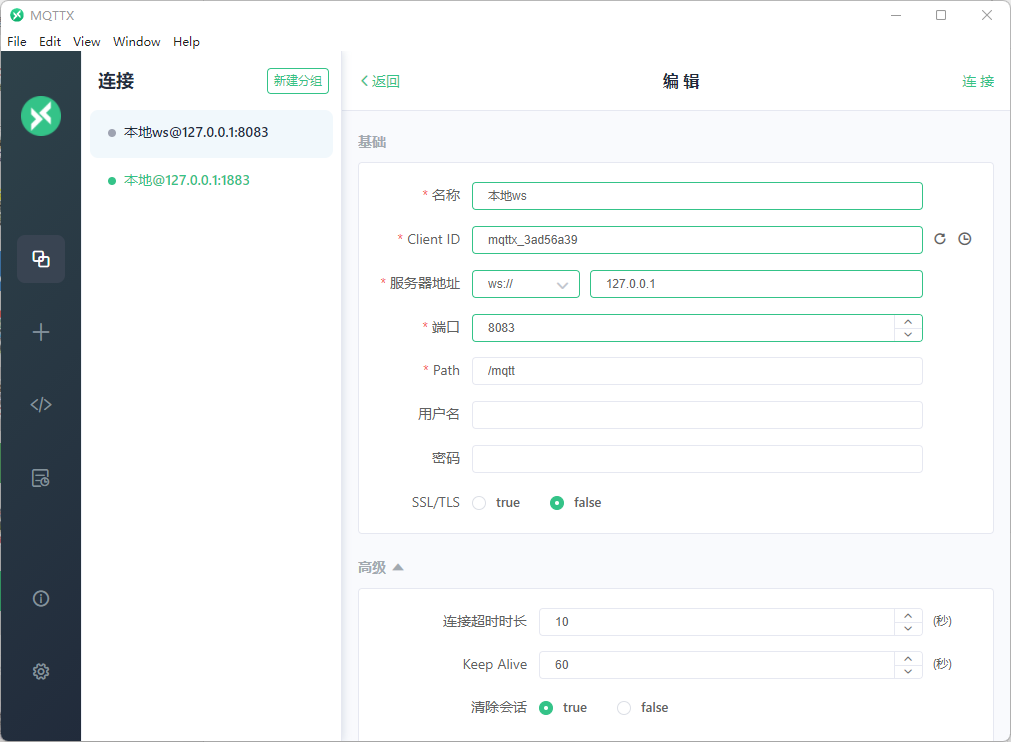
客户端连接:使用测试工具
MQTTX

在线网页工具
MQTT WebSocket Toolkit
http://tools.emqx.io/
MQTT Websocket Client
http://mqtt.p2hp.com/websocket/
http://www.hivemq.com/demos/websocket-client/

客户端连接:使用 Java Paho
修改一行代码
options.setServerURIs(new String[]{"ws://127.0.0.1:8083/mqtt"});
客户端连接:使用 mqtt.js
https://github.com/mqttjs/MQTT.js
<!DOCTYPE html>
<html lang="en">
<head>
    <meta charset="UTF-8">
    <title>MQTT over WebSocket</title>
    <script src="https://cdn.bootcdn.net/ajax/libs/mqtt/4.2.8/mqtt.js"></script>
</head>

<body>

<div>
    发送的内容:
    <input id="send" type="text" style="width: 300px;height: 30px">
    <button id="sendButton">发送</button>
</div>

<div>
    收到的内容:
    <input id="receive" type="text" style="width: 300px;height: 30px">
</div>

<script type="module">

    const clientId = 'mqttjs_' + Math.random().toString(16).substr(2, 8)

    const host = 'ws://127.0.0.1:8083/mqtt'
    // const host = 'ws://broker.emqx.io:8083/mqtt'

    const options = {
        keepalive: 60,
        clientId: clientId,
        protocolId: 'MQTT',
        protocolVersion: 4,
        clean: true,
        reconnectPeriod: 1000,
        connectTimeout: 30 * 1000,
        // will: {
        //     topic: 'collector',
        //     payload: '异常断开!',
        //     qos: 0,
        //     retain: false
        // },
    }

    const client = mqtt.connect(host, options)

    client.on('connect', () => {
        console.log('连接状态:' + client.connected)
    })

    client.on('error', (err) => {
        console.log('连接错误: ', err)
        client.end()
    })

    client.on('reconnect', () => {
        console.log('重连中...')
    })

    // 当窗口关闭时,主动去关闭连接
    window.onbeforeunload = () => {
        client.end();
        return("ok");
    }

    // 订阅消息:订阅一个名为 collector QoS 为 0 的 主题
    client.subscribe('collector', {qos: 0}, function (error, granted) {
        if (error) {
            console.log(error)
        } else {
            console.log(`已订阅主题: ${granted[0].topic}`)
        }
    })

    // 收到消息
    client.on('message', function (topic, payload, packet) {
        // Payload is Buffer
        console.log(`主题: ${topic}, 消息: ${payload.toString()}, QoS: ${packet.qos}`)
        document.getElementById('receive').value = `主题: ${topic}, 消息: ${payload.toString()}, QoS: ${packet.qos}`;
    })


    // 发布消息
    let sendButton = window.document.getElementById("sendButton");
    sendButton.addEventListener("click", () => {
        let message = document.getElementById('send').value;
        client.publish('collector', message, {qos: 1, retain: false, dup: true});
    })

</script>
</body>
</html>
效果
TLS
TLS(Transport Layer Security,安全传输层),TLS是建立在传输层TCP协议之上的协议,服务于应用层。
解决消息传递过程的安全问题:http,mqtt,传输过程中都是明文,IP访问好像没问题,域名访问会出现伪造域名IP的问题(就是DNS返回错误的IP地址)
数字证书原理没有弄懂,说操作吧
把域名解析到服务器IP地址
在腾讯云上给一个域名申请SSL证书,然后把Apache证书文件放到/etc/mosquitto/certs/文件夹下
测试配置,mosquitto.conf
bind_address 0.0.0.0

listener 8883
protocol mqtt
cafile /etc/mosquitto/certs/root_bundle.crt
certfile /etc/mosquitto/certs/200180.xyz.crt
keyfile /etc/mosquitto/certs/200180.xyz.key
tls_version tlsv1.2

listener 9001
protocol websockets

listener 9883
protocol websockets
cafile /etc/mosquitto/certs/root_bundle.crt
certfile /etc/mosquitto/certs/200180.xyz.crt
keyfile /etc/mosquitto/certs/200180.xyz.key
tls_version tlsv1.2
服务器上开放相应防火墙端口
说明:ws的域名访问连不上
💦 域名:200180.xyz
💦 TCP 端口: 1883
💦 TCP + TLS 端口: 8883
💦 WebSocket 端口:9001
💦 WebSocket + tls 端口:9883
客户端连接时,
ws:// 改成 wss://,
tcp:// 改成 ssl://(Paho)
效果
实现过程
将 MQTT 通过 WebSockets 与 Mosquitto 结合使用
这文章莫名其妙,没看明白
知道了可以使用 MQTT.js 去连接
CentOS 7.4 搭建mosquitto服务器并配置tls/ssl websocket
原来使用 WebSocket 连接可以这样配置
这个比较有启发,原来是使用多端口机制,listener 和 protocol 要成对配置
配置wss参考

 浙公网安备 33010602011771号