
本文介绍SpringBoot对Spring MVC自动配置,SpringBoot自动配置原理可以参考:【SpringBoot】SpringBoot配置与单元测试(二)
首先新建一个SpringBoot的web项目,参考:【SpringBoot】SpringBoot快速入门(一)
本例pom文件如下:


 1 <?xml version="1.0" encoding="UTF-8"?>
 2 <project xmlns="http://maven.apache.org/POM/4.0.0"
 3          xmlns:xsi="http://www.w3.org/2001/XMLSchema-instance"
 4          xsi:schemaLocation="http://maven.apache.org/POM/4.0.0 http://maven.apache.org/xsd/maven-4.0.0.xsd">
 5     <modelVersion>4.0.0</modelVersion>
 6
 7     <groupId>com.test</groupId>
 8     <artifactId>test-springboot-web</artifactId>
 9     <version>1.0-SNAPSHOT</version>
10
11
12     <parent>
13         <groupId>org.springframework.boot</groupId>
14         <artifactId>spring-boot-starter-parent</artifactId>
15         <version>2.1.8.RELEASE</version>
16     </parent>
17
18     <properties>
19
20         <project.build.sourceEncoding>UTF-8</project.build.sourceEncoding>
21         <project.reporting.outputEncoding>UTF-8</project.reporting.outputEncoding>
22         <java.version>1.8</java.version>
23     </properties>
24
25     <dependencies>
26         <dependency>
27             <groupId>org.springframework.boot</groupId>
28             <artifactId>spring-boot-starter-web</artifactId>
29         </dependency>
30
31         <!--引入jquery-webjar-->
32         <dependency>
33             <groupId>org.webjars</groupId>
34             <artifactId>jquery</artifactId>
35             <version>3.3.1</version>
36         </dependency>
37
38         <dependency>
39             <groupId>org.springframework.boot</groupId>
40             <artifactId>spring-boot-starter-test</artifactId>
41             <scope>test</scope>
42         </dependency>
43
44     </dependencies>
45
46
47     <!-- SpringBoot打包插件,可以将代码打包成一个可执行的jar包 -->
48     <build>
49         <plugins>
50             <plugin>
51                 <groupId>org.springframework.boot</groupId>
52                 <artifactId>spring-boot-maven-plugin</artifactId>
53             </plugin>
54         </plugins>
55     </build>
56 </project>
SpringMVC自动配置
自动配置在Spring的默认值之上添加了以下功能:
- 包含
ContentNegotiatingViewResolver和BeanNameViewResolver。 - 支持服务静态资源,包括对WebJars的支持。
- 自动注册
Converter,GenericConverter和Formatter豆类。 - 支持
HttpMessageConverters。 - 自动注册
MessageCodesResolver。 - 静态
index.html支持。 - 定制
Favicon支持。 - 自动使用
ConfigurableWebBindingInitializerbean。
如果想保留Spring Boot MVC功能,并且想要添加其他MVC配置(拦截器,格式化程序,视图控制器和其他功能),则可以编写一个配置类(@Configuration),并实现WebMvcConfigurer接口的类,但不能加 @EnableWebMvc。如果您希望提供,或的自定义实例RequestMappingHandlerMapping,则可以声明一个实例来提供此类组件。RequestMappingHandlerAdapter、ExceptionHandlerExceptionResolver、WebMvcRegistrationsAdapter
如果想完全控制Spring MVC,可以在配置类(@Configuration)添加上注释@EnableWebMvc。
添加MVC配置类
1、原理:
1)、WebMvcAutoConfiguration是SpringMVC的自动配置类
2)、在做其他自动配置时会导入;@Import(EnableWebMvcConfiguration.class)
3)、容器中所有的WebMvcConfigurer都会一起起作用;
4)、我们的配置类也会被调用;
2、编写一个配置类(@Configuration),实现WebMvcConfigurer接口;不能标注@EnableWebMvc;
这样既保留了所有的自动配置(WebMvcAutoConfiguration),也能用我们扩展的配置;
 1 // @EnableWebMvc // 全面接管SpringMVC,所有的WebMvc自动配置都失效,如静态资源的访问都失效
 2 @Configuration
 3 public class MyMvcConfig implements WebMvcConfigurer {
 4
 5     @Override
 6     public void addViewControllers(ViewControllerRegistry registry) {
 7         // 浏览器访问 "/success2" 重定向到 "/success"
 8         registry.addRedirectViewController("/success2", "/success");
 9         // 浏览器访问 "/success2" 转发 "/success"
10         registry.addViewController("/success3").setViewName("/success");
11     }
12 }
3、验证:效果SpringMVC的自动配置和我们的扩展配置都会起作用
重定向请求验证地址:http://localhost:8080/success
转发请求验证地址:http://localhost:8080/success
全面接管SpringMVC
1、原理
1)、查看源码WebMvcAutoConfiguration类,有条件注解,在没有WebMvcConfigurationSupport类的情况下才注入
@Configuration
@ConditionalOnWebApplication(type = Type.SERVLET)
@ConditionalOnClass({ Servlet.class, DispatcherServlet.class, WebMvcConfigurer.class })
// 条件判断:在没有WebMvcConfigurationSupport类的情况下才注入
@ConditionalOnMissingBean(WebMvcConfigurationSupport.class)
@AutoConfigureOrder(Ordered.HIGHEST_PRECEDENCE + 10)
@AutoConfigureAfter({ DispatcherServletAutoConfiguration.class, TaskExecutionAutoConfiguration.class,
        ValidationAutoConfiguration.class })
public class WebMvcAutoConfiguration {
2)、查看@EnableWebMvc注解源码,发现它导入DelegatingWebMvcConfiguration类
1 @Retention(RetentionPolicy.RUNTIME)
2 @Target(ElementType.TYPE)
3 @Documented
4 // 导入DelegatingWebMvcConfiguration类
5 @Import(DelegatingWebMvcConfiguration.class)
6 public @interface EnableWebMvc {
7 }
DelegatingWebMvcConfiguration类继承了WebMvcConfigurationSupport类
1 @Configuration
2 public class DelegatingWebMvcConfiguration extends WebMvcConfigurationSupport {
3)、@EnableWebMvc将WebMvcConfigurationSupport组件导入进来,导入的WebMvcConfigurationSupport只是SpringMVC最基本的功能,WebMvcAutoConfiguration类又是在没有WebMvcConfigurationSupport组件情况下生效,所以@EnableWebMvc能使WebMvcAutoConfiguration失效,并全面接管SpringMVC
静态资源的映射规则
SpringBoot对静态文件映射都在类中WebMvcAutoConfiguration,自动配置好了,打开WebMvcAutoConfiguration类,并分析
1、规则:/webjars/**
规则:所有 /webjars/** ,都去 classpath:/META-INF/resources/webjars/ 找资源;
webjars:以jar包的方式引入静态资源; 官网地址:http://www.webjars.org/
 1 // 添加静态资源映射
 2 @Override
 3 public void addResourceHandlers(ResourceHandlerRegistry registry) {
 4     if (!this.resourceProperties.isAddMappings()) {
 5         logger.debug("Default resource handling disabled");
 6         return;
 7     }
 8     Duration cachePeriod = this.resourceProperties.getCache().getPeriod();
 9     CacheControl cacheControl = this.resourceProperties.getCache().getCachecontrol().toHttpCacheControl();
10     if (!registry.hasMappingForPattern("/webjars/**")) {
11         // 添加映射
12         customizeResourceHandlerRegistration(registry.addResourceHandler("/webjars/**")
13                 .addResourceLocations("classpath:/META-INF/resources/webjars/")
14                 .setCachePeriod(getSeconds(cachePeriod)).setCacheControl(cacheControl));
15     }
16     String staticPathPattern = this.mvcProperties.getStaticPathPattern();
17     if (!registry.hasMappingForPattern(staticPathPattern)) {
18         customizeResourceHandlerRegistration(registry.addResourceHandler(staticPathPattern)
19                 .addResourceLocations(getResourceLocations(this.resourceProperties.getStaticLocations()))
20                 .setCachePeriod(getSeconds(cachePeriod)).setCacheControl(cacheControl));
21     }
22 }
测试:在pom文件中引入依赖
1 <!--引入jquery-webjar-->
2 <dependency>
3     <groupId>org.webjars</groupId>
4     <artifactId>jquery</artifactId>
5     <version>3.3.1</version>
6 </dependency>
可以看到jar包中有jquery.js文件
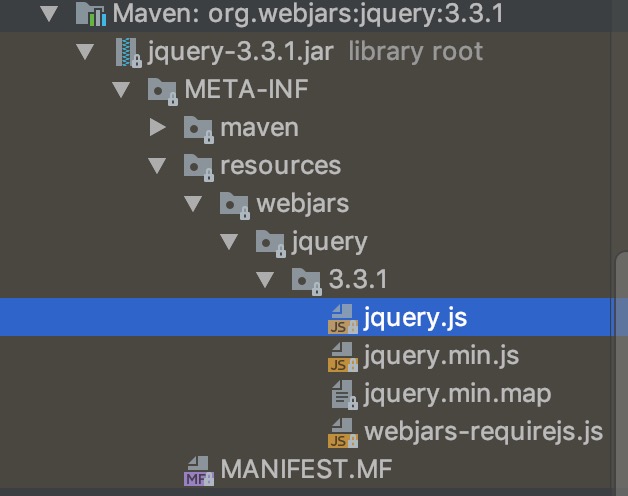
验证:重启项目,浏览器上打开地址:http://localhost:8080/webjars/jquery/3.3.1/jquery.js,即可看到能获取到js文件
2、规则:/**
"/**" 访问当前项目的任何资源,都去(静态资源的文件夹)找映射,静态资源的文件夹如下:
1 "classpath:/META-INF/resources/",
2 "classpath:/resources/",
3 "classpath:/static/",
4 "classpath:/public/"
测试:在类路径中,创建static文件夹,在其中添加一个测试页面test.html
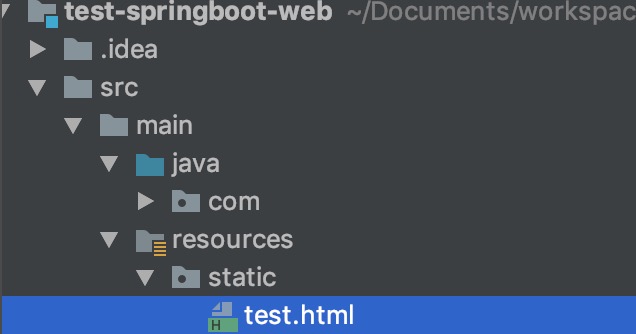
验证:重启项目,浏览器使用地址:http://localhost:8080/test.html,访问,即可看到test页面
3、规则:首页
首页映射规则代码在类中WebMvcAutoConfiguration,如下,也在静态文件夹(即规则2下的文件夹)下查找
1 // 添加首页映射
2 @Bean
3 public WelcomePageHandlerMapping welcomePageHandlerMapping(ApplicationContext applicationContext) {
4     WelcomePageHandlerMapping welcomePageHandlerMapping = new WelcomePageHandlerMapping(
5             new TemplateAvailabilityProviders(applicationContext), applicationContext, getWelcomePage(),
6             this.mvcProperties.getStaticPathPattern());
7     welcomePageHandlerMapping.setInterceptors(getInterceptors());
8     return welcomePageHandlerMapping;
9 }
测试:在类路径中的static文件夹,在其中添加一个欢迎页面index.html
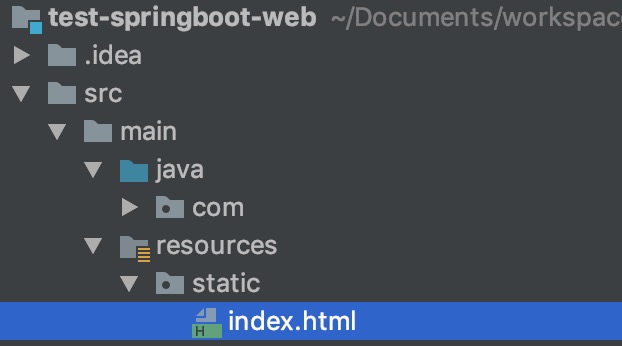
验证:重启项目,浏览器使用地址:http://localhost:8080,访问,即可看到欢迎页面
4、规则:**/favicon.ico
所有的 **/favicon.ico 都是在静态资源文件(即规则2下的文件夹)下找;
首页映射规则代码在类中WebMvcAutoConfiguration,如下
 1 // 配置站点的图标映射
 2 @Configuration
 3 @ConditionalOnProperty(value = "spring.mvc.favicon.enabled", matchIfMissing = true)
 4 public static class FaviconConfiguration implements ResourceLoaderAware {
 5
 6     private final ResourceProperties resourceProperties;
 7
 8     private ResourceLoader resourceLoader;
 9
10     public FaviconConfiguration(ResourceProperties resourceProperties) {
11         this.resourceProperties = resourceProperties;
12     }
13
14     @Override
15     public void setResourceLoader(ResourceLoader resourceLoader) {
16         this.resourceLoader = resourceLoader;
17     }
18
19     @Bean
20     public SimpleUrlHandlerMapping faviconHandlerMapping() {
21         SimpleUrlHandlerMapping mapping = new SimpleUrlHandlerMapping();
22         mapping.setOrder(Ordered.HIGHEST_PRECEDENCE + 1);
23         mapping.setUrlMap(Collections.singletonMap("**/favicon.ico", faviconRequestHandler()));
24         return mapping;
25     }
26
27     @Bean
28     public ResourceHttpRequestHandler faviconRequestHandler() {
29         ResourceHttpRequestHandler requestHandler = new ResourceHttpRequestHandler();
30         requestHandler.setLocations(resolveFaviconLocations());
31         return requestHandler;
32     }
33
34     private List<Resource> resolveFaviconLocations() {
35         String[] staticLocations = getResourceLocations(this.resourceProperties.getStaticLocations());
36         List<Resource> locations = new ArrayList<>(staticLocations.length + 1);
37         Arrays.stream(staticLocations).map(this.resourceLoader::getResource).forEach(locations::add);
38         locations.add(new ClassPathResource("/"));
39         return Collections.unmodifiableList(locations);
40     }
41
42 }
测试:在类路径中的static文件夹,在其中添加一个favicon.ico图标
验证:重启项目,浏览器使用地址:http://localhost:8080,访问,即可看到浏览器标题上的站点图标已改变


 浙公网安备 33010602011771号