使用openresty替换线上nginx网关之openresty安装细节
背景
线上跑了多年的一个网关业务,随着部门的拆分,逐渐有了一个痛点。该网关业务主要处理app端请求,app端发起的请求,采用http协议,post方法,content-type采用application/x-www-form-urlencoded,表单中有一个固定的字段,叫功能号,即funcNo=1000100这样,然后表单中其他业务字段就根据funcNo的不同而各有不同。
后端有一个接入层nginx,nginx将请求转给一个网关服务进行处理,网关会解析出funcNo字段。我们的funcNo字段也是有讲究的,前4位(1000)是系统编码,后面3位(100)是接口编号。网关就根据系统编码转发给不同的系统进行处理。
网关采用的技术是早起的servlet容器,容器叫resin,我之前也没有接触过,总之就是类似于tomcat,不过轻量一些。
说起来,这个网关的职责和现在流行的接入层网关,比如现在的spring cloud gateway等,职责也差不太多。只是早期都是配置文件那种,把后端的各个系统全都先配置好;而不像现在的网关,会采用动态配置。
现在有啥问题呢?每次新上一个服务,都需要在这个服务中配置新服务的系统编码、新服务的后端ip+端口等,当然了,具体细节更加复杂,它还需要配置新服务中的各个接口编号,以及各个接口需要使用哪些filter等。
总之,这个服务的代码架构还是稳定的,但是配置经常需要变更。
以前,这个服务归技术部管,后来部门拆分了,多出一个部门B,这个服务还归技术部管;但是部门B新上服务的话,就要来找技术部对这个服务加配置,变更上线。
我们就想着,让部门B能自己上线是最好,免得总来找我们,因此,想到的办法就是,将这个网关服务再部署一套给部门B用,然后前端nginx替换为openresty,openresty根据请求中的funcNo,判断系统编码属于哪个部门,然后就把请求转发到对应的网关服务。
大体思路
1、首先,将网关服务做成无状态的,目前的网关,还使用了servlet session技术,是有状态的,这一步目前已经做了修改,把使用servlet session的代码,换成了jwt,有待测试环境验证,这个本篇先不讲;
2、其次,开发环境模拟安装openresty,届时,使用openresty替换nginx。openresty相当于增强版本的nginx,可以写lua代码,解析请求中的funcNo字段,然后决定分发到哪个部门的网关服务。
本篇文章,主要是聚焦于第二个事情,即如何用openresty完美替换线上的nginx,说起来简单,实则复杂,因为线上nginx运行多年,很多配置项,我们openresty届时必须把线上nginx的配置也迁移过来才行,而且要保证功能都正常,不能说之前在nginx处理得好好的,到了openresty就不行了。
一、安装openresty
官网推荐的安装方式,为什么不适用
我们首先要解决的是,线上服务器,怎么安装openresty的问题。
一般来说,官网都是让你用yum这类包管理器安装,如下:
https://openresty.org/en/installation.html提到其提供了预编译好的版本,yum安装即可:
OpenResty® provides official pre-built packages for some of the common Linux distributions (Ubuntu, Debian, CentOS, RHEL, Fedora, OpenSUSE, Alpine, and Amazon Linux).
但是,由于线上服务器都是没有外网的,你想yum安装是不行的(要么就是yum中的版本太老了),所以,基本是采用rpm安装。
rpm方式安装,为什么不适用
rpm安装的话,那么,如何获取一个rpm包呢?
我们在开发环境机器上,可以利用yum来获取rpm包。
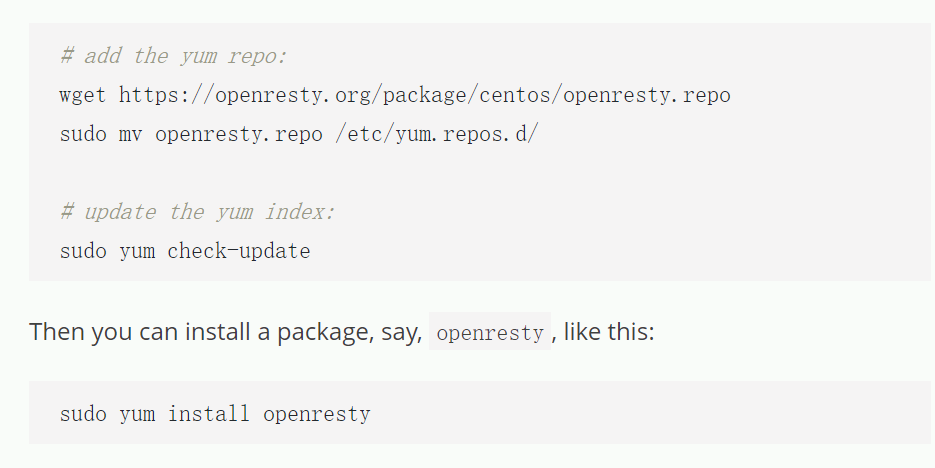
先设置repo仓库:
wget https://openresty.org/package/centos/openresty.repo
sudo mv openresty.repo /etc/yum.repos.d/

# update the yum index:
sudo yum check-update
然后,我们不执行yum install openresty,而是执行如下命令,将rpm包下载到指定目录:
yum install --downloadonly --downloaddir=/root/mypackage/ openresty
下载的结果如下:
[root@server172 openresty-1.21.4.1]# ls /root/mypackage/*.rpm
/root/mypackage/openresty-1.21.4.1-1.el7.x86_64.rpm
/root/mypackage/openresty-pcre-8.45-1.el7.x86_64.rpm
/root/mypackage/openresty-openssl111-1.1.1s-1.el7.x86_64.rpm
/root/mypackage/openresty-zlib-1.2.13-1.el7.x86_64.rpm
下载了rpm后,进行rpm安装:
cd /root/mypackage
rpm -ivh openresty-*
默认安装目录即在/usr/local/openresty下:
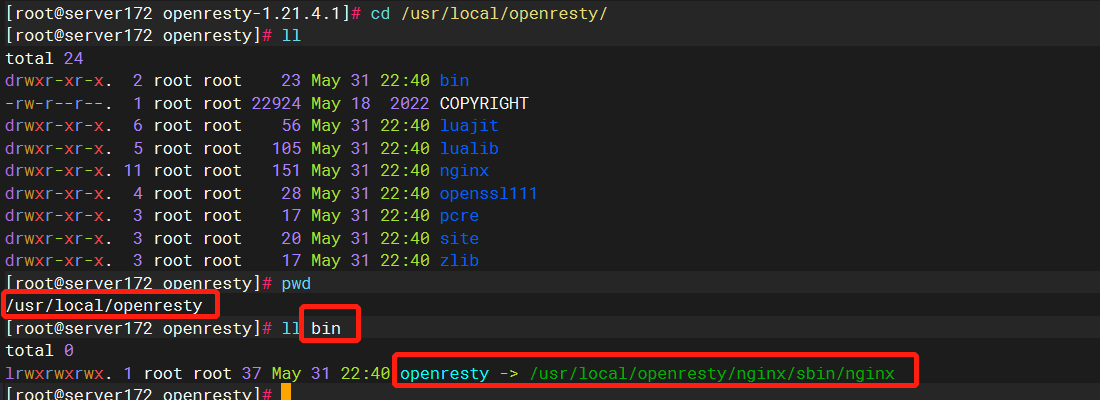
可以看到,其中在bin目录下创建了一个链接文件openresty,链接到openresty下的nginx可执行文件,这里也可以看出,openresty是基于nginx的增强。
我们执行下openresty -V,查看这种安装方式下的编译选项:
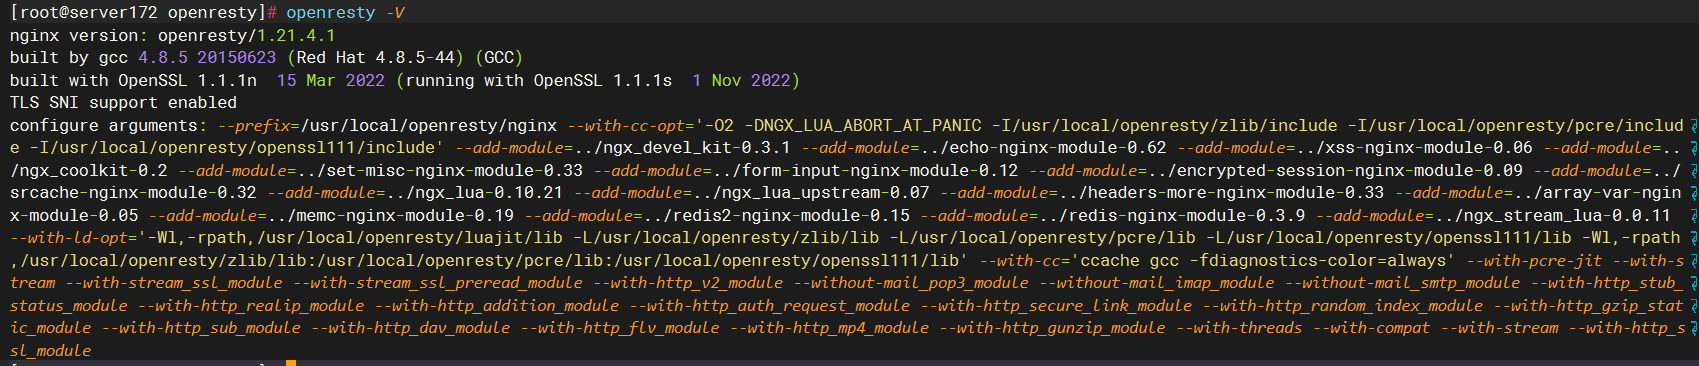
格式化之后,如下:
[root@server172 openresty]# openresty -V
nginx version: openresty/1.21.4.1
built by gcc 4.8.5 20150623 (Red Hat 4.8.5-44) (GCC)
built with OpenSSL 1.1.1n  15 Mar 2022 (running with OpenSSL 1.1.1s  1 Nov 2022)
TLS SNI support enabled
configure arguments: --prefix=/usr/local/openresty/nginx
 --with-cc-opt='-O2 -DNGX_LUA_ABORT_AT_PANIC -I/usr/local/openresty/zlib/include -I/usr/local/openresty/pcre/include
 -I/usr/local/openresty/openssl111/include'
 --add-module=../ngx_devel_kit-0.3.1
 --add-module=../echo-nginx-module-0.62
 --add-module=../xss-nginx-module-0.06
 --add-module=../ngx_coolkit-0.2
 --add-module=../set-misc-nginx-module-0.33
 --add-module=../form-input-nginx-module-0.12
 --add-module=../encrypted-session-nginx-module-0.09
 --add-module=../srcache-nginx-module-0.32
 --add-module=../ngx_lua-0.10.21
 --add-module=../ngx_lua_upstream-0.07
 --add-module=../headers-more-nginx-module-0.33
 --add-module=../array-var-nginx-module-0.05
 --add-module=../memc-nginx-module-0.19
 --add-module=../redis2-nginx-module-0.15
 --add-module=../redis-nginx-module-0.3.9
 --add-module=../ngx_stream_lua-0.0.11
 --with-ld-opt='-Wl,-rpath,/usr/local/openresty/luajit/lib
 -L/usr/local/openresty/zlib/lib -L/usr/local/openresty/pcre/lib
 -L/usr/local/openresty/openssl111/lib -Wl,-rpath,/usr/local/openresty/zlib/lib:/usr/local/openresty/pcre/lib:/usr/local/openresty/openssl111/lib'
 --with-cc='ccache gcc -fdiagnostics-color=always'
 --with-pcre-jit
 --with-stream
 --with-stream_ssl_module
 --with-stream_ssl_preread_module
 --with-http_v2_module
 --without-mail_pop3_module
 --without-mail_imap_module
 --without-mail_smtp_module
 --with-http_stub_status_module
 --with-http_realip_module
 --with-http_addition_module
 --with-http_auth_request_module
 --with-http_secure_link_module
 --with-http_random_index_module
 --with-http_gzip_static_module
 --with-http_sub_module
 --with-http_dav_module
 --with-http_flv_module
 --with-http_mp4_module
 --with-http_gunzip_module
 --with-threads
 --with-compat
 --with-stream
 --with-http_ssl_module
但是,我们还是不能用rpm方式安装,因为,因为目前在跑的nginx,我支持是支持ipv6的,而上面rpm安装的这个openresty,没看到ipv6的选项啊。这种安装方式,好像也没办法再去增加对其他模块的支持,如ipv6.
那只能利用源码方式来安装了。
源码方式安装--获取线上configure选项
要编译,得拿到编译选项,等到运维同事有空后,终于拿到了线上nginx的配置:
线上一共两台nginx机器,在第一台执行nginx -V查看配置:
nginx version: nginx/1.16.1
built by gcc 4.8.5 20150623 (Red Hat 4.8.5-11) (GCC)
built with OpenSSL 1.1.1d  10 Sep 2019
TLS SNI support enabled
configure arguments: --prefix=/opt/software/nginx --with-http_stub_status_module --with-stream --with-http_ssl_module --with-http_realip_module --with-ipv6 --add-module=./nginx-http-concat-master --with-openssl=/opt/software/openssl-1.1.1d --with-pcre=/opt/software/pcre-8.10
第二台执行后,查看配置:
nginx version: nginx/1.12.1
built by gcc 4.8.5 20150623 (Red Hat 4.8.5-11) (GCC)
built with OpenSSL 1.0.2k  26 Jan 2017
TLS SNI support enabled
configure arguments: --prefix=/opt/software/nginx --with-http_stub_status_module --with-stream --with-http_ssl_module --with-http_realip_module --add-module=./nginx-http-concat-master --with-openssl=/opt/software/openssl-1.0.2k --with-pcre=/opt/install/pcre-8.10
两台的差别,主要是:
-
nginx版本不一致
-
--with-openssl中ssl路径不同
-
第一台多了--with-ipv6选项
ok,编译选项拿到了,接下来,就开始准备源码编译。
源码方式安装--源码准备
先下载openresty源码包(自己在官网看文档找):
wget https://openresty.org/download/openresty-1.21.4.1.tar.gz

tar -xvf openresty-1.21.4.1.tar.gz

cd openresty-1.21.4.1/
另外,由于线上nginx的如下编译选项还依赖了openssl、pcre、nginx-http-concat-maste等,而当时也没注意要运维同事帮我们把这些线上目录拿下来,所以,我们还要在网上找下这些模块的源码。
--add-module=./nginx-http-concat-master --with-openssl=/opt/software/openssl-1.0.2k --with-pcre=/opt/install/pcre-8.10
添加的第三方模块源码:
openssl:
wget --no-check-certificate https://www.openssl.org/source/openssl-1.1.1d.tar.gz
tar -zxvf openssl-1.1.1d.tar.gz
解压后存放到:
/root/mypackage/openresty-source/openssl-1.1.1d
pcre:
wget https://sourceforge.net/projects/pcre/files/pcre/8.10/pcre-8.10.tar.gz/download --no-check-certificate
tar -zxvf pcre-8.10.tar.gz
解压后存放到:
/root/mypackage/openresty-source/pcre-8.10
nginx-http-concat:
https://github.com/alibaba/nginx-http-concat
/root/mypackage/openresty-source/nginx-http-concat-master
解压后存放到:
/root/mypackage/openresty-source/nginx-http-concat-master
准备好上面的依赖模块后,编辑好下面的命令:
./configure --with-http_stub_status_module --with-stream --with-http_ssl_module --with-http_realip_module --with-ipv6 --with-openssl=/root/mypackage/openresty-source/openssl-1.1.1d --with-pcre=/opt/software/pcre-8.10 --add-module=/root/mypackage/openresty-source/nginx-http-concat-master
configure完成后,发现:
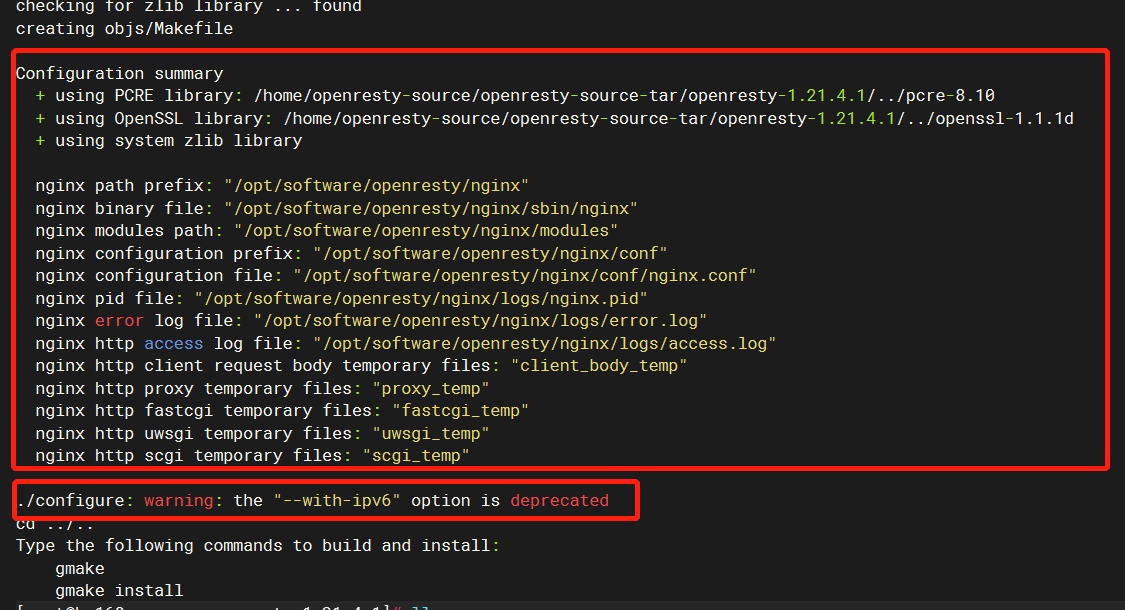
其中提示--with-ipv6选项已经过期,这个不影响,因为nginx的高版本已经默认开启了ipv6。
那是不是意味着直接用rpm的方式安装也可以呢,这个呢,反正就是看rpm方式安装出来的nginx -V的编译选项,到底是不是包含了线上nginx的全部选项,如果是的话,也可以。我这边就还是用源码方式算了,更灵活一些。
执行make,可能需要等待几分钟
make
make完成后,make install即可。
make install
完成后,即在/opt/software/openresty目录下安装好了,切换到bin目录下,里面有可执行openresty,其实就是个指向/opt/software/openresty/nginx/sbin/nginx的软连接。
二、准备openresty配置
大体思路
这一步的大体思路,就是找运维同事拿到线上的nginx配置,然后根据这份配置,来修改openresty的配置。
这块有个简单的方式,使用beyond compare进行对比(nginx.conf),看看有哪些差异,然后配置成和线上一致,测试openresty即可。

线上陌生nginx配置解读
with-http_stub_status_module
源文件就不看了,这里说下看到的陌生的配置。看到nginx.conf里http块下有:
    #设置监控nginx状态URL
    location /__nginxstatus
    {
       stub_status on;
       access_log off;
    }
请求这个接口,发现响应如下:
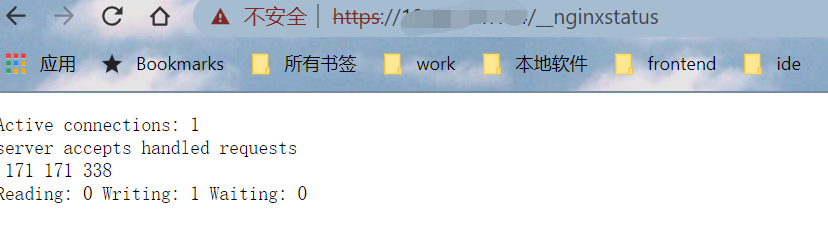
看起来,就是一些状态信息,不知道是拿来干啥的,难道是健康监测?
我网上查了下,原来这个不是nginx默认模块,是需要在configure的时候,使用如下模块才有的:
./configure --with-http_stub_status_module
参考文档如下:
http://nginx.org/en/docs/http/ngx_http_stub_status_module.html
https://blog.redis.com.cn/doc/index.html
https://blog.redis.com.cn/doc/optional/stubstatus.html
with-http_realip_module
这个模块也在线上nginx的configure中出现了。
这个模块的作用是,有时候nginx是部署在l5这类硬件负载均衡软件后的,nginx正常获取客户端ip的话,那可能就拿到的是l5的ip,要怎么获取真实客户端的ip呢?
一般l5这种,会在请求nginx时,往header里加一个X-Real-IP或者X-Forwarded-For这样的header,里面的value就是客户端的真实ip。
所以,nginx启用这个模块后,就会从这些header里获取客户端ip。
http://nginx.org/en/docs/http/ngx_http_realip_module.html
https://blog.redis.com.cn/doc/optional/realip.html
nginx-http-concat
这个模块在configure里有,是淘宝开发的, https://github.com/alibaba/nginx-http-concat 。
用途是,当nginx作为一个静态文件服务器时,如客户端请求1.js、2.js,就会是两个请求和响应,当文件多的时候,比较耗性能。
所以,nginx开启这个模块后,支持如下方式访问: http://host:80/??1.js ,2.js,此时,该模块就可以一把拿到1.js、2.js,合并后返回给客户端。
效果如下(来自于https://blog.csdn.net/qq_34556414/article/details/105892602):
# curl  http://www.ttlsa.com/static/??css/ttlsa_concat.css ,css/a.css
/** this is css ttlsa_concat.css **/
/** this is css a.css *
但我在配置文件中,没找到相关的配置项,不知道是不是线上从未使用过这个功能。
ssl支持
#开启SSL支持
ssl     on;
ssl_certificate              test.crt;
ssl_certificate_key          test.key;
ssl_session_timeout          5m;
ssl_protocols                 TLSv1 TLSv1.1 TLSv1.2;
ssi (Server Side Include)
ssi on;
ssi_silent_errors on;
ssi_types text/shtml;
应该是没在使用了,老掉牙的技术了,有兴趣随便看看:
https://blog.csdn.net/qq_33616529/article/details/79061608
https://cloud.tencent.com/developer/article/1915087
gzip
gzip  on;
gzip_min_length  1K;
gzip_buffers     4 8k;
gzip_types       text/* text/css application/javascript application/x-javascript application/xml;

gzip_comp_level  9;
gzip_proxied     any;
gzip_vary        on;
gzip_http_version 1.1;
参考文档:
http://nginx.org/en/docs/http/ngx_http_gzip_module.html
三、验证功能
这部分就主要包括,https验证、功能验证,具体就不展开了,和业务强相关。如果一切验证ok,就可以准备上线了。

 浙公网安备 33010602011771号