曹工说Spring Boot源码(19)-- Spring 带给我们的工具利器,创建代理不用愁(ProxyFactory)
写在前面的话
相关背景及资源:
曹工说Spring Boot源码(1)-- Bean Definition到底是什么,附spring思维导图分享
曹工说Spring Boot源码(2)-- Bean Definition到底是什么,咱们对着接口,逐个方法讲解
曹工说Spring Boot源码(3)-- 手动注册Bean Definition不比游戏好玩吗,我们来试一下
曹工说Spring Boot源码(4)-- 我是怎么自定义ApplicationContext,从json文件读取bean definition的?
曹工说Spring Boot源码(5)-- 怎么从properties文件读取bean
曹工说Spring Boot源码(6)-- Spring怎么从xml文件里解析bean的
曹工说Spring Boot源码(7)-- Spring解析xml文件,到底从中得到了什么(上)
曹工说Spring Boot源码(8)-- Spring解析xml文件,到底从中得到了什么(util命名空间)
曹工说Spring Boot源码(9)-- Spring解析xml文件,到底从中得到了什么(context命名空间上)
曹工说Spring Boot源码(10)-- Spring解析xml文件,到底从中得到了什么(context:annotation-config 解析)
曹工说Spring Boot源码(11)-- context:component-scan,你真的会用吗(这次来说说它的奇技淫巧)
曹工说Spring Boot源码(12)-- Spring解析xml文件,到底从中得到了什么(context:component-scan完整解析)
曹工说Spring Boot源码(13)-- AspectJ的运行时织入(Load-Time-Weaving),基本内容是讲清楚了(附源码)
曹工说Spring Boot源码(14)-- AspectJ的Load-Time-Weaving的两种实现方式细细讲解,以及怎么和Spring Instrumentation集成
曹工说Spring Boot源码(15)-- Spring从xml文件里到底得到了什么(context:load-time-weaver 完整解析)
曹工说Spring Boot源码(16)-- Spring从xml文件里到底得到了什么(aop:config完整解析【上】)
曹工说Spring Boot源码(17)-- Spring从xml文件里到底得到了什么(aop:config完整解析【中】)
曹工说Spring Boot源码(18)-- Spring AOP源码分析三部曲,终于快讲完了 (aop:config完整解析【下】)
工程结构图:

概要
本篇是接着前三篇讲的,但是本篇相对独立,即使不使用spring aop 和spring ioc,我们也可以利用今天要讲的ProxyFactory为我们所用。
曹工说Spring Boot源码(16)-- Spring从xml文件里到底得到了什么(aop:config完整解析【上】)
曹工说Spring Boot源码(17)-- Spring从xml文件里到底得到了什么(aop:config完整解析【中】)
曹工说Spring Boot源码(18)-- Spring AOP源码分析三部曲,终于快讲完了 (aop:config完整解析【下】)
前面几篇说到,spring如何实现aop,即将匹配切点的bean,生成动态代理,并将生成的动态代理放到ioc容器,来替换原先的bean,一系列骚操作,完成"代理换真身"的操作。
jdk动态代理
比较老套的话题,但是,我问大家几个问题,看看大家是否真的足够了解他呢?
在代理对象上,调用不在接口中的方法
package foo;


public class Performer implements Perform {
    @Override
    public void sing() {
        try {
            Thread.sleep(1000);
        } catch (InterruptedException e) {
            e.printStackTrace();
        }
        System.out.println("男孩在唱歌");

    }

    public void eat() {
        System.out.println("男孩在吃饭");
    }
}
可以看到,我们sing是实现了接口中的方法,而eat不在接口中定义。
那么,如下代码,结果会是啥:
@Test
public void createJdkDynamicProxyManual() throws NoSuchMethodException, InvocationTargetException, IllegalAccessException {
    ClassLoader loader = Thread.currentThread().getContextClassLoader();
    Object generatedProxy = Proxy.newProxyInstance(loader, new Class[]{Perform.class}, new InvocationHandler() {
        @Override
        public Object invoke(Object proxy, Method method, Object[] args) throws Throwable {
            System.out.println("proxy:" + proxy.getClass());
            return "hahh";
        }
    });
    Method eat = Perform.class.getMethod("eat");
    eat.setAccessible(true);
    eat.invoke(generatedProxy,null);
}
代码中,我们创建了一个代理对象:generatedProxy;然后,调用了其eat方法,结果会是啥呢?
java.lang.NoSuchMethodException: foo.Perform.eat()
at java.lang.Class.getMethod(Class.java:1665)
at java.lang.Class.getMethod(Class.java:1665)
为啥会这样呢?因为我们创建代理对象时,是在Perform.class这个接口上创建的。大家可以再仔细看看。
jdk 动态代理(Proxy.newProxyInstance)有哪几个步骤
这个问题,有人思考过吗?简单来说,其实有3个步骤。
- 生成动态代理类的class,虽然不像其他class文件那样,是编译了就有的,这里,是动态生成的;
- 加载第一步拿到的字节流,丢给jvm加载该class,拿到Class对象
- 根据第二步的Class对象,反射生成动态代理对象。
我刚仔细看了Proxy.newProxyInstance的方法注释:
Returns an instance of a proxy class for the specified interfaces
that dispatches method invocations to the specified invocation
handler.  This method is equivalent to:

Proxy.getProxyClass(loader, interfaces).         // 对应步骤1和2
	getConstructor(new Class[] { InvocationHandler.class }).   // 对应步骤3
	newInstance(new Object[] { handler }); // 对应步骤3
其中,第一步,细问一下,class是怎么生成的,很多人估计又答不上了。咱们这里就看一下:
public static Object newProxyInstance(ClassLoader loader,
                                      Class<?>[] interfaces,
                                      InvocationHandler h)
    throws IllegalArgumentException
{
    /*
     * Look up or generate the designated proxy class.
     */
    Class<?> cl = getProxyClass0(loader, interfaces);

    /*
     * Invoke its constructor with the designated invocation handler.
     */
    return newInstance(cons, ih);
}
可以看到,主要的获取Class,是getProxyClass0方法,这个方法里面代码不少,去掉非核心的缓存等部分,核心的部分如下:
String proxyName = proxyPkg + "$Proxy" + num;

/*
 * Generate the specified proxy class.
 */
byte[] proxyClassFile = ProxyGenerator.generateProxyClass(
    proxyName, interfaces);
proxyClass = defineClass0(loader, proxyName,
                          proxyClassFile, 0, proxyClassFile.length);
这其中,ProxyGenerator.generateProxyClass 负责生成class的字节流,对应我们前面讲到的步骤1;defineClass0对应类加载。我们仔细说说:
-
字节流生成
这部分呢,其实就是调用了ProxyGenerator.generateProxyClass,我们跟踪发现,它的全名为:sun.misc.ProxyGenerator,是sun包下的。这部分没法看源码,还好我之前下载过openjdk的源码,这里我给大家全文贴一下:
	/**
     * Generate a class file for the proxy class.  This method drives the
     * class file generation process.
     */
    private byte[] generateClassFile() {

        /* ============================================================
         * Step 1: Assemble ProxyMethod objects for all methods to
         * generate proxy dispatching code for.
         */

        /*
         * Record that proxy methods are needed for the hashCode, equals,
         * and toString methods of java.lang.Object.  This is done before
         * the methods from the proxy interfaces so that the methods from
         * java.lang.Object take precedence over duplicate methods in the
         * proxy interfaces.
         */
        addProxyMethod(hashCodeMethod, Object.class);
        addProxyMethod(equalsMethod, Object.class);
        addProxyMethod(toStringMethod, Object.class);

        /*
         * Now record all of the methods from the proxy interfaces, giving
         * earlier interfaces precedence over later ones with duplicate
         * methods.
         */
        for (int i = 0; i < interfaces.length; i++) {
            Method[] methods = interfaces[i].getMethods();
            for (int j = 0; j < methods.length; j++) {
                addProxyMethod(methods[j], interfaces[i]);
            }
        }

        /*
         * For each set of proxy methods with the same signature,
         * verify that the methods' return types are compatible.
         */
        for (List<ProxyMethod> sigmethods : proxyMethods.values()) {
            checkReturnTypes(sigmethods);
        }

        /* ============================================================
         * Step 2: Assemble FieldInfo and MethodInfo structs for all of
         * fields and methods in the class we are generating.
         */
        try {
            methods.add(generateConstructor());

            for (List<ProxyMethod> sigmethods : proxyMethods.values()) {
                for (ProxyMethod pm : sigmethods) {

                    // add static field for method's Method object
                    fields.add(new FieldInfo(pm.methodFieldName,
                        "Ljava/lang/reflect/Method;",
                         ACC_PRIVATE | ACC_STATIC));

                    // generate code for proxy method and add it
                    methods.add(pm.generateMethod());
                }
            }

            methods.add(generateStaticInitializer());

        } catch (IOException e) {
            throw new InternalError("unexpected I/O Exception");
        }

        if (methods.size() > 65535) {
            throw new IllegalArgumentException("method limit exceeded");
        }
        if (fields.size() > 65535) {
            throw new IllegalArgumentException("field limit exceeded");
        }

        /* ============================================================
         * Step 3: Write the final class file.
         */

        /*
         * Make sure that constant pool indexes are reserved for the
         * following items before starting to write the final class file.
         */
        cp.getClass(dotToSlash(className));
        cp.getClass(superclassName);
        for (int i = 0; i < interfaces.length; i++) {
            cp.getClass(dotToSlash(interfaces[i].getName()));
        }

        /*
         * Disallow new constant pool additions beyond this point, since
         * we are about to write the final constant pool table.
         */
        cp.setReadOnly();

        ByteArrayOutputStream bout = new ByteArrayOutputStream();
        DataOutputStream dout = new DataOutputStream(bout);

        try {
            /*
             * Write all the items of the "ClassFile" structure.
             * See JVMS section 4.1.
             */
                                        // u4 magic;
            dout.writeInt(0xCAFEBABE);
                                        // u2 minor_version;
            dout.writeShort(CLASSFILE_MINOR_VERSION);
                                        // u2 major_version;
            dout.writeShort(CLASSFILE_MAJOR_VERSION);

            cp.write(dout);             // (write constant pool)

                                        // u2 access_flags;
            dout.writeShort(ACC_PUBLIC | ACC_FINAL | ACC_SUPER);
                                        // u2 this_class;
            dout.writeShort(cp.getClass(dotToSlash(className)));
                                        // u2 super_class;
            dout.writeShort(cp.getClass(superclassName));

                                        // u2 interfaces_count;
            dout.writeShort(interfaces.length);
                                        // u2 interfaces[interfaces_count];
            for (int i = 0; i < interfaces.length; i++) {
                dout.writeShort(cp.getClass(
                    dotToSlash(interfaces[i].getName())));
            }

                                        // u2 fields_count;
            dout.writeShort(fields.size());
                                        // field_info fields[fields_count];
            for (FieldInfo f : fields) {
                f.write(dout);
            }

                                        // u2 methods_count;
            dout.writeShort(methods.size());
                                        // method_info methods[methods_count];
            for (MethodInfo m : methods) {
                m.write(dout);
            }

                                         // u2 attributes_count;
            dout.writeShort(0); // (no ClassFile attributes for proxy classes)

        } catch (IOException e) {
            throw new InternalError("unexpected I/O Exception");
        }

        return bout.toByteArray();
    }
这里其实是有面试题的,我之前还被问过,问我用的什么技术来生成class字节流,这里其实是没有用任何第三方工具的,这个类的import语句部分,也没有asm、javaasist等工具。
import java.io.ByteArrayOutputStream; import java.io.DataOutputStream; import java.io.FileOutputStream; import java.io.IOException; import java.io.OutputStream; import java.lang.reflect.Array; import java.lang.reflect.Method; import java.util.ArrayList; import java.util.HashMap; import java.util.LinkedList; import java.util.List; import java.util.ListIterator; import java.util.Map; import sun.security.action.GetBooleanAction;-
加载class字节流为Class
这部分的代码即为前面提到的:
try {
    proxyClass = defineClass0(loader, proxyName,
        proxyClassFile, 0, proxyClassFile.length);
}
其中,defineClass0 是一个native方法:
java.lang.reflect.Proxy#defineClass0
private static native Class defineClass0(ClassLoader loader, String name,
                                         byte[] b, int off, int len);
让我比较惊讶的是,这个native方法,是在Proxy类里,且除了此处的调用,没有被其他代码调用。
我去看了Classloader这个类的代码,里面也有几个native的defineClass的方法:
private native Class defineClass0(String name, byte[] b, int off, int len,
                                  ProtectionDomain pd);

private native Class defineClass1(String name, byte[] b, int off, int len,
                                  ProtectionDomain pd, String source);

private native Class defineClass2(String name, java.nio.ByteBuffer b,
                                  int off, int len, ProtectionDomain pd,
                                  String source);
看来,Proxy是自己自立门户啊,没有使用Classloader类下面的defineClass等方法。
如果大家想看生成的class的文件的内容,可以加这个虚拟机启动参数:
-Dsun.misc.ProxyGenerator.saveGeneratedFiles=true或者main最前面,加这个:
System.getProperties().put("sun.misc.ProxyGenerator.saveGeneratedFiles", "true"); -
反射生成代理对象
这步就没啥好说的了,经过上面第二步,已经拿到Class对象了。反射对于大家,也是轻车熟路了。
Constructor<?> cons = cl.getConstructor({ InvocationHandler.class });
final InvocationHandler ih = h;
newInstance(cons, ih);

private static Object newInstance(Constructor<?> cons, InvocationHandler h) {
    return cons.newInstance(new Object[] {h} );
}
这里,我们看到,获取的构造函数,就是要接收一个InvocationHandler对象的。拿到了构造函数后,接下来,就调用了构造函数的newInstance,来生成代理对象。
具体的调用就不说了,反正你调用的任何方法(只能调用接口里有的那些),都会转到invocationHandler的invoke方法。
-
关于jdk动态代理的思考
其实,大家看到上面,会想下面这个问题不?现在在代理对象上,调用方法,最终都会进入到:
 java.lang.reflect.InvocationHandler#invoke
 public Object invoke(Object proxy, Method method, Object[] args)
     throws Throwable;
我如果想在这个逻辑里面,去调用原始目标的方法,怎么办呢?
我们看看传给我们的几个参数:
1. proxy,代理对象;这个没办法拿到原始对象
2. method,是被调用的方法,也拿不到原始对象
3. args,给method的参数,也拿不到原始对象。
这就迷离了。那我咋办呢?
答案是,在创建InvocationHandler时,把原始对象传进去,以及其他一切必要的信息,都传进去。
当然,你也可以不传进去,在invoke方法里,为所欲为,比如下面的方法:
  ClassLoader loader = Thread.currentThread().getContextClassLoader();
  Object generatedProxy = Proxy.newProxyInstance(loader, new Class[]{Perform.class}, new InvocationHandler() {
      @Override
      public Object invoke(Object proxy, Method method, Object[] args) throws Throwable {
          System.out.println("到我这为止,不会调用target了");
          return null;
      }
  });
  // 这里,虽然调用了sing,但里面的逻辑也不会执行。
  ((Perform)generatedProxy).sing();
其实,这个代理,已经相当于是Perform接口的另一个实现了;和之前的实现类,没有半毛钱关系。
如果要让它实施代理的工作,可以这样做:
  @Test
  public  void createJdkDynamicProxyManual() throws NoSuchMethodException, InvocationTargetException, IllegalAccessException {
      Performer performer = new Performer();
      MyCustomInvocationHandler myCustomInvocationHandler = new MyCustomInvocationHandler(performer);

      ClassLoader loader = Thread.currentThread().getContextClassLoader();
      Object generatedProxy = Proxy.newProxyInstance(loader,
              new Class[]{Perform.class}, myCustomInvocationHandler);

      ((Perform)generatedProxy).sing();

  }

  public static class MyCustomInvocationHandler implements InvocationHandler {
      Performer performer;

      public MyCustomInvocationHandler(Performer performer) {
          this.performer = performer;
      }

      @Override
      public Object invoke(Object proxy, Method method, Object[] args) throws Throwable {
          System.out.println("我是一个称职的代理");
          return method.invoke(performer,args);
      }
  }
上面这个代码,就没问题了。会输出如下:
我是一个称职的代理
男孩在唱歌
jdk动态代理实现思路的案例代码
我们上面说了怎么样正确地实现代理的思路,就是要把target/原始bean,在new invocationHandler的时候,传递给它,后续在invoke里再使用。我们看看框架对invocationHandler的其他实现,是怎么做的吧?
我在project里找了下InvocationHandler的实现类,发现了jdbc中的一个实现类。
org.springframework.jdbc.datasource.ConnectionProxy

public interface ConnectionProxy extends Connection {

   /**
    * Return the target Connection of this proxy.
    * <p>This will typically be the native driver Connection
    * or a wrapper from a connection pool.
    * @return the underlying Connection (never {@code null})
    */
   Connection getTargetConnection();

}
这个是Connection的子接口,通过这个接口,获取真正的数据库连接。我们看看其代理实现:
org.springframework.jdbc.datasource.LazyConnectionDataSourceProxy#getConnection(java.lang.String, java.lang.String)
public Connection getConnection(String username, String password) throws SQLException {
   return (Connection) Proxy.newProxyInstance(
         ConnectionProxy.class.getClassLoader(),
         new Class[] {ConnectionProxy.class},
         new LazyConnectionInvocationHandler(username, password));
}
这个代理实现,主要是延迟获取数据库连接,等到使用的时候,才去获取连接;而不是启动时,即建立连接池。
private class LazyConnectionInvocationHandler implements InvocationHandler {

   private String username;

   private String password;

   private Boolean readOnly = Boolean.FALSE;

   private Integer transactionIsolation;

   private Boolean autoCommit;

   private boolean closed = false;

   private Connection target;

   public LazyConnectionInvocationHandler() {
      this.autoCommit = defaultAutoCommit();
      this.transactionIsolation = defaultTransactionIsolation();
   }

   public LazyConnectionInvocationHandler(String username, String password) {
      this();
      this.username = username;
      this.password = password;
   }

   public Object invoke(Object proxy, Method method, Object[] args) throws Throwable {
      // Invocation on ConnectionProxy interface coming in...

      if (method.getName().equals("equals")) {
         // We must avoid fetching a target Connection for "equals".
         // Only consider equal when proxies are identical.
         return (proxy == args[0]);
      }
      ...
      else if (method.getName().equals("getTargetConnection")) {
         // Handle getTargetConnection method: return underlying connection.
         return getTargetConnection(method);
      }
      ...
   }
这里呢,如果方法为getTargetConnection,则调用了以下方法:
private Connection getTargetConnection(Method operation) throws SQLException {
      if (this.target == null) {
         // No target Connection held -> fetch one.
         if (logger.isDebugEnabled()) {
            logger.debug("Connecting to database for operation '" + operation.getName() + "'");
         }

         // 通过用户名,密码去获取数据库连接
         this.target = (this.username != null) ?
               getTargetDataSource().getConnection(this.username, this.password) :
               getTargetDataSource().getConnection();

         // If we still lack default connection properties, check them now.
         checkDefaultConnectionProperties(this.target);

         // Apply kept transaction settings, if any.
         if (this.readOnly) {
            try {
               this.target.setReadOnly(this.readOnly);
            }
            catch (Exception ex) {
               // "read-only not supported" -> ignore, it's just a hint anyway
               logger.debug("Could not set JDBC Connection read-only", ex);
            }
         }
         if (this.transactionIsolation != null &&
               !this.transactionIsolation.equals(defaultTransactionIsolation())) {
            this.target.setTransactionIsolation(this.transactionIsolation);
         }
         if (this.autoCommit != null && this.autoCommit != this.target.getAutoCommit()) {
            this.target.setAutoCommit(this.autoCommit);
         }
      }

      return this.target;
   }
}
大家从上面代码,可以看到,是有通过用户名密码去获取数据库连接的。
所以,看来,正确的实现代理的思路就是,在构造proxy的时候,把你需要的东西,都通过构造函数或setter,传递给invocationHandler。然后再在invoke方法内去使用这些东西,来完成你的逻辑。
Spring提供给我们的强大工具类:ProxyFactory
大家看了上面,觉得生成代理,简单,还是复杂呢?也许还不是很难。但如果是使用cglib的方式去创建代理,代码可就要多好一些了。(这个留到后面讲)
其实,spring里给我们提供了神器的,即我们要说的:ProxyFactory。其注释如下,意思是,aop代理工厂,不用通过bean factory,可以直接使用。这个类提供一个简单的获取和配置aop代理的方式。
* Factory for AOP proxies for programmatic use, rather than via a bean
* factory. This class provides a simple way of obtaining and configuring
* AOP proxies in code.
意思是,我们平时,实现aop,主要依靠spring的aop,即通过注解或者xml的方式,声明式地创建aop(比如配置事务时)。这里的意思是,我们可以通过代码方式来实现同样的效果,即,创建代理。
大家把这个类,理解为代理工厂即可,工厂嘛,就是给它东西,它给你返回产品,这个产品,就是代理对象。
如何利用ProxyFactory创建代理
我们看看,把它当成黑盒的话,如何利用它,来简化我们创建代理的过程:
 @Test
    public void createJdkDynamicProxy() {
        ProxyFactory proxyFactory = new ProxyFactory();
//        Performer performer = new Performer();
//        proxyFactory.setTarget(performer);

        proxyFactory.addInterface(Perform.class);

        Perform proxy = (Perform) proxyFactory.getProxy();

        log.info("proxy class:{}",proxy.getClass().getName());
        proxy.sing();
        log.info("proxy:{}",proxy);
    }
正常情况下,按照我们前面对jdk动态代理的理解,上面这样就够了。但是,上面代码会报错,说没有指定target 对象。所以,我们实际上,需要把上面那两行注释给放开,否则报如下错误。
org.springframework.aop.framework.AopConfigException: No advisors and no TargetSource specified

	at org.springframework.aop.framework.JdkDynamicAopProxy.<init>(JdkDynamicAopProxy.java:103)
	at org.springframework.aop.framework.DefaultAopProxyFactory.createAopProxy(DefaultAopProxyFactory.java:65)
	at org.springframework.aop.framework.ProxyCreatorSupport.createAopProxy(ProxyCreatorSupport.java:105)
	at org.springframework.aop.framework.ProxyFactory.getProxy(ProxyFactory.java:98)
	at ProxyFactoryTest.createJdkDynamicProxy(ProxyFactoryTest.java:44)
上面放开那个注释代码后,默认就会去调用target的对应方法,会有如下输出:
2020-02-25 08:32:29.828 [main] INFO  ProxyFactoryTest - proxy class:com.sun.proxy.$Proxy5
男孩在唱歌
2020-02-25 08:32:30.910 [main] INFO  ProxyFactoryTest - proxy:foo.Performer@502775a1
如何创建代理的同时,织入切面
我们上面只是创建了代理,默认去调用了target的对应方法,假设我们要切一下,怎么办?
不慌!
@Test
    public void createJdkDynamicProxyWithAdvisor() {
        ProxyFactory proxyFactory = new ProxyFactory();
        Performer performer = new Performer();
        proxyFactory.setTarget(performer);

        proxyFactory.addInterface(Perform.class);
        DefaultPointcutAdvisor advisor = new DefaultPointcutAdvisor();
        advisor.setAdvice(new MethodInterceptor() {
            @Override
            public Object invoke(MethodInvocation invocation) throws Throwable {
                Object result = invocation.proceed();
                System.out.println("男孩唱完要行礼");
                return result;
            }
        });

        proxyFactory.addAdvisor(advisor);

        Perform proxy = (Perform) proxyFactory.getProxy();

        ProxyFactoryTest.log.info("proxy class:{}",proxy.getClass().getName());
        proxy.sing();
    }
这里的重点代码就是:
		DefaultPointcutAdvisor advisor = new DefaultPointcutAdvisor();
        advisor.setAdvice(new MethodInterceptor() {
            @Override
            public Object invoke(MethodInvocation invocation) throws Throwable {
                Object result = invocation.proceed();
                System.out.println("男孩唱完要行礼");
                return result;
            }
        });

        proxyFactory.addAdvisor(advisor);
这上面的几行代码,主要是创建了一个advisor,一个advisor 几乎等于切点+通知。
advisor的setAdvice呢,主要接受一个Advice类型的参数。而MethodInterceptor就是它的子接口。
当然了,其实advice的实现很多,包括spring里都有很多内部实现。我这里找了一个,对方法执行耗时,进行监测的。
我把上面的代码改动了一行:
advisor.setAdvice(new PerformanceMonitorInterceptor());
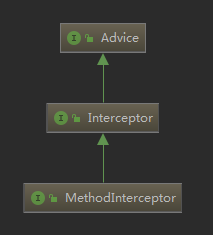
这个类,的继承关系如下:

主要功能就是记录耗时,此时,输出如下:
2020-02-25 08:40:06.825 [main] INFO ProxyFactoryTest - proxy class:com.sun.proxy.$Proxy5
男孩在唱歌
2020-02-25 08:40:07.868 [main] TRACE o.s.aop.interceptor.PerformanceMonitorInterceptor - StopWatch 'foo.Perform.sing': running time (millis) = 1006
总结
今天大概讲了jdk动态代理的原理,和ProxyFactory的使用。下一讲,继续aop之旅,主要讲解ProxyFactory的原理。

 浙公网安备 33010602011771号