

代码
import sys
directory = '/home/dongdong/2project/2_3DGaosi/reduced-3dgs/'
sys.path.append(directory)
import cv2
import numpy as np
import torch
from scene import Scene
import os
from tqdm import tqdm
from os import makedirs
from gaussian_renderer import render
import torchvision
from utils.general_utils import safe_state
from argparse import ArgumentParser
from arguments import ModelParams, PipelineParams, get_combined_args
from gaussian_renderer import GaussianModel
import pandas as pd
import torch
from torch import nn
import numpy as np
from utils.graphics_utils import getWorld2View2, getProjectionMatrix
from scene.colmap_loader import *
from scene.dataset_readers import *
# 要选的视角
class Camera_view(nn.Module):
def __init__(self, img_id, R, FoVx, FoVy, image_width,image_height,
t=np.array([0.0, 0.0, 0.0]), scale=1.0
):
super(Camera_view, self).__init__()
self.img_id = img_id
# 这里默认是 相机到世界 也就是相机在世界坐标系下的位姿
self.R = R
self.t = t
self.scale = scale # 尺度 展示没有
self.FoVx = FoVx
self.FoVy = FoVy
self.image_width = image_width
self.image_height = image_height
self.zfar = 100.0
self.znear = 0.01
# 相机在世界坐标系下的位姿 相机到世界的变换矩阵
sRt_c2w = np.zeros((4, 4)) #标准的矩阵转置
sRt_c2w[:3, :3] = self.R
sRt_c2w[:3, 3] = self.scale*self.t
sRt_c2w[3, 3] = 1.0
# 3D高斯渲染 需要的是 一个3D高斯球(x,y,z) 投影到相机像素画面 ,也就是世界到相机的变换矩阵, 所以需要对相机到世界矩阵sRt转置取逆
#3D世界到3D相机坐标系 变换矩阵
#self.world_view_transform = torch.tensor(np.float32(sRt_c2w)).transpose(0, 1).cuda() #
self.world_view_transform = torch.tensor(np.float32(sRt_c2w)).transpose(0, 1).cuda() #
'''
#将3D相机坐标投影到2D相机像素平面的投影矩阵
# 真实相机成像模型中 该矩阵是由 fx fy cx cy构造的
# 虚拟渲染相机模型中 该矩阵是由 znear 默认0.01 近平面 zfar 默认100 远平面 视场角FoVx FoVy构造的。计算视场角FoVx=fx/(W/2),FoVy=fy/(H/2)
# 两者关系:
# 虚拟渲染相机用fx和fy表示的话 ,最后都是变为统一的形式。
(相机前方为z正轴的坐标系)
u=fx*x/z-W/2
v=fy*y/z-H/2
w=-zfar*n/z (像素坐标不关心投影后的z值,无用舍去,所以最终znear和zfar对像素坐标u,v没有影响。)
# 真实采集相机参数 fx fy cx=实际物理值 cy=实际物理值 成像分辨率 W*H
# 渲染虚拟相机参数 fx fy cx=W/2 cy=H/2 成像分辨率 W*H
'''
self.projection_matrix = getProjectionMatrix(znear=self.znear, zfar=self.zfar, fovX=self.FoVx, fovY=self.FoVy).transpose(0, 1).cuda()
# 3D世界点投影到2D相机像素坐标 变换矩阵
self.full_proj_transform = (self.world_view_transform.unsqueeze(0).bmm(self.projection_matrix.unsqueeze(0))).squeeze(0)
self.inverse_full_proj_transform = self.full_proj_transform.inverse()# 后面貌似没用到
self.camera_center = self.world_view_transform[3, :3] #相机中心的世界坐标
def __del__(self):
# 如果几个数据使用.cuda() 创建的,会自动存到显卡内存,多次渲染积累造成内存爆满,每次用完需要指定回收释放。否则不会随着程序(cpu)关闭而销毁。
# 删除张量并释放 GPU 内存
del self.world_view_transform
del self.full_proj_transform
del self.inverse_full_proj_transform
del self.camera_center
torch.cuda.empty_cache()
#print("cuda占用回收.")
#训练中间只会保存 原始模型 。 训练结束最后一次会保存原始模型baseline 精度减半模型quantised 精度减半减半模型 quantised_half,三种不同模型供测试。
# 要测试的模型类型。标准的、基准的模型 “baseline”和将模型的权重或激活值量化为半精度(16-bit)格式“quantised_half”之间的选择
#功能:量化可以显著降低计算量和内存消耗,但可能会引入一些精度损失。具体来说,“quantised_half”可能指的是将模型参数或中间激活值量化为16-bit浮点数(half precision),从而减少存储需求并提高计算效率。
#半浮点量化 如果采用半浮点量化,则码本条目以及位置参数将以半精度存储。这意味着使用 16 位而不是 32 位,因此存储的是 float16 而不是 float32。
# #但是,由于格式.ply不允许 float16 类型的数字,因此参数将指针转换为 int16 并以此形式存储。
models_configuration = {
'baseline': {
'quantised': False,
'half_float': False,
'name': 'point_cloud.ply'
},
'quantised': {
'quantised': True,
'half_float': False,
'name': 'point_cloud_quantised.ply'
},
'quantised_half': {
'quantised': True,
'half_float': True,
'name': 'point_cloud_quantised_half.ply'
},
}
def measure_fps(iteration, views, gaussians, pipeline, background, pcd_name):
fps = 0
for _, view in enumerate(views):
render(view, gaussians, pipeline, background, measure_fps=False)
for _, view in enumerate(views):
fps += render(view, gaussians, pipeline, background, measure_fps=True)["FPS"]
fps *= 1000 / len(views)
return pd.Series([fps], index=["FPS"], name=f"{pcd_name}_{iteration}")
def rotation_matrix_x(theta_x):
""" 创建绕x轴旋转的旋转矩阵 """
c, s = np.cos(theta_x), np.sin(theta_x)
return np.array([
[1, 0, 0],
[0, c, -s],
[0, s, c]
])
def rotation_matrix_y(theta_y):
""" 创建绕y轴旋转的旋转矩阵 """
c, s = np.cos(theta_y), np.sin(theta_y)
return np.array([
[c, 0, s],
[0, 1, 0],
[-s, 0, c]
])
def rotation_matrix_z(theta_z):
""" 创建绕z轴旋转的旋转矩阵 """
c, s = np.cos(theta_z), np.sin(theta_z)
return np.array([
[c, -s, 0],
[s, c, 0],
[0, 0, 1]
])
def combined_rotation_matrix(theta_x, theta_y, theta_z):
""" 通过绕x、y、z轴的旋转角度创建组合旋转矩阵 """
Rx = rotation_matrix_x(theta_x)
Ry = rotation_matrix_y(theta_y)
Rz = rotation_matrix_z(theta_z)
# 旋转矩阵的组合顺序:绕z轴 -> 绕y轴 -> 绕x轴
R = Rz @ Ry @ Rx
return R
# # 示例角度(以弧度为单位)
# theta_x = np.radians(30) # 30度
# theta_y = np.radians(45) # 45度
# theta_z = np.radians(60) # 60度
# # 计算旋转矩阵
# R = combined_rotation_matrix(theta_x, theta_y, theta_z)
# print("旋转矩阵 R:")
# print(R)
def quaternion_to_rotation_matrix(q):
qx, qy, qz, qw = q
R = np.array([
[1 - 2*(qy**2 + qz**2), 2*(qx*qy - qz*qw), 2*(qx*qz + qy*qw)],
[2*(qx*qy + qz*qw), 1 - 2*(qx**2 + qz**2), 2*(qy*qz - qx*qw)],
[2*(qx*qz - qy*qw), 2*(qy*qz + qx*qw), 1 - 2*(qx**2 + qy**2)]
])
return R
def rotation_matrix_to_euler_angles(R):
sy = np.sqrt(R[0, 0]**2 + R[1, 0]**2)
singular = sy < 1e-6
if not singular:
x = np.arctan2(R[2, 1], R[2, 2])
y = np.arctan2(-R[2, 0], sy)
z = np.arctan2(R[1, 0], R[0, 0])
else:
x = np.arctan2(-R[1, 2], R[1, 1])
y = np.arctan2(-R[2, 0], sy)
z = 0
return np.degrees(x), np.degrees(y), np.degrees(z)
# # 示例四元数
# quaternion = (0.0, 0.0, 0.0, 1.0) # 替换为你自己的四元数
# # 转换为旋转矩阵
# R = quaternion_to_rotation_matrix(quaternion)
# print("旋转矩阵 R:")
# print(R)
# # 从旋转矩阵获取欧拉角
# roll, pitch, yaw = rotation_matrix_to_euler_angles(R)
# print(f"绕 X 轴的角度 (roll): {roll:.2f}°")
# print(f"绕 Y 轴的角度 (pitch): {pitch:.2f}°")
# print(f"绕 Z 轴的角度 (yaw): {yaw:.2f}°")
# 渲染单个视角图像并转化opencv图像
def render_img(view,
gaussians, # 模型
pipeline,
background,
):
#for idx, view in enumerate(tqdm(views, desc="Rendering progress")):
# view 拷贝 # gaussians 继承 pipeline 拷贝 background 继承
rendering = render(view, gaussians, pipeline, background)["render"]
#fps = render(view, gaussians, pipeline, background, measure_fps=True)["FPS"]
#gt = view.original_image[0:3, :, :]
# 将渲染图像转换为 NumPy 数组
rendering_np = rendering.cpu().numpy()
# 如果张量是 (C, H, W) 形式,需要调整为 (H, W, C)
if rendering_np.shape[0] == 3:
rendering_np = np.transpose(rendering_np, (1, 2, 0))
# 将 RGB 转换为 BGR
#opencv_img = rendering_np[..., ::-1] # 后续调用convert_image 一次性完成
#print("转化前 ",opencv_img.dtype)
opencv_img = convert_image(rendering_np) #高斯输出是 float32(imshow虽然可以直接显示出来) 但是opencv和ros发送需要8UC3 图像
#print("转化后",opencv_img.dtype)
# 及时清空显卡数据缓存
#del rendering
#del rendering_np
#torch.cuda.empty_cache()
# # 显示图像
# cv2.imshow('Rendering', opencv_img)
# cv2.waitKey(0) # 等待用户按键
return opencv_img
def convert_image(image_32fc3):
# 确保图像类型是 float32
if image_32fc3.dtype != np.float32:
raise TypeError("输入图像必须是 32FC3 类型")
# 将 32FC3 图像转换为 8UC3 图像
# 将浮点值缩放到 0-255 范围
image_8uc3 = cv2.convertScaleAbs(image_32fc3, alpha=(255.0 / np.max(image_32fc3)))
# 转换为 BGR 颜色空间
image_bgr8 = cv2.cvtColor(image_8uc3, cv2.COLOR_RGB2BGR)
return image_bgr8
# 从slam读取相机参数
def Read_caminfo_from_orbslam(path):
# wait to do
pass
# 从colmap读取相机参数
def Read_caminfo_from_colmap(path):
cam_intrinsics={}
cam_extrinsics={}
# 自带的代码
'''
from scene.colmap_loader import *
from scene.dataset_readers import *
'''
try:
cameras_extrinsic_file = os.path.join(path, "sparse/0", "images.bin")
cameras_intrinsic_file = os.path.join(path, "sparse/0", "cameras.bin")
cam_extrinsics = read_extrinsics_binary(cameras_extrinsic_file)
cam_intrinsics = read_intrinsics_binary(cameras_intrinsic_file)
except:
cameras_extrinsic_file = os.path.join(path, "sparse/0", "images.txt")
cameras_intrinsic_file = os.path.join(path, "sparse/0", "cameras.txt")
cam_extrinsics = read_extrinsics_text(cameras_extrinsic_file)
cam_intrinsics = read_intrinsics_text(cameras_intrinsic_file)
'''
加载相机内参 read_intrinsics_text()
# Camera list with one line of data per camera:
# CAMERA_ID, MODEL, WIDTH, HEIGHT, PARAMS[]
# Number of cameras: 1
1 PINHOLE 1920 1080 1114.0581411159471 1108.508409747483 960 540
'''
cam_id=1 # 从1开始。以一个相机模型 这里默认colmap一般只有一个相机. 但是可能存在GNSS照片和视频抽离的帧,2个相机模型参数
cam_parameters=cam_intrinsics[cam_id]
print("相机id",cam_parameters.id)
print("相机模型",cam_parameters.model)
print("图像宽度",cam_parameters.width)
print("图像高度",cam_parameters.height)
print("相机内参 fx ",cam_parameters.params[0])
print("相机内参 fy ",cam_parameters.params[1])
FovY=0
FovX=0
if cam_parameters.model=="SIMPLE_PINHOLE":
focal_length_x = cam_parameters.params[0]
FovY = focal2fov(focal_length_x, cam_parameters.height)
FovX = focal2fov(focal_length_x, cam_parameters.width)
elif cam_parameters.model=="PINHOLE":
focal_length_x = cam_parameters.params[0]
focal_length_y = cam_parameters.params[1]
FovY = focal2fov(focal_length_y, cam_parameters.height)
FovX = focal2fov(focal_length_x, cam_parameters.width)
else:
assert False, "Colmap camera model not handled: only undistorted datasets (PINHOLE or SIMPLE_PINHOLE cameras) supported!"
cam_info = {
"width": cam_parameters.width,
"height": cam_parameters.height,
"fx": cam_parameters.params[0],
"fy": cam_parameters.params[1],
"FovX": FovX,
"FovY": FovY
}
return cam_info
def render_sets_handMode(dataset : ModelParams,
iteration : int,
pipeline : PipelineParams,
):
with torch.no_grad():
print("dataset._model_path 训练渲染保存的模型总路径",dataset.model_path)
print("dataset._source_path 原始输入SFM数据路径",dataset.source_path)
print("dataset.sh_degree 球谐系数",dataset.sh_degree)
print("dataset.white_background 是否白色背景",dataset.sh_degree)
cam_info = Read_caminfo_from_colmap(dataset.source_path)
height, width = cam_info["height"], cam_info["width"]
Fovx,Fovy = cam_info["FovX"], cam_info["FovY"]
img_opencv = np.ones((height, width, 3), dtype=np.uint8) * 0
cv2.namedWindow('Rendering_Img', cv2.WINDOW_NORMAL)
i=0 # 渲染的图像计数 id
x=0 # 位置
y=0
z=0
step_=0.1
theta_x=0 # 旋转角度
theta_y=0
theta_z=0
step_theta=1
# 加载渲染器
gaussians = GaussianModel(dataset.sh_degree)
bg_color = [1,1,1] if dataset.white_background else [0, 0, 0]
background = torch.tensor(bg_color, dtype=torch.float32, device="cuda")
# 加载什么精度模型
model = args.models
print("渲染实际加载的训练模型精度类型 (标准baseline 半精度quantised 半半精度half_float)",model)
name = models_configuration[model]['name']
quantised = models_configuration[model]['quantised']
half_float = models_configuration[model]['half_float']
try:
# 选择什么训练次数模型
model_path = dataset.model_path+"/point_cloud/iteration_"+str(iteration)+"/"
model_path=os.path.join(model_path,name)
print("渲染实际加载的训练模型",model_path)
gaussians.load_ply(model_path, quantised=quantised, half_float=half_float)
except:
raise RuntimeError(f"Configuration {model} with name {name} not found!")
while True:
new_img=0
image = img_opencv # 原始渲染图不能被污染 要发送slam回去,新创建图可视化 cv2.UMat转换后才可以 cv2.putText
# 设置文字的参数
font_scale = 2 # 大小
thickness = 2 # 粗细
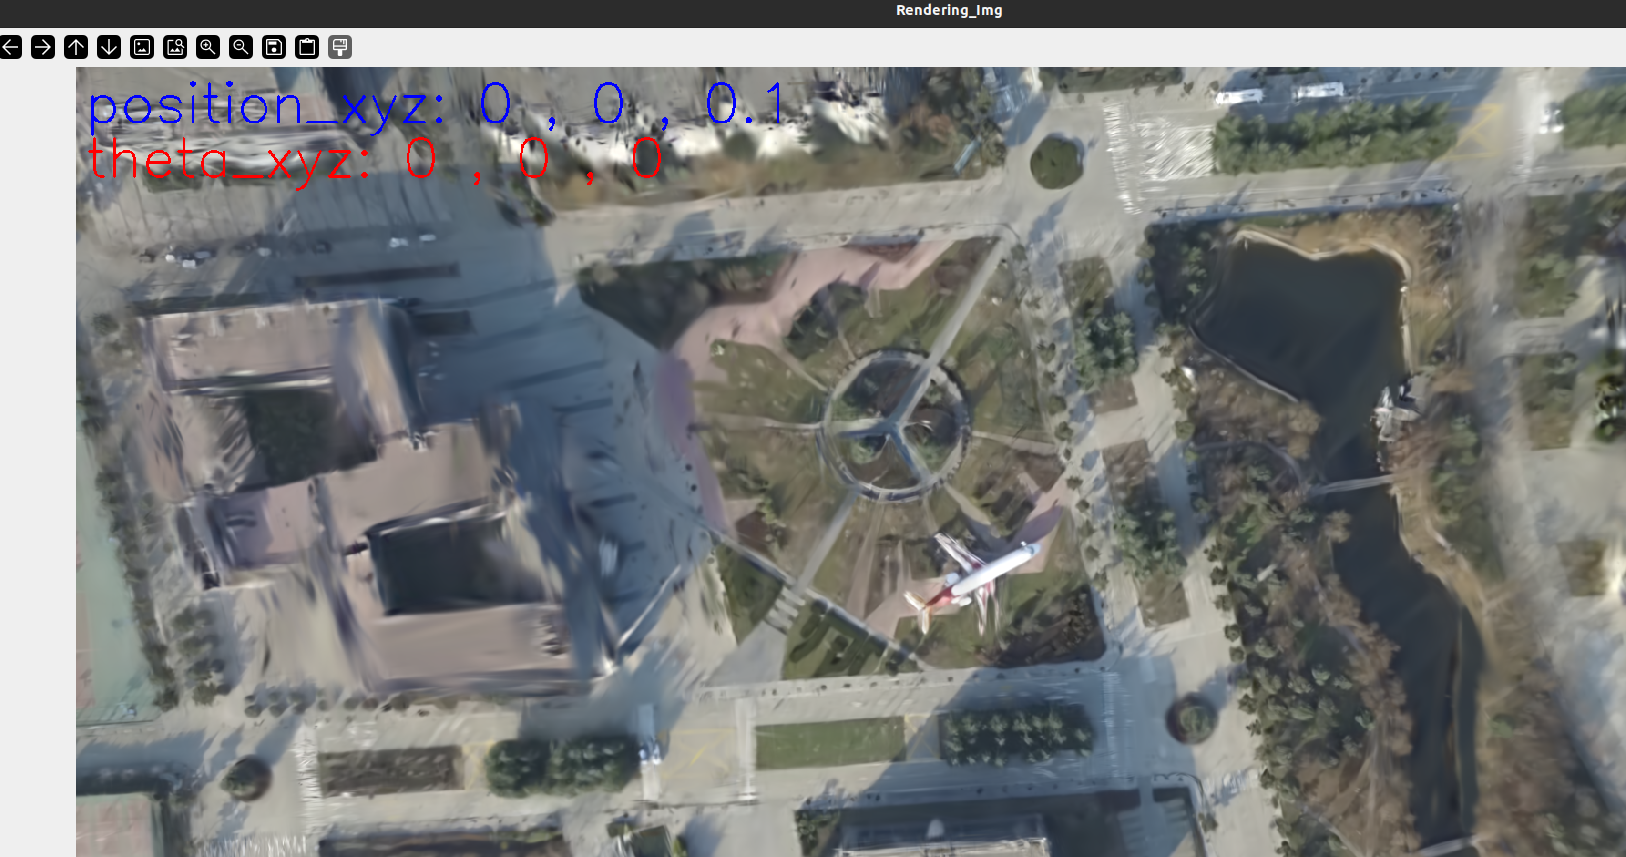
text1 ="position_xyz: " + str(round(x, 2))+" , "+str(round(y, 2)) +" , "+ str(round(z, 2))
position1 = (10, 60) # 文字的位置
cv2.putText(image, text1, position1, cv2.FONT_HERSHEY_SIMPLEX, font_scale, (255, 0, 0), thickness)
text2 = "theta_xyz: " + str(round(theta_x, 2))+" , "+str(round(theta_y, 2)) +" , "+ str(round(theta_z, 2))
position2 = (10, 120) # 文字的位置
cv2.putText(image, text2, position2, cv2.FONT_HERSHEY_SIMPLEX, font_scale, (0, 0, 255), thickness)
cv2.imshow('Rendering_Img', image)
#cv2.imshow('Rendering_Img', img_opencv)# imshow 不需要额外 cv2.UMat转换
key = cv2.waitKey(1) & 0xFF
if key == 27: # 按下 'q' 键
print("退出")
break
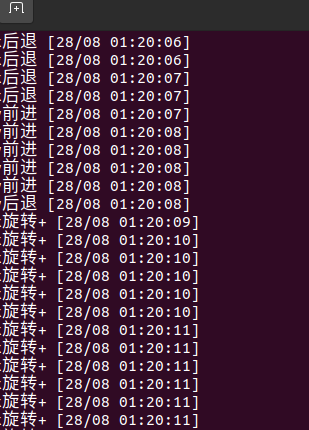
elif key == ord('w'): # 按下 's' 键
print("x前进")
x=x+step_
i=i+1
new_img=1
elif key == ord('s'): # 按下 's' 键
print("x后退")
x=x-step_
i=i+1
new_img=1
elif key == ord('a'): # 按下 's' 键
print("y前进")
y=y+step_
i=i+1
new_img=1
elif key == ord('d'): # 按下 's' 键
print("y后退")
y=y-step_
i=i+1
new_img=1
elif key == ord('q'): # 按下 's' 键
print("z前进")
z=z+step_
i=i+1
new_img=1
elif key == ord('e'): # 按下 's' 键
print("z后退")
z=z-step_
i=i+1
new_img=1
elif key == ord('i'): # 按下 's' 键
print("x旋转+")
theta_x=theta_x+step_theta
if(theta_x>360 or theta_x<-360): theta_x=0
i=i+1
new_img=1
elif key == ord('k'): # 按下 's' 键
print("x旋转-")
theta_x=theta_x-step_theta
if(theta_x>360 or theta_x<-360): theta_x=0
i=i+1
new_img=1
elif key == ord('j'): # 按下 's' 键
print("y旋转+")
theta_y=theta_y+step_theta
if(theta_y>360 or theta_y<-360): theta_y=0
i=i+1
new_img=1
elif key == ord('l'): # 按下 's' 键
print("y旋转-")
theta_y=theta_y-step_theta
if(theta_y>360 or theta_y<-360): theta_y=0
i=i+1
new_img=1
elif key == ord('u'): # 按下 's' 键
print("z旋转+")
theta_z=theta_z+step_theta
if(theta_z>360 or theta_z<-360): theta_z=0
i=i+1
new_img=1
elif key == ord('o'): # 按下 's' 键
print("z旋转-")
theta_z=theta_z-step_theta
if(theta_z>360 or theta_z<-360): theta_z=0
i=i+1
new_img=1
if new_img==1:
# # 示例角度(以弧度为单位)
theta_x_pi = np.radians(theta_x) # 30度
theta_y_pi = np.radians(theta_y) # 45度
theta_z_pi = np.radians(theta_z) # 60度
# # 计算旋转矩阵
R_c2w = combined_rotation_matrix(theta_x_pi, theta_y_pi, theta_z_pi)
# 相机到世界的旋转矩阵
# R_c2w = np.array([
# [1.0, 0.0, 0.0],
# [0.0, 1.0, 0.0],
# [0.0, 0.0, 1.0]
# ])
# print("旋转矩阵 R:")
# print(R)
# 相机到世界的平移矩阵 也就是相机在世界坐标系下的位置
t_c2w=np.array([x, y, z])
scale_c2w=1
view = Camera_view(img_id=i,
R=R_c2w,
t=t_c2w,
scale=scale_c2w,
FoVx=Fovx,
FoVy=Fovy,
image_width=width,
image_height=height)
#df = pd.DataFrame()
img_opencv = render_img( view, gaussians, pipeline, background)
# python ./render.py -m /home/dongdong/2project/0data/NWPU/gs_out/train1_out_sh1_num7000 --iteration 7010
# if __name__ == "__main__":
# # Set up command line argument parser
# parser = ArgumentParser(description="渲染测试脚本")
# model = ModelParams(parser, sentinel=True)
# pipeline = PipelineParams(parser)
# parser.add_argument("--iteration", default=30000, type=int)
# parser.add_argument("--models", default='baseline',type=str) #'baseline','quantised' 'quantised_half'
# parser.add_argument("--quiet", action="store_true") #标记以省略写入标准输出管道的任何文本。
# args = get_combined_args(parser) # 从cfg_args加载路径
# safe_state(args.quiet)
# render_sets_handMode(model.extract(args), args.iteration, pipeline.extract(args))
如果是脚本中执行的话 参考
#!/bin/bash

#外部给与执行权限
#sudo chmod +x run_ros_nodes.sh


WORKSPACE_DIR="/home/dongdong/2project/2_3DGaosi/reduced-3dgs/ros/ros_cgg" # 修改1 自己创建的ros节点工程catkin_make根目录
python_DIR="$WORKSPACE_DIR/src/image_gaosi/src" # 修改2 自己创建的python脚本位置


conda_envs="/home/dongdong/1sorftware/1work/yes" # 修改3 自己的conda 安装路径
conda_envs_int=$conda_envs"/etc/profile.d/conda.sh" # 不用改 conda自带初始化文件
echo $conda_envs_int
conda_envs_bin=$conda_envs"/envs/gaussian_splatting/bin" # 不用改 conda自带python安装位置 脚本中需要指定是conda特定的环境python而不是系统默认的
echo $conda_envs_bin
ROS_SETUP="/opt/ros/noetic/setup.bash" #不用改  安装时候添加到系统路径了 不需要每次都source 这里留着
#指定目录

# 启动 ROS Master 不用改
echo "Starting ROS 总结点..."
gnome-terminal -- bash -c "\
cd $WORKSPACE_DIR; source devel/setup.bash; \
roscore; \
exec bash"

# 等待 ROS Master 启动
sleep 3

# 运行 C++ 发布节点
echo "Running C++ 发布节点..."
gnome-terminal -- bash -c "\
cd $WORKSPACE_DIR; source devel/setup.bash; \
rosrun image_gaosi image_pose_publisher; \
exec bash"

# 运行 python 接受节点
echo "Running python 订阅节点..."
echo "1 激活conda本身(脚本执行需要) 2 激活conda环境  3运行python 节点 并跟上输入参数[训练模型保存根目录,指定要使用的模型训练次数,要测试的模型精度模式]"
gnome-terminal -- bash -c "\
source $conda_envs_int; \
conda activate gaussian_splatting ; \
cd $python_DIR; \
python3 image_gps_subscriber.py \
-m /home/dongdong/2project/0data/NWPU/gs_out/train1_out_sh1_num7000 \
--iteration 7010 \
--models baseline ;\
exec bash"

#$conda_envs_bin/python3 image_gps_subscriber.py \

 浙公网安备 33010602011771号