

https://zh.d2l.ai/chapter_computer-vision/neural-style.html


import torch
import torchvision
from torch import nn
from d2l import torch as d2l
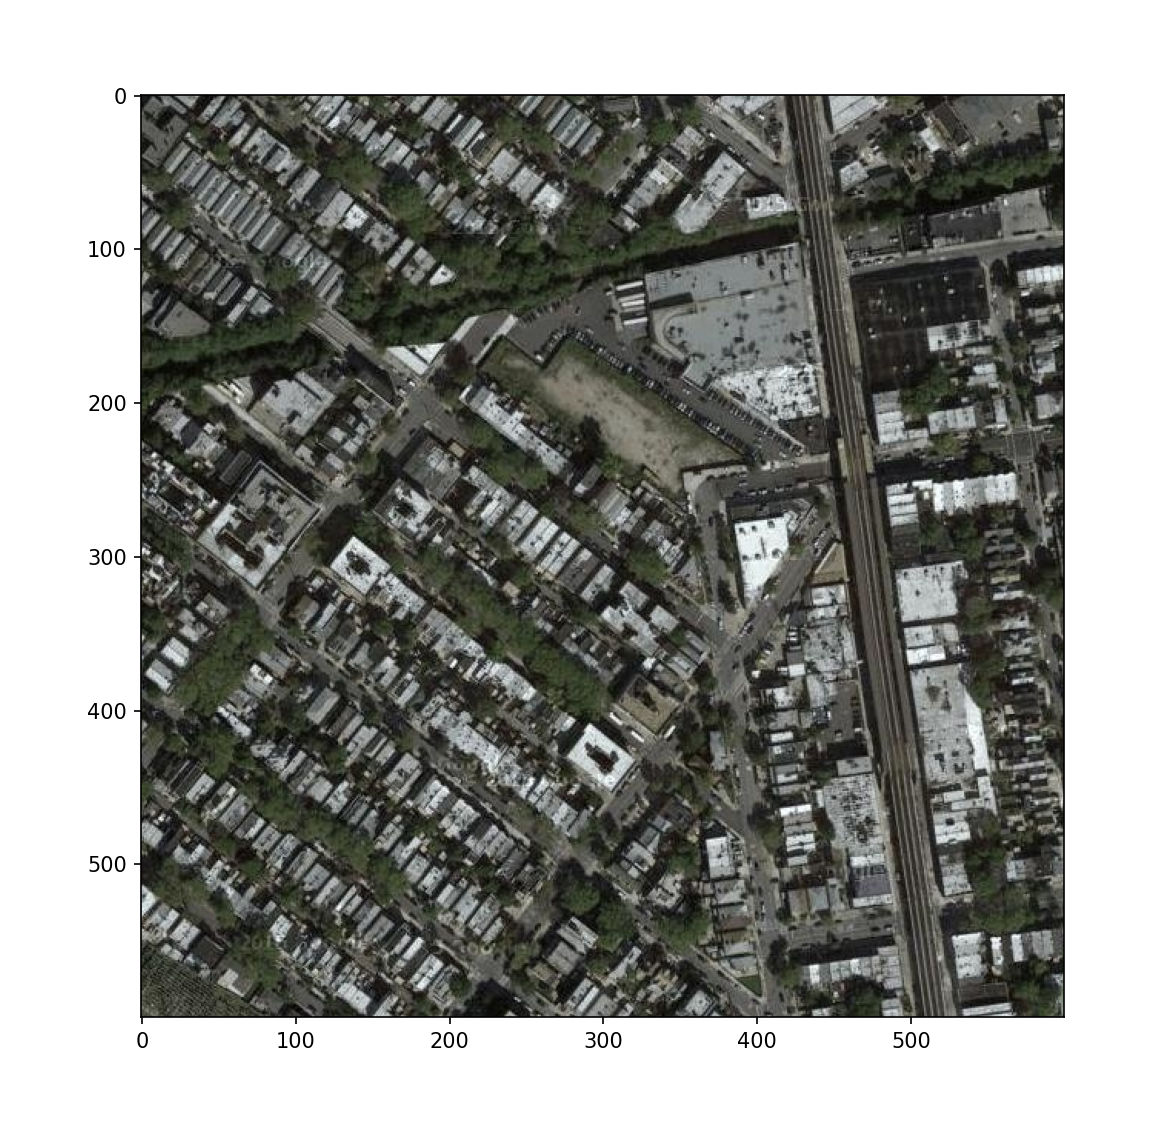
#======================== 1阅读内容和风格图像==============================
dir="/maps"
nameA='59_A.jpg'
nameB='70_B.jpg'
d2l.set_figsize()
content_img = d2l.Image.open('./data/'+dir+dir+'/testA/'+nameA)
d2l.plt.imshow(content_img)
d2l.plt.show()
style_img = d2l.Image.open('./data/'+dir+dir+'/testB/'+nameB)
d2l.plt.imshow(style_img)
d2l.plt.show()
#======================== 2 预处理和后处理==============================
rgb_mean = torch.tensor([0.485, 0.456, 0.406])
rgb_std = torch.tensor([0.229, 0.224, 0.225])
#预处理函数preprocess对输入图像在RGB三个通道分别做标准化,并将结果变换成卷积神经网络接受的输入格式。
def preprocess(img, image_shape):
transforms = torchvision.transforms.Compose([
torchvision.transforms.Resize(image_shape),
torchvision.transforms.ToTensor(),
torchvision.transforms.Normalize(mean=rgb_mean, std=rgb_std)])
return transforms(img).unsqueeze(0)
#后处理函数postprocess则将输出图像中的像素值还原回标准化之前的值。
def postprocess(img):
img = img[0].to(rgb_std.device)
#由于图像打印函数要求每个像素的浮点数值在0~1之间,我们对小于0和大于1的值分别取0和1。
img = torch.clamp(img.permute(1, 2, 0) * rgb_std + rgb_mean, 0, 1)
return torchvision.transforms.ToPILImage()(img.permute(2, 0, 1))
#======================== 3 抽取图像特征==============================
#基于ImageNet数据集预训练的VGG-19模型来抽取图像特征
pretrained_net = torchvision.models.vgg19(pretrained=True)
style_layers, content_layers = [0, 5, 10, 19, 28], [25]
#使用VGG层抽取特征时,我们只需要用到从输入层到最靠近输出层的内容层或风格层之间的所有层。
#下面构建一个新的网络net,它只保留需要用到的VGG的所有层。
net = nn.Sequential(*[pretrained_net.features[i] for i in
range(max(content_layers + style_layers) + 1)])
# 给定输入X,如果我们简单地调用前向传播net(X),只能获得最后一层的输出。
# 由于我们还需要中间层的输出,因此这里我们逐层计算,并保留内容层和风格层的输出。
#越靠近输入层,越容易抽取图像的细节信息;
#反之,则越容易抽取图像的全局信息。
# 为了避免合成图像过多保留内容图像的细节,我们选择VGG较靠近输出的层,即内容层,来输出图像的内容特征。
# 我们还从VGG中选择不同层的输出来匹配局部和全局的风格,这些图层也称为风格层。
def extract_features(X, content_layers, style_layers):
contents = []
styles = []
for i in range(len(net)):
X = net[i](X)
#我们还从VGG中选择不同层的输出来匹配局部和全局的风格,这些图层也称为风格层。
#选择每个卷积块的第一个卷积层作为风格层。 [0, 5, 10, 19, 28]
if i in style_layers:
styles.append(X)
#VGG较靠近输出的层,即内容层,来输出图像的内容特征。
#我们选择第四卷积块的最后一个卷积层作为内容层, [25]
if i in content_layers:
contents.append(X)
return contents, styles
#因为在训练时无须改变预训练的VGG的模型参数,所以我们可以在训练开始之前就提取出内容特征和风格特征。
#由于合成图像是风格迁移所需迭代的模型参数,我们只能在训练过程中通过调用extract_features函数来抽取合成图像的内容特征和风格特征。
#get_contents函数对内容图像抽取内容特征
def get_contents(image_shape, device):
content_X = preprocess(content_img, image_shape).to(device)
contents_Y, _ = extract_features(content_X, content_layers, style_layers)
return content_X, contents_Y
# get_styles函数对风格图像抽取风格特征。
def get_styles(image_shape, device):
style_X = preprocess(style_img, image_shape).to(device)
_, styles_Y = extract_features(style_X, content_layers, style_layers)
return style_X, styles_Y
#======================== 4 定义损失函数==============================
#内容损失、风格损失和全变分损失3部分组成。
#4-1 内容损失
#平方误差函数衡量合成图像与内容图像在内容特征上的差异
#平方误差函数的两个输入均为extract_features函数计算所得到的内容层的输出。
def content_loss(Y_hat, Y):
# 我们从动态计算梯度的树中分离目标:
# 这是一个规定的值,而不是一个变量。
return torch.square(Y_hat - Y.detach()).mean()
#为了让风格损失不受这些值的大小影响,gram函数将格拉姆矩阵除以了矩阵中元素的个数,即 chw.
def gram(X):
num_channels, n = X.shape[1], X.numel() // X.shape[1]
X = X.reshape((num_channels, n))
return torch.matmul(X, X.T) / (num_channels * n)
#4-2 风格损失
#也通过平方误差函数衡量合成图像与风格图像在风格上的差异
def style_loss(Y_hat, gram_Y):
return torch.square(gram(Y_hat) - gram_Y.detach()).mean()
#4-3全变分损失#
#我们学到的合成图像里面有大量高频噪点,即有特别亮或者特别暗的颗粒像素。
def tv_loss(Y_hat):
return 0.5 * (torch.abs(Y_hat[:, :, 1:, :] - Y_hat[:, :, :-1, :]).mean() +
torch.abs(Y_hat[:, :, :, 1:] - Y_hat[:, :, :, :-1]).mean())
#风格转移的损失函数是内容损失、风格损失和总变化损失的加权和。
content_weight, style_weight, tv_weight = 1, 1e3, 10
def compute_loss(X, contents_Y_hat, styles_Y_hat, contents_Y, styles_Y_gram):
# 分别计算内容损失、风格损失和全变分损失
contents_l = [content_loss(Y_hat, Y) * content_weight for Y_hat, Y in zip(
contents_Y_hat, contents_Y)]
styles_l = [style_loss(Y_hat, Y) * style_weight for Y_hat, Y in zip(
styles_Y_hat, styles_Y_gram)]
tv_l = tv_loss(X) * tv_weight
# 对所有损失求和
l = sum(10 * styles_l + contents_l + [tv_l])
return contents_l, styles_l, tv_l, l
#======================== 5 初始化合成图像==============================
class SynthesizedImage(nn.Module):
def __init__(self, img_shape, **kwargs):
super(SynthesizedImage, self).__init__(**kwargs)
self.weight = nn.Parameter(torch.rand(*img_shape))
def forward(self):
return self.weight
#我们定义get_inits函数。该函数创建了合成图像的模型实例,并将其初始化为图像X。
def get_inits(X, device, lr, styles_Y):
gen_img = SynthesizedImage(X.shape).to(device)
gen_img.weight.data.copy_(X.data)
trainer = torch.optim.Adam(gen_img.parameters(), lr=lr)
styles_Y_gram = [gram(Y) for Y in styles_Y]
return gen_img(), styles_Y_gram, trainer
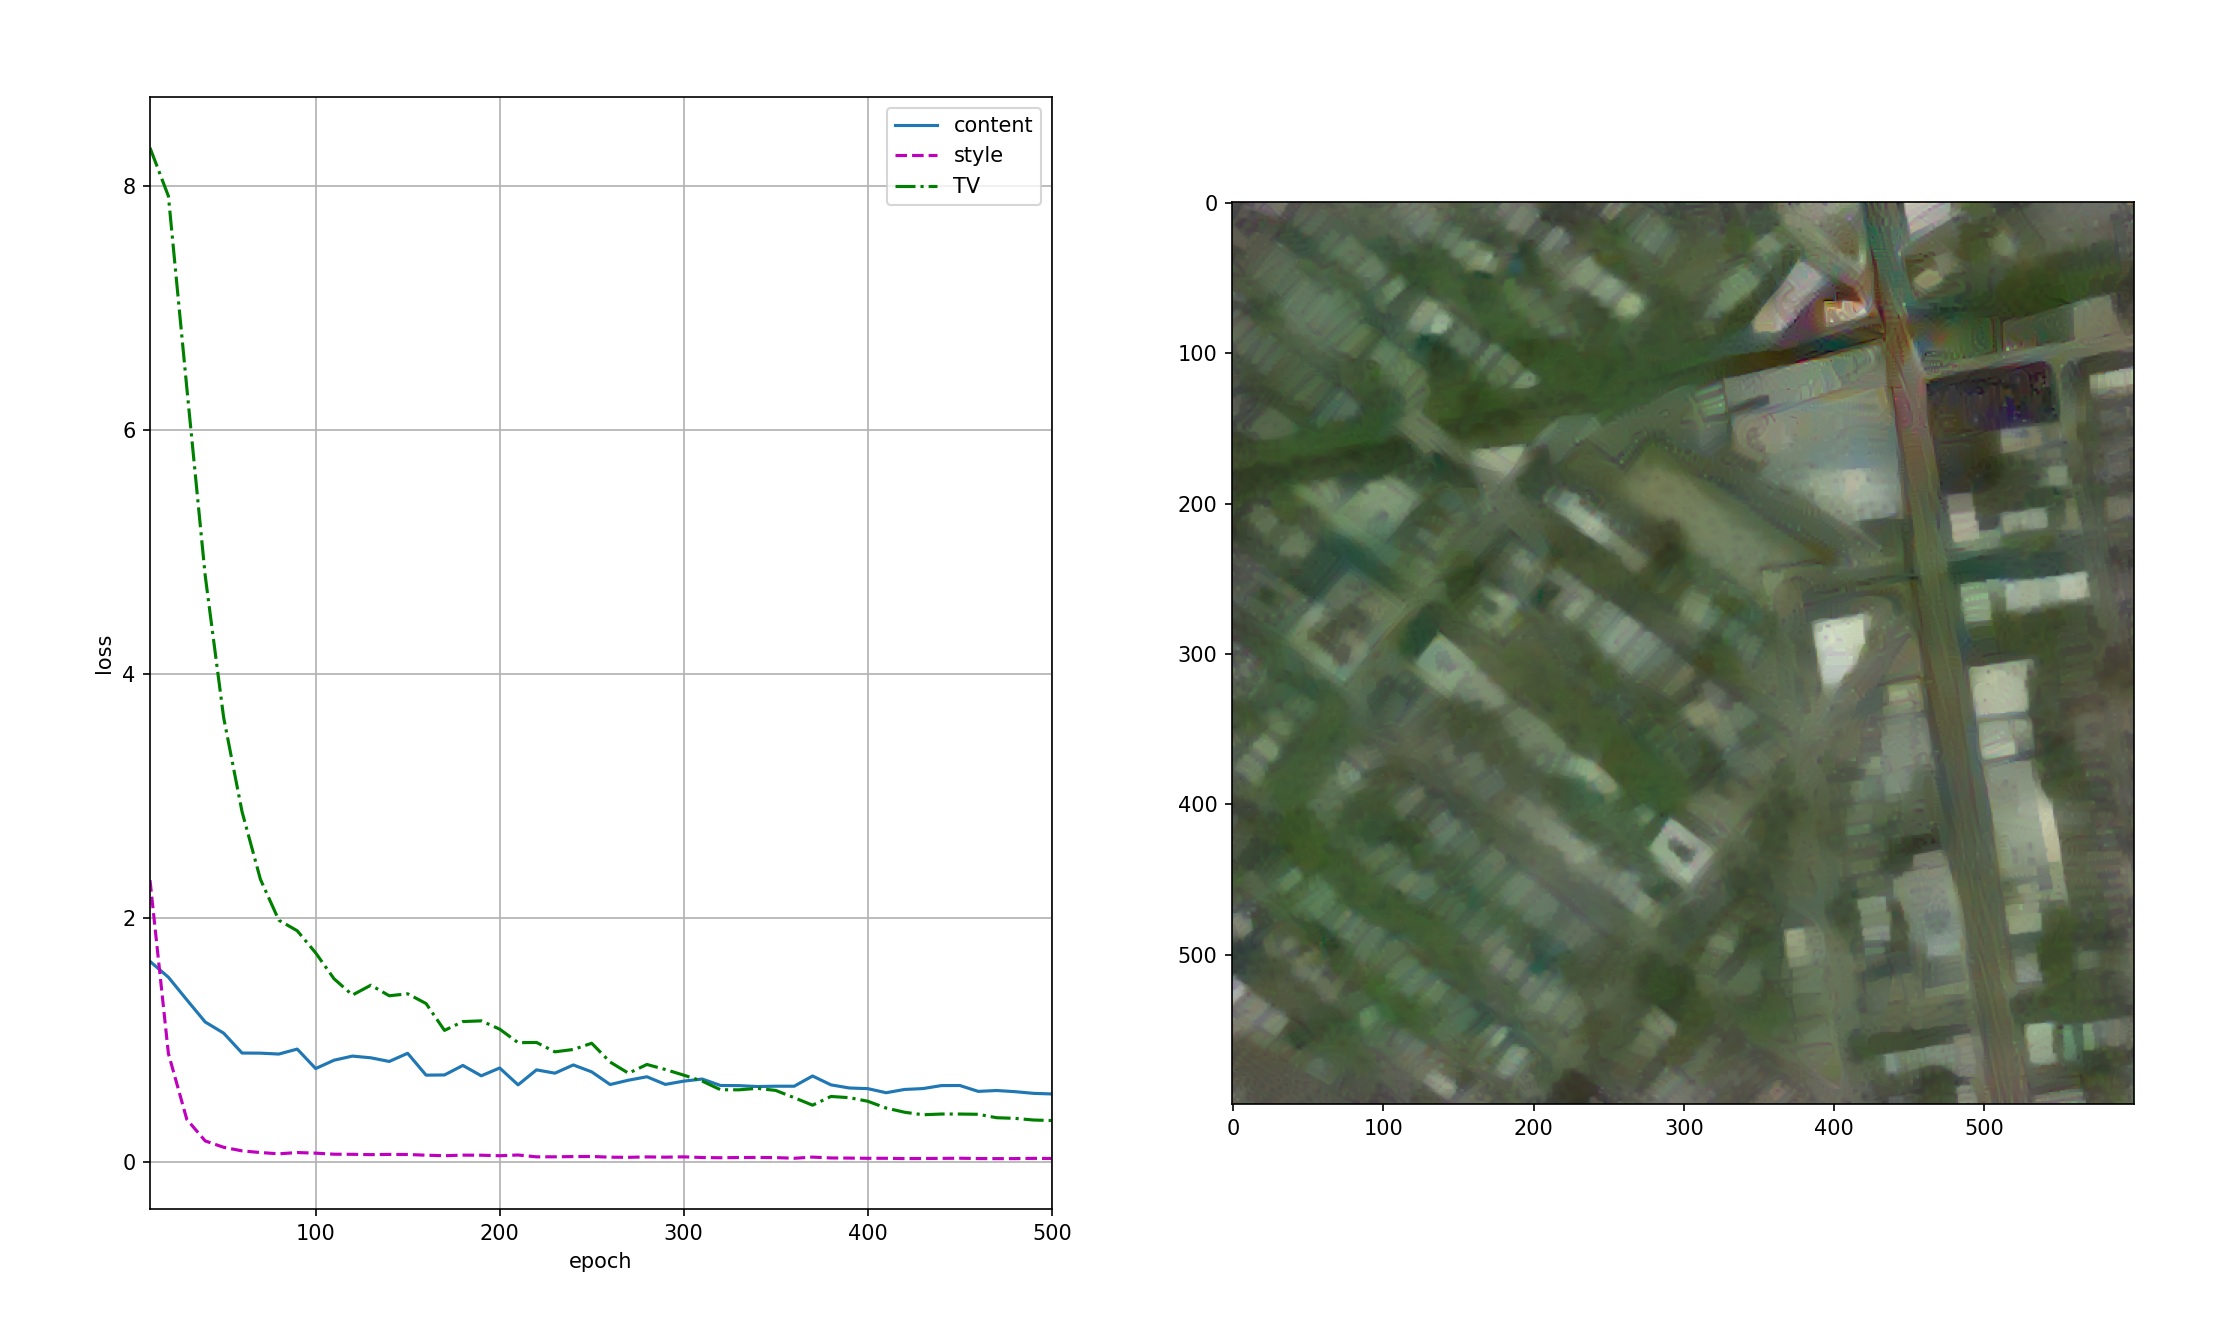
#======================== 6 训练模型==============================
#在训练模型进行风格迁移时,我们不断抽取合成图像的内容特征和风格特征,然后计算损失函数。下面定义了训练循环。
def train(X, contents_Y, styles_Y, device, lr, num_epochs, lr_decay_epoch):
X, styles_Y_gram, trainer = get_inits(X, device, lr, styles_Y)
scheduler = torch.optim.lr_scheduler.StepLR(trainer, lr_decay_epoch, 0.8)
animator = d2l.Animator(xlabel='epoch', ylabel='loss',
xlim=[10, num_epochs],
legend=['content', 'style', 'TV'],
ncols=2, figsize=(7, 2.5))
for epoch in range(num_epochs):
trainer.zero_grad()
contents_Y_hat, styles_Y_hat = extract_features(
X, content_layers, style_layers)
contents_l, styles_l, tv_l, l = compute_loss(
X, contents_Y_hat, styles_Y_hat, contents_Y, styles_Y_gram)
l.backward()
trainer.step()
scheduler.step()
if (epoch + 1) % 10 == 0:
animator.axes[1].imshow(postprocess(X))
animator.add(epoch + 1, [float(sum(contents_l)),
float(sum(styles_l)), float(tv_l)])
d2l.plt.show()
return X
#==========================7 =================================
#现在我们训练模型: 首先将内容图像和风格图像的高和宽分别调整为300和450像素,用内容图像来初始化合成图像。
device, image_shape = d2l.try_gpu(), (450, 450)
net = net.to(device)
content_X, contents_Y = get_contents(image_shape, device)
_, styles_Y = get_styles(image_shape, device)
output = train(content_X, contents_Y, styles_Y, device, 0.3, 500, 50)

 浙公网安备 33010602011771号