PySide图形界面开发(一)
一.为什么要使用PySide?
PySide由Qt的官方团队--Nokia Qt进行维护,集成了Qt和Python的优势。一个PySide程序员只需要使用简单的Python语言就能够发挥Qt的所有功能。PySide拥有LGPL2.1版授权许可,允许进行免费/开源软件和私有商业软件的开发。Matplotlib,PhotoGrabber,Wing IDE,Lucas Chess,Fminer等应用程序均使用PySide开发,这证明了PySide在软件行业的广泛普及和使用。另外,PySide Mobility工程还允许python访问Qt Mobile API,这对你进行移动开发是很有帮助的。现在让我们开始学习吧!
二.从创建窗口入手
一个简单的PySide程序示例:
 1 #coding:utf-8
 2 # 导入必须模块
 3 import sys
 4 from PySide.QtCore import Qt
 5 from PySide.QtGui import QApplication, QLabel
 6
 7 # 主函数
 8 if __name__ == '__main__':
 9      # 创建main application
10      myApp = QApplication(sys.argv)
11      # 创建Label并设置它的属性
12      appLabel = QLabel()
13      appLabel.setText("Hello, World!!!\n Look at my first app using PySide")
14      appLabel.setAlignment(Qt.AlignCenter)
15      appLabel.setWindowTitle("My First Application")
16      appLabel.setGeometry(300, 300, 250, 175)
17      # 显示这个Label
18      appLabel.show()
19      # 运行main application
20      myApp.exec_()
21      sys.exit()
运行后的效果如图:
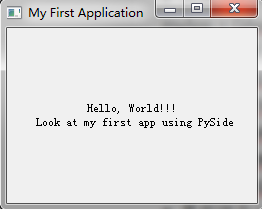
上面程序实际上就是在一个标题为“My First Application”的主窗体上添加一个label控件,在上面显示“Hello, World!!! Look at my first app using PySide”。通过上面的例子我们可以看到在主程序中,我们创建了一个QApplication类的实例。QApplication类管理图形用户界面应用程序的控制流和主要设置。它包含主事件循环,在其中来自窗口系统和其它资源的所有事件被处理和调度。它也处理应用程序的初始化和结束,并且提供对话管理。它也处理绝大多数系统范围和应用程序范围的设置。
对于任何一个使用Qt的图形用户界面应用程序,都正好存在一个QApplication对象,而不论这个应用程序在同一时间内是不是有一个或多个窗口。
2.1 创建应用图标
应用程序图标是在应用程序左上角以及任务栏显示的,强调应用程序设计目的的图片,一般是72 X 72大小,PNG格式。
 1 #coding:utf-8
 2 import sys
 3 import time
 4 from PySide.QtGui import QApplication, QWidget, QIcon
 5
 6 #QWidget是所有用户界面类的基类
 7 class SampleWindow(QWidget):
 8     #主窗口类
 9     #构造函数
10     def __init__(self):
11         QWidget.__init__(self)
12         self.setWindowTitle("Sample Window")
13         #从屏幕上(300,300)位置开始(即为最左上角的点),显示一个200*150的界面(宽200,高150)
14         self.setGeometry(300, 300, 400, 350)
15
16     def setIcon(self):
17         #设置icon
18         appIcon = QIcon("pyside_logo.png")
19         self.setWindowIcon(appIcon)
20
21 if __name__ == "__main__":
22     try:
23         myApp = QApplication(sys.argv)
24         myWindow = SampleWindow()
25         myWindow.setIcon()
26         myWindow.show()
27         myApp.exec_()
28         sys.exit(0)
29     except NameError:
30         print("NameError:", sys.exc_info()[1])
31     except SystemExit:
32         print("Closing Window...")
33     except Exception:
34         print(sys.exc_info()[1])
在上面的代码中我们在类中定义了一个函数来设置图标,然后在main函数中调用。从下面的运行结果可知,图标已经设置成功。

PySide.QtGui.QIcon类提供了一组函数可以对icon设置不同的大小和模式。QIcon包括以下几种构造函数:
QIcon()
QIcon(engine)
QIcon(other)
QIcon(pixmap)
QIcon(filename)
第一种构造函数构造了一个空图标。第二种形式需要PySide.QtGui.QIconEngineas作为参数。这个类为QIcon渲染器提供了一个抽象基类。每个图标都有一个对应的引擎,负责与请求的大小,绘制图标模式,状态。第三形式简单的从其它QIcon对象复制过来,这是最快的一种方法。第四种形式是从PySide.QtGui.QPixmap类构造图标。这个类是一个离屏图像表示,可以用作涂料设备。一个使用PySide.QtGui pixmapcan容易显示在屏幕上。类、PySide.QtGui QLabelor两个按钮中的一个。QPushButtonor PySide.QtGui.QToolButton。QLabelhas象素映射属性而QPushButton / QToolButtonhas图标属性。最后一种是通过给定的文件名构造一个图标。如果文件名包含相对路径,那它一定是相对于运行时的工作路径。
QIcon类中的pixmap函数提供了各种模式来展现icon图标。pixmap函数:PySide.QtGui.QIcon.pixmap(width, height[, mode=Normal[, state=Off]]),前两个参数表示了icon的大小,mode参数有下列四个取值可选择。

state参数表示哪个pixmap将被使用。

下面的函数是通过设置pixmap函数的mode参数来展现icon的各种模式的例子。我们将它添加到SampleWindow类中。
 1 def setIconModes(self):
 2         myIcon1 = QIcon('pyside_logo.png')
 3         myLabel1 = QLabel('sample', self)
 4         #图标可用,并且与用户有交互
 5         pixmap1 = myIcon1.pixmap(50, 50, QIcon.Active, QIcon.On)
 6         myLabel1.setPixmap(pixmap1)
 7         myIcon2 = QIcon('pyside_logo.png')
 8         myLabel2 = QLabel('sample', self)
 9         #图标不可用
10         pixmap2 = myIcon2.pixmap(50, 50, QIcon.Disabled, QIcon.Off)
11         myLabel2.setPixmap(pixmap2)
12         myLabel2.move(50, 0)
13         myIcon3 = QIcon('pyside_logo.png')
14         myLabel3 = QLabel('sample', self)
15         #图标被选中
16         pixmap3 = myIcon3.pixmap(50, 50, QIcon.Selected, QIcon.On)
17         myLabel3.setPixmap(pixmap3)
18         myLabel3.move(100, 0)
然后在main函数中添加调用代码:
myWindow.setIconModes()
运行得到:

2.2 显示提示信息
使用PySide.QtGui.QToolTip类来显示提示信息。QToolTip类可用设置提示信息的字体、颜色和富文本展示等等。如字体设置:
QToolTip.setFont(QFont("Decorative", 8, QFont.Bold))
将提示信息添加到控件:
myLabel1.setToolTip('Active Icon')
我们对之前的代码作以下修改:
 1 def __init__(self):
 2     QWidget.__init__(self)
 3     self.setWindowTitle("Icon Sample")
 4     self.setGeometry(300, 300, 200, 150)
 5     QToolTip.setFont(QFont("Decorative", 8, QFont.Bold))
 6     self.setToolTip('Our Main Window')
 7     ...
 8 def setIconModes(self):
 9     ...
10     myLabel1.setPixmap(pixmap1)
11     myLabel1.setToolTip('Active Icon')
12     ...
13     myLabel2.move(50, 0)
14     myLabel2.setToolTip('Disabled Icon')
15     ...
16     myLabel3.move(100, 0)
17     myLabel3.setToolTip('Selected Icon')
然后运行,将鼠标放到图标上就可以看到提示信息了。

2.3 增加按钮
使用最多的按钮是下压按钮或命令按钮,典型的下压按钮包括OK, Apply, Cancel, Close, Yes, No和Help几种。下压按钮在点击鼠标,按快捷键、空格键等事件时就会发出一个信号,与击键事件相关联的控件在接收到信号时就会执行,这在Qt中通常被称为槽。
除了下压按钮外,还包括QToolButton, QRadioButton, QCommandLinkButton和QCheckBox等其它按钮。
QPushButton有三种实例化方式,它包含3个不同特征的构造函数:
QPushButton(parent=None)

QPushButton(text, [parent=None])

QPushButton(icon, text, [parent=None])
parent参数可以是任何控件,text参数可以是任何的字符串,icon是一个有效的QIcon对象。
在下面的例子中我们增加了一个按钮,用来实现关闭应用的功能:
def setButton(self):

    """增加退出按钮"""

    myButton = QPushButton("Quit",self)

    myButton.move(50, 100)

    myButton.clicked.connect(myApp.quit)
在上例中,用户可能会因为失误点击了按钮而造成程序退出。所以我们在用户点击退出按钮后必须要有用户的确认才能退出程序,QMessageBox便能实现这个功能。我们创建以下函数:
1 def quitApp(self):
2     """从用户获取确认消息"""
3     userInfo = QMessageBox.question(self, "Confirmation","This will quit the application. Do you want to Continue?", QMessageBox.Yes | QMessageBox.No)
4     if userInfo == QMessageBox.Yes:
5         myApp.quit()
6     if userInfo == QMessageBox.No:
7         pass
修改connect函数参数:
myButton.clicked.connect(myApp.quitApp)
在main函数中调用show函数之前添加以下语句:
myWindow.setButton()
运行后如图所示:

2.4 窗口居中
在PySide中没有现成的方法实现窗口居中显示,需要自己实现。首先需要获取窗口的大小和位置,然后再获取屏幕的中心位置,最后把窗口移到屏幕中间。
 1 def center(self):
 2
 3     """将应用居中"""
 4
 5     qRect = self.frameGeometry()
 6
 7     centerPoint = QDesktopWidget().availableGeometry().center()
 8
 9     qRect.moveCenter(centerPoint)
10
11     self.move(qRect.topLeft())
frameGeometry()函数返回一个PySide.QtCore.QRect对象,包含了窗口的高度、宽度、顶点和左边位置。QDesktopWidget().availableGeometry().center()返回屏幕的中心位置,接下来的两行代码实现将窗口移到屏幕中心的功能,然后在myWindow.show()之前调用这个函数。
2.5 关于对话框
关于对话框是用来显示应用程序的开发者、版权和版本信息的。QMessageBox类提供了一个内置函数来实现这个功能。
PySide.QtGui.QMessageBox.about(parent, title, text)
下面我们在以前的代码中添加一个关于对话框:
1 def setAboutButton(self):
2     """设置about按钮"""
3     self.aboutButton = QPushButton("About", self)
4     self.aboutButton.move(150, 100)
5     self.aboutButton.clicked.connect(self.showAbout)
6
7 def showAbout(self):
8     """显示About窗口"""
9     QMessageBox.about(self.aboutButton, "About PySide","First PySide Program by gh0st.")
下图为运行结果:

QMessage类还提供了另外一个函数,PySide.QtGui.QMessageBox.aboutQt(parent[, title=""]),该函数用于显示开发者使用的Qt版本信息。
2.6 定时器
在Qt中使用定时器需要用到PySide.QtCore.QTimer和PySide.QtCore.QDateTime类,开启和关闭计时器的函数为QTimer.start(1000)和QTimer.stop(),计时的单位为ms。PySide.QtCore.QDateTime类提供了日历日期和时钟时间函数,是PySide.QtCore.QDate和PySide.QtCore.QTime类的组合。以下为一个数字时钟示例代码:
 1 #coding:utf-8
 2
 3 import sys
 4 from PySide.QtCore import QDateTime, QTimer, SIGNAL
 5 from PySide.QtGui import QApplication, QWidget, QLCDNumber
 6
 7 class MyTimer(QWidget):
 8     """计时器的主窗口类"""
 9     def __init__(self):
10         QWidget.__init__(self)
11         self.setWindowTitle("My Digital Clock")
12         timer = QTimer(self)
13         self.connect(timer, SIGNAL("timeout()"), self.updtTime)
14         self.myTimeDisplay = QLCDNumber(self)
15         self.myTimeDisplay.setSegmentStyle(QLCDNumber.Filled)
16         self.myTimeDisplay.setDigitCount(8)
17         self.myTimeDisplay.resize(500, 150)
18         timer.start(1000)
19
20     def updtTime(self):
21         """更新当前时间"""
22         currentTime = QDateTime.currentDateTime().toString('hh:mm:ss')
23         self.myTimeDisplay.display(currentTime)
24
25 if __name__ == "__main__":
26     try:
27         myApp = QApplication(sys.argv)
28         myWindow = MyTimer()
29         myWindow.show()
30         myApp.exec_()
31         sys.exit(0)
32     except NameError:
33         print("Name Error", sys.exe_info()[1])
34     except SystemExit:
35         print("Closing Window...")
36     except Exception:
37         print(sys.exe_info()[1])
运行显示如下:
2.7 Windows样式
未完待续,觉得好,点个赞!

 浙公网安备 33010602011771号