
ASP.NET Core on K8S学习之旅(13)Ocelot API网关接入
 上一篇介绍了Ingress的基本概念和Nginx Ingress的基本配置和使用,考虑到很多团队都在使用Ocelot作为API网关(包括我司)做了很多限流和鉴权的工作,因此本篇介绍一下如何使用Ocelot接入替代Nginx Ingress作为统一入口。
本篇已加入《.NET Core on K8S学习实践系列文章索引》,可以点击查看更多容器化技术相关系列文章。
上一篇介绍了Ingress的基本概念和Nginx Ingress的基本配置和使用,考虑到很多团队都在使用Ocelot作为API网关(包括我司)做了很多限流和鉴权的工作,因此本篇介绍一下如何使用Ocelot接入替代Nginx Ingress作为统一入口。
一、准备工作
我们仍然以上一篇的两个ASP.NET Core WebAPI示例作为K8s集群中的后端服务示例,这里我们来快速地准备一个基于Ocelot的API网关服务。
至于怎么创建Ocelot API网关,已经有很多文章介绍了,这里就不再赘述。需要注意的步骤有以下几点:
(1)根据Ocelot的版本引入匹配的K8s Provider:

可以看到,这个Provider包是张队写的,目前已经支持.NET Core 3.1,最新版本是15.0.6。这里我选择的是13.5.2,因为我的API网关服务还是.NET Core 2.2的版本。
KubeClient是kubernetes 的C#语言客户端简单易用,KubeClient是.NET Core(目标netstandard1.4)的可扩展Kubernetes API客户端, github地址点击这里。这个Ocelot的kubernetes集成模块就是使用KubeClient开发的,可以参考张队的这篇文章。
(2)在StartUp类的ConfigureService方法中添加以下代码:
services.AddOcelot()
    .AddKubernetes();
(3)编写ocelot.json配置文件:
{
  "GlobalConfiguration": {
    "ServiceDiscoveryProvider": {
      "Token": "your token",
      "Namespace": "xdp-poc",
      "Type": "kube"
    }
  },
  "ReRoutes": [
    // API01: apple-api-svc
    {
      "DownstreamPathTemplate": "/api/{url}",
      "DownstreamScheme": "http",
      "UpstreamPathTemplate": "/apple/{url}",
      "ServiceName": "apple-api-svc",
      "UpstreamHttpMethod": [ "Get", "Post", "Put", "Delete" ]
    },
    // API02: banana-api-svc
    {
      "DownstreamPathTemplate": "/api/{url}",
      "DownstreamScheme": "http",
      "UpstreamPathTemplate": "/banana/{url}",
      "ServiceName": "banana-api-svc",
      "UpstreamHttpMethod": [ "Get", "Post", "Put", "Delete" ]
    }
  ]
}
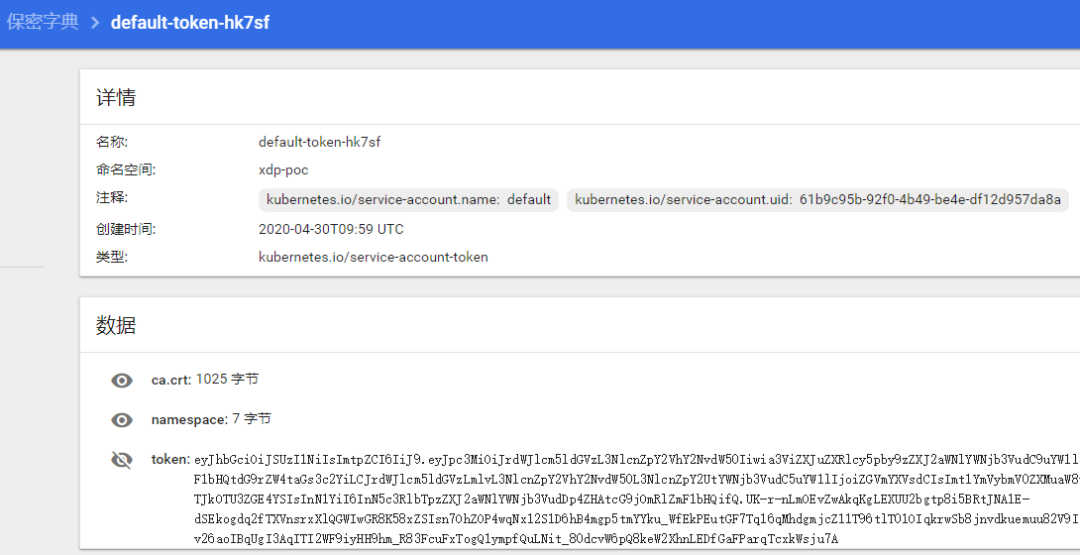
由于我的是13.5.2的老版本,因此需要配置ServiceDiscoveryProvider下的信息(例如Token),这里我直接使用的我要配置的命名空间xdp-poc下的default-token,你可以在这里获取到:
据张队介绍,新版本的K8s Provider不再需要提供这些信息配置。
为了能够让这个serviceaccount能够具有获取endpoint的权限,我们还需要事先执行一下以下语句:
kubectl create clusterrolebinding k8s-api-admin\
--clusterrole=cluster-admin --user=admin --user=kubelet\
--group=system:serviceaccounts
实际环境中可以专门给Ocelot网关服务建立一个ServiceAccount,仅仅给它赋予View权限,示例语句如下(感谢圣杰的补充):
kubectl create clusterrolebinding ocelot-svc-discovery --clusterrole=view --serviceaccount=demo:default
如果不执行以上语句可能会出现KubeClient的权限不够,无法获取对应服务的注册地址和端口,也就无法正确指向对应的服务接口。
默认情况下,如果在GlobalConfiguration中配置了ServiceNamespace,那么在路由表中不再需要为每个路由设置ServiceNamespace,但是如果某一个或几个是在不同的ServiceNamespace下,可以在其中为其单独设置ServiceNamespace,如下所示:
{
  "DownstreamPathTemplate": "/api/{url}",
  "DownstreamScheme": "http",
  "UpstreamPathTemplate": "/banana/{url}",
  "ServiceName": "banana-api-svc",
  "ServiceNamespace" : "kube-system",
  "UpstreamHttpMethod": [ "Get", "Post", "Put", "Delete" ]
}
二、镜像&部署
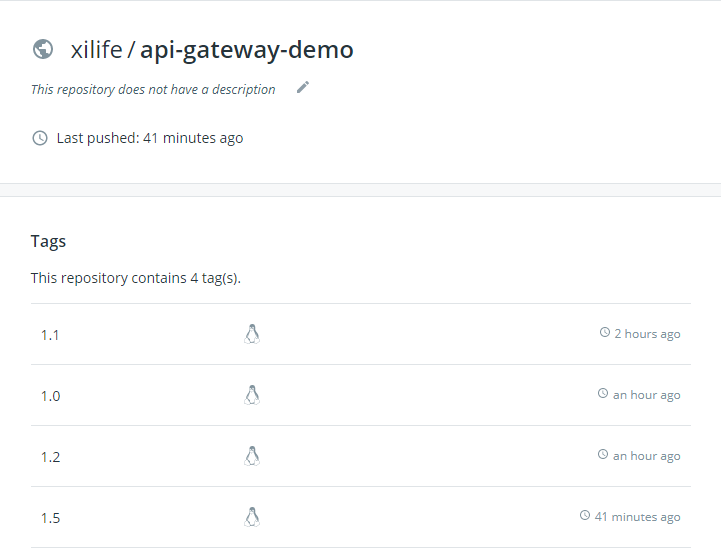
准备好了API网关的代码,就可以生成镜像并推送到镜像仓库了,这里我仍然推到我的docker hub上,如下图所示:
当然,实际中还是建议推到自己企业的私有镜像仓库(例如基于Harbor搭建一个)或者使用阿里云或其他云的私有镜像仓库服务。
然后,准备一个用于deploy的yaml文件如下:
apiVersion: apps/v1
kind: Deployment
metadata:
  name: api-gateway-demo
  namespace: xdp-poc
  labels:
    name: api-gateway-demo
spec:
  replicas: 2
  selector:
    matchLabels:
      name: api-gateway-demo
  template:
    metadata:
      labels:
        name: api-gateway-demo
    spec:
      containers:
      - name: api-gateway-demo
        image: xilife/api-gateway-demo:1.0
        ports:
        - containerPort: 80
        imagePullPolicy: IfNotPresent

---

kind: Service
apiVersion: v1
metadata:
  name: api-gateway-svc
  namespace: xdp-poc
spec:
  type: NodePort
  ports:
    - port: 80
      targetPort: 80
      nodePort: 30080
  selector:
    name: api-gateway-demo
通过kubectl将其部署到K8s集群中:
kubectl apply -f deploy-api-gateway-svc.yaml
通过Dashboard也可以看到部署成功:

亦或通过查看容器日志验证:

三、快速验证
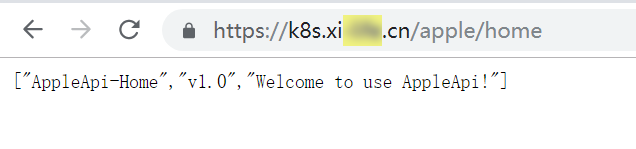
这里由于我刚刚设置的服务是NodePort方式,并且指定暴露的端口号是30080,那么我直接通过IP+Port来直接访问:
(1)AppleApi

(2)BananaApi

当然,你也可以为你的API网关入口配置SSL证书,通过https来访问提高安全性(实际中也是强烈建议):
四、小结
本文介绍了如何在K8s集群中接入基于Ocelot的API网关服务来替代Ingress作为K8s集群API服务的统一入口,虽然示例很简单,但是基本的介绍目的已经达到了。在此,也特别感谢Ocelot的贡献者们,以及张队贡献的这个集成K8s的 Provider。
参考资料
Ocelot K8s部分Doc,https://ocelot.readthedocs.io/en/latest/features/kubernetes.html
忧康,K8s-Endpoint访问外部服务
杨波,《Sprint Boot与Kubernetes云原生应用实践》课程


 浙公网安备 33010602011771号