[UWP]UIElement.Clip虽然残废,但它还可以这样玩
1. 复习一下WPF的UIElement.Clip
用了很久很久的WPF,但几乎没有主动用过它的Clip属性,我只记得它很灵活,可以裁剪出多种形状。在官方文档复习了一下,大致用法和效果如下:
<Image
  Source="sampleImages\Waterlilies.jpg"
  Width="200" Height="150" HorizontalAlignment="Left">
  <Image.Clip>
    <EllipseGeometry
      RadiusX="100"
      RadiusY="75"
      Center="100,75"/>
  </Image.Clip>
</Image>

WPF的Clip是一个Geometry属性,它有多种派生类:
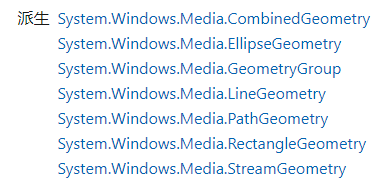
有这么多种Geometry,WPF的UIElement就可以裁剪成各种奇形怪状的形状,过去也有很多示例和文章讲解过如何利用WPF的Clip,这里就割爱了。
2. UWP中的UIElement.Clip
WPF的Clip真的为所欲为,然而到了UWP就变得绑手绑脚了,因为UWP的UIElement.Clip居然是个RectangleGeometry属性,也就是说UIElement只能接受矩形的裁剪区域,这已经不是简单,近乎残废了。具体用法差不多:
<Canvas>
    <Image Source="Images/Water_lilies.jpg" Width="200" Height="150">
        <Image.Clip>
            <RectangleGeometry Rect="100 75 50 50"/>
        </Image.Clip>
    </Image>
</Canvas>
其实Win2D和CompositionAPI可以做到复杂的裁剪,但用起来也比较复杂啊。也许UWP的理念是将XAML做成一个简单好用的工具,更复杂的内容全部交给Win2D和CompositionAPI实现?
3. 也许用不着Clip?
如果只能简单地剪切出矩形区域的话,很多时候都用不着Clip,在XAML中有其它方法可以实现需要的功能。

例如上面这个长阴影的失败例子,我应该裁剪超过边框的元素,如果要用Clip,XAML要这样写:
<StackPanel Background="#FFE87A69"
            x:Name="ShadowBorder">
    <StackPanel.Clip>
        <RectangleGeometry Rect="0 0 600 160" />
    </StackPanel.Clip>
…
…
</StackPanel>
虽然最终实现了我要的想过,但一点都不开心,因为写死的尺寸都不优雅。或者可以绑定到ActualHeight和ActualWidth?反正我没有试过。
在用WPF时我也常常遇到这种问题,但我总是用ScrollViewer解决,ScrollViewer本身就有提供Clip的功能,代码如下:
<ScrollViewer Padding="0"
              BorderThickness="0"
              HorizontalScrollBarVisibility="Disabled"
              VerticalScrollBarVisibility="Disabled">
    <StackPanel Background="#FFE87A69"
                x:Name="ShadowBorder">
        ...
        ...
    </StackPanel>
</ScrollViewer>
XAML胖点就胖点吧,又不会怎样。
不过UWP有个神奇的功能,CornerRadius设置为大于0的值就会裁剪范围外的内容,毕竟有了圆角不裁剪的话会很难看?所以UWP贴心地帮忙做了这个操作?算了不管原理了,反正一个像素的圆角,你不说我不说没人会看得出来,安心地这样用比自己设置Clip方便多了。
<StackPanel Background="#FFE87A69" CornerRadius="1">
看吧,1像素的圆角真的很难发现。最近WinUI改版,它的圆角做成2像素了,就是因为1像素真的看不出来。
4. Clip还可以这样玩
上面介绍到如何使用、或者不使用Clip裁剪范围内的剧情区域。除此之外,因为可以指定裁剪的起始和结束为止,还是有不少可玩的地方。
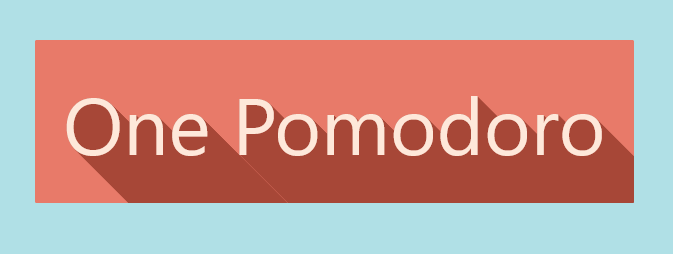
上面这个懂的人都懂的中二病红和智障蓝组成的番茄钟就用了Clip,简单地将同一个文字复制出来两份,以中间为届分别裁剪出上半部分和下半部分,再分别向两边做位移的Spring动画,这样就能做出切开的效果:
<Grid Height="1050" Width="1920" x:Name="ContentArea" RenderTransformOrigin="0.5,0.5" >
    <Grid.RenderTransform>
        <CompositeTransform Rotation="-8"/>
    </Grid.RenderTransform>
    <Grid >
        <Grid x:Name="FocusElementTop">
            <Grid.Clip>
                <RectangleGeometry Rect="-1000,-1000,3920,1525"/>
            </Grid.Clip>
            <TextBlock Style="{StaticResource FocusText}" />
        </Grid>
        <Grid x:Name="FocusElementBottom">
            <Grid.Clip>
                <RectangleGeometry Rect="-1000,525,3920,1525"/>
            </Grid.Clip>
            <TextBlock Style="{StaticResource FocusText}" />
        </Grid>
        <Grid x:Name="RelaxElementTop">
            <Grid.Clip>
                <RectangleGeometry Rect="-1000,-1000,3920,1525"/>
            </Grid.Clip>
            <TextBlock Style="{StaticResource RelaxText}"/>
        </Grid>
        <Grid x:Name="RelaxElementBottom">
            <Grid.Clip>
                <RectangleGeometry Rect="-1000,525,3920,1525"/>
            </Grid.Clip>
            <TextBlock Style="{StaticResource RelaxText}"/>
        </Grid>
    </Grid>
</Grid>
做UWP应用不需要太介意性能,UWP的的性能比WPF好太多,而且都2019年了,那些少内存就不要客气了。上面这个懂的人都懂的五等分配色的番茄钟就毫不客气地叠加再叠加,每个部分用了不同的Clip,背景和文字用了不同时间的Spring动画,出来的效果很有趣。XAML大致上是这样:
<Grid Width="1600"
      HorizontalAlignment="Left">
    <Grid Background="#f8a9a2">
        <UIElement.Clip>
            <RectangleGeometry Rect="000,-1000,320,5050" />
        </UIElement.Clip>
        <controls:HeaderedContentControl Foreground="White"
                                         Header="FOCUS ON JOB"/>
    </Grid>
    <Grid Background="White">
        <UIElement.Clip>
            <RectangleGeometry Rect="320,-1000,320,5050" />
        </UIElement.Clip>
        <controls:HeaderedContentControl Foreground="#ed4e5d"
                                         Header="FOCUS ON JOB"/>
    </Grid>
    <Grid Background="#974945">
        <UIElement.Clip>
            <RectangleGeometry Rect="640,-1000,320,5050" />
        </UIElement.Clip>
        <controls:HeaderedContentControl Foreground="White"
                                         Header="FOCUS ON JOB"/>
    </Grid>
    <Grid Background="White">
        <UIElement.Clip>
            <RectangleGeometry Rect="960,-1000,320,5050" />
        </UIElement.Clip>
        <controls:HeaderedContentControl Foreground="#ef804b"
                                         Header="FOCUS ON JOB"/>
    </Grid>
    <Grid Background="#e74b36">
        <UIElement.Clip>
            <RectangleGeometry Rect="1280,-1000,320,5050" />
        </UIElement.Clip>
        <controls:HeaderedContentControl Foreground="White"
                                         Header="FOCUS ON JOB"/>
    </Grid>
</Grid>
5. 也许真用不着Clip?
不要因为学会用Clip了就什么地方都用Clip,有时候并不需要用到。例如上面这个,看上去文字是从Clip外面的区域进入的,但其实并没有用到Clip,只是调整了Canvas.ZIndex遮住不需要的部分而已。
6. 结语
UWP中其实有几种裁剪方案,最残废的是UIElement.Clip,也就是这篇文章提到的这个。上一篇文章还讲解了Win2D中裁剪。其实CompositionAPI也有它的裁剪方案,下一篇文章将介绍CompositionAPI的Clip用法。
顺便一提,火火提到WPF可以用UIElement.ClipToBounds。因为Silverlight没有这个属性,而我很多控件SL和WPF都用同一套代码,所以以前很少用到这个属性,很偶尔偶尔才会想起有这个属性,例如这么用:
7. 参考
UIElement.Clip 属性 (System.Windows) _ Microsoft Docs
UIElement.Clip Property (Windows.UI.Xaml) - Windows UWP applications _ Microsoft Docs
RectangleGeometry Class (Windows.UI.Xaml.Media) - Windows UWP applications _ Microsoft Docs
8. 源码
OnePomodoro_DoNotDisturbView.xaml at master
作者:dino.c
出处:http://www.cnblogs.com/dino623/
说明:欢迎转载并请标明来源和作者。如有错漏请指出,谢谢。

 浙公网安备 33010602011771号