0. 开发准备
安装好 vscode 、npm / yarn,安装方法见百度。
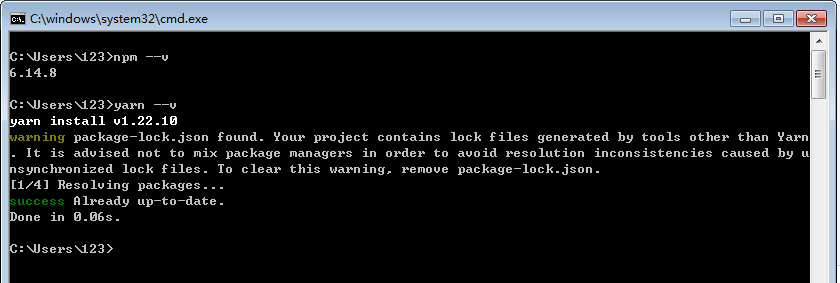
1. Electron-vue 安装
# 如果没有 vue-cli 的话需要全局安装
npm install -g vue-cli

# 然后使用 vue-cli 来安装 electron-vue 的模板
vue init simulatedgreg/electron-vue grpc-client-electron-vue

# 安装依赖
cd grpc-client-electron-vue
yarn # or npm install

# 进入开发模式
yarn run dev # or npm run dev
注1:运行完命令 vue init simulatedgreg/electron-vue hello-world 后,除了 ESLint 选项按 N 键选 no 外,其他一路按 Enter 键选择默认配置即可。如下图所示:
(EsLint 校验,主要用来规范开发人员的代码。但有些像缩进、空格、空白行之类的规范,会导致在开发过程中一直报错,选择关闭)

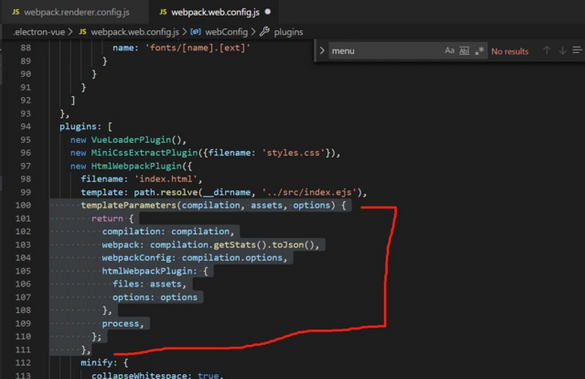
注2:当 node 版本高于 12 的时候,会报错:
Html Webpack Plugin:
ReferenceError: process is not defined
解决方法:打开.electron-vue 文件夹中的 webpack.web.config.js 和 .electron-vue/webpack.renderer.config.js,
在 HtmlWebpackPlugin,添加 templateParameters,如下图所示:
templateParameters(compilation, assets, options) {
        return {
          compilation: compilation,
          webpack: compilation.getStats().toJson(),
          webpackConfig: compilation.options,
          htmlWebpackPlugin: {
            files: assets,
            options: options
          },
          process,
        };
      },
注:后面的内容(2/3/4/5)如果不用 BootStrap 则忽略。
2. 将 Bootstrap 和 BootstrapVue 添加到项目中
# With yarn
yarn add bootstrap-vue bootstrap axios
# With npm
npm install bootstrap-vue bootstrap axios
3. 设置 BootstrapVue
接下来,让我们设置刚刚安装的 BootstrapVue 包。转到 src/render/main.js 文件并将这行代码添加到顶部:
import BootstrapVue from 'bootstrap-vue'
Vue.use(BootstrapVue)
在这里做的事情非常简单,我们导入了 BoostrapVue 包,然后用 Vue.use() 函数在程序中注册它,以便 Vue 程序可以识别。
我们还需要将 Bootstrap CSS 文件导入到项目中。将这段代码段添加到 main.js 文件中:
import 'bootstrap/dist/css/bootstrap.css'
import 'bootstrap-vue/dist/bootstrap-vue.css'
在将必要的模块导入 Vue 程序后,你的 main.js 文件应该和下面的代码段类似:


import Vue from 'vue'
import axios from 'axios'

import App from './App'
import router from './router'
import store from './store'

import 'bootstrap/dist/css/bootstrap.css'
import 'bootstrap-vue/dist/bootstrap-vue.css'
import BootstrapVue from 'bootstrap-vue'
Vue.use(BootstrapVue)

if (!process.env.IS_WEB) Vue.use(require('vue-electron'))
Vue.http = Vue.prototype.$http = axios
Vue.config.productionTip = false

/* eslint-disable no-new */
new Vue({
  components: { App },
  router,
  store,
  template: '<App/>'
}).$mount('#app')
4.创建包含 Bootstrap 组件的 vue 组件
下面开始创建我们的第一个组件,第一个组件是 Navbar 组件。在 components 目录下创建一个名为 Navbar.vue 的文件,并使用以下代码更新它:
//src/components/Navbar.vue
<template>
    <div>
      <b-navbar toggleable="lg" type="dark" variant="success">
        <b-container>
            <b-navbar-brand href="#">Mealzers</b-navbar-brand>
            <b-navbar-toggle target="nav-collapse"></b-navbar-toggle>
            <b-collapse id="nav-collapse" is-nav>
              <!-- Right aligned nav items -->
              <b-navbar-nav class="ml-auto">
                <b-nav-form>
                  <b-form-input
                    size="sm"
                    class="mr-sm-2"
                    placeholder="Search for a meal"
                    v-model="meal"
                    ></b-form-input>
                  <b-button
                    size="sm"
                    class="my-2 my-sm-0"
                    type="submit"
                    @click.prevent="getMeal"
                    >Search</b-button>
                </b-nav-form>
                <b-nav-item-dropdown right>
                  <!-- Using 'button-content' slot -->
                  <template slot="button-content"><em>User</em></template>
                  <b-dropdown-item href="#">Profile</b-dropdown-item>
                  <b-dropdown-item href="#">Sign Out</b-dropdown-item>
                </b-nav-item-dropdown>
              </b-navbar-nav>
            </b-collapse>
          </b-container>
      </b-navbar>
    </div>
</template>
<script>
export default {
    data() {
        return {
            meal: ''
        }
    },
  methods: {
    getMeal() {

    }
  }
}
</script>
Navbar 组件中包含几个 BootstrapVue 组件,其中一个是 b-navbar 组件。它是 Navbar 中其他组件的父组件。如果没有这个组件,Navbar 中的所有其他组件将无法正确呈现。
可以用 type 属性更改 Navbar 上的文本颜色。Navbar 的 background-color 也可以用 variant 属性来改变。这些颜色可以是任何正常的 Bootstrap 默认颜色 —— info、primary、success 等。
另一个是 b-navbar-brand 组件。这是可以呈现网站徽标的地方。它还包含 variant 和 type 属性,它们可以分别用于改变 background-color 和 text-color。
其他 BootstrapVue 组件是:
- b-nav-form
- b-nav-item-dropdown
- b-dropdown-item
- b-navbar-toggle
- b-collapse
- b-nav-item(可以用“disabled”属性禁用)
- b-navbar-nav
- b-nav-item.
- 更多
BootstrapVue 组件的一个美妙之处在于它们默认是响应式的。所以你无需编写额外的代码或用外部库来使其实现响应式。
还有一个组件是 Card 组件。card 组件允许我们在卡中显示图像、文本等。它写做 b-card 。为了演示它,让我们在 components 目录中创建一个 Cards.vue 文件。然后用下面的代码更新其内容:
<template>
  <b-container>
    <div v-if="meals.length">
      <b-row>
        <div v-bind:key="data.index" v-for="data in meals">
          <b-col l="4">
            <b-card
              v-bind:title="data.strCategory"
              v-bind:img-src="data.strCategoryThumb"
              img-alt="Image"
              img-top
              tag="article"
              style="max-width: 20rem;"
              class="mb-2">
              <b-card-text>{{ `${data.strCategoryDescription.slice(0,100)}...` }}</b-card-text>
              <b-button href="#" variant="primary">View food</b-button>
            </b-card>
          </b-col>
        </div>
      </b-row>
    </div>
    <div v-else>
      <h5>No meals available yet 😢</h5>
    </div>
  </b-container>
</template>
<script>
import axios from "axios";
export default {
  data() {
    return {
      meals: []
    };
  },
  mounted() {
    axios
      .get("https://www.themealdb.com/api/json/v1/1/categories.php")
      .then(response => {
        this.meals = response.data.categories;
      })
      .catch(err => {
        console.log(err);
      });
  }
};
</script>
5. 渲染包含 Bootstrap 组件的 vue 组件
为了渲染之前创建的 Navbar、Cards 组件,需要修改 LandingPage.vue 文件。打开它并使用以下代码更新:
<template>
  <div id="wrapper">
    <img id="logo" src="~@/assets/logo.png" alt="electron-vue">
    <main>
      <div class="top-side">
        <span class="title">
          Welcome to your new project!
        </span>
        <system-information></system-information>
      </div>

      <div class="bottom-side">
        <navbar/>
        <cards />
      </div>
    </main>
  </div>
</template>

<script>
  import Navbar from './Navbar.vue'
  import Cards from './Cards.vue'
  import SystemInformation from './LandingPage/SystemInformation'

  export default {
    name: 'landing-page',
    components: { SystemInformation, Cards, Navbar },
    methods: {
      open (link) {
        this.$electron.shell.openExternal(link)
      }
    }
  }
</script>

<style>
  @import url('https://fonts.googleapis.com/css?family=Source+Sans+Pro');

  * {
    box-sizing: border-box;
    margin: 0;
    padding: 0;
  }

  body { font-family: 'Source Sans Pro', sans-serif; }

  #wrapper {
    background:
      radial-gradient(
        ellipse at top left,
        rgba(255, 255, 255, 1) 40%,
        rgba(229, 229, 229, .9) 100%
      );
    height: 100vh;
    padding: 60px 80px;
    width: 100vw;
  }

  #logo {
    height: auto;
    margin-bottom: 20px;
    width: 420px;
  }

  main {
    display: flex;
    justify-content: space-between;
  }

  main > div { flex-basis: 50%; }

  .left-side {
    display: flex;
    flex-direction: column;
  }

  .welcome {
    color: #555;
    font-size: 23px;
    margin-bottom: 10px;
  }

  .title {
    color: #2c3e50;
    font-size: 20px;
    font-weight: bold;
    margin-bottom: 6px;
  }

  .title.alt {
    font-size: 18px;
    margin-bottom: 10px;
  }

  .doc p {
    color: black;
    margin-bottom: 10px;
  }

  .doc button {
    font-size: .8em;
    cursor: pointer;
    outline: none;
    padding: 0.75em 2em;
    border-radius: 2em;
    display: inline-block;
    color: #fff;
    background-color: #4fc08d;
    transition: all 0.15s ease;
    box-sizing: border-box;
    border: 1px solid #4fc08d;
  }

  .doc button.alt {
    color: #42b983;
    background-color: transparent;
  }
</style>
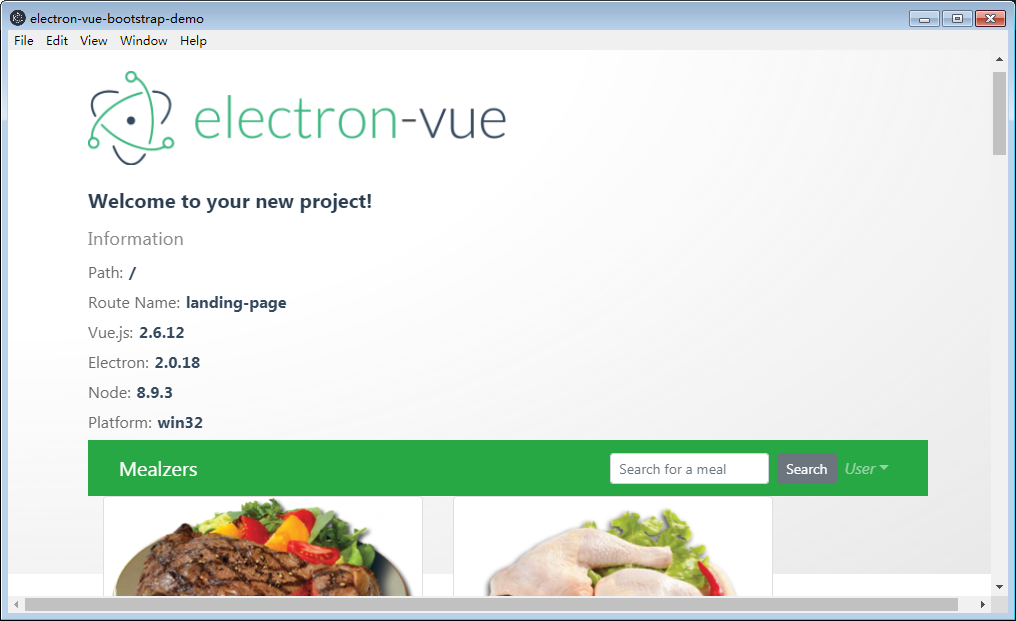
在这里做的是创建一个 Navbar、Cards 组件并将其嵌入到 LandingPage.vue 文件中,这时再运行 yarn run dev 命令,可以看到我们的 Demo 程序运行如下:

 浙公网安备 33010602011771号