C# PDF Page操作——设置页面切换按钮 C# 添加、读取Word脚注尾注 C#为什么不能像C/C++一样的支持函数只读传参 web 给大家分享一个好玩的东西,也许你那块就用的到
C# PDF Page操作——设置页面切换按钮
概述
在以下示例中,将介绍在PDF文档页面设置页面切换按钮的方法。示例中将页面切换按钮的添加分为了两种情况,一种是设置按钮跳转到首页、下页、上页或者最后一页,另一种是设置按钮跳转到指定页面。两种方法适应不同的程序设计需要,可自行选择合适的添加方法。
说明
这里的代码示例需要使用类库Spire.PDF for .NET,版本4.0 。在使用该类库时,在项目程序中引用Spire.Pdf.dll即可(dll文件在安装路径下的Bin文件中获取)。
如:

代码操作示例(供参考)
1.跳转至特定页(首页、下一页、上一页、最后一页)
【C#】

using Spire.Pdf;
using Spire.Pdf.Actions;
using Spire.Pdf.Fields;
using Spire.Pdf.Graphics;
using System.Drawing;

namespace ButtonToAppointedPage_PDF
{
    class Program
    {
        static void Main(string[] args)
        {
            //实例化PdfDocument类,加载PDF测试F文档
            PdfDocument doc = new PdfDocument();
            doc.LoadFromFile("sample.pdf");

            //允许添加Form
            doc.AllowCreateForm = true;

            //获取文档最后一页
            PdfPageBase lastPage = doc.Pages[doc.Pages.Count - 1];

            //在页面指定位置添加指定大小的按钮
            PdfButtonField button = new PdfButtonField(lastPage, "Click To Back ");
            button.Bounds = new RectangleF(lastPage.ActualSize.Width - 150, lastPage.ActualSize.Height - 400, 60, 20);

            //设置按钮边框颜色
            button.BorderStyle = PdfBorderStyle.Solid;
            button.BorderColor = new PdfRGBColor(Color.White);

            //设置按钮背景色
            button.BackColor = Color.Azure;

            //设置按钮提示语
            button.ToolTip = "To the first page";

            //设置按钮文字字体和颜色
            PdfTrueTypeFont trueTypeFont = new PdfTrueTypeFont(new Font("Avant Garde", 9f), true);
            button.Font = trueTypeFont;
            button.ForeColor = Color.Black;

            //创建PdfNamedAction实例,在传入的参数中选择上一页、下一页、首页或最后一页
            PdfNamedAction namedAction = new PdfNamedAction(PdfActionDestination.FirstPage);

            //应用动作
            button.Actions.MouseDown = namedAction;

            //添加按钮到文档
            doc.Form.Fields.Add(button);

            //保存并打开PDF文档
            doc.SaveToFile("result.pdf", FileFormat.PDF);
            System.Diagnostics.Process.Start("result.pdf");

        }
    }
}
PS:这里的PdfNameAction类支持四种按钮跳转动作

添加效果(截图):

点击文中的按钮时,即可跳转至按钮指向的页面。
2.跳转至指定页面
【C#】
using Spire.Pdf;
using Spire.Pdf.Actions;
using Spire.Pdf.Fields;
using Spire.Pdf.General;
using Spire.Pdf.Graphics;
using System.Drawing;

namespace Buttom2
{
    class Program
    {
        static void Main(string[] args)
        {
            //实例化PdfDocument类,加载PDF文档
            PdfDocument doc = new PdfDocument();
            doc.LoadFromFile("sample.pdf");

            //允许添加Form
            doc.AllowCreateForm = true;

            //获取最后一页
            PdfPageBase lastPage = doc.Pages[doc.Pages.Count - 1];

            //在页面指定位置添加按钮
            PdfButtonField button = new PdfButtonField(lastPage, "Back");
            button.Bounds = new RectangleF(lastPage.ActualSize.Width - 150, lastPage.ActualSize.Height - 700, 50, 20);

            //设置按钮边框颜色
            button.BorderStyle = PdfBorderStyle.Solid;
            button.BorderColor = new PdfRGBColor(Color.Transparent);

            //设置按钮背景色
            button.BackColor = Color.WhiteSmoke;

            //设置按钮提示语
            button.ToolTip = "Click and back to the third page";

            //设置按钮文字字体和颜色
            PdfTrueTypeFont trueTypeFont = new PdfTrueTypeFont(new Font("Avant Garde", 9f), true);
            button.Font = trueTypeFont;
            button.ForeColor = Color.Black;

            //实例化PdfDestination对象,传入指定页码到第3页
            PdfDestination destination = new PdfDestination(doc.Pages[2]);

            //创建go to动作
            PdfGoToAction goToAction = new PdfGoToAction(destination);

            //应用动作
            button.Actions.MouseDown = goToAction;

            //添加按钮到文档
            doc.Form.Fields.Add(button);

            //保存并打开PDF文档
            doc.SaveToFile("result.pdf", FileFormat.PDF);
            System.Diagnostics.Process.Start("result.pdf");
        }
    }
}
添加效果(截图):

点击按钮,即可跳转至指定的文档第3页。
关于添加PDF页面跳转按钮的方法,本文介绍到这里,希望文中的代码能给各位开发者提供一定参考价值。
如需转载,请注明出处。
感谢阅读!
C# 添加、读取Word脚注尾注
脚注和尾注是对文本的补充说明。脚注一般位于页面的底部,可以作为文档某处内容的注释;尾注一般位于文档的末尾,列出引文 的出处等。在本示例中将介绍如何来添加或删除Word脚注。
工具使用: Free Spire. Doc for .NET(免费版)
第一步 :dll引用

第二步: 添加Word脚注、尾注
【C#】

using Spire.Doc;
using Spire.Doc.Documents;
using Spire.Doc.Fields;
using System.Drawing;

namespace InsertFootnote_Doc
{
    class Program
    {
        static void Main(string[] args)
        {
            //新建一个word文档对象并加载需要添加脚注尾注的word文档
            Document document = new Document();
            document.LoadFromFile("sample.docx", FileFormat.Docx2010);

            //获取第3个段落
            Paragraph paragraph = document.Sections[0].Paragraphs[2];

            //添加脚注
            Footnote footnote = paragraph.AppendFootnote(FootnoteType.Footnote);

            //在第一段里查找指定字符串,并添加脚注
            DocumentObject obj = null;

            for (int i = 0; i < paragraph.ChildObjects.Count; i++)
            {
                obj = paragraph.ChildObjects[i];
                if (obj.DocumentObjectType == DocumentObjectType.TextRange)
                {
                    TextRange textRange = obj as TextRange;

                    if (textRange.Text == "中国——东盟自贸区框架")
                    {
                        //为添加脚注的字符串设置加粗格式
                        textRange.CharacterFormat.Bold = true;
                        //插入脚注
                        paragraph.ChildObjects.Insert(i + 1, footnote);
                        break;
                    }
                }
            }

            //添加脚注内容被设置字体格式
            TextRange text = footnote.TextBody.AddParagraph().AppendText("2002年11月4日,***总理和东盟10国领导人共同签署了《中国-东盟全面经济合作框架协议》,这标志着中国与东盟的经贸合作进入了一个新的历史阶段。");
            text.CharacterFormat.FontName = "Arial Black";
            text.CharacterFormat.FontSize = 9;
            text.CharacterFormat.TextColor = Color.DarkGray;
            footnote.MarkerCharacterFormat.FontName = "Calibri";
            footnote.MarkerCharacterFormat.FontSize = 12;
            footnote.MarkerCharacterFormat.Bold = true;
            footnote.MarkerCharacterFormat.TextColor = Color.DarkGreen;


            //获取第5段落
            Paragraph paragraph2 = document.Sections[0].Paragraphs[4];

            //添加尾注并设置尾注和格式
            Footnote endnote = paragraph2.AppendFootnote(FootnoteType.Endnote);

            TextRange text2 = endnote.TextBody.AddParagraph().AppendText("党的十七大报告明确指出:"
                +"“坚持对外开放的*本国策,把‘引进来’和‘走出去’更好地结合起来,"
                +"扩大开放领域,优化开放结构,提高开放质量,完善内外联动,"
                +"互利共赢、安全高效的开放型经济体系,形成经济全球化条件下参与国际经济合作和竞争的新优势。");
            text2.CharacterFormat.FontName = "Arial Black";
            text2.CharacterFormat.FontSize = 9;
            text2.CharacterFormat.TextColor = Color.Black;
            endnote.MarkerCharacterFormat.FontName = "Calibri";
            endnote.MarkerCharacterFormat.FontSize = 12;
            endnote.MarkerCharacterFormat.Bold = false;
            endnote.MarkerCharacterFormat.TextColor = Color.DarkGreen;

            //保存并打开文档
            document.SaveToFile("添加脚注尾注.docx", FileFormat.Docx2010);
            System.Diagnostics.Process.Start("添加脚注尾注.docx");
        }
    }
}
测试结果:

第三步 :读取脚注/尾注
【C#】
//创建Document类对象,加载需要测试的文档
            Document document = new Document();
            document.LoadFromFile("添加脚注尾注.docx");
            //获取文档第一个section
            Section section = document.Sections[0];

            //实例化StringBuilder类
            StringBuilder sb = new StringBuilder();

            //遍历文档中所有段落
            foreach (Paragraph paragraph in section.Paragraphs)
            {
                for (int i = 0, cnt = paragraph.ChildObjects.Count; i < cnt; i++)
                {
                    ParagraphBase pBase = paragraph.ChildObjects[i] as ParagraphBase;
                    if (pBase is Footnote)
                    {
                        //若需要读取尾注,将此处FootnoteType.Footnote改成 FootnoteType.Endnote即可
                        if ((pBase as Footnote).FootnoteType == FootnoteType.Footnote)
                        {
                            foreach (Paragraph footPara in (pBase as Footnote).TextBody.Paragraphs)
                            {
                                sb.Append(footPara.Text);
                            }
                        }
                    }
                }
            }
            //将读取内容写入文本并保存
            File.WriteAllText("FootNotes.txt", sb.ToString());
            //打开文档
            System.Diagnostics.Process.Start("FootNotes.txt");
读取结果:
脚注读取结果:

尾注读取结果:

C#为什么不能像C/C++一样的支持函数只读传参
C#为什么不能像C/C++一样的支持函数只读传参?
这个问题其实问的人挺多的,我自己也经常想实现这个功能,但是发现总是那么的不尽人意。
有些人倒是给出了一下答案,但是都不能很好的解决像C/C++一样的支持函数只读传参这个问题。
其实这块我觉得我们可能有个误区。就是我们为什么要这样做呢?这样做的目的是什么?对了就是这个。答案也在这里面。关键就在这目的上。我们用C/C++可能有 function(Data const * const pcData),但是在C#里面没有了。感觉似乎少了点什么。对就是少了点什么,我一直这么觉着。其实我们仔细想一想,C/C++这么写是什么目的?这么写的目的是不允许(限制)写接口的人在实现接口的时候在接口类部修改参数内容,对了,就是这个目的。可是写接口的人不管怎么写,调用接口的人怎么知道呢,他可能看了头文件里面的函数声明,哦,这个函数是安全的,不会修改我的参数。关键点来了。其实C/C++的const参数限定,是在写代码的时候编译期限定的,也就是说编译器在你编译方法的时候就帮你检查了方法是否有修改参数的行为。那么C#呢?他就让写方法的人去决定是否会在内部修改参数内容。C#有四种参数修饰符:in、params、ref、out。这四种各有各的用途,尤其是ref和out,out专门用来修改参数的,那么当我们没有修饰符的修改参数的时候,我们应该默认是不修改函数参数的。目前本人只能理解到这种地步,希望有更深层次的理解的朋友给出帮助。谢谢!!!
C#中有引用类型和值类型的说法。C++中没有专门区分出值类型与引用类型
web 给大家分享一个好玩的东西,也许你那块就用的到
先看效果:
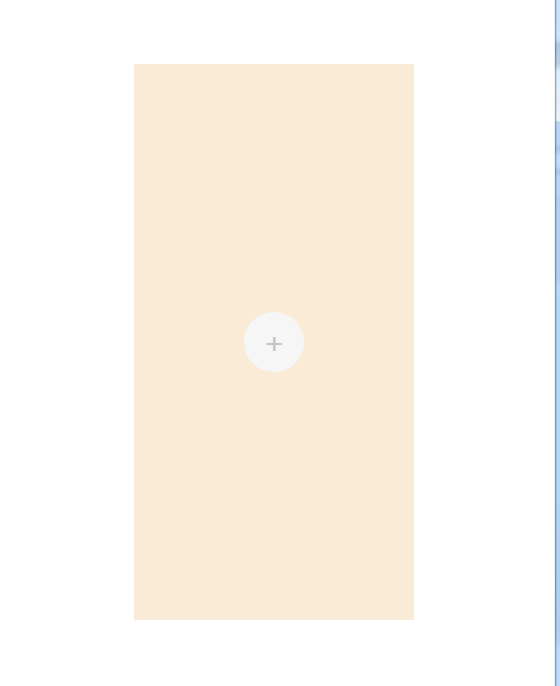
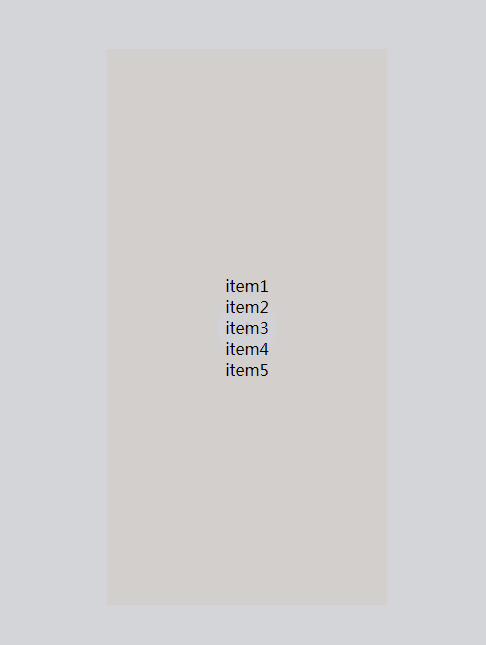
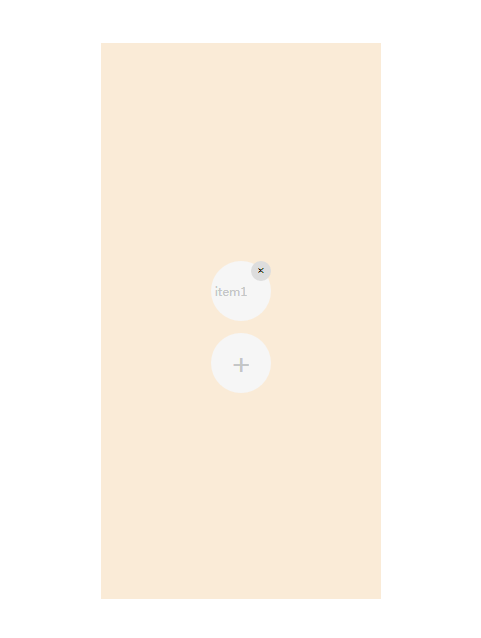
就这个效果。当你点击右上角的删除按钮,会删除掉item1。
上代码:

  1 <!DOCTYPE html>
  2 <html>
  3
  4 <head>
  5     <meta charset="utf-8">
  6     <title></title>
  7     <style type="text/css">
  8         .central {
  9             /* 利用绝对定位和flex实现居中 */
 10             position: absolute;
 11             top: 0px;
 12             right: 0px;
 13             bottom: 0px;
 14             left: 0px;
 15             margin: auto;
 16             width: 50%;
 17             height: 80%;
 18             background-color: antiquewhite;
 19             /* 居中效果结束 */
 20
 21             display: flex;
 22             flex-direction: column;
 23             /* 垂直排列 */
 24             /* 与justify-content相同的方式在侧轴方向上将当前行上的弹性元素对齐。也就是上下居中 */
 25             align-items: center;
 26             /* 居中排列,水平方向 */
 27             justify-content: center;
 28         }
 29
 30         #pop_div {
 31             background-color: #F6F6F6;
 32             width: 60px;
 33             height: 60px;
 34             border-radius: 30px;    /* 用边框半径实现圆形div */
 35             text-align: center;
 36             line-height: 60px;
 37             outline: none;
 38             font-size: 30px;
 39             color: #C4C6C7;
 40         }
 41
 42         #pop_div:hover {
 43             cursor: pointer;        /* 当鼠标移动到标签上是,自动变成手指形状 */
 44         }
 45
 46         .add_item {
 47             background-color: #F6F6F6;
 48             width: 60px;
 49             height: 60px;
 50             border-radius: 30px;
 51             text-align: center;
 52             line-height: 60px;
 53             outline: none;
 54             font-size: 10px;
 55             color: #C4C6C7;
 56         }
 57
 58         .btn_delete {
 59             position: relative;
 60             float: right;
 61             right: 0px;
 62             top: 0px;
 63             width: 20px;
 64             height: 20px;
 65             border-radius: 10px;
 66             outline: none;
 67             border: none;
 68             cursor: pointer;
 69         }
 70
 71         .hide_div {
 72             position: absolute;
 73             top: 0px;
 74             right: 0px;
 75             bottom: 0px;
 76             left: 0px;
 77             margin: auto;
 78             width: 100%;
 79             height: 100%;
 80
 81             display: none;  /* 显示方式:none(标签不显示) */
 82             background-color: rgba(194, 195, 201, 0.7);     /* 实现半透明北京,0.7代表不透明度 */
 83         }
 84
 85         .hide_div div {
 86             cursor: pointer;
 87         }
 88     </style>
 89 </head>
 90
 91 <body>
 92     <div class="central">
 93         <div id="panel"></div>
 94         <div id="pop_div" title="添加" onclick="popDiv();">+</div>
 95     </div>
 96     <div id="hide_div" class="hide_div">
 97         <div id="item1" onclick="itemClick('item1');">item1</div>
 98         <div id="item2" onclick="itemClick('item2');">item2</div>
 99         <div id="item3" onclick="itemClick('item3');">item3</div>
100         <div id="item4" onclick="itemClick('item4');">item4</div>
101         <div id="item5" onclick="itemClick('item5');">item5</div>
102     </div>
103     <script>
104         function popDiv() {
105             // alert("将要弹出一个div");
106             var vardiv = document.getElementById("hide_div");
107             vardiv.style.display = "flex";
108             vardiv.style.flexDirection = "column";
109             vardiv.style.justifyContent = "center";
110             vardiv.style.alignItems = "center";
111             // vardiv.onclick = itemClick;
112         }
113
114         function itemClick(item) {
115             var text = document.getElementById(item).innerHTML; /* 获取元素html属性返回string */
116             // alert(text);
117             var vardiv = document.getElementById("hide_div");
118             vardiv.style.display = "none";
119             addElementToHtml(text);
120         }
121
122         var index = 0;
123         function addElementToHtml(text) {
124             // 判断是否已经存在这个id的标签
125             if (null != document.getElementById(text + "_p")) {
126                 alert('不能重复添加...');
127                 return;
128             }
129
130             // 创建一个p标签,设置属性
131             var p = document.createElement('p');
132             p.id = text + "_p";
133             p.innerHTML = text;
134             p.className = "add_item";
135
136             // 创建一个input标签,设置属性
137             var btnDel = document.createElement('input');
138             btnDel.type = 'button';
139             btnDel.value = '×';
140             btnDel.title = "删除";
141             btnDel.className = "btn_delete";
142
143             // 绑定删除按钮删除事件
144             btnDel.onclick = function () {
145                 // alert("将删除" + this.parentNode.id + "标签及子标签...");
146                 this.parentNode.parentNode.removeChild(this.parentNode); /* 首先要找到要删除节点的父节点,然后通过父节点才能删除自己 */
147             };
148
149             // 添加删除按钮到p标签中
150             p.appendChild(btnDel);
151
152             var panel = document.getElementById("panel");
153             panel.appendChild(p);
154         }
155     </script>
156 </body>
157
158 </html>

 浙公网安备 33010602011771号