

elasticsearch-7.7.0安装集群环境
系统:centos7(x86_64)
版本:elasticsearch-7.7.0-linux-x86_64.tar.gz
主机node01:192.168.60.110
主机node02:192.168.60.120
主机node03:192.168.60.130
ElasticSearch: https://mirrors.huaweicloud.com/elasticsearch/?C=N&O=D
logstash: https://mirrors.huaweicloud.com/logstash/?C=N&O=D
kibana: https://mirrors.huaweicloud.com/kibana/?C=N&O=D
elasticsearch-analysis-ik: https://github.com/medcl/elasticsearch-analysis-ik/releases
cerebro: https://github.com/lmenezes/cerebro/releases
准备:关闭防火墙,关闭selinux,更改主机名,主机名与ip地址映射,机器重启,免密码登录,时钟同步,安装jdk
1.三台服务器配置环境
vi /etc/security/limits.conf   命令
#在后面添加
* soft nofile 65537
* hard nofile 65537
* soft nproc 65537
* hard nproc 65537
* hard memlock unlimited
* soft memlock unlimited
切换到root用户:
在   /etc/sysctl.conf文件最后添加一行
vm.max_map_count=262144

立即生效命令:
sysctl -p
vi /etc/systemd/system.conf 命令
DefaultLimitNOFILE=65536
DefaultLimitNPROC=32000
DefaultLimitMEMLOCK=infinity
备注:修改好三个配置文件之后,重新连接secureCRT或者重新连接xshell生效
需要保存、退出、重新登录xshell才可生效。
2.上传安装包解压分发
三台服务器创建文件夹
mkdir -p /export/servers/es/
192.168.60.110服务器上传tar.gz包
tar -zxvf elasticsearch-7.7.0-linux-x86_64.tar.gz -C /export/servers/es/
192.168.60.110复制两个实例
cp -r elasticsearch-7.7.0/ elasticsearch-7.7.0_r1
cp -r elasticsearch-7.7.0/ elasticsearch-7.7.0_r2
192.168.60.110创建logs文件夹和datas文件夹
mkdir -p /export/servers/es/elasticsearch-7.7.0_r1/datas
mkdir -p /export/servers/es/elasticsearch-7.7.0_r1/logs

mkdir -p /export/servers/es/elasticsearch-7.7.0_r2/datas
mkdir -p /export/servers/es/elasticsearch-7.7.0_r2/logs
192.168.60.110分发包到192.168.60.120和192.168.60.130上
scp -r /export/servers/es/elasticsearch-7.7.0_r1 root@192.168.60.120:/export/servers/es/
scp -r /export/servers/es/elasticsearch-7.7.0_r2 root@192.168.60.120:/export/servers/es/

scp -r /export/servers/es/elasticsearch-7.7.0_r1 root@192.168.60.130:/export/servers/es/
scp -r /export/servers/es/elasticsearch-7.7.0_r2 root@192.168.60.130:/export/servers/es/
3.创建普通用户
ES不能使用root用户来启动,必须使用普通用户来安装启动。
三台服务器执行:
useradd elastic
chown -R elastic:elastic /export/servers/es
4.配置elasticsearch配置文件
192.168.60.110 /export/servers/es/elasticsearch-7.7.0_r1/config/elasticsearch.yml
#配置es的集群名称
cluster.name: cloud_es
#节点名
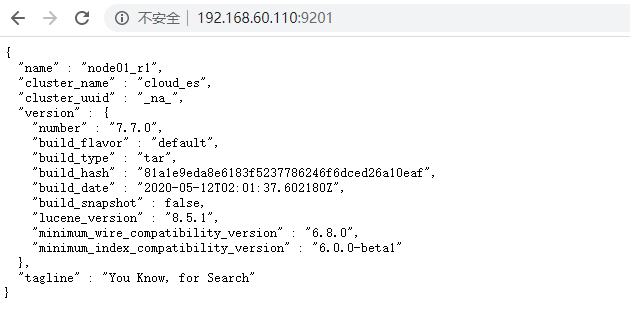
node.name: node01_r1
#主节点
node.master: true
#数据节点
node.data: true
#数据存放目录,可以设置多个存储路径,用逗号隔开
path.data: /export/servers/es/elasticsearch-7.7.0_r1/datas
#日志存放目录,可以设置多个日志路径,用逗号隔开
path.logs: /export/servers/es/elasticsearch-7.7.0_r1/logs
#服务器ip
network.host: ${HOSTNAME}
#设置节点间交互的tcp端口,默认是9300
transport.tcp.port: 9301
#设置对外服务的http端口,默认为9200
http.port: 9201
#设置这个参数来保证集群中的节点可以知道其它N个有master资格的节点。默认为1,对于大的集群来说,可以设置大一点的值(2-4)
discovery.zen.minimum_master_nodes: 2
#自动发现设置,配置之后集群的主机之间可以自动发现。对应旧版中的discovery.zen.ping.unicast.hosts。
discovery.seed_hosts: ["node01.hadoop.com:9301", "node02.hadoop.com:9301", "node03.hadoop.com:9301", "node01.hadoop.com:9302", "node02.hadoop.com:9302", "node03.hadoop.com:9302"]
#设置一系列符合主节点条件的节点的主机名或 IP 地址来引导启动集群。如果手动设置了node.name,还可以设置为此节点的名称。
cluster.initial_master_nodes: ["node01_r1"] # 确保当前节点是主节点
#是否支持跨域,默认为false
http.cors.enabled: true
#当设置允许跨域,默认为*,表示支持所有域名,
http.cors.allow-origin: "*"
#默认为false,这项使用默认配置,会导致硬盘频繁读,IOPS变高。设置true锁定物理内存地址,防止es内存被交换出去,也就是避免es使用swap交换分区。
bootstrap.memory_lock: true
#开启seccomp安全机制,seccomp能使一个进程进入到一种“安全”运行模式,该模式下的进程只能调用4种系统调用(system call),即 read(), write(), exit() 和 sigreturn(),否则进程便会被终止。
#centos6.x操作系统不支持SecComp只能为false,centos7.x操作系统可以设置成true
bootstrap.system_call_filter: true
#默认值是false,如果设置为true,那么就不允许将一个primary shard和replica shard分配到同一个物理机上,也许这个物理机上启动了多个es实例。
cluster.routing.allocation.same_shard.host: true
#设置一台机子能运行的节点数目,一般采用默认的1即可,因为我们一般也只在一台机子上部署一个节点。
node.max_local_storage_nodes: 2
192.168.60.110 /export/servers/es/elasticsearch-7.7.0_r2/config/elasticsearch.yml
#配置es的集群名称
cluster.name: cloud_es
#节点名
node.name: node01_r2

#主节点
node.master: true
#数据节点
node.data: true

#数据存放目录,可以设置多个存储路径,用逗号隔开
path.data: /export/servers/es/elasticsearch-7.7.0_r2/datas
#日志存放目录,可以设置多个日志路径,用逗号隔开
path.logs: /export/servers/es/elasticsearch-7.7.0_r2/logs

#服务器ip
network.host: ${HOSTNAME}
#设置节点间交互的tcp端口,默认是9300
transport.tcp.port: 9302
#设置对外服务的http端口,默认为9200
http.port: 9202

#设置这个参数来保证集群中的节点可以知道其它N个有master资格的节点。默认为1,对于大的集群来说,可以设置大一点的值(2-4)
discovery.zen.minimum_master_nodes: 2
#自动发现设置,配置之后集群的主机之间可以自动发现。对应旧版中的discovery.zen.ping.unicast.hosts。
discovery.seed_hosts: ["node01.hadoop.com:9301", "node02.hadoop.com:9301", "node03.hadoop.com:9301", "node01.hadoop.com:9302", "node02.hadoop.com:9302", "node03.hadoop.com:9302"]
#设置一系列符合主节点条件的节点的主机名或 IP 地址来引导启动集群。如果手动设置了node.name,还可以设置为此节点的名称。
cluster.initial_master_nodes: ["node01_r1", "node01_r2", "node02_r1", "node02_r2", "node03_r1", "node03_r2"] # 确保当前节点是主节点

#是否支持跨域,默认为false
http.cors.enabled: true
#当设置允许跨域,默认为*,表示支持所有域名,
http.cors.allow-origin: "*"

#默认为false,这项使用默认配置,会导致硬盘频繁读,IOPS变高。设置true锁定物理内存地址,防止es内存被交换出去,也就是避免es使用swap交换分区。
bootstrap.memory_lock: true
#开启seccomp安全机制,seccomp能使一个进程进入到一种“安全”运行模式,该模式下的进程只能调用4种系统调用(system call),即 read(), write(), exit() 和 sigreturn(),否则进程便会被终止。
#centos6.x操作系统不支持SecComp只能为false,centos7.x操作系统可以设置成true
bootstrap.system_call_filter: true

#默认值是false,如果设置为true,那么就不允许将一个primary shard和replica shard分配到同一个物理机上,也许这个物理机上启动了多个es实例。
cluster.routing.allocation.same_shard.host: true
#设置一台机子能运行的节点数目,一般采用默认的1即可,因为我们一般也只在一台机子上部署一个节点。
node.max_local_storage_nodes: 2
192.168.60.120 /export/servers/es/elasticsearch-7.7.0_r1/config/elasticsearch.yml
#配置es的集群名称
cluster.name: cloud_es
#节点名
node.name: node02_r1

#主节点
node.master: true
#数据节点
node.data: true

#数据存放目录,可以设置多个存储路径,用逗号隔开
path.data: /export/servers/es/elasticsearch-7.7.0_r1/datas
#日志存放目录,可以设置多个日志路径,用逗号隔开
path.logs: /export/servers/es/elasticsearch-7.7.0_r1/logs

#服务器ip
network.host: ${HOSTNAME}
#设置节点间交互的tcp端口,默认是9300
transport.tcp.port: 9301
#设置对外服务的http端口,默认为9200
http.port: 9201

#设置这个参数来保证集群中的节点可以知道其它N个有master资格的节点。默认为1,对于大的集群来说,可以设置大一点的值(2-4)
discovery.zen.minimum_master_nodes: 2
#自动发现设置,配置之后集群的主机之间可以自动发现。对应旧版中的discovery.zen.ping.unicast.hosts。
discovery.seed_hosts: ["node01.hadoop.com:9301", "node02.hadoop.com:9301", "node03.hadoop.com:9301", "node01.hadoop.com:9302", "node02.hadoop.com:9302", "node03.hadoop.com:9302"]
#设置一系列符合主节点条件的节点的主机名或 IP 地址来引导启动集群。如果手动设置了node.name,还可以设置为此节点的名称。
cluster.initial_master_nodes: ["node01_r1", "node01_r2", "node02_r1", "node02_r2", "node03_r1", "node03_r2"] # 确保当前节点是主节点

#是否支持跨域,默认为false
http.cors.enabled: true
#当设置允许跨域,默认为*,表示支持所有域名,
http.cors.allow-origin: "*"

#默认为false,这项使用默认配置,会导致硬盘频繁读,IOPS变高。设置true锁定物理内存地址,防止es内存被交换出去,也就是避免es使用swap交换分区。
bootstrap.memory_lock: true
#开启seccomp安全机制,seccomp能使一个进程进入到一种“安全”运行模式,该模式下的进程只能调用4种系统调用(system call),即 read(), write(), exit() 和 sigreturn(),否则进程便会被终止。
#centos6.x操作系统不支持SecComp只能为false,centos7.x操作系统可以设置成true
bootstrap.system_call_filter: true

#默认值是false,如果设置为true,那么就不允许将一个primary shard和replica shard分配到同一个物理机上,也许这个物理机上启动了多个es实例。
cluster.routing.allocation.same_shard.host: true
#设置一台机子能运行的节点数目,一般采用默认的1即可,因为我们一般也只在一台机子上部署一个节点。
node.max_local_storage_nodes: 2
192.168.60.120 /export/servers/es/elasticsearch-7.7.0_r2/config/elasticsearch.yml
#配置es的集群名称
cluster.name: cloud_es
#节点名
node.name: node02_r2

#主节点
node.master: true
#数据节点
node.data: true

#数据存放目录,可以设置多个存储路径,用逗号隔开
path.data: /export/servers/es/elasticsearch-7.7.0_r2/datas
#日志存放目录,可以设置多个日志路径,用逗号隔开
path.logs: /export/servers/es/elasticsearch-7.7.0_r2/logs

#服务器ip
network.host: ${HOSTNAME}
#设置节点间交互的tcp端口,默认是9300
transport.tcp.port: 9302
#设置对外服务的http端口,默认为9200
http.port: 9202

#设置这个参数来保证集群中的节点可以知道其它N个有master资格的节点。默认为1,对于大的集群来说,可以设置大一点的值(2-4)
discovery.zen.minimum_master_nodes: 2
#自动发现设置,配置之后集群的主机之间可以自动发现。对应旧版中的discovery.zen.ping.unicast.hosts。
discovery.seed_hosts: ["node01.hadoop.com:9301", "node02.hadoop.com:9301", "node03.hadoop.com:9301", "node01.hadoop.com:9302", "node02.hadoop.com:9302", "node03.hadoop.com:9302"]
#设置一系列符合主节点条件的节点的主机名或 IP 地址来引导启动集群。如果手动设置了node.name,还可以设置为此节点的名称。
cluster.initial_master_nodes: ["node01_r1", "node01_r2", "node02_r1", "node02_r2", "node03_r1", "node03_r2"] # 确保当前节点是主节点

#是否支持跨域,默认为false
http.cors.enabled: true
#当设置允许跨域,默认为*,表示支持所有域名,
http.cors.allow-origin: "*"

#默认为false,这项使用默认配置,会导致硬盘频繁读,IOPS变高。设置true锁定物理内存地址,防止es内存被交换出去,也就是避免es使用swap交换分区。
bootstrap.memory_lock: true
#开启seccomp安全机制,seccomp能使一个进程进入到一种“安全”运行模式,该模式下的进程只能调用4种系统调用(system call),即 read(), write(), exit() 和 sigreturn(),否则进程便会被终止。
#centos6.x操作系统不支持SecComp只能为false,centos7.x操作系统可以设置成true
bootstrap.system_call_filter: true

#默认值是false,如果设置为true,那么就不允许将一个primary shard和replica shard分配到同一个物理机上,也许这个物理机上启动了多个es实例。
cluster.routing.allocation.same_shard.host: true
#设置一台机子能运行的节点数目,一般采用默认的1即可,因为我们一般也只在一台机子上部署一个节点。
node.max_local_storage_nodes: 2
192.168.60.130 /export/servers/es/elasticsearch-7.7.0_r1/config/elasticsearch.yml
#配置es的集群名称
cluster.name: cloud_es
#节点名
node.name: node03_r1

#主节点
node.master: true
#数据节点
node.data: true

#数据存放目录,可以设置多个存储路径,用逗号隔开
path.data: /export/servers/es/elasticsearch-7.7.0_r1/datas
#日志存放目录,可以设置多个日志路径,用逗号隔开
path.logs: /export/servers/es/elasticsearch-7.7.0_r1/logs

#服务器ip
network.host: ${HOSTNAME}
#设置节点间交互的tcp端口,默认是9300
transport.tcp.port: 9301
#设置对外服务的http端口,默认为9200
http.port: 9201

#设置这个参数来保证集群中的节点可以知道其它N个有master资格的节点。默认为1,对于大的集群来说,可以设置大一点的值(2-4)
discovery.zen.minimum_master_nodes: 2
#自动发现设置,配置之后集群的主机之间可以自动发现。对应旧版中的discovery.zen.ping.unicast.hosts。
discovery.seed_hosts: ["node01.hadoop.com:9301", "node02.hadoop.com:9301", "node03.hadoop.com:9301", "node01.hadoop.com:9302", "node02.hadoop.com:9302", "node03.hadoop.com:9302"]
#设置一系列符合主节点条件的节点的主机名或 IP 地址来引导启动集群。如果手动设置了node.name,还可以设置为此节点的名称。
cluster.initial_master_nodes: ["node01_r1", "node01_r2", "node02_r1", "node02_r2", "node03_r1", "node03_r2"] # 确保当前节点是主节点

#是否支持跨域,默认为false
http.cors.enabled: true
#当设置允许跨域,默认为*,表示支持所有域名,
http.cors.allow-origin: "*"

#默认为false,这项使用默认配置,会导致硬盘频繁读,IOPS变高。设置true锁定物理内存地址,防止es内存被交换出去,也就是避免es使用swap交换分区。
bootstrap.memory_lock: true
#开启seccomp安全机制,seccomp能使一个进程进入到一种“安全”运行模式,该模式下的进程只能调用4种系统调用(system call),即 read(), write(), exit() 和 sigreturn(),否则进程便会被终止。
#centos6.x操作系统不支持SecComp只能为false,centos7.x操作系统可以设置成true
bootstrap.system_call_filter: true

#默认值是false,如果设置为true,那么就不允许将一个primary shard和replica shard分配到同一个物理机上,也许这个物理机上启动了多个es实例。
cluster.routing.allocation.same_shard.host: true
#设置一台机子能运行的节点数目,一般采用默认的1即可,因为我们一般也只在一台机子上部署一个节点。
node.max_local_storage_nodes: 2
192.168.60.130 /export/servers/es/elasticsearch-7.7.0_r2/config/elasticsearch.yml
#配置es的集群名称
cluster.name: cloud_es
#节点名
node.name: node03_r2

#主节点
node.master: true
#数据节点
node.data: true

#数据存放目录,可以设置多个存储路径,用逗号隔开
path.data: /export/servers/es/elasticsearch-7.7.0_r2/datas
#日志存放目录,可以设置多个日志路径,用逗号隔开
path.logs: /export/servers/es/elasticsearch-7.7.0_r2/logs

#服务器ip
network.host: ${HOSTNAME}
#设置节点间交互的tcp端口,默认是9300
transport.tcp.port: 9302
#设置对外服务的http端口,默认为9200
http.port: 9202

#设置这个参数来保证集群中的节点可以知道其它N个有master资格的节点。默认为1,对于大的集群来说,可以设置大一点的值(2-4)
discovery.zen.minimum_master_nodes: 2
#自动发现设置,配置之后集群的主机之间可以自动发现。对应旧版中的discovery.zen.ping.unicast.hosts。
discovery.seed_hosts: ["node01.hadoop.com:9301", "node02.hadoop.com:9301", "node03.hadoop.com:9301", "node01.hadoop.com:9302", "node02.hadoop.com:9302", "node03.hadoop.com:9302"]
#设置一系列符合主节点条件的节点的主机名或 IP 地址来引导启动集群。如果手动设置了node.name,还可以设置为此节点的名称。
cluster.initial_master_nodes: ["node01_r1", "node01_r2", "node02_r1", "node02_r2", "node03_r1", "node03_r2"] # 确保当前节点是主节点

#是否支持跨域,默认为false
http.cors.enabled: true
#当设置允许跨域,默认为*,表示支持所有域名,
http.cors.allow-origin: "*"

#默认为false,这项使用默认配置,会导致硬盘频繁读,IOPS变高。设置true锁定物理内存地址,防止es内存被交换出去,也就是避免es使用swap交换分区。
bootstrap.memory_lock: true
#开启seccomp安全机制,seccomp能使一个进程进入到一种“安全”运行模式,该模式下的进程只能调用4种系统调用(system call),即 read(), write(), exit() 和 sigreturn(),否则进程便会被终止。
#centos6.x操作系统不支持SecComp只能为false,centos7.x操作系统可以设置成true
bootstrap.system_call_filter: true

#默认值是false,如果设置为true,那么就不允许将一个primary shard和replica shard分配到同一个物理机上,也许这个物理机上启动了多个es实例。
cluster.routing.allocation.same_shard.host: true
#设置一台机子能运行的节点数目,一般采用默认的1即可,因为我们一般也只在一台机子上部署一个节点。
node.max_local_storage_nodes: 2
5.启动elaticsearch服务
切换到elastic用户执行启动命令,或者在前面加上 nohup 后台运行,三台服务器分别执行:
/export/servers/es/elasticsearch-7.7.0_r1/bin/elasticsearch 2>&1 &
/export/servers/es/elasticsearch-7.7.0_r2/bin/elasticsearch 2>&1 &
或者使用启动脚本:
#!/bin/bash

/usr/bin/su - elastic -c '/usr/local/elasticsearch-7.3.0-cluster-node1/bin/elasticsearch -p /tmp/elasticsearch_9200_pid -d'
/usr/bin/su - elastic -c '/usr/local/elasticsearch-7.3.0-cluster-node2/bin/elasticsearch -p /tmp/elasticsearch_9201_pid -d'
/usr/bin/su - elastic -c '/usr/local/elasticsearch-7.3.0-cluster-node3/bin/elasticsearch -p /tmp/elasticsearch_9202_pid -d'
关闭脚本:
#!/bin/bash

kill -9 `ps -u elastic|awk '{print $1}'`
重启脚本:
./elasticsearch -d
6.启动成功


7.查看集群状态
http://192.168.60.110:9201/_cat/health?v

正常
8.建议
如果一个节点即有成为主节点的资格,又存储数据,这个时候如果某个节点被选举成为了真正的主节点,那么他还要存储数据,这样对于这个节点的压力就比较大了。elasticsearch默认每个节点都是这样的配置,在测试环境下这样做没问题。实际工作中建议不要这样设置,这样相当于主节点和数据节点的角色混合到一块了。
1. 生产环境一台服务器部署两个节点, 一个只为主节点 一个只为数据节点。或者3台以上主节点,其他全为数据节点。
9.ES开机自启
/etc/init.d/startES
#!/bin/bash
#
# chkconfig: 2345 55 25
# description:start ES instance


host=$(hostname)

time=$( date '+%Y-%m-%d %H:%M:%S')
echo  "$@ $host $time elasticsearch-6.1.0" >> /root/powerOn.log
su - elastic -c '/usr/local/elasticsearch-6.1.0/bin/elasticsearch -d'

time=$( date '+%Y-%m-%d %H:%M:%S')
echo  "$@ $host $time cerebro " >> /root/powerOn.log
su - elastic -c "nohup /usr/local/cerebro-0.7.2/bin/cerebro >/dev/null &"


time=$( date '+%Y-%m-%d %H:%M:%S')
echo  "$@ $host $time kibana" >> /root/powerOn.log
su - elastic -c "nohup /usr/local/kibana-6.1.0-linux-x86_64/bin/kibana >/dev/null &"


time=$( date '+%Y-%m-%d %H:%M:%S')
echo  "$@ $host $time kafka-manager" >> /root/powerOn.log
num=$(netstat -ntlp |grep 9997 |wc -l)
RUNNING_FILE=/usr/local/kafka-manager-1.3.3.7/RUNNING_PID
if [[ $num -eq  0 ]];then

  if [ -f $RUNNING_FILE ];then
    rm $RUNNING_FILE
  fi

   nohup /usr/local/kafka-manager-1.3.3.7/bin/kafka-manager -Dconfig.file=/usr/local/kafka-manager-1.3.3.7/conf/application.conf -Dhttp.port=9997 >/dev/null 2>&1 &
fi

 浙公网安备 33010602011771号