

Spring boot后台搭建二为Shiro权限控制添加缓存
在添加权限控制后,添加方法 查看

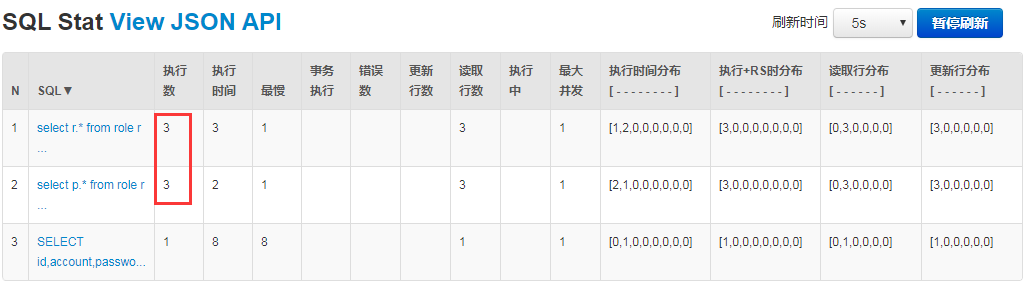
当用户访问”获取用户信息”、”新增用户”和”删除用户”的时,后台输出打印如下信息 ,

Druid数据源SQL监控
为了避免频繁访问数据库获取权限信息,在Shiro中加入缓存
缓存有基于Redis和Ehcache的
基于Redis
1.Shiro集成Redis的引入依赖
<dependency>
    <groupId>org.crazycake</groupId>
    <artifactId>shiro-redis</artifactId>
</dependency>
2.Redis配置
spring.redis.host=localhost
spring.redis.port=6379
spring.redis.jedis.pool.max-active=8
spring.redis.jedis.pool.max-wait=-1
spring.redis.jedis.pool.max-idle=8
spring.redis.jedis.pool.min-idle=0
spring.redis.timeout=0
3.在ShiroConfig中配置Redis
public RedisManager redisManager() {
    RedisManager redisManager = new RedisManager();
    return redisManager;
}

public RedisCacheManager cacheManager() {
    RedisCacheManager redisCacheManager = new RedisCacheManager();
    redisCacheManager.setRedisManager(redisManager());
    return redisCacheManager;
}
在SecurityManager中加入RedisCacheManager
@Bean
    public SecurityManager securityManager() {
        DefaultWebSecurityManager securityManager =  new DefaultWebSecurityManager();
        ……
        securityManager.setCacheManager(cacheManager());
        return securityManager;
    }
4.测试
启动项目
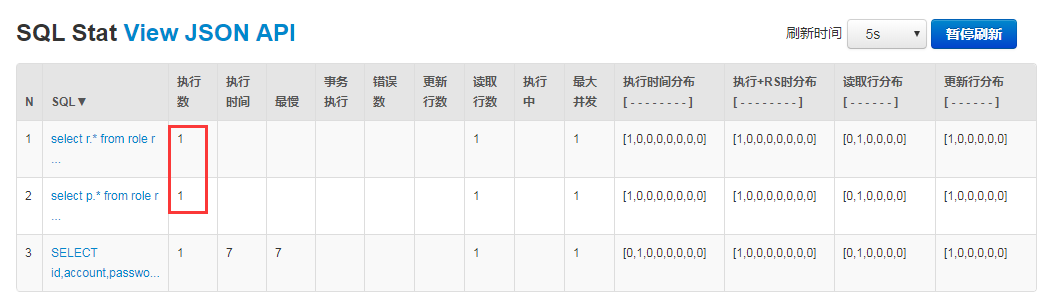
访问访问”获取用户信息”、”新增用户”和”删除用户”,后台只打印一次获取权限信息

Druid数据源SQL监控
基于Ehcache
1.添加依赖
<!-- shiro ehcache -->
<dependency>
    <groupId>org.apache.shiro</groupId>
    <artifactId>shiro-ehcache</artifactId>
    <version>1.4.1</version>
</dependency>
<!-- ehchache -->
<dependency>
    <groupId>org.springframework.boot</groupId>
    <artifactId>spring-boot-starter-cache</artifactId>
</dependency>
<dependency>
    <groupId>net.sf.ehcache</groupId>
    <artifactId>ehcache</artifactId>
</dependency>
2.添加配置
src\main\resources\config下添加shiro-ehcache.xml
<?xml version="1.0" encoding="UTF-8"?>
<ehcache xmlns:xsi="http://www.w3.org/2001/XMLSchema-instance"
         xsi:noNamespaceSchemaLocation="http://ehcache.org/ehcache.xsd"
         updateCheck="false">
    <diskStore path="java.io.tmpdir/Tmp_EhCache"/>
    <defaultCache
            maxElementsInMemory="10000"
            eternal="false"
            timeToIdleSeconds="120"
            timeToLiveSeconds="120"
            overflowToDisk="false"
            diskPersistent="false"
            diskExpiryThreadIntervalSeconds="120"/>

    <!-- 登录记录缓存锁定1小时 -->
    <cache
            name="passwordRetryCache"
            maxEntriesLocalHeap="2000"
            eternal="false"
            timeToIdleSeconds="3600"
            timeToLiveSeconds="0"
            overflowToDisk="false"
            statistics="true"/>
</ehcache>
3.在ShiroConfig中
注入Ehcache缓存
添加getEhCacheManager()
@Bean
public EhCacheManager getEhCacheManager() {
     EhCacheManager em = new EhCacheManager();
     em.setCacheManagerConfigFile("classpath:config/shiro-ehcache.xml");
     return em;
}
将缓存对象注入到SecurityManager中
修改securityManager()
@Bean
    public SecurityManager securityManager() {
        DefaultWebSecurityManager securityManager =  new DefaultWebSecurityManager();
        securityManager.setRealm(myShiroRealm());
        securityManager.setRememberMeManager(rememberMeManager());
        securityManager.setCacheManager(getEhCacheManager());
        return securityManager;
    }
4.测试
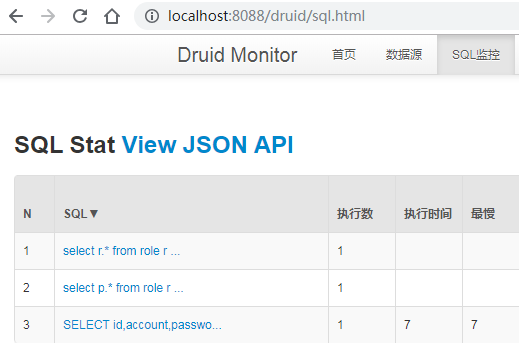
启动项目,分别访问访问”获取用户信息”、”新增用户”,只获取一次权限信息

 浙公网安备 33010602011771号