k8s实用整理(16)-产品安装试用之Rancher
安装测试基于k8s的各开源和商用产品:红帽的openshift rancher2.0 IBM的icp等
此文为整理的Rancher2.0安装说明及参考资料
相关链接:
官方网站:www.rancher.com
GitHub链接:https://github.com/rancher/rancher/releases
Rancher 2.0部署文档:https://rancher.com/docs/rancher/v2.x/en/quick-start-guide/
Rancher 2.0正式发布:简化、加速企业Kubernetes落地: https://mp.weixin.qq.com/s/NmfTxrtylHwS8GqYLvOvEA
rancher 和 icp默认都不会安装kubectl
1 require AND preinstall
1.1 require
Operating System Requirements
- Ubuntu 16.04 (64-bit)
- Red Hat Enterprise Linux 7.5 (64-bit)
- RancherOS 1.3.0 (64-bit)
Hardware Requirements
- Memory: 4GB
Software requirements
- Software: Docker
1.12.61.13.117.03.2
1.2 preinstall
参考ICP相关preinstall k8s实用整理(15)-产品安装试用之ICP
python
docker加速器
ssh
/etc/hosts
2 install rancher
2.1 run rancher容器
$ sudo docker run -d --restart=unless-stopped -p 80:80 -p 443:443 rancher/rancher
保证上述两端口未被占用。


root@Rancher-master:~# docker run -d --restart=unless-stopped -p 80:80 -p 443:443 rancher/rancher
e1447458dc749965c7ffd305277e1b3512be88621d585121672b18a3a52d9eb4
2.2 登陆rancher web ui
https://172.28.2.240
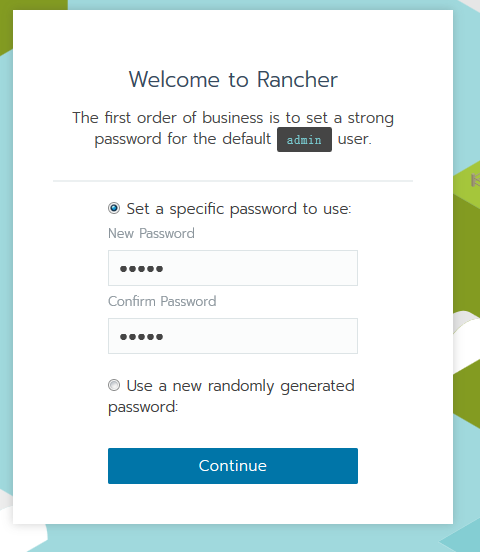
默认使用admin用户,开始会让大家为admin创建密码。
然后让你确认或变更URL地址,可使用默认https://masterip或主机名,但需确保群集中的每个节点都能够解析到URL。

2.3 Create The Cluster
选择WEB UI,上述页面中的 Add Cluster
使用官方步骤,各步骤附图如下。
2.3.1 步骤
-
From the Clusters page, click Add Cluster.
-
Choose Custom.
-
Enter a Cluster Name.
-
Skip Member Roles and Cluster Options. We’ll tell you about them later.
-
Click Next.--图1
-
From Node Role, select all the roles: etcd, Control, and Worker. --按图2选中所有,拷贝生成的命令,在各节点(master<可不执行> node)执行docker run
![]() View Code
View Codesudo docker run -d --privileged --restart=unless-stopped --net=host -v /etc/kubernetes:/etc/kubernetes -v /var/run:/var/run rancher/rancher-agent:v2.0.0 --server https://172.28.2.240 --token g6dwrcrn7ktqwn8ld5fkw4ddr6zzg257frqf6vcpqlrzhskbglj7qb --ca-checksum a0e12e541ecf4409a3709e4d437e56dd51b61efe658182929263aae9947123a4 --etcd --controlplane --worker
-
Skip the Labels stuff. It’s not important for now.
-
Copy the command displayed on screen to your clipboard.
-
Log in to your Linux host using your preferred shell, such as PuTTy or a remote Terminal connection. Run the command copied to your clipboard.
-
When you finish running the command on your Linux host, click Done.--按图2,上述步骤,及各节点完成dockerrun后,web页面会有提示如:“3 new nodes have registered”
- 点击Done
Result:
- Your cluster is created and assigned a state of Provisioning. Rancher is standing up your cluster. Rancher WEB UI会进入配置进行中的界面,如图3,红色字体不断刷新最新状态(类ansible playbook的输出)
- You can access your cluster after its state is updated to Active. 可以在状态更新为活动之后访问集群。
- Active clusters are assigned a Project and Namespace, both of which are named
Default.活动集群被分配了一个项目和命名空间,它们都被命名为default。
2.3.2 相关图
图1 :
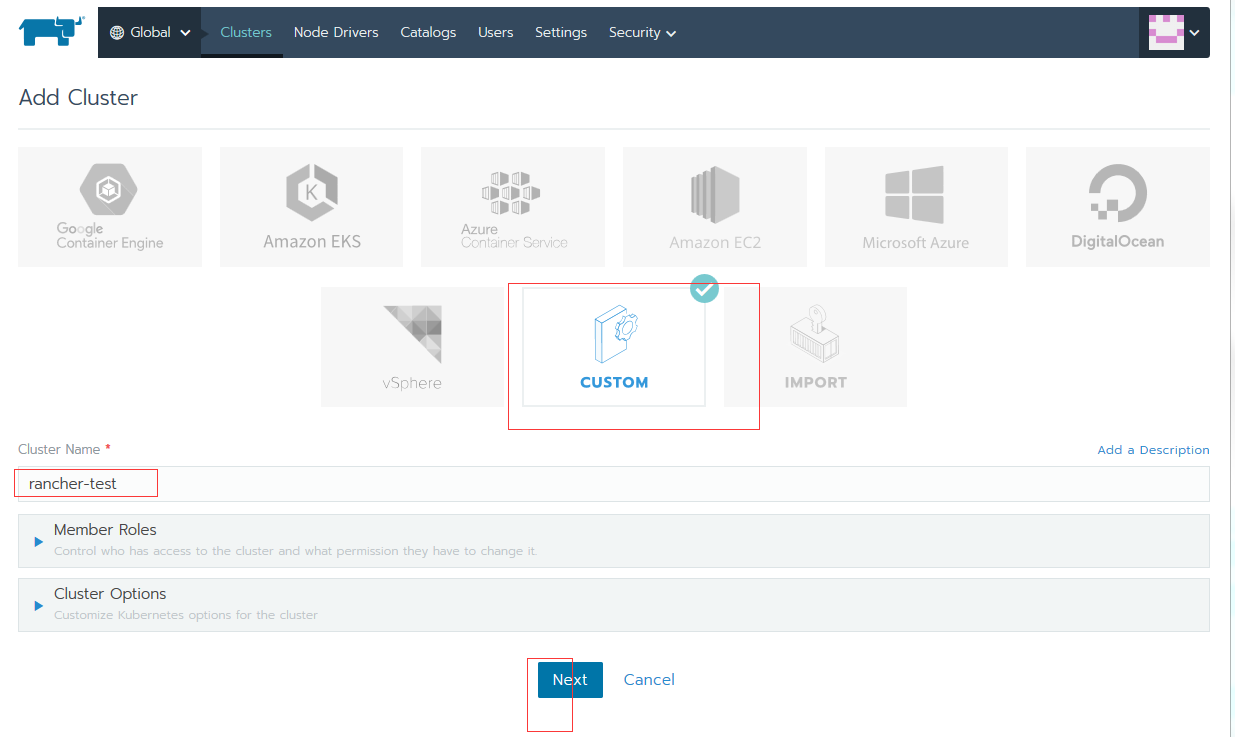
图2:
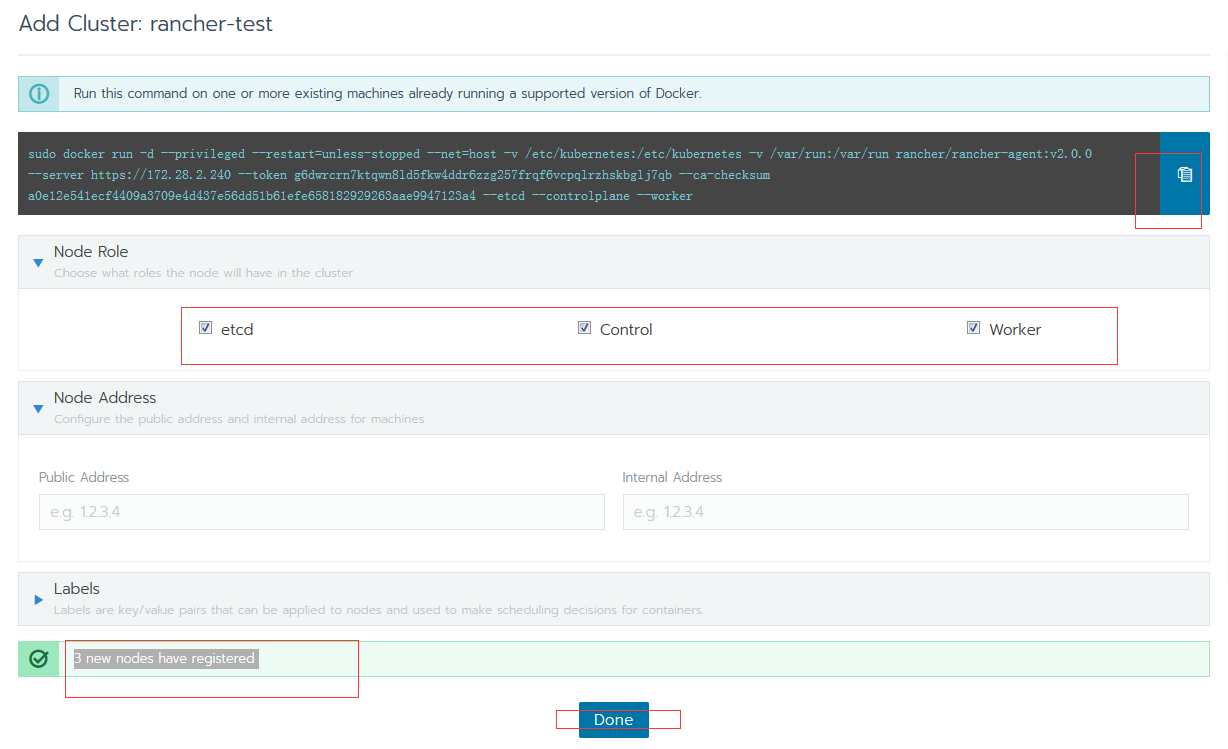
图3

安装完成(很快(几分钟)):

点击上图的cluster name :rancher-test,进入dashboard,如下。
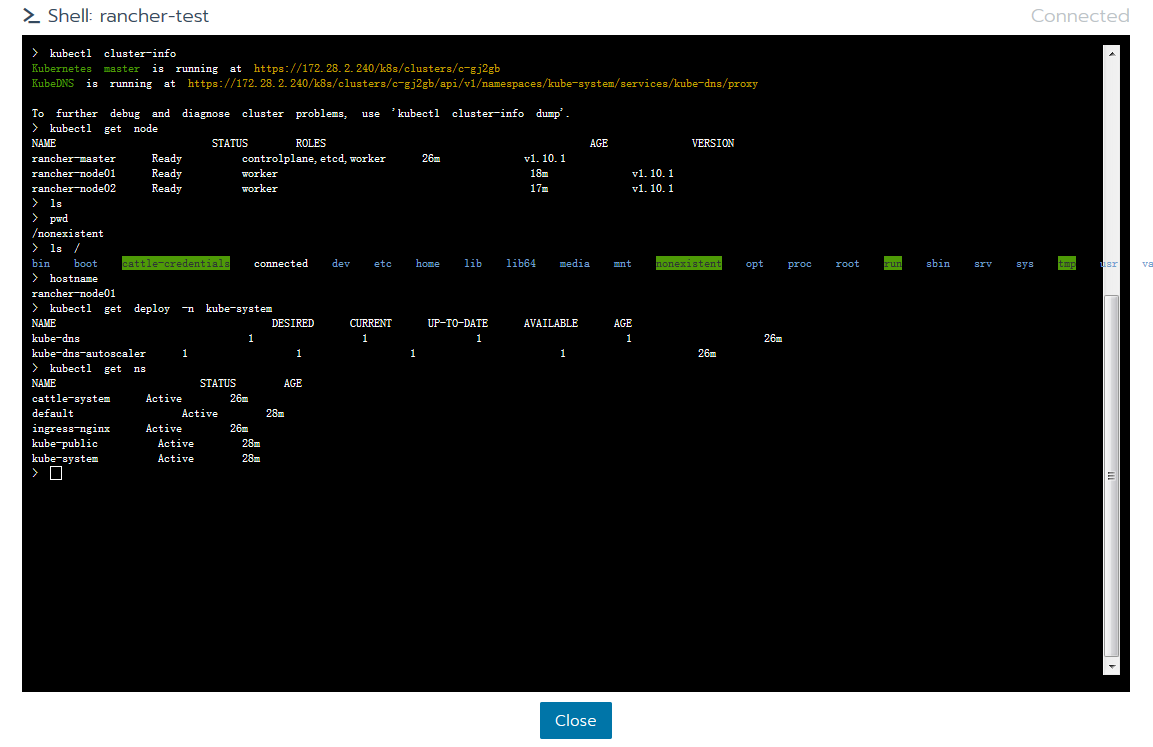
可看到监控界面,及kubectl相关控制台(Launch kubectl);
kubeconfig file会提供kubeconfig和kubectl的下载地址链接(官网地址),在master或各节点安装kubectl后,可使用kubeconfigfile进行配置。
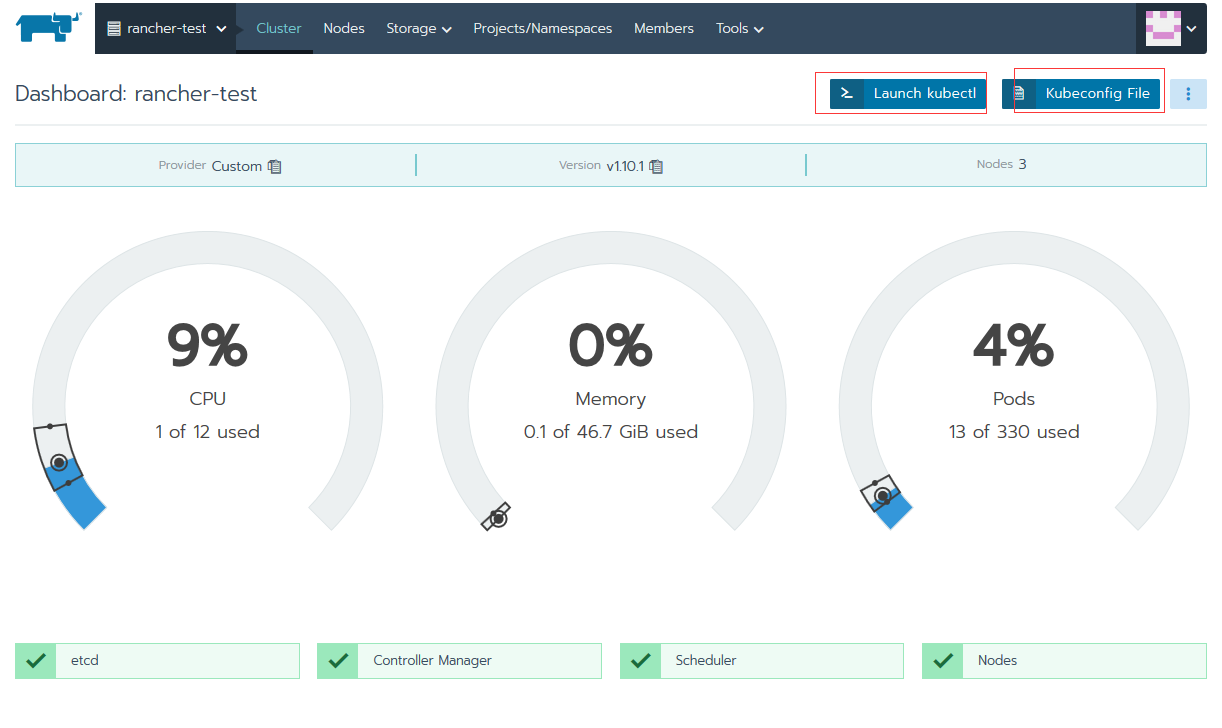
launch kubectl可进入控制台,可使用kubectl命令进行操作。
实际打开的是node1的一个容器,在node1中可查找确认容器。
(master 各节点均未安装kubectl命令,安装方法参考官网,配置可使用给出的kubeconfig)
root@rancher-node01:~# docker ps --no-trunc | grep host
5d46438e9e10117e4e134518bfba172c23e21f486a6d9733350da3a4c6bdd694   rancher/hyperkube:v1.10.1-rancher2                                                                         "/opt/rke/entrypoint.sh kubelet --volume-plugin-dir=/var/lib/kubelet/volumeplugins --cluster-domain=cluster.local --pod-infra-container-image=rancher/pause-amd64:3.1 --tls-cipher-suites=TLS_ECDHE_ECDSA_WITH_AES_128_GCM_SHA256,TLS_ECDHE_ECDSA_WITH_AES_256_GCM_SHA384,TLS_ECDHE_ECDSA_WITH_CHACHA20_POLY1305,TLS_ECDHE_RSA_WITH_AES_128_GCM_SHA256,TLS_ECDHE_RSA_WITH_AES_256_GCM_SHA384,TLS_ECDHE_RSA_WITH_CHACHA20_POLY1305 --cgroups-per-qos=True --network-plugin=cni --anonymous-auth=false --hostname-override=rancher-node01 --client-ca-file=/etc/kubernetes/ssl/kube-ca.pem --fail-swap-on=false --cni-conf-dir=/etc/cni/net.d --resolv-conf=/etc/resolv.conf --allow-privileged=true --read-only-port=0 --enforce-node-allocatable= --cluster-dns=10.43.0.10 --kubeconfig=/etc/kubernetes/ssl/kubecfg-kube-node.yaml --root-dir=/var/lib/kubelet --v=2 --address=0.0.0.0 --cadvisor-port=0 --feature-gates=MountPropagation=false --cni-bin-dir=/opt/cni/bin --cloud-provider="   15 minutes ago      Up 15 minutes                           kubelet
5d46438e9e10 rancher/hyperkube:v1.10.1-rancher2 "/opt/rke/entrypoi..." 16 minutes ago Up 16 minutes kubelet
2.4 Deploy a Workload(待整理)
You’re ready to create your first workload. A workload is an object that includes pods along with other files and info needed to deploy your application.
For this workload, you’ll be deploying the application NGINX.
-
From the Clusters page, open the cluster that you just created.
-
From the main menu of the Dashboard, select Projects.
-
Open the Default project.
-
Click + Deploy.
Step Result: The Deploy Workload page opens.
-
Enter a Name for your workload.
-
From the Docker Image field, enter
nginx. -
From Port Mapping, click Add Port.
-
From the Publish on drop-down, make sure that Every node is selected.
-
From the Source Port field, leave the Random value in place.
-
From the Container Port field, enter port
80. -
Leave the remaining options on their default setting. We’ll tell you about them later.
-
Click Launch.
Result:
- Your workload is deployed. This process might take a few minutes to complete.
- When your workload completes deployment, it’s assigned a state of Active. You can view this status from the project’s Workloads page.
View Your Application
When your workload completes deployment, browse to its IP to confirm your application is working.
From the Workloads page, click the link underneath your workload. If your deployment succeeded, your application opens.
What’s Next?
Congratulations! You have:
- Created your first cluster.
- Deployed NGINX to your cluster using a workload.

 浙公网安备 33010602011771号