2025.6.25学习日常
1.进度条tqdm
tqdm是python的第三方库,用于显式进度条,接受的对象为可迭代对象,最为基础的用法为
from tqdm import tqdm
for i in tqdm(range(100)):
    time.sleep(0.01)
较为进阶的用法是将tqdm与深度学习流程相结合,显示训练轮次,显示准确率与损失值
- 用法1:使用DataLoader作为可迭代对象,DataLoader中的数据封装格式为元组
(batch_id,Tensor,Tensor),获取batch_id时需要进行拆分,使用如下语法即可
for batch_idx, (data, labels) in tqdm(enumerate(my_dataloader),total=len(my_dataloader), desc="Processing batches"):
    print(f"Batch {batch_idx}: data shape {data.shape}, labels shape {labels.shape}")
- 用法2:为进度条添加训练轮次,准确率,损失值
# 生成示例数据
data = torch.randn(100, 5)  # 100 个样本,每个样本有 5 个特征
labels = torch.randint(0, 2, (100,))  # 100 个标签,取值为 0 或 1

# 实例化数据集
dataset = MyDataset(data, labels)
# 实例化 DataLoader
dataloader = DataLoader(dataset, batch_size=10, shuffle=True, num_workers=0)
for epoch in range(10):
    # 可以加两个列表用来获得loss与acc的均值
    loop = tqdm((dataloader),total = len(dataloader),desc="Start")
    for data,labels in loop:
        # 模拟计算时间
        time.sleep(0.1)
        # 随机生成loss和acc
        loss = torch.randn(1).item()
        acc = torch.randn(1).item()
        # 设置进度条
        loop.set_description(f'Epoch [{epoch+1}/{10}]')
        loop.set_postfix(acc = acc,loss = loss)
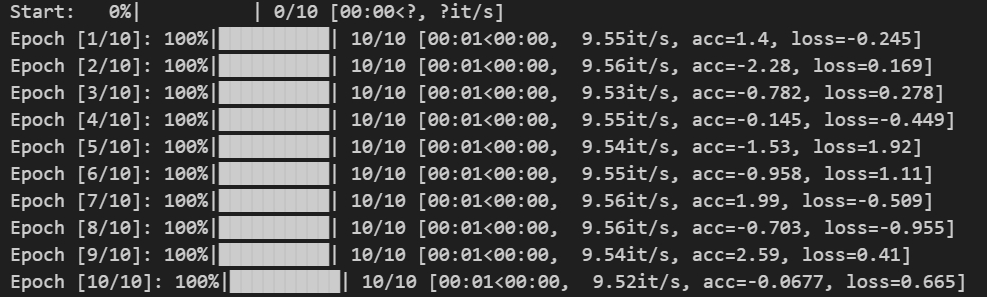
最后呈现的效果为
上述dataloader的定义可以从这个地方获得https://www.runoob.com/pytorch/pytorch-datasets.html
2.Pytorch
2.1 CNN
首先先要了解通道的概念,通道又称为Channel,在RGB图像中channel为3,在NLP领域中,channel为token的embedding数。
在CNN模型类的卷积层的定义中,我们并不显式给出图片大小(C,H,W),或者说token的个数(Embedding,token1,token2),而是指定Channel的数量。在全连接层时,需要显示给定特征图的大小,方便做全连接.
【注】:CNN无法直接做到端到端的推理,因为模型内部的设计与
2.2 Transformer(Vision)
Transformer模型由位置编码,编码器(Encoder)和解码器(Decoder)构成
- 位置编码:位置编码的dim_of_embedding,需要与图像的dim_embedding一致
- 编码器:包含两个子层,多头注意力机制,前馈神经网络。构建代码如下:
class EncoderLayer(nn.Module):
    def __init__(self, d_model, num_heads, d_ff, dropout):
        super(EncoderLayer, self).__init__()
        self.self_attn = MultiHeadAttention(d_model, num_heads)  # 自注意力机制
        self.feed_forward = PositionWiseFeedForward(d_model, d_ff)  # 前馈网络
        self.norm1 = nn.LayerNorm(d_model)  # 层归一化
        self.norm2 = nn.LayerNorm(d_model)
        self.dropout = nn.Dropout(dropout)  # Dropout

    def forward(self, x, mask):
        # 自注意力机制
        attn_output = self.self_attn(x, x, x, mask)
        x = self.norm1(x + self.dropout(attn_output))  # 残差连接和层归一化

        # 前馈网络
        ff_output = self.feed_forward(x)
        x = self.norm2(x + self.dropout(ff_output))  # 残差连接和层归一化
        return x
由于nn模块中并没有内置Transformer的组件的相关类(例如实现卷积层直接调用nn.Conv2d),所以需要自己重写一些继承自nn.Module的类。要写的类有MutiHeadAttention(),PositionWiseFeedForward(),该部分的代码可以参考该文章https://www.runoob.com/pytorch/pytorch-transformer-model.html
- 解码器:包含三个子层,自注意力机制,交叉注意力机制,前馈神经网络,构建代码如下:
class DecoderLayer(nn.Module):
    def __init__(self, d_model, num_heads, d_ff, dropout):
        super(DecoderLayer, self).__init__()
        self.self_attn = MultiHeadAttention(d_model, num_heads)  # 自注意力机制
        self.cross_attn = MultiHeadAttention(d_model, num_heads)  # 交叉注意力机制
        self.feed_forward = PositionWiseFeedForward(d_model, d_ff)  # 前馈网络
        self.norm1 = nn.LayerNorm(d_model)  # 层归一化
        self.norm2 = nn.LayerNorm(d_model)
        self.norm3 = nn.LayerNorm(d_model)
        self.dropout = nn.Dropout(dropout)  # Dropout

    def forward(self, x, enc_output, src_mask, tgt_mask):
        # 自注意力机制
        attn_output = self.self_attn(x, x, x, tgt_mask)
        x = self.norm1(x + self.dropout(attn_output))  # 残差连接和层归一化

        # 交叉注意力机制
        attn_output = self.cross_attn(x, enc_output, enc_output, src_mask)
        x = self.norm2(x + self.dropout(attn_output))  # 残差连接和层归一化

        # 前馈网络
        ff_output = self.feed_forward(x)
        x = self.norm3(x + self.dropout(ff_output))  # 残差连接和层归一化
        return x
同样的代码可以在编码器提及到的文章内寻找
3.Python部分基础
3.1 import和from X import Y
根据Python查找作用域的LEGB原则,如果想直接使用模块X中的函数或者类,import X 直接无法做到的,因为缺少了当前的文件(Global)根本是不模块文件X,需要在使用前显式指定模块X。
但是 from X import Y可以直接做到,在动态执行中,该语句将Y直接放入到了当前文件的Global作用域中,实现了该效果
- import告诉解释器要跨文件寻找,并在寻找时要给出路径
- from X import Y 告诉解释器直接从文件X中找到Y并copy到当前文件中。

 浙公网安备 33010602011771号