
使用ML.NET和Azure Function进行机器学习 - 第1部分
介绍
一提到机器学习,总是让人望而生畏。幸运的是,Azure正在想方设法让开发人员更容易进入机器学习。ML.NET是Microsoft Research专为.NET开发人员开发的机器学习框架,因此您可以在Visual Studio中完成所有工作。如果你还没有玩过它,我想你会爱上它。当您准备好部署ML.NET算法时,您可以通过Azure Function使用无服务器架构- 而不必担心运行时会把服务器和容器弄得一团糟。
无服务器机器学习
受到Luis Quintanilla的文章启发,有关ML.NET与Azure Function,我们尝试把二者结合起来使用。您将在本地使用ML.NET来训练您的机器学习模型。然后,您将创建一个Azure环境,其中包含存储帐户和Azure Function,以托管您的机器学习应用程序。使用您的模型构建应用程序的最后一步将在下一篇文章中介绍。
创建您的模型
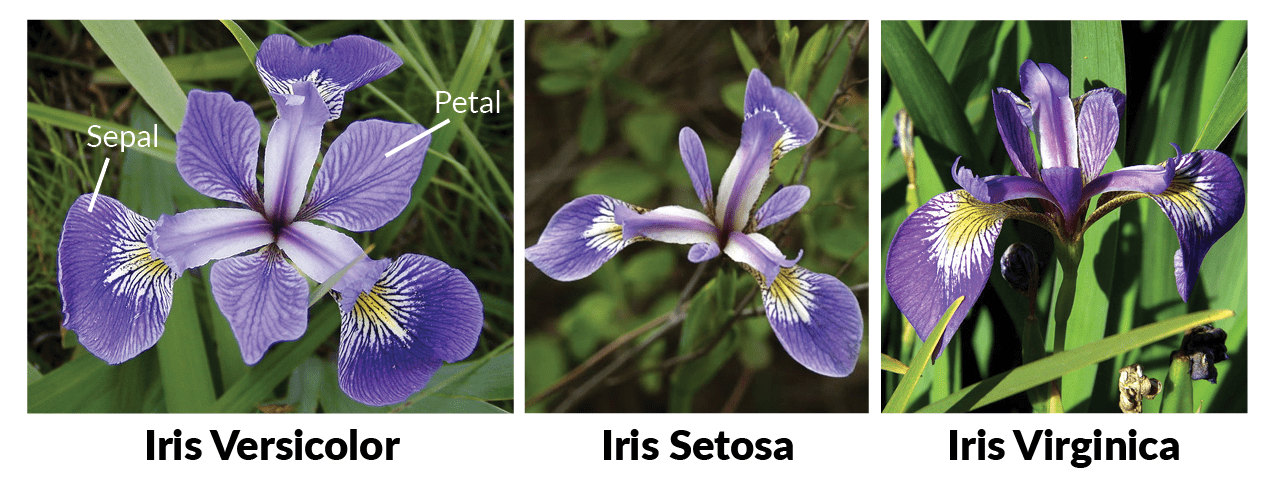
对于这个快速项目的ML.NET部分,让我们从ML.NET10分钟入门教程中构建鸢尾花分类模型。作为先决条件,您需要安装Azure CLI 2.0, Azure Function Core Tools和最新版本的.NET Core。
打开命令提示符并为ML.NET项目创建一个新文件夹。
> mkdir demo
> cd demo
接下来,创建一个新的解决方案以及一个新的控制台项目并安装ML.NET包。
> dotnet new solution
> dotnet new console -o model
> dotnet sln add model/model.csproj
> cd model
> dotnet add package Microsoft.ML --version 0.4.0
> dotnet restore
在模型下创建数据目录。
> mkdir data
打开UCI机器学习库:Iris数据集,将数据复制并粘贴到VS Code或TextEdit或Notepad中,并将其保存为数据目录中的iris-data.txt。现在是时候写一些代码了。在Visual Studio Code中打开项目并创建几个数据结构类:IrisData.cs和IrisPrediction.cs。
using Microsoft.ML.Runtime.Api;

        public class IrisData
        {
            [Column("0")]
            public float SepalLength;

            [Column("1")]
            public float SepalWidth;

            [Column("2")]
            public float PetalLength;

            [Column("3")]
            public float PetalWidth;

            [Column("4")]
            [ColumnName("Label")]
            public string Label;
        }

        public class IrisPrediction
        {
            [ColumnName("PredictedLabel")]
            public string PredictedLabels;
        }
添加模型类以执行机器学习训练。
using System.Threading.Tasks;
using Microsoft.ML;
using Microsoft.ML.Data;
using Microsoft.ML.Trainers;
using Microsoft.ML.Transforms;

    class Model
    {
        public static async Task<PredictionModel<IrisData, IrisPrediction>> Train(LearningPipeline pipeline, string dataPath, string modelPath)
        {
            // Load Data
            pipeline.Add(new TextLoader(dataPath).CreateFrom<IrisData>(separator: ','));

            // Transform Data
            // Assign numeric values to text in the "Label" column, because
            // only numbers can be processed during model training
            pipeline.Add(new Dictionarizer("Label"));

            // Vectorize Features
            pipeline.Add(new ColumnConcatenator("Features", "SepalLength", "SepalWidth", "PetalLength", "PetalWidth"));

            // Add Learner
            pipeline.Add(new StochasticDualCoordinateAscentClassifier());

            // Convert Label back to text
            pipeline.Add(new PredictedLabelColumnOriginalValueConverter() { PredictedLabelColumn = "PredictedLabel" });

            // Train Model
            var model = pipeline.Train<IrisData, IrisPrediction>();

            // Persist Model
            await model.WriteAsync(modelPath);

            return model;
        }
    }
将您的逻辑放在Program.cs文件中以运行该过程:
 class Program
    {
        static void Main(string[] args)
        {
            string dataPath = "/Users/mbcrump/Documents/demo/model/data/iris-data.txt";

            string modelPath = "/Users/mbcrump/Documents/demo/model/model.zip";

            var model = Model.Train(new LearningPipeline(), dataPath, modelPath).Result;

            // Test data for prediction
            var prediction = model.Predict(new IrisData()
            {
                SepalLength = 3.3f,
                SepalWidth = 1.6f,
                PetalLength = 0.2f,
                PetalWidth = 5.1f
            });

            Console.WriteLine($"Predicted flower type is: {prediction.PredictedLabels}");

        }
    }
运行模型项目以在根目录中创建新的model.zip文件。以下是我得到的结果。
Michaels-MacBook-Pro:model mbcrump$ dotnet run
Automatically adding a MinMax normalization transform, use 'norm=Warn' or 'norm=No' to turn this behavior off.
Using 4 threads to train.
Automatically choosing a check frequency of 4.
Auto-tuning parameters: maxIterations = 9996.
Auto-tuning parameters: L2 = 2.668802E-05.
Auto-tuning parameters: L1Threshold (L1/L2) = 0.
Using best model from iteration 500.
Not training a calibrator because it is not needed.
Predicted flower type is: Iris-virginica
恭喜!您已经使用ML.NET对机器学习模型进行了培训,对鸢尾花进行了分类。
使用Cloud Shell设置Azure环境
我们将使用Azure Cloud Shell,它使用Azure CLI来设置我们的Azure环境。最简单的方法是登录Azure门户帐户,然后单击下面显示的Cloud Shell图标以打开bash shell或转到shell.azure.com。

登录后,在bash shell中为此项目创建一个新资源组(并用您自己的一个替换“mlnetdemo”以及该位置)。
$ az group create --name mlnetdemo --location westus
将存储添加到此资源组。
注意:您必须将以下名称更改为唯一的名称
$ az storage account create --name mlnetdemostorage --location westus --resource-group mlnetdemo --sku Standard_LRS
创建Azure Function并将其配置为使用支持.NET Core的beta运行时。
注意:您必须将以下名称更改为唯一的名称
 $ az functionapp create --name mlnetdemoazfunction1 --storage-account mlnetdemostorage1 --consumption-plan-location westus --resource-group mlnetdemo

 $ az functionapp config appsettings set --name mlnetdemoazfunction1 --resource-group mlnetdemo --settings FUNCTIONS_EXTENSION_VERSION=beta
部署您的机器学习模型
要将模型部署到服务器,您需要获取存储帐户的密钥。在bash窗口中使用以下命令来获取它。
$ az storage account keys list --account-name mlnetdemostorage1 --resource-group mlnetdemo
你会看到以下内容:
[
  {
    "keyName": "key1",
    "permissions": "Full",
    "value": "YOURKEY"
  },
  {
    "keyName": "key2",
    "permissions": "Full",
    "value": "NONEYOBUSINESS"
  }
]
使用以下命令基于您的帐户密钥创建一个名为models的新目录,用于放入模型(可以在设置|访问键下的导航窗口中找到)。
$ az storage container create --name models --account-key YOURKEY --account-name mlnetdemostorage1

由于我们使用的是Cloud Shell,因此在此步骤中使用Azure Portal会更容易。如果您愿意,也可以使用Azure CLI。浏览到您的mlnetdemo资源组版本,并深入查看您之前创建的存储资源。以这些blob进行训练前,您会看到models文件夹下新的子目录,在硬盘上找到model.zip上传到这里。
在第2部分中,我们将介绍构建由Azure Function托管的应用程序,该应用程序将针对您的鸢尾花图像进行分类。

 浙公网安备 33010602011771号