[AWS] Deploy Sample App to Elastic Beanstalk
Elastic Beanstalk
In this hands-on exercise, you will use Elastic Beanstalk to deploy a web application to the cloud.
- Pre-requisites: AWS Account
- By the end of this lab, you will be able to deploy a web application to the cloud using Elastic Beanstalk
Follow the exercise instructions described below:
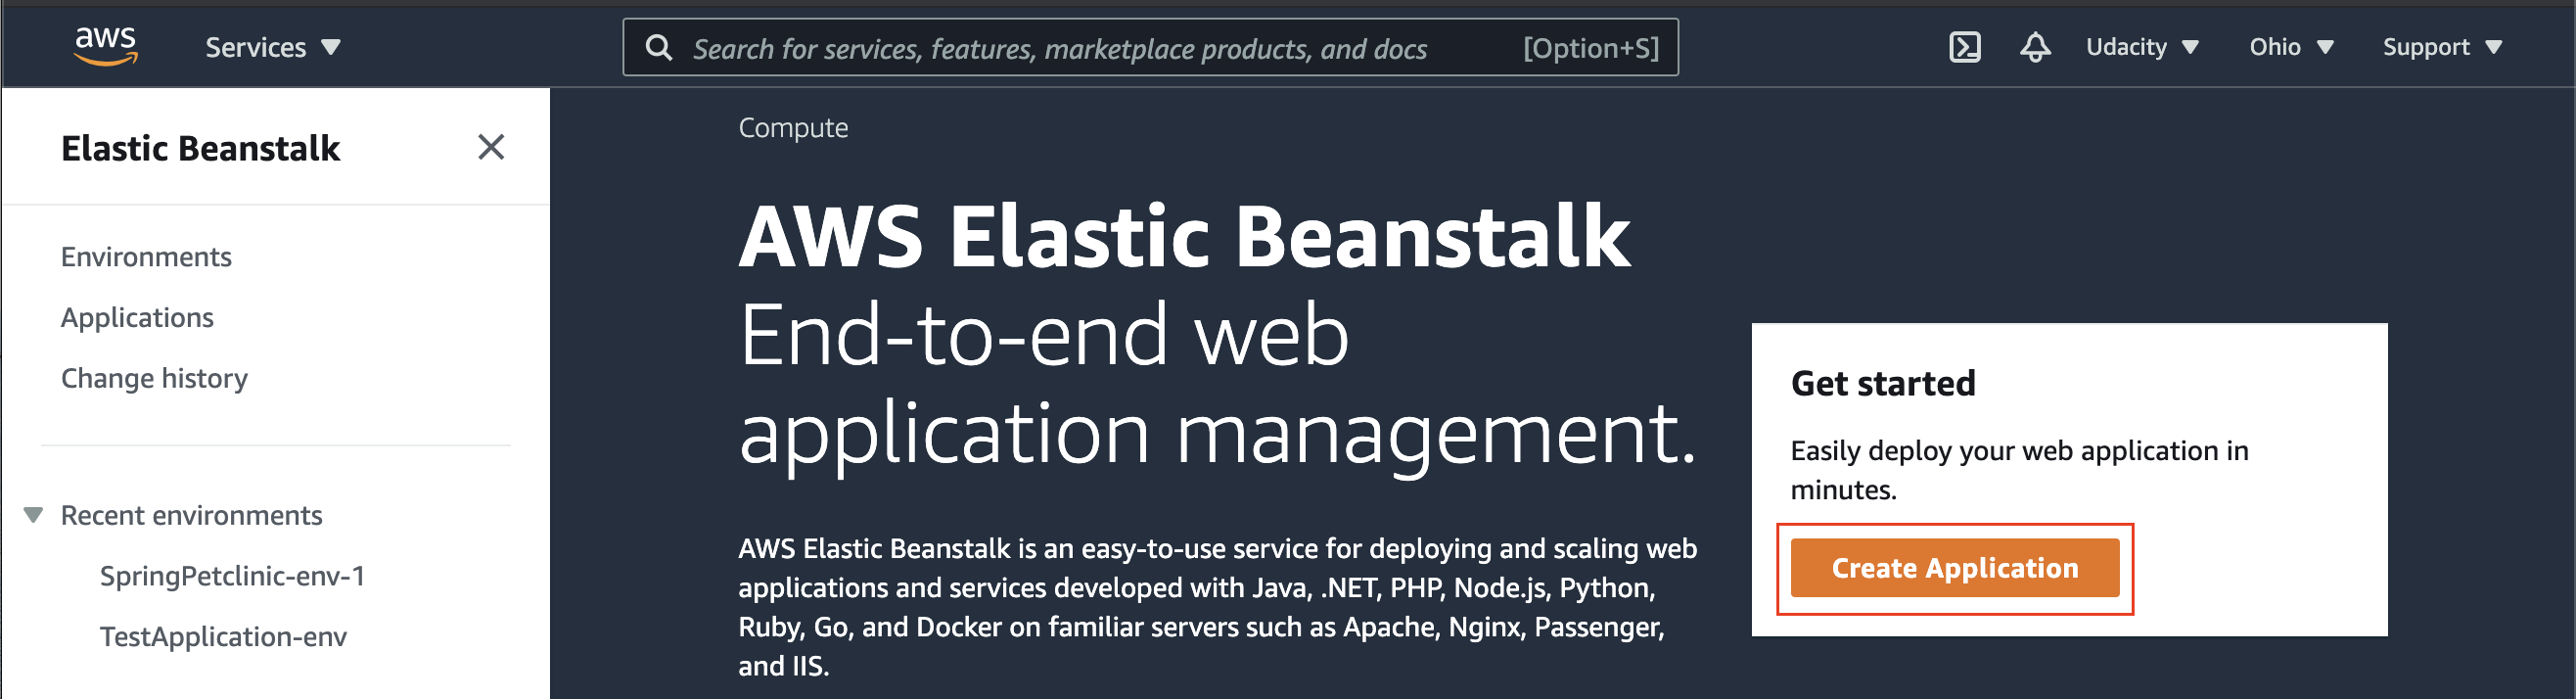
Step 1. Access Elastic Beanstalk service from AWS Management Console
- From the AWS Management Console page, select the Elastic Beanstalk service.
Launch the default Create application wizard
- Use the Create Application wizard to create an application with the following configuration details:
| Field | Value |
|---|---|
| Application name | Your choice |
| Platform | TomcatUse the default Platform branch and version |
| Application code | Sample application |
- It will create an environment for a sample application to run.
What is an environment?
An environment is the collection of AWS resources and permissions to allow your web application to run smoothly. The Elastic Beanstalk service manages the environment for us.
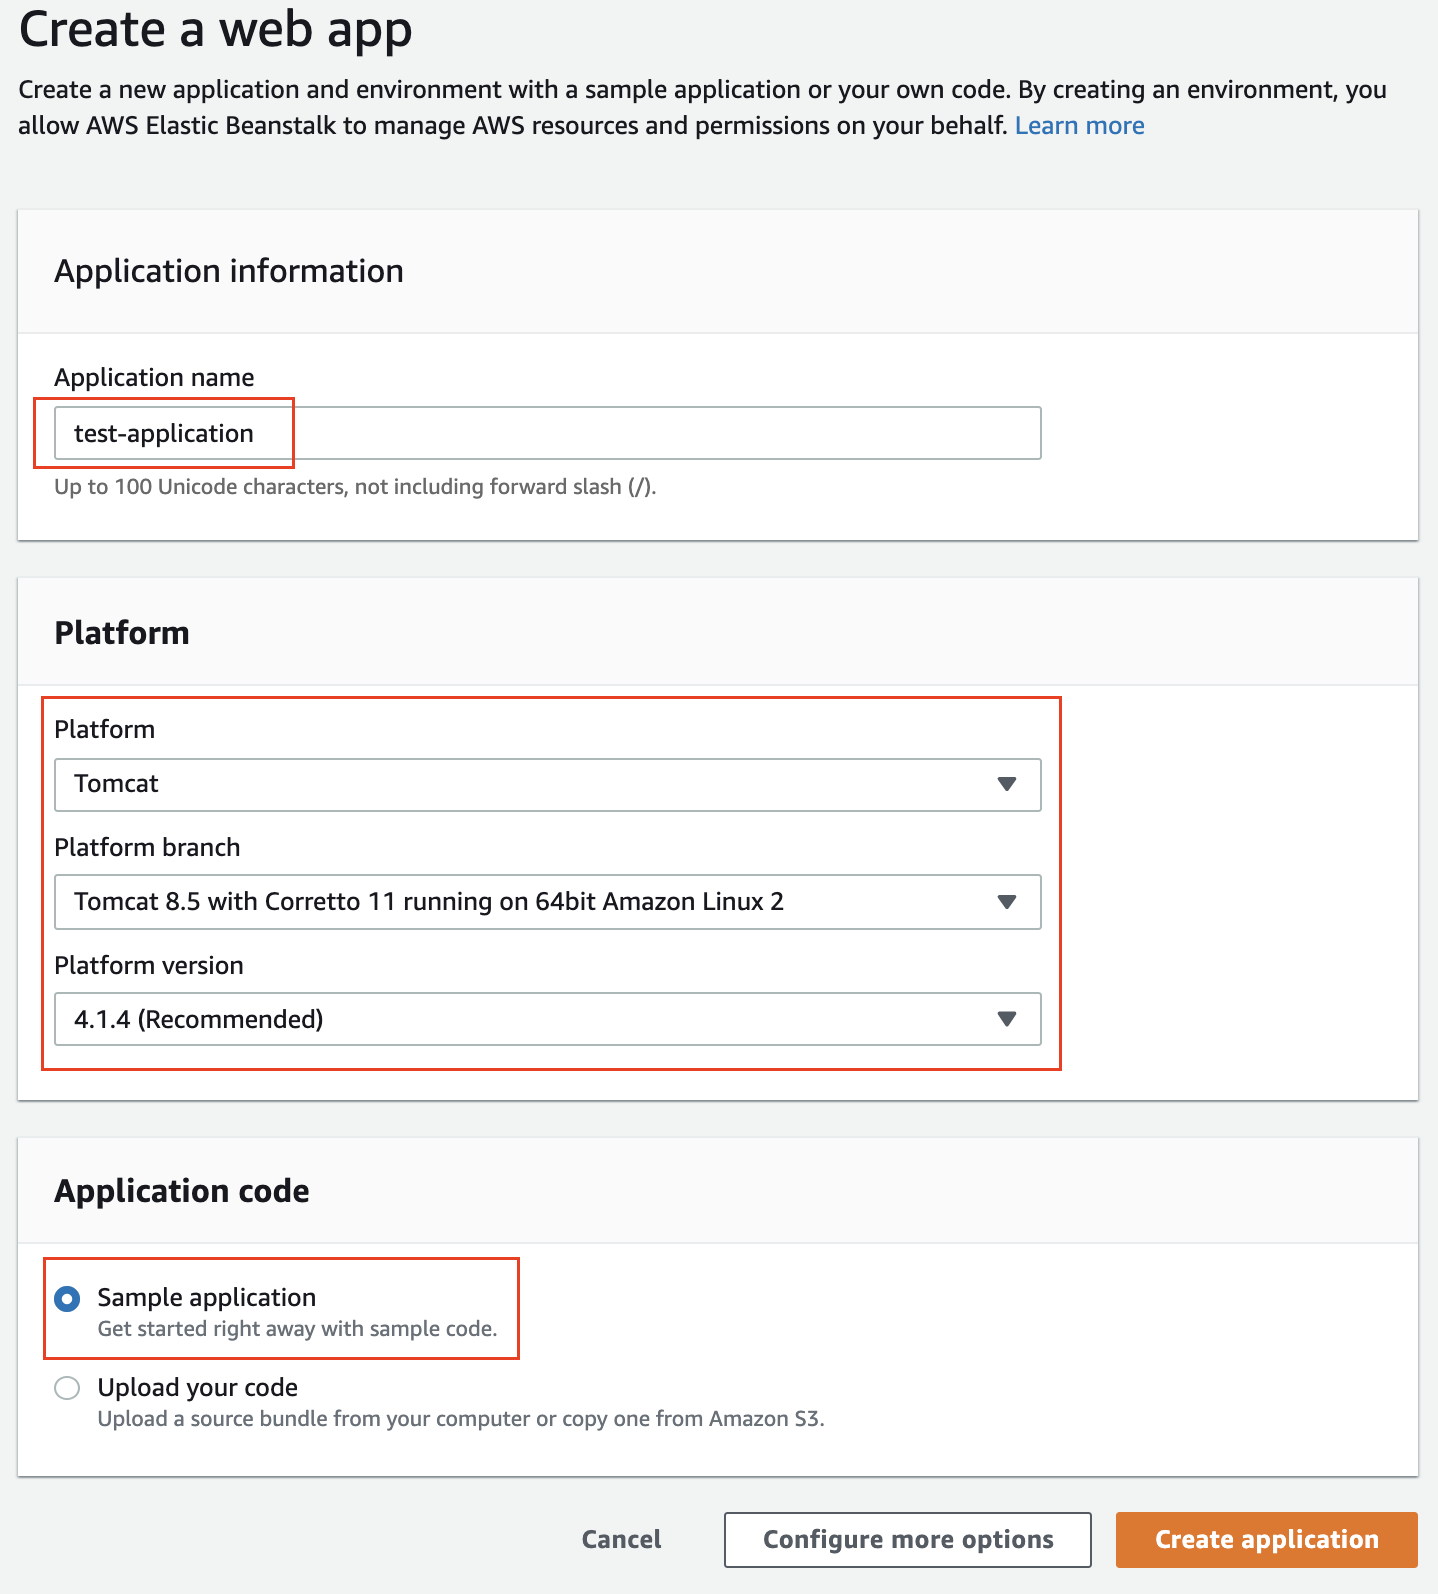
Create a sample web application, that will run on the Tomcat webserver
-
Click the Create application button.
Note: It will take about 10 minutes for your application, and its environment to be created.
-
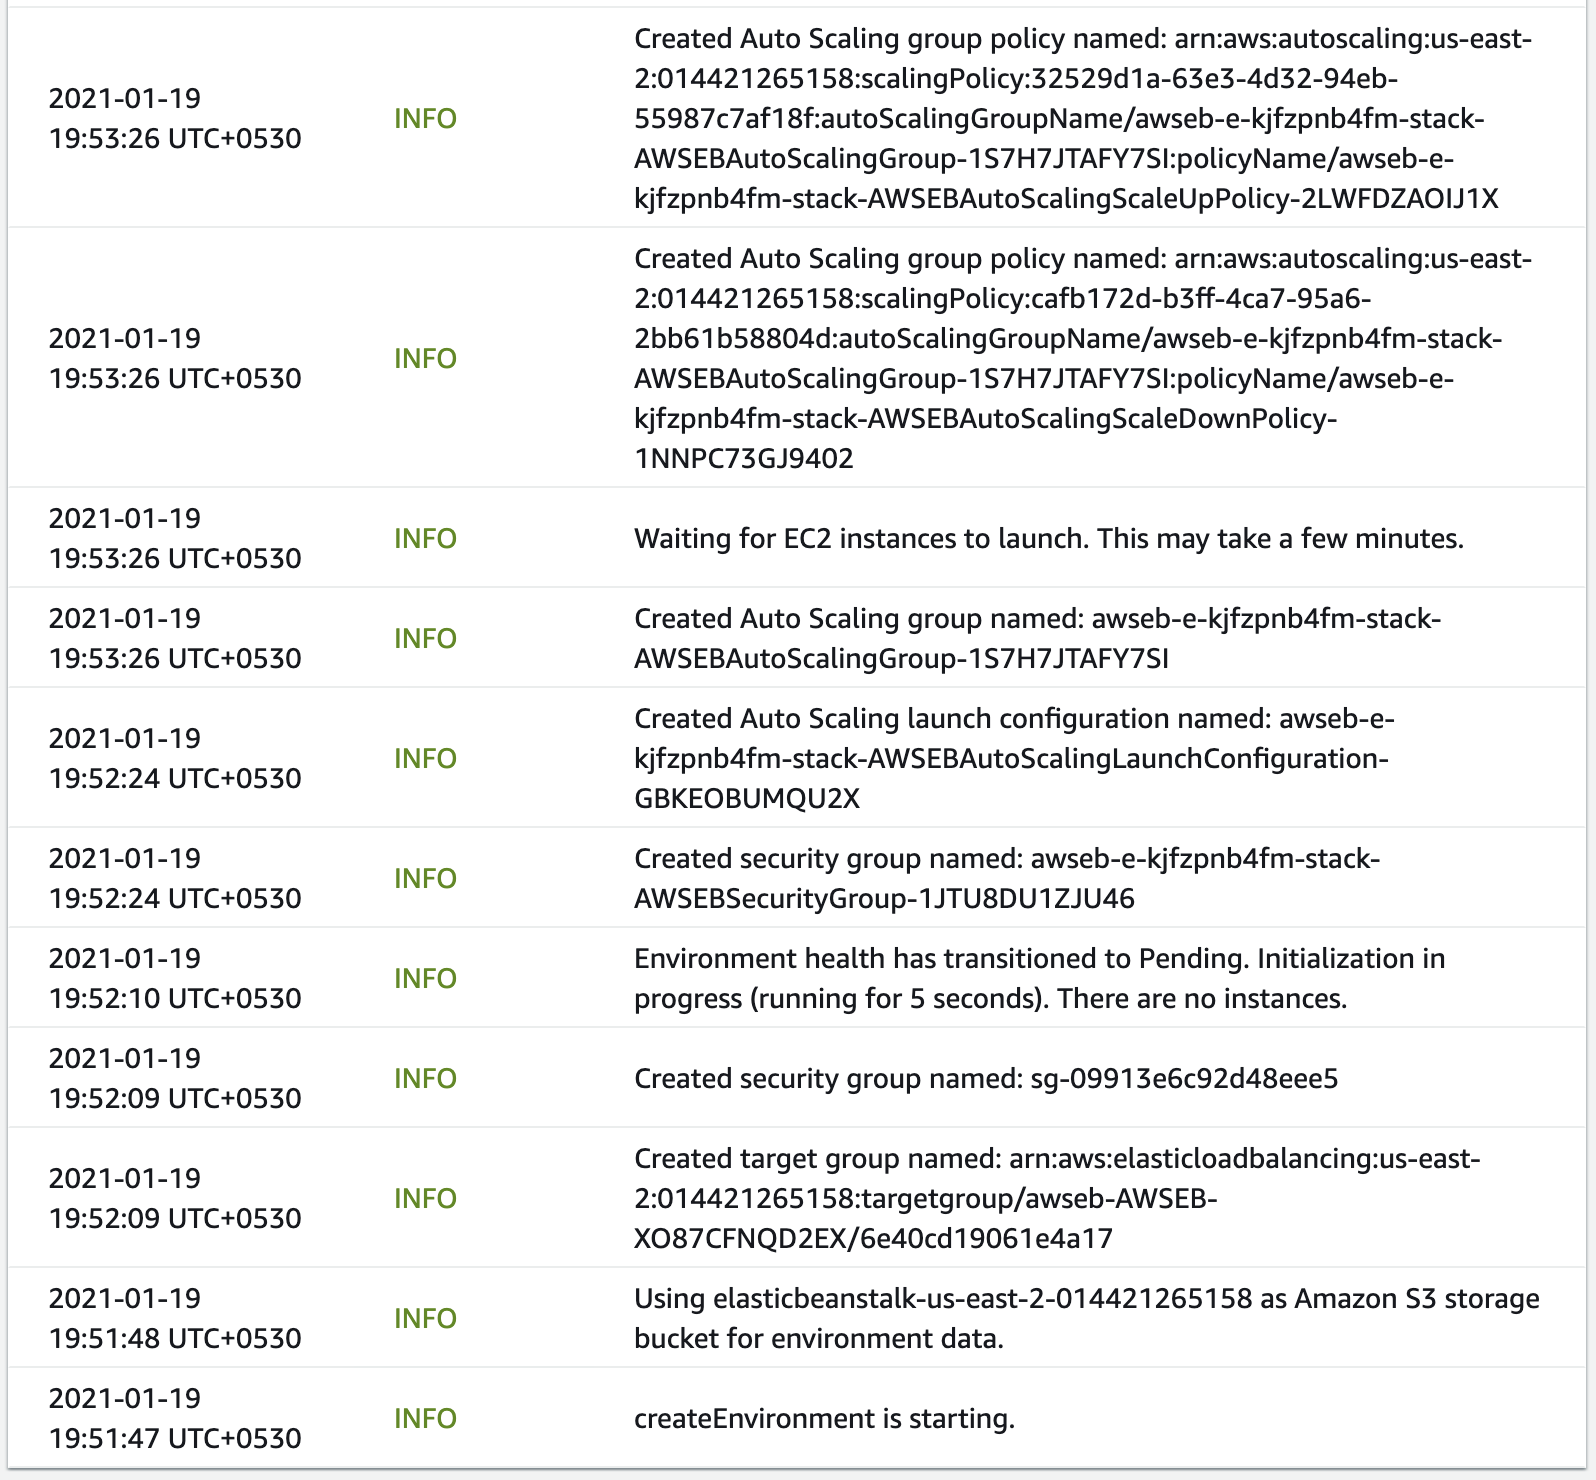
Important - Observe the logs shown on your dashboard to understand the resources that are spun up to support your application. While launching the environment and deploying EC2 instances to run your application, the following resources get created automatically:
- Amazon S3 storage bucket
- A target group in the default VPC
- Multiple security groups
- An autoscaling launch configuration and an autoscaling group
- Multiple EC2 instances
- Multiple CloudWatch alarms
- EC2 load balancer
You can even see the logs of each event (success and failure) after the creation of the environment. See the snapshots below.
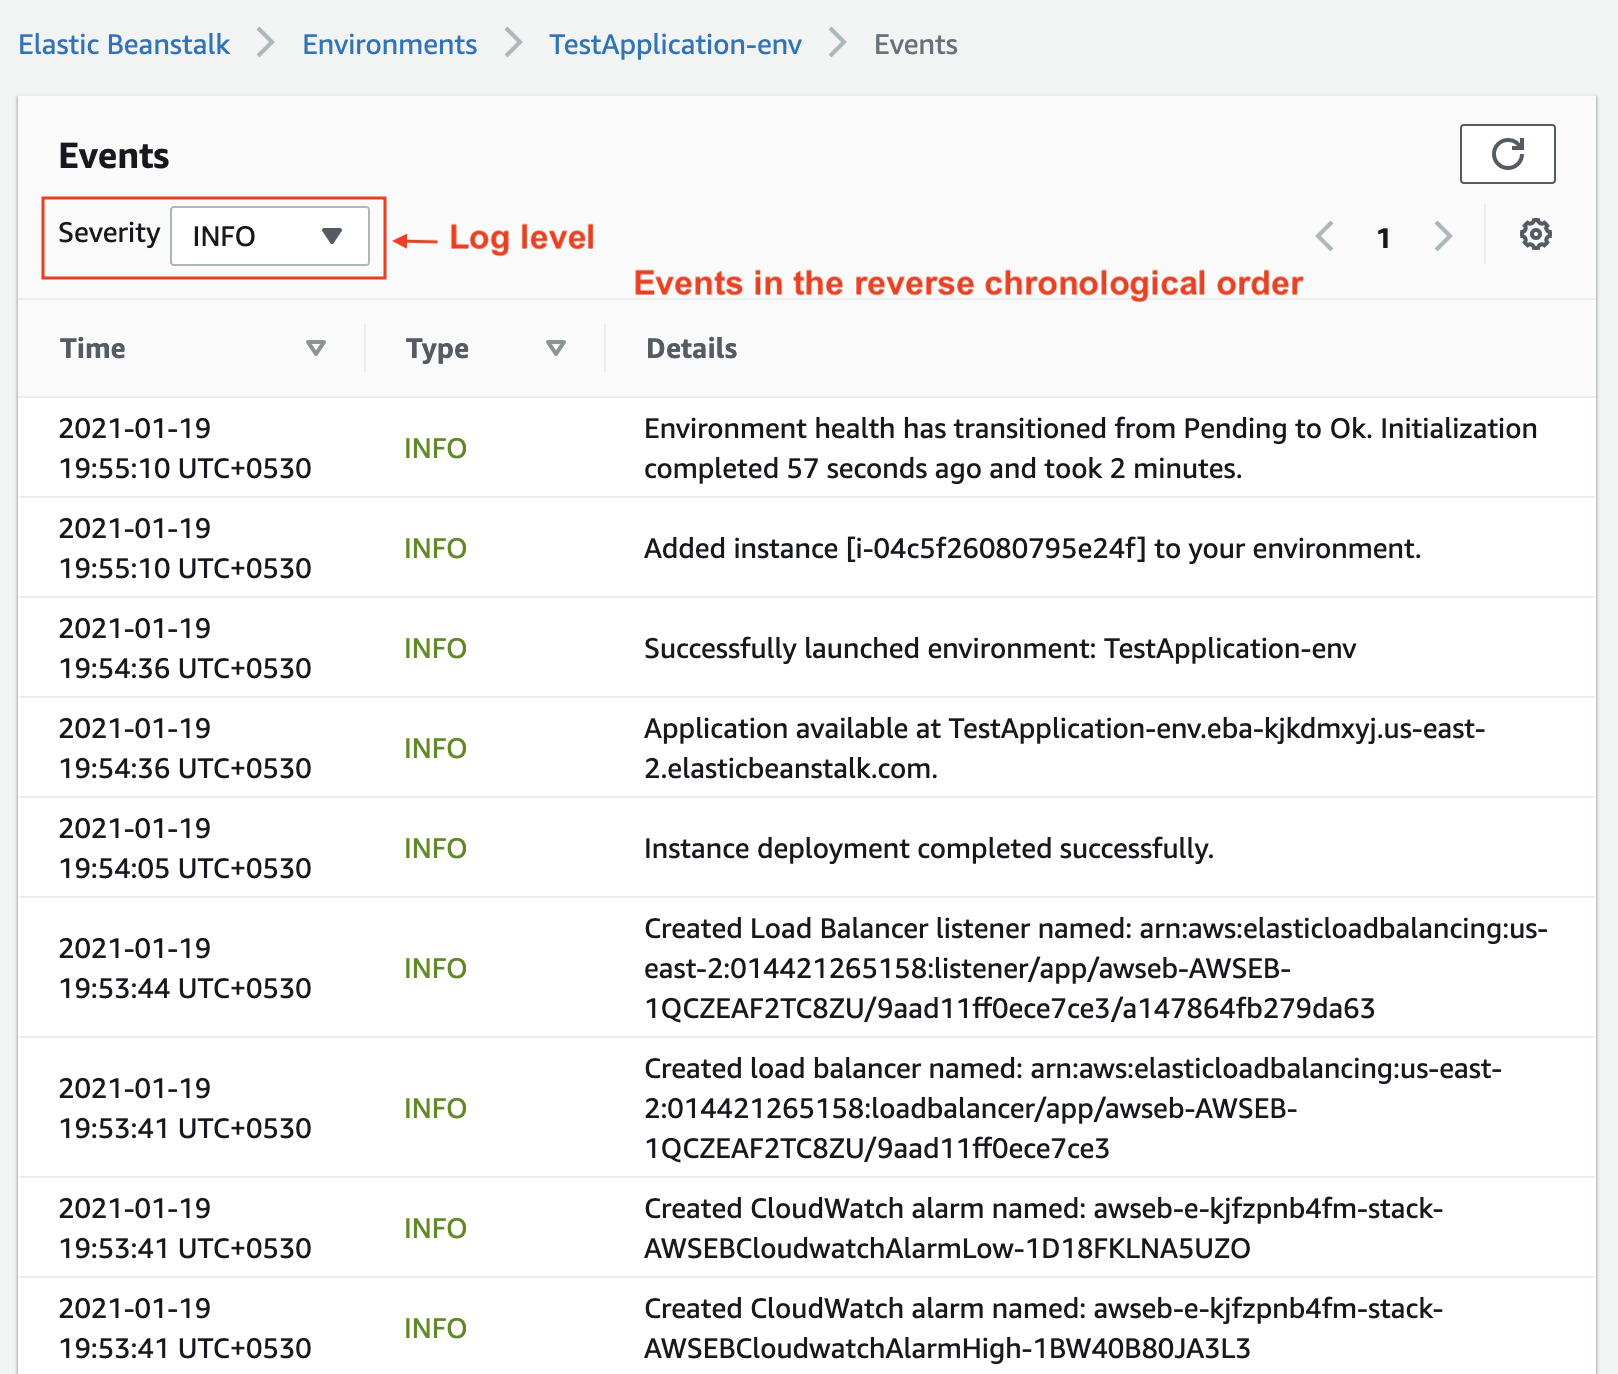
Events logs while creating the environment.
- You can change the log-level to see more detailed information. The standard log-levels in any application are trace, debug, info, warn, error, and fatal.
- Your application is created once you see a green checkmark and the Health of your application as Ok.
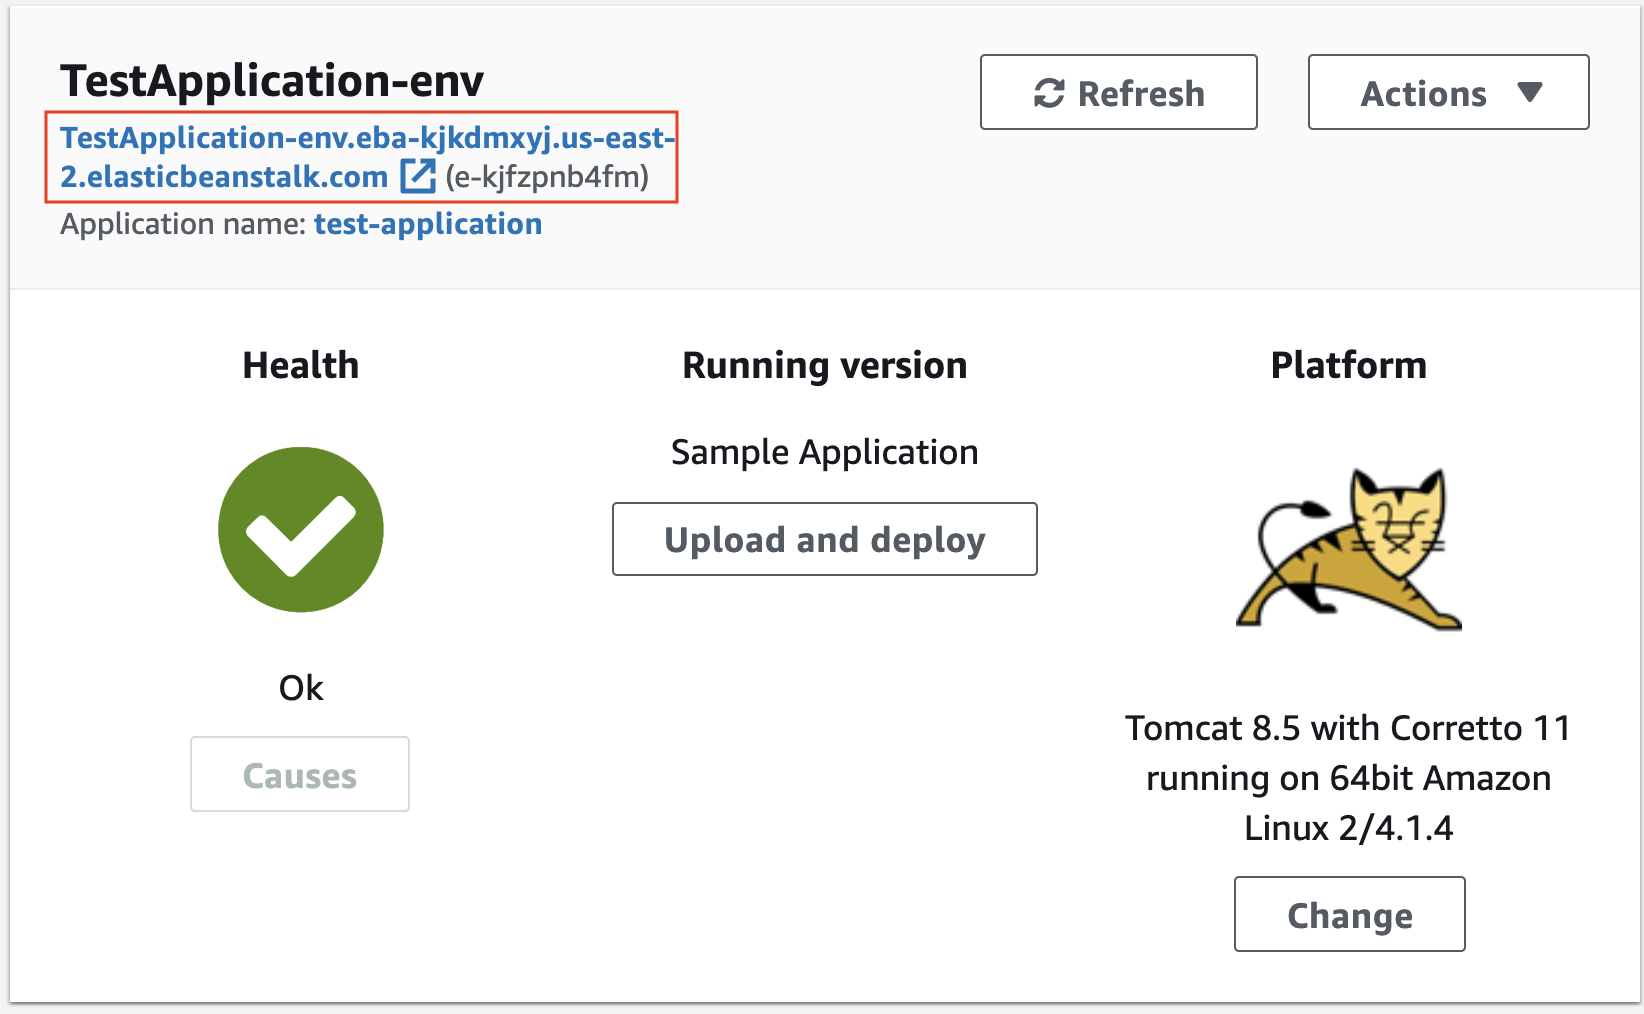
A successfully deployed application.
- After the application is deployed successfully, copy the application’s URL that can be found against your application’s name, and paste it in a web browser like Chrome or Safari.
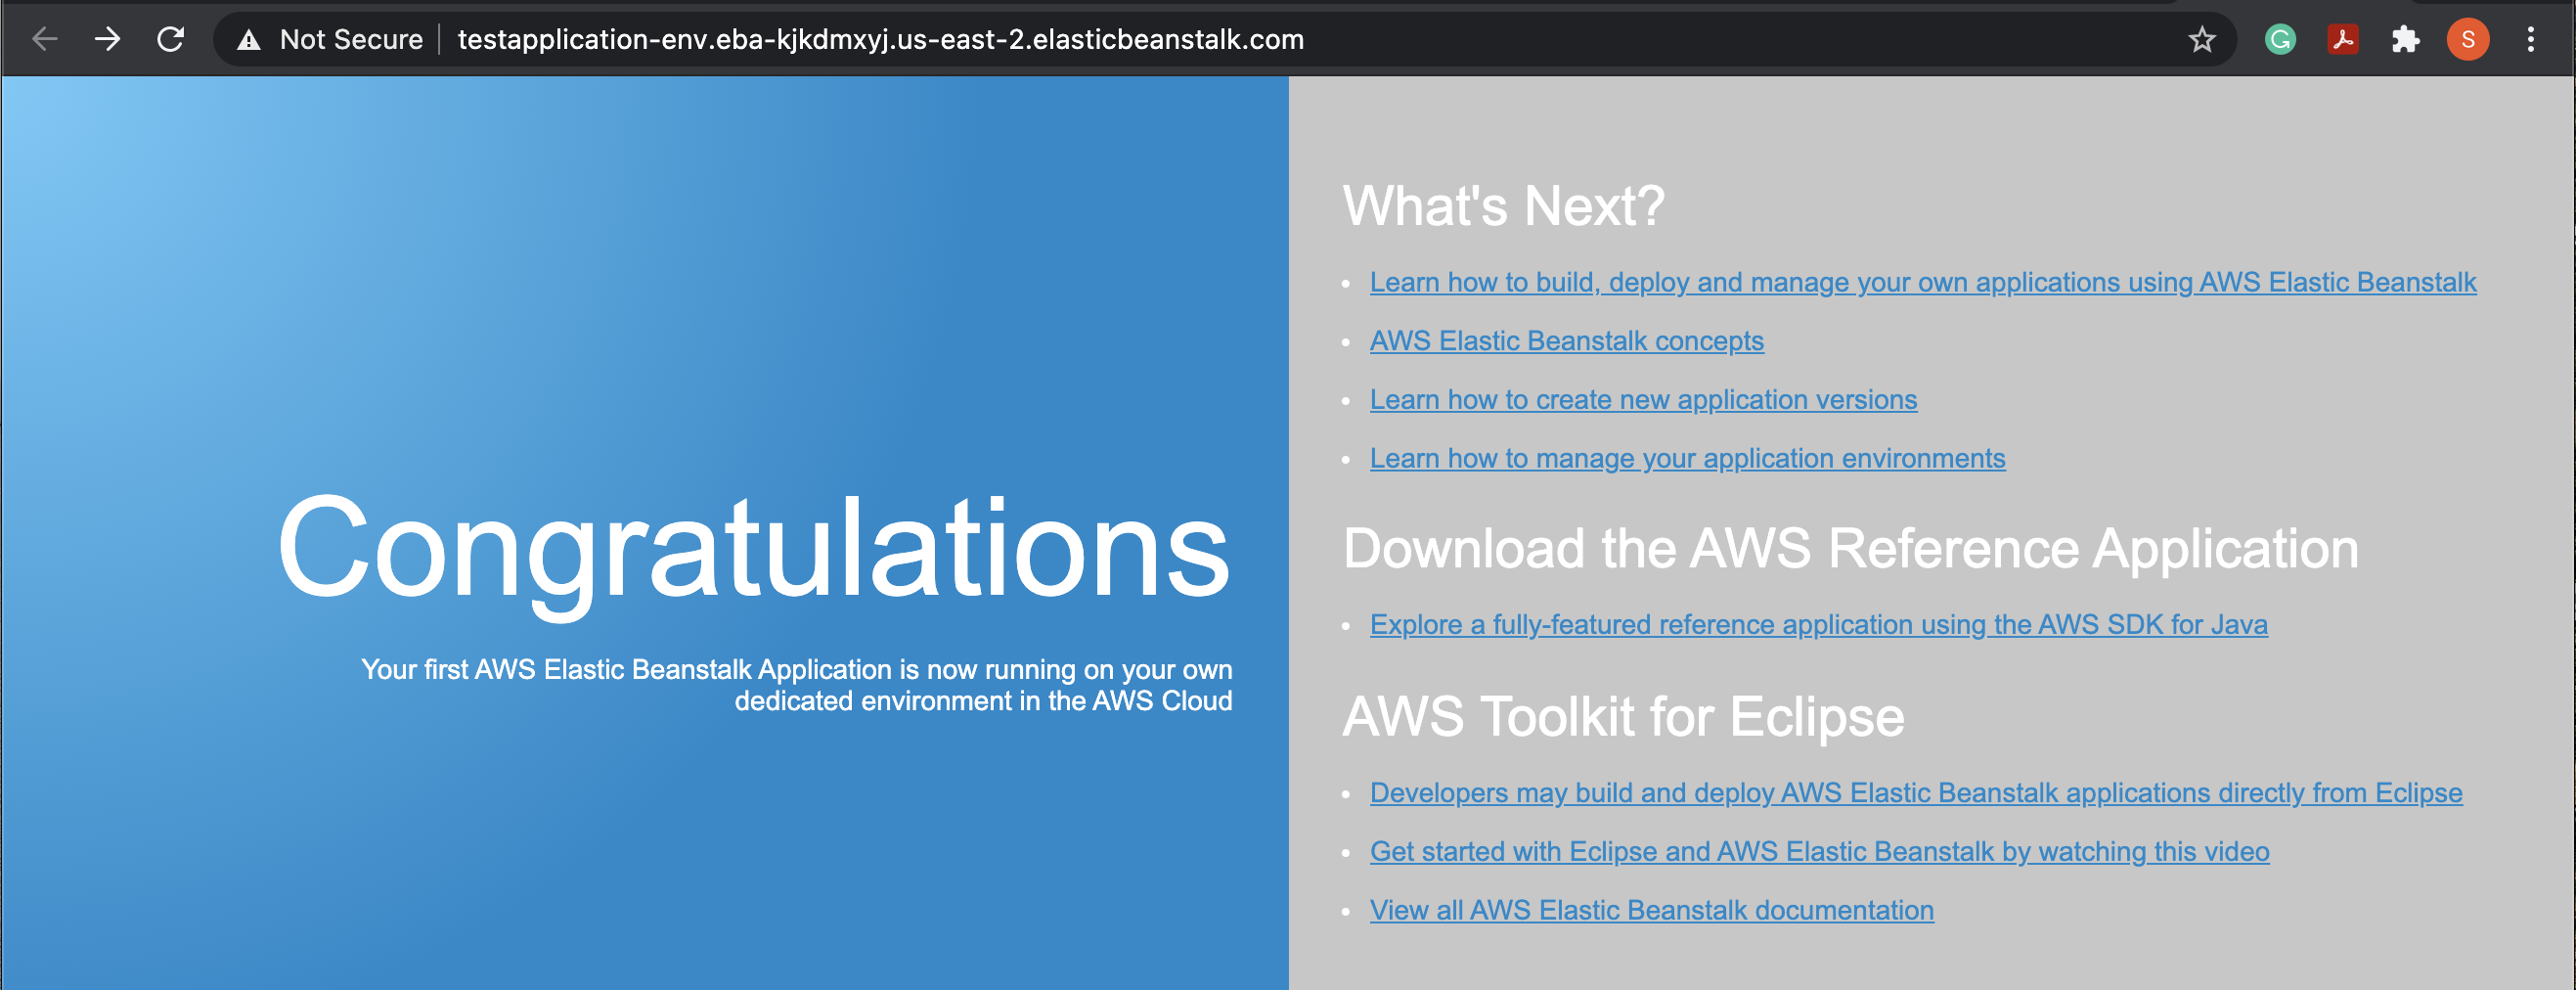
Congratulations! You've deployed a sample application and learned about the resources that spun up automatically.
Step 2. Inspect the resources created for you
- Navigate to the EC2 console and inspect the instance that was created for you. The instance has the same name as your application. You can administer and manage this EC2 as if you created it yourself.
- On the same EC2 dashboard, on the left-side menu pane, select the Security groups service to view the security groups (firewall rules) that got created automatically.
- You can also navigate to the Amazon S3 service (https://console.aws.amazon.com/s3/ ) to view the S3 buckets created for the web application. All these resources are managed by the Elastic Beanstalk service.
Step 3. Cleanup and delete resources
To clean up the resources to avoid recurring charges, you must delete your AWS resources.
- Delete application: Go to the Elastic Beankstalk's Applications dashboard. Click on the Actions button in the upper right-hand corner, and click on Delete application to delete your application components.
- Delete environment: Ideally, deleting the application will also delete the associated environment. However, you can navigate back to the Elastic Beankstalk's Environments dashboard. Select your environment, if any exists. Select the Actions button in the upper-right hand corner, and click on Terminate environment to terminate your environment.
- Delete S3 buckets: Lastly, delete the S3 bucket that got automatically created for you. Go to the S3 console at https://console.aws.amazon.com/s3/ and delete the bucket related to the Beanstalk. In case, you face an access denied error, refer to the troubleshooting steps here.

 浙公网安备 33010602011771号