

博客园项目(BBS)
博客园-首页设计、个人站点设计和文章详细页(点赞功能)
首页设计
前端页面

{% load static %}
<!DOCTYPE html>
<html lang="zh-CN">
<head>
    <meta charset="UTF-8">
    <meta http-equiv="x-ua-compatible" content="IE=edge">
    <meta name="viewport" content="width=device-width, initial-scale=1">
    <title>首页</title>
    <link rel="stylesheet" href="{% static 'bootstrap-3.3.7/css/bootstrap.min.css' %}">
    <link rel="stylesheet" href="{% static 'css/index_content.css' %}">
    <script src="{% static 'jquery-3.2.1.min.js' %}"></script>
    <script src="{% static 'bootstrap-3.3.7/js/bootstrap.min.js' %}"></script>
</head>
<body>


<nav class="navbar navbar-inverse">
    <div class="container">
        <div class="navbar-header">
            <button type="button" class="navbar-toggle collapsed" data-toggle="collapse"
                    data-target="#bs-example-navbar-collapse-1" aria-expanded="false">
                <span class="sr-only">Toggle navigation</span>
                <span class="icon-bar"></span>
                <span class="icon-bar"></span>
                <span class="icon-bar"></span>
            </button>
            <a class="navbar-brand" href="#">Brand</a>
        </div>

        <!-- Collect the nav links, forms, and other content for toggling -->
        <div class="collapse navbar-collapse" id="bs-example-navbar-collapse-1">
            <ul class="nav navbar-nav">
                <li class="active"><a href="#">Link <span class="sr-only">(current)</span></a></li>
                <li><a href="#">Link</a></li>
                <li class="dropdown">
                    <a href="#" class="dropdown-toggle" data-toggle="dropdown" role="button" aria-haspopup="true"
                       aria-expanded="false">Dropdown <span class="caret"></span></a>
                    <ul class="dropdown-menu">
                        <li><a href="#">Action</a></li>
                        <li><a href="#">Another action</a></li>
                        <li><a href="#">Something else here</a></li>
                        <li role="separator" class="divider"></li>
                        <li><a href="#">Separated link</a></li>
                        <li role="separator" class="divider"></li>
                        <li><a href="#">One more separated link</a></li>
                    </ul>
                </li>
            </ul>

            <div class="collapse navbar-collapse" id="bs-example-navbar-collapse-1">
                {% if request.user.is_authenticated %}
                    <ul class="nav navbar-nav navbar-right">
                        <li><a href="#">Hello {{ request.user.username }}</a></li>
                        <li><a href="/logout/">注销</a></li>
                        <li><a href="/modify_pwd/">修改密码</a></li>
                    </ul>
                {% else %}
                    <ul class="nav navbar-nav navbar-right">
                        <li><a href="/login/">登录</a></li>
                        <li><a href="/register/">注册</a></li>
                    </ul>
                {% endif %}

            </div>
        </div>
</nav>

<div class="container-fluid">
    <div class="row">
        <!-- 左侧菜单 -->
        <div class="col-md-3">
            <div class="panel panel-primary">
                <div class="panel-heading">Panel heading</div>
                <div class="panel-body">
                    <p>...</p>
                </div>
            </div>
            <div class="panel panel-success">
                <div class="panel-heading">Panel heading</div>
                <div class="panel-body">
                    <p>...</p>
                </div>
            </div>
            <div class="panel panel-danger">
                <div class="panel-heading">Panel heading</div>
                <div class="panel-body">
                    <p>...</p>
                </div>
            </div>
        </div>
        <!-- 文章列表 -->
        <div class="col-md-6">
            {% for article in article_list %}
                <div class="content-item">
                    <div class="title">
                        <a href="/blog/{{ article.user.username }}/articles/{{ article.nid }}.html/">{{ article.title }}</a>
                    </div>
                    <p class="desc">
                        <a href="/blog/{{ article.user.username }}" id="avater"><img src="/media/{{ article.user.avatar }}" alt="" width="48" height="48"></a>
                        <span>{{ article.desc }}</span>
                    </p>
                    <div class="content-item-foot">
                        <a href="/blog/{{ article.user.username }}" id="user">{{ article.user.username }}</a>
                        发布于{{ article.create_time|date:"Y-m-d H:i" }}
                        <a href="#" class="comment_count">评论({{ article.comment_count }})</a>
                        <a href="#" class="up_count">点赞({{ article.up_count }})</a>
                    </div>
                </div>
            {% endfor %}
        </div>
        <!-- 广告 -->
        <div class="col-md-3">

        </div>
    </div>

</div>


</body>
</html>
可以看到前端我们引入用户头像时使用的是src="/media/{{ article.user.avatar }}",还可以使用{{ article.user.avatar.url }}
同时,点击页面上的头像和用户名也能进入用户的个人站点
引用的css文件
index_content.css
#avater{
    margin-right: 5px;
    float: left;
}

.content-item{
    border-bottom: 1px dotted #ccc;
    margin-bottom: 15px;
    padding-bottom: 15px;
    font-size: 12px;
}

.title{
    color: #105cb6;
    font-size: 15px;
    font-weight: bold;
    text-decoration: underline;
    margin-bottom: 10px;
}

.desc{
    margin-bottom: 5px;
    color: #333;
    overflow: hidden;
    padding-right: 5px;
    font-size: 12px;
    padding-top: 5px;
    line-height: 1.8em;
}

#user{
    color: #005a94;
    text-decoration: none;
}

.comment_count{
    background: transparent url(/static/img/icon_comment.gif) no-repeat scroll 0 0;
    padding-left: 18px;
    padding-right: 5px;
    margin-left: 1px;
}

.up_count{
    background: transparent url(/static/img/icon_arrow.gif) no-repeat scroll 0 0;
    padding-left: 18px;
    padding-right: 5px;
    margin-left: 1px;
}
后端视图函数
def index(request):
    article_list = models.Article.objects.all()
    return render(request, "index.html", locals())
查询出所有的文章对象,在页面上进行渲染
个人站点设计
url设计
我们通过 域名/blog/用户名的 的url来访问用户的个人站点
urlpatterns = [
    url(r'^admin/', admin.site.urls),
    # blog url的分发
    url(r'^blog/', include('blog.urls')),
]
blog应用下的url文件
from django.conf.urls import url
from blog import views


urlpatterns = [
    # 个人站点的url
    url(r'^(?P<username>\w+)/', views.home_site),
]
前端页面
{% load static %}
<!DOCTYPE html>
<html lang="zh-CN">
<head>
    <meta charset="UTF-8">
    <meta http-equiv="x-ua-compatible" content="IE=edge">
    <meta name="viewport" content="width=device-width, initial-scale=1">
    <title>Title</title>
    <link rel="stylesheet" href="{% static 'bootstrap-3.3.7/css/bootstrap.min.css' %}">
    <link rel="stylesheet" href="{% static 'css/home_site.css' %}">
    <script src="{% static 'jquery-3.2.1.min.js' %}"></script>
    <script src="{% static 'bootstrap-3.3.7/js/bootstrap.min.js' %}"></script>
</head>
<body>

<div class="header">
    <p class="title">{{ user.nickname }}</p>
    <div class="action">
        <a href="">管理</a>
        <a href="">首页</a>
        <a href="">文章</a>
        <a href="">随笔</a>
    </div>
</div>


<div class="container-fluid">
    <div class="row">
       <div class="col-md-3">
            <div class="panel panel-primary">
                <div class="panel-heading">我的分类</div>
                <div class="panel-body">
                        {% for category in category_list %}
                            <p><a href="">{{ category }}({{ category.article_set.all.count }})</a></p>
                        {% endfor %}
                </div>
            </div>
            <div class="panel panel-success">
                <div class="panel-heading">标签</div>
                <div class="panel-body">
                    {% for tag in tag_list %}
                        <p><a href="">{{ tag.0 }}({{ tag.1 }})</a></p>
                    {% endfor %}
                </div>
            </div>
            <div class="panel panel-danger">
                <div class="panel-heading">文章归档</div>
                <div class="panel-body">
                    <p>...</p>
                </div>
            </div>
        </div>
        <div class="col-md-8">
            <div class="articles_region">
                {% for article in article_list %}
                    <div class="content-item">
                        <div class="title">
                            <a href="#">{{ article.title }}</a>
                        </div>
                        <p class="desc">
                            <span>{{ article.desc }}</span>
                        </p>
                        <div class="content-item-foot pull-right">
                            <a href="#" id="user">{{ article.user.username }}</a>
                            发布于{{ article.create_time|date:"Y-m-d H:i" }}
                            <a href="#" class="comment_count">评论({{ article.comment_count }})</a>
                            <a href="#" class="up_count">点赞({{ article.up_count }})</a>
                        </div>
                    </div>
                {% endfor %}
            </div>
        </div>
    </div>
</div>
</body>
</html>
视图函数
# 个人站点
def home_site(request, username):
    # 判断用户是否存在
    user = models.UserInfo.objects.filter(username=username).first()
    if not user:
        return render(request, "blog/not_found.html")
    # 当前站点
    blog = user.blog
    # 筛选当前站点的所有文章
    article_list = models.Article.objects.filter(user=user)
    # 查询当前站点的所有分类
    category_list = models.HomeCategory.objects.filter(blog=blog)
    # category_list = models.HomeCategory.objects.filter(blog_id=blog.pk)  pk默认取的就是主键的值

    # 查询当前站点的每一个分类名称以及对应的文章数
    # ret = models.HomeCategory.objects.filter(blog=blog).annotate(c=Count("article")).values_list("title", "c")
    # print(ret)  # <QuerySet [('Linux', 1), ('JavaScript', 1)]>

    # 查询当前站点每一个标签名称以及对应的文章数
    tag_list = models.Tag.objects.filter(blog=blog).annotate(c=Count("article")).values_list("title", "c")

    # 日期归档
    date_list = []
    for obj in article_list:
        temp = []
        # print(obj.create_time)  # 2018-02-05 11:35:05+00:00
        # print(type(obj.create_time))  # <class 'datetime.datetime'>
        s = "%s-%s" % (obj.create_time.year, obj.create_time.month)
        count = models.Article.objects.filter(user=user).filter(create_time__year=obj.create_time.year, create_time__month=obj.create_time.month).count()
        temp.append(s)
        temp.append(count)
        if temp not in date_list:
            date_list.append(temp)
    print(date_list)
    return render(request, "blog/home_site.html", locals())
这里我们可以看到查询文章分类等信息的时候用到了分组查询
而根据日期对文章进行归档时,由于我们存的日期格式为 年-月-日 时:分:秒 ,所以要想办法把文件按 年-月 分组并查出文章数
使用ORM的extra方法对日期归档
# 个人站点
def home_site(request, username, **kwargs):
    # 判断用户是否存在
    user = models.UserInfo.objects.filter(username=username).first()
    if not user:
        return render(request, "blog/not_found.html")
    # 当前站点
    blog = user.blog
    # 筛选当前站点的所有文章
    if not kwargs:
        article_list = models.Article.objects.filter(user=user)
    else:
        condition = kwargs.get("condition")
        params = kwargs.get("params")
        if condition == "cate":
            article_list = models.Article.objects.filter(user=user).filter(homeCategory__title=params)
        elif condition == "tag":
            article_list = models.Article.objects.filter(user=user).filter(tags__title=params)
        else:
            year, month = params.split("-")
            article_list = models.Article.objects.filter(user=user).filter(create_time__year=year, create_time__month=month)
    # 查询当前站点的所有分类
    category_list = models.HomeCategory.objects.filter(blog=blog)
    # category_list = models.HomeCategory.objects.filter(blog_id=blog.pk)  pk默认取的就是主键的值

    # 查询当前站点的每一个分类名称以及对应的文章数
    # ret = models.HomeCategory.objects.filter(blog=blog).annotate(c=Count("article")).values_list("title", "c")
    # print(ret)  # <QuerySet [('Linux', 1), ('JavaScript', 1)]>

    # 查询当前站点每一个标签名称以及对应的文章数
    tag_list = models.Tag.objects.filter(blog=blog).annotate(c=Count("article")).values_list("title", "c")

    # 日期归档
    # date_list = []
    # for obj in article_list:
    #     temp = []
        # print(obj.create_time)  # 2018-02-05 11:35:05+00:00
        # print(type(obj.create_time))  # <class 'datetime.datetime'>
    #     s = "%s-%s" % (obj.create_time.year, obj.create_time.month)
    #     count = models.Article.objects.filter(user=user).filter(create_time__startswith=s).count()
    #     temp.append(s)
    #     temp.append(count)
    #     if temp not in date_list:
    #         date_list.append(temp)
    # print(date_list)

    # extra方法
    # date_list = models.Article.objects.filter(user=user).extra(select={"year_month": "date_format(create_time,'%%Y-%%m')"}).values("year_month").annotate(c=Count("nid"))
    # print(date_list)  # <QuerySet [{'year_month': b'2017-12', 'c': 1}, {'year_month': b'2017-11', 'c': 1}]>
    date_list = models.Article.objects.filter(user=user).extra(
        select={"year_month": "date_format(create_time,'%%Y-%%m')"}).values_list("year_month").annotate(c=Count("nid"))  # 相当于在每个文章对象里加了一个年-月形式的时间字段,再以该字段分组,统计每个时间段的文章数量
    # print(date_list)  # <QuerySet [(b'2017-12', 1), (b'2017-11', 1)]>
    return render(request, "blog/home_site.html", locals())
这里利用ORM的extra方法给每一个找到的文章对象增加一个 年-月形式的字段,再以该字段分组,统计每个时间段的文章数量
分类、标签、归档跳转
url设计
from django.conf.urls import url
from blog import views


urlpatterns = [
    # 个人站点的url
    url(r'^(?P<username>\w+)/$', views.home_site),
    url(r'^(?P<username>\w+)/(?P<condition>cate|tag|date)/(?P<params>.+)/$', views.home_site),
]
这三个跳转我们使用统一的url,并且依然使用home_site视图函数
当我们点击分类、标签、归档进行跳转时,可以发现,导航条和左侧菜单部分是不变的,变化的只有右边的文章列表
这时候你可能会想到模板继承,但是这里我们发现只要改变一下渲染模板时的article_list就能实现这个功能
所以我们依然使用home_site这个视图函数,只是通过url传过来的参数进行判断,再对article_list进行相应的过滤,就能实现功能
# 个人站点
def home_site(request, username, **kwargs):
    # 判断用户是否存在
    user = models.UserInfo.objects.filter(username=username).first()
    if not user:
        return render(request, "blog/not_found.html")
    # 当前站点
    blog = user.blog
    # 筛选当前站点的所有文章
    if not kwargs:
        article_list = models.Article.objects.filter(user=user)
    else:
        condition = kwargs.get("condition")
        params = kwargs.get("params")
        if condition == "cate":
            article_list = models.Article.objects.filter(user=user).filter(homeCategory__title=params)
        elif condition == "tag":
            article_list = models.Article.objects.filter(user=user).filter(tags__title=params)
        else:
            year, month = params.split("-")
            article_list = models.Article.objects.filter(user=user).filter(create_time__year=year, create_time__month=month)
    # 查询当前站点的所有分类
    category_list = models.HomeCategory.objects.filter(blog=blog)
    # category_list = models.HomeCategory.objects.filter(blog_id=blog.pk)  pk默认取的就是主键的值

    # 查询当前站点的每一个分类名称以及对应的文章数
    # ret = models.HomeCategory.objects.filter(blog=blog).annotate(c=Count("article")).values_list("title", "c")
    # print(ret)  # <QuerySet [('Linux', 1), ('JavaScript', 1)]>

    # 查询当前站点每一个标签名称以及对应的文章数
    tag_list = models.Tag.objects.filter(blog=blog).annotate(c=Count("article")).values_list("title", "c")

    # 日期归档
    # date_list = []
    # for obj in article_list:
    #     temp = []
        # print(obj.create_time)  # 2018-02-05 11:35:05+00:00
        # print(type(obj.create_time))  # <class 'datetime.datetime'>
    #     s = "%s-%s" % (obj.create_time.year, obj.create_time.month)
    #     count = models.Article.objects.filter(user=user).filter(create_time__startswith=s).count()
    #     temp.append(s)
    #     temp.append(count)
    #     if temp not in date_list:
    #         date_list.append(temp)
    # print(date_list)

    # extra方法
    # date_list = models.Article.objects.filter(user=user).extra(select={"year_month": "date_format(create_time,'%%Y-%%m')"}).values("year_month").annotate(c=Count("nid"))
    # print(date_list)  # <QuerySet [{'year_month': b'2017-12', 'c': 1}, {'year_month': b'2017-11', 'c': 1}]>
    date_list = models.Article.objects.filter(user=user).extra(
        select={"year_month": "date_format(create_time,'%%Y-%%m')"}).values_list("year_month").annotate(c=Count("nid"))  # 相当于在每个文章对象里加了一个年-月形式的时间字段,再以该字段分组,统计每个时间段的文章数量
    # print(date_list)  # <QuerySet [(b'2017-12', 1), (b'2017-11', 1)]>
    return render(request, "blog/home_site.html", locals())
文章详细页
当我们访问首页和个人站点时,可以看到一篇篇的文章列表,当我们点击文章名时,可以进入文章详细页
进入文章详细页后我们发现导航条和左侧菜单部分还是和个人站点一样,唯一的不同是右边的文章列表变成了一篇文章的详细内容
这时我们想到了模板继承
url设计
from django.conf.urls import url
from blog import views


urlpatterns = [
    # 文章详细页的点赞url
    url(r'digg/$', views.digg),

    # 个人站点的url
    url(r'^(?P<username>\w+)/$', views.home_site),
    url(r'^(?P<username>\w+)/(?P<condition>cate|tag|date)/(?P<params>.+)/$', views.home_site),
    url(r'^(?P<username>\w+)/articles/(?P<article_id>\d+)\.html/$', views.article_detail),
]
这里我们使用 域名/blog/articles/文章id 的url,可以通过文章的id很快的在数据库中搜索到文章
前端模板
由于与个人站点页有很多一样的部分,我们采用模板继承的方式,创建一个home_base.html的模板
{% load static %}
{% load my_tags %}
<!DOCTYPE html>
<html lang="zh-CN">
<head>
    <meta charset="UTF-8">
    <meta http-equiv="x-ua-compatible" content="IE=edge">
    <meta name="viewport" content="width=device-width, initial-scale=1">
    <title>Title</title>
    <link rel="stylesheet" href="{% static 'bootstrap-3.3.7/css/bootstrap.min.css' %}">
    <link rel="stylesheet" href="{% static 'css/home_site.css' %}">
    <script src="{% static 'jquery-3.2.1.min.js' %}"></script>
    <script src="{% static 'bootstrap-3.3.7/js/bootstrap.min.js' %}"></script>
</head>
<body>

<div class="header">
    <p class="title">{{ username }}</p>
    <div class="action">
        <a href="">管理</a>
        <a href="">首页</a>
        <a href="">文章</a>
        <a href="">随笔</a>
    </div>
</div>


<div class="container-fluid">
    <div class="row">
        {% get_archive_style username %}
        <div class="col-md-8">
            {% block content %}
                <div class="articles_region">
                    {% for article in article_list %}
                        <div class="content-item">
                            <div class="title">
                                <a href="/blog/{{ username }}/articles/{{ article.nid }}.html/">{{ article.title }}</a>
                            </div>
                            <p class="desc">
                                <span>{{ article.desc }}</span>
                            </p>
                            <div class="content-item-foot pull-right">
                                <a href="#" id="user">{{ article.user.username }}</a>
                                发布于{{ article.create_time|date:"Y-m-d H:i" }}
                                <a href="#" class="comment_count">评论({{ article.comment_count }})</a>
                                <a href="#" class="up_count">点赞({{ article.up_count }})</a>
                            </div>
                        </div>
                    {% endfor %}
                </div>
            {% endblock %}
        </div>
    </div>
</div>
</body>
</html>
同时我们发现左侧菜单部分不论在哪都是一样的,我们可以将左侧菜单单独写到一个archive.html文件中,在模板中需要的地方使用{ % include 'archive.html' % }的方式来引用他
<div class="col-md-3">
            <div class="panel panel-primary">
                <div class="panel-heading">我的分类</div>
                <div class="panel-body">
                    {% for category in category_list %}
                        <p>
                            <a href="/blog/{{ username }}/cate/{{ category.title }}">{{ category }}({{ category.article_set.all.count }})</a>
                        </p>
                    {% endfor %}
                </div>
            </div>
            <div class="panel panel-success">
                <div class="panel-heading">标签</div>
                <div class="panel-body">
                    {% for tag in tag_list %}
                        <p><a href="/blog/{{ username }}/tag/{{ tag.0 }}">{{ tag.0 }}({{ tag.1 }})</a></p>
                    {% endfor %}
                </div>
            </div>
            <div class="panel panel-danger">
                <div class="panel-heading">日期归档</div>
                <div class="panel-body">
                    {% for date in date_list %}
                        <p><a href="/blog/{{ username }}/date/{{ date.0 }}">{{ date.0 }}({{ date.1 }})</a></p>
                    {% endfor %}

                </div>
            </div>
        </div>
然而这里又出现了问题,左侧菜单部分的内容都是通过我们在后端数据库中查询的数据进行渲染的,如果我们要看到数据,又需要到数据库中去查询一遍数据
而这个查询的过程在个人站点的视图函数中已经经理过一次了,为了能够不写重复代码,还能保证数据渲染到页面上,这里我们使用自定义标签的方法
自定义标签
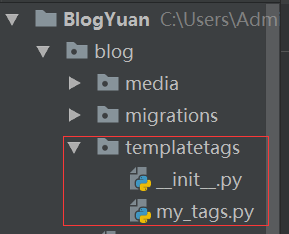
先在项目app下创建templatetags包,在包中创建一个py文件
在这个文件中写我们所需要的自定义标签
from django import template
from django.utils.safestring import mark_safe
from blog import models
from django.db.models import Count
register = template.Library()


@register.inclusion_tag("blog/archive.html")
def get_archive_style(username):
    # 判断用户是否存在
    user = models.UserInfo.objects.filter(username=username).first()
    # 当前站点
    blog = user.blog
    # 查询当前站点的所有分类
    category_list = models.HomeCategory.objects.filter(blog=blog)
    # category_list = models.HomeCategory.objects.filter(blog_id=blog.pk)  pk默认取的就是主键的值

    # 查询当前站点的每一个分类名称以及对应的文章数
    # ret = models.HomeCategory.objects.filter(blog=blog).annotate(c=Count("article")).values_list("title", "c")
    # print(ret)  # <QuerySet [('Linux', 1), ('JavaScript', 1)]>

    # 查询当前站点每一个标签名称以及对应的文章数
    tag_list = models.Tag.objects.filter(blog=blog).annotate(c=Count("article")).values_list("title", "c")

    # 日期归档
    # date_list = []
    # for obj in article_list:
    #     temp = []
    # print(obj.create_time)  # 2018-02-05 11:35:05+00:00
    # print(type(obj.create_time))  # <class 'datetime.datetime'>
    #     s = "%s-%s" % (obj.create_time.year, obj.create_time.month)
    #     count = models.Article.objects.filter(user=user).filter(create_time__startswith=s).count()
    #     temp.append(s)
    #     temp.append(count)
    #     if temp not in date_list:
    #         date_list.append(temp)
    # print(date_list)

    # extra方法
    # date_list = models.Article.objects.filter(user=user).extra(select={"year_month": "date_format(create_time,'%%Y-%%m')"}).values("year_month").annotate(c=Count("nid"))
    # print(date_list)  # <QuerySet [{'year_month': b'2017-12', 'c': 1}, {'year_month': b'2017-11', 'c': 1}]>
    date_list = models.Article.objects.filter(user=user).extra(
        select={"year_month": "date_format(create_time,'%%Y-%%m')"}).values_list("year_month").annotate(
        c=Count("nid"))  # 相当于在每个文章对象里加了一个年-月形式的时间字段,再以该字段分组,统计每个时间段的文章数量
    # print(date_list)  # <QuerySet [(b'2017-12', 1), (b'2017-11', 1)]>
    return {"user": user, "username": username, "category_list": category_list, "tag_list": tag_list, "date_list": date_list}
可以看到在这里我们将archive.html文件中需要的数据都进行了查询,并把数据返回给了该页面,这样我们在模板中引入该页面的标签时,标签里是自带了数据的
模板引入的方法
<div class="container-fluid">
    <div class="row">
        {% get_archive_style username %}
视图函数
def article_detail(request, username, article_id):
    article_obj = models.Article.objects.filter(pk=article_id).first()
    return render(request, "blog/article_detail.html", {"username": username, "article_obj": article_obj})
这里我们只需要根据url传来的id找到相应的文章,并将他和查询其它数据所需要的username一起传给前端即可
继承模板
有了模板,我们只要继承好模板,再加入自己的内容即可
{% extends "blog/home_base.html" %}

{% block content %}
    <div class="article_info">
        <h4 class="text-center"><a href="">{{ article_obj.title }}</a></h4>
        {{ article_obj.articledetail.content|safe }}
    </div>

<div id="div_digg">
    <div class="diggit digg">
        <span class="diggnum" id="digg_count">{{ article_obj.up_count }}</span>
    </div>
    <div class="buryit digg">
        <span class="burynum" id="bury_count">{{ article_obj.down_count }}</span>
    </div>
    <div class="clear"></div>
    <div class="diggword" id="digg_tips">
    </div>
</div>
    {% csrf_token %}
个人站点目录继承模板
个人站点目录同样可以使用该模板
{% extends "blog/home_base.html" %}
而且由于很多需要查询的内容在自定义标签中已经查询过了,所以后端的视图函数中也不需要了
# 个人站点
def home_site(request, username, **kwargs):
    # 判断用户是否存在
    user = models.UserInfo.objects.filter(username=username).first()
    if not user:
        return render(request, "blog/not_found.html")
    # 当前站点
    blog = user.blog
    # 筛选当前站点的所有文章
    if not kwargs:
        article_list = models.Article.objects.filter(user=user)
    else:
        condition = kwargs.get("condition")
        params = kwargs.get("params")
        if condition == "cate":
            article_list = models.Article.objects.filter(user=user).filter(homeCategory__title=params)
        elif condition == "tag":
            article_list = models.Article.objects.filter(user=user).filter(tags__title=params)
        else:
            year, month = params.split("-")
            article_list = models.Article.objects.filter(user=user).filter(create_time__year=year, create_time__month=month)

    return render(request, "blog/home_site.html", locals())
点赞和反对功能
前端页面
该功能是在文章详细页中的
{% extends "blog/home_base.html" %}

{% block content %}
    <div class="article_info">
        <h4 class="text-center"><a href="">{{ article_obj.title }}</a></h4>
        {{ article_obj.articledetail.content|safe }}
    </div>

<div id="div_digg">
    <div class="diggit digg">
        <span class="diggnum" id="digg_count">{{ article_obj.up_count }}</span>
    </div>
    <div class="buryit digg">
        <span class="burynum" id="bury_count">{{ article_obj.down_count }}</span>
    </div>
    <div class="clear"></div>
    <div class="diggword" id="digg_tips">
    </div>
</div>
    {% csrf_token %}

    <script>
    // js里所有的对象布尔值都是true,哪怕是空的,只有空字符串是false
    $(".digg").click(function () {
        var is_up = $(this).hasClass("diggit");
        // 绑定提交点赞请求
        $.ajax({
            url:"/blog/digg/",
            type:"post",
            data:{
                "article_id":{{ article_obj.pk }},
                "csrfmiddlewaretoken":$("[name='csrfmiddlewaretoken']").val(),
                "is_up":is_up
            },
            success:function (data) {
                if (data.state){
                    if (is_up){
                        var val = parseInt($("#digg_count").text())+1;
                        $("#digg_count").text(val)
                    }else{
                        var val = parseInt($("#bury_count").text())+1;
                        $("#bury_count").text(val)
                    }

                }else{
                    var error_info;
                    if (data.first_updown){
                        error_info = "已经点赞过了"
                    }else{
                        error_info = "已经反对过了"
                    }

                    $("#digg_tips").text(error_info).css("color","red");
                    setTimeout(function () {
                        $("#digg_tips").text("")
                    },1000)
                }
            }
        })
    })
    </script>
{% endblock %}
当点击了点赞和反对后,通过ajax将文章的id,点赞还是反对的状态传给后台
视图函数
from django.db import transaction  # 事务
from django.http import JsonResponse
def digg(request):
    article_id = request.POST.get("article_id")
    is_up = json.loads(request.POST.get("is_up"))  # 前端传来的数据是个字符串,需要反序列化为布尔值
    user_id = request.user.nid
    response = {"state": True}
    try:
        with transaction.atomic():  # 添加事务
            obj = models.ArticleUpDown.objects.create(user_id=user_id, article_id=article_id, is_up=is_up)
            if is_up:
                models.Article.objects.filter(nid=article_id).update(up_count=F("up_count")+1)
            else:
                models.Article.objects.filter(nid=article_id).update(down_count=F("down_count") + 1)
    except Exception as e:
        first_updown = models.ArticleUpDown.objects.filter(user_id=user_id, article_id=article_id).values("is_up").first().get("is_up")
        response["state"] = False
        response["first_updown"] = first_updown
    return JsonResponse(response)  # 帮我们发送json,并且前端会自动解析,不用我们自己解析
后端接收到前端的数据,通过is_up的值来判断用户是点赞还是反对,并将数据添加到数据库
这里需要注意,前端传来的数据在后端接收到的是一个字符串,需要进行反序列化,得到相应的布尔值:
is_up = json.loads(request.POST.get("is_up"))
由于点赞和反对表中我们对user_id 和 article_id两个字段设置了联合唯一(同一个用户只能对同一篇文章进行一次点赞或反对),如果数据库中之前已经有了该数据,再次添加则会报错
这里我们采用异常处理的方式,一旦报错,便判断一下数据库中原来的值是点赞还是反对,将对应的布尔值传给前端
前端再通过相应的值,对页面进行改变(详见上面的前端页面ajax部分)
这里要考虑一点,如果用户没有登录,是不能点赞的,还需要进行判断
ps:
在JS中所有的对象对应的布尔值都是true(即使内容是空),只有空字符串为false

 浙公网安备 33010602011771号