
hexo博客yilia主题深度设置
转载:Shuyan
http://dongshuyan.com/2019/05/24/hexo博客注意事项/
1、微信分享异常
这里是themes\yilia\layout\ _partial\post\share.ejs出了问题。
而且是两个问题:
1.1 首先是百度网盘取消了生成二维码的功能。
解决方法是修改themes\yilia\layout_partial\post\share.ejs
文件中的
1
|
//pan.baidu.com/share/qrcode?url=
|
修改为
1
|
//api.qrserver.com/v1/create-qr-code/?size=150x150&data=
|
1.2 我这里分享的网址有问题。方法一
直接在根目录的配置文件中添加你网站的url信息。
1.3 我这里分享的网址有问题。方法二
解决方法是在文件中的
1
|
var sUrl = url.replace(/index\.html$/, '');
|
下面加一行(这里的20是根据自己网址长度计算得到的)
1
|
test=sUrl.substring(20);
|
然后上面就变成了:
1
|
<%
|
然后将上一步中的
1
|
'//api.qrserver.com/v1/create-qr-code/?size=150x150&data=' + sUrl
|
改为
1
|
'//api.qrserver.com/v1/create-qr-code/?size=150x150&data=你的主页网址' + test
|
举例,我的网址是(dongshuyan.github.io)那么就改为:
1
|
<div class="page-modal wx-share js-wx-box">
|
2.点击“所有文章”无显示
themes\yilia\ _config.yml文件里面
1
|
mathjax: true
|
改成
1
|
mathjax: false
|
3.在左侧显示总文章数
将themes\yilia\layout_partial\left-col.ejs文件的
1
|
<nav class="header-menu">
|
后面加上
1
|
<nav>
|
4.怎么置顶文章
4.1安装插件
1
|
npm uninstall hexo-generator-index --save
|
4.2配置置顶标准
打开:/themes/*/layout(/_macro)/post.ejs
直接在最前面加入以下代码即可
1
|
<% if (page.top) { %>
|
4.3配置文章
然后在需要置顶的文章的Front-matter中加上top选项即可
top后面的数字越大,优先级越高
1
|
---
|
4.4优先级配置
修改根目录配置文件/_config.yml,top值-1标示根据top值倒序(正序设置为1即可),同样date也是根据创建日期倒序。
1
|
index_generator:
|
5.Hexo 实现私密文章加密
1
|
cd /Hexo
|
6.增加不蒜子统计
利用这个统计,可以知道你博客的访问量
6.1安装不蒜子脚本
在 themes\yilia\layout\ _partial\after-footer.ejs最后添加
1
|
<script async src="https://dn-lbstatics.qbox.me/busuanzi/2.3/busuanzi.pure.mini.js"></script>
|
6.2单篇文章点击量
在themes/yilia/layout/_partial/article.ejs中 在
1
|
<%- partial('post/title', {class_name: 'article-title'}) %>
|
后面插入如下代码
1
|
<!--显示阅读次数-->
|
7.增加版权声明
7.1配置yilia
在
1
|
themes/yilia/layout/_partial/article.ejs
|
中标注的位置添加代码
1
|
<div class="article-entry" itemprop="articleBody">
|
添加的代码如下
1
|
<!-- 增加版权声明 -->
|
创建新文件
1
|
themes/yilia/source-src/css/declare.scss
|
并添加如下CSS代码。
1
|
.declare {
|
为
1
|
themes/yilia/source-src/css/main.scss
|
添加如下代码:
1
|
@import "./declare";
|
7.2配置显示
修改为
1
|
themes/yilia/_config.yml
|
在里面加入:
1
|
#版权基础设定:0-关闭声明; 1-文章对应的md文件里有declare: true属性,才有版权声明; 2-所有文章均有版权声明
|
然后在需要进行版权声明的文章的md文件头部,设置属性
1
|
declare:true
|
即可。
8.字数、阅读时长添加(失败)
8.1 安装hexo-wordcount 安装完就报错了 pass
在博客目录下打开terminal,输入命令
1
|
npm i --save hexo-wordcount
|
9.鼠标点击小红心的设置
在
1
|
hexo/themes/yilia/source
|
文件目录下添加
1
|
love.js
|
文件。
1
|
!function(e,t,a){function r(){for(var e=0;e<s.length;e++)s[e].alpha<=0?(t.body.removeChild(s[e].el),s.splice(e,1)):(s[e].y--,s[e].scale+=.004,s[e].alpha-=.013,s[e].el.style.cssText="left:"+s[e].x+"px;top:"+s[e].y+"px;opacity:"+s[e].alpha+";transform:scale("+s[e].scale+","+s[e].scale+") rotate(45deg);background:"+s[e].color+";z-index:99999");requestAnimationFrame(r)}function n(){var t="function"==typeof e.onclick&&e.onclick;e.onclick=function(e){t&&t(),o(e)}}function o(e){var a=t.createElement("div");a.className="heart",s.push({el:a,x:e.clientX-5,y:e.clientY-5,scale:1,alpha:1,color:c()}),t.body.appendChild(a)}function i(e){var a=t.createElement("style");a.type="text/css";try{a.appendChild(t.createTextNode(e))}catch(t){a.styleSheet.cssText=e}t.getElementsByTagName("head")[0].appendChild(a)}function c(){return"rgb("+~~(255*Math.random())+","+~~(255*Math.random())+","+~~(255*Math.random())+")"}var s=[];e.requestAnimationFrame=e.requestAnimationFrame||e.webkitRequestAnimationFrame||e.mozRequestAnimationFrame||e.oRequestAnimationFrame||e.msRequestAnimationFrame||function(e){setTimeout(e,1e3/60)},i(".heart{width: 10px;height: 10px;position: fixed;background: #f00;transform: rotate(45deg);-webkit-transform: rotate(45deg);-moz-transform: rotate(45deg);}.heart:after,.heart:before{content: '';width: inherit;height: inherit;background: inherit;border-radius: 50%;-webkit-border-radius: 50%;-moz-border-radius: 50%;position: fixed;}.heart:after{top: -5px;}.heart:before{left: -5px;}"),n(),r()}(window,document);
|
在
1
|
hexo/themes/yilia/layout/_partial/footer.ejs
|
文件的最后, 添加以下代码:
1
|
<!--页面点击小红心-->
|
10.文本结束并且与more无冲突
打开
1
|
yourblog\themes\yilia\layout\_partial
|
文件夹,并编辑
1
|
article.ejs
|
文件
并在这段代码:
1
|
<% if (!post.noDate){ %>
|
的下面添加:
1
|
<% if ((theme.essayending_type === 2 || (theme.essayending_type === 1 && post.essayending)) && !index){ %>
|
然后在
1
|
\theme\yilia\_config.yml
|
文件中找到合适位置添加
1
|
#文章结束
|
这里
0表示关闭文章结束提示
2表示全开
1表示需要在文章开头加上 essayending: true 才会开启文章结束提示
11. 404 页面
直接在hexo/source文件夹里面加一个404.html
12. Sitemap方式提交网页
在 Hexo 根目录打开命令行工具,执行以下命令:
1
|
npm install hexo-generator-sitemap --save
|
查看
1
|
{your_hexo_path}/public
|
文件夹,可以看到
1
|
sitmap.xml
|
文件。
sitemap 的初衷是给搜索引擎看的,为了提高搜索引擎对自己站点的收录效果,我们最好手动到 google 和百度等搜索引擎提交 sitemap.xml。
baidu提交网址:https://ziyuan.baidu.com/?castk=LTE%3D
13.百度自动推送方式提交网页
在本机
1
|
<博客根目录>/themes/yilia/layout/_partial
|
目录下打开article.ejs文件,定位到如下这段代码:
1
|
<%
|
在它前面加上:
1
|
<!- 百度自动推送方式提交 -->
|
即完成了新增博客文章页面(不包括其他页面)的自动推送方式提交。
14.Hexo添加百度统计
打开
1
|
themes/yilia/layout/_partial/baidu-analytics.ejs
|
将你在百度统计里面得到的代码粘进去
然后打开
1
|
themes/yilia/_config.yml
|
里面
1
|
baidu_analytics: ''
|
改为
1
|
baidu_analytics: 'true'
|
15链接提交
百度站长平台的链接提交方式分为自动提交和手动提交两种,此处只讲自动提交,手动提交按照要求操作即可。
15.1 主动推送
主动推送最为快速的提交方式,是被百度收录最快的推送方式。主动推送可以通过安装插件实现:
15.1.1首先安装插件:
1
|
npm install hexo-baidu-url-submit --save
|
修改站点根目录下的配置文件_config.yml,添加以下内容:
1
|
baidu_url_submit:
|
15.1.2准入秘钥获取
在如下图的网址中: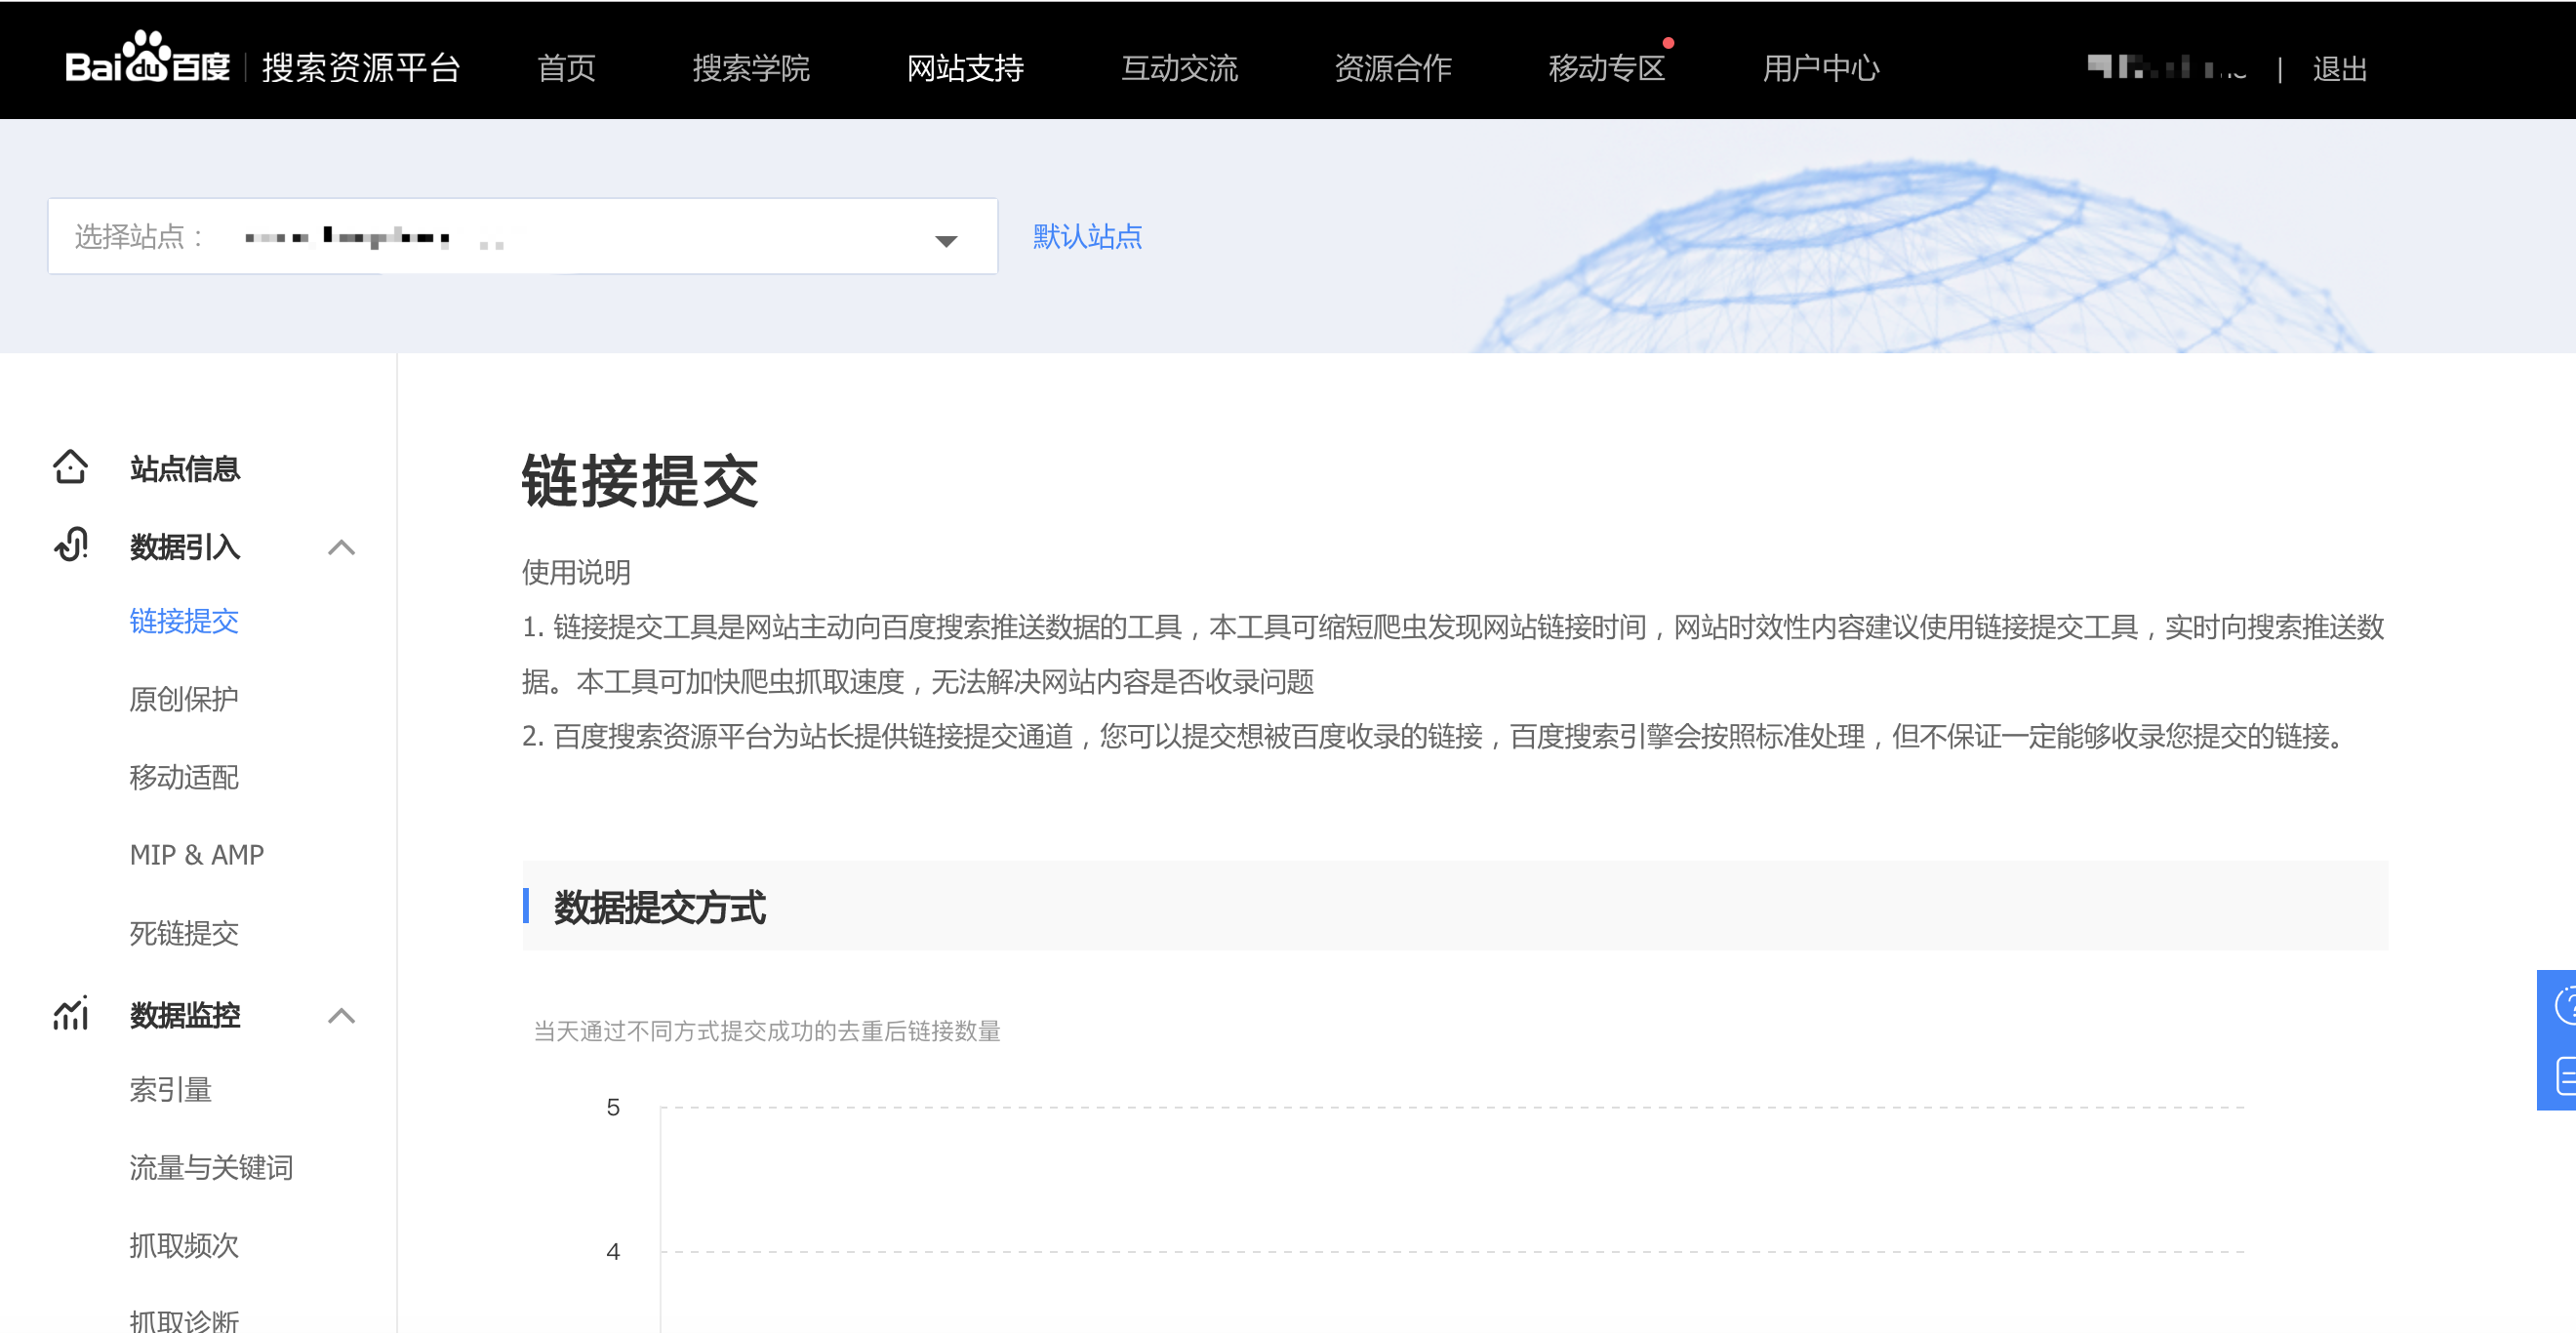
下拉,找到这里:
点击进去就是准入秘钥。
15.1.3 检查
其次,记得查看根目录下的_config.yml文件中url的值, 必须包含是百度站长平台注册的域名, 比如:
1
|
# URL
|
最后,加入新的deployer
最后,加入新的deployer:
1
|
deploy:
|
这里的”-“,必不可少! 否则报错。
使用
其主动推送的实现原理如下:
新链接的产生, hexo generate 会产生一个文本文件,里面包含最新的链接
新链接的提交, hexo deploy 会从上述文件中读取链接,提交至百度搜索引擎
15.2 自动推送
安装自动推送JS代码的网页,在页面被访问时,页面URL将立即被推送给百度。
修改主题目录下的layout/post.ejs文件,末尾添加自动推送代码,代码如下:
1
|
<script>
|
16 google收录
网址
这里我选择的是右边的里面的html方式,把下载下来的网页放进根目录下的source文件夹里,然后
1
|
hexo clean
|
不过google验证非常慢,我等了好几天,才验证成功。
验证成功之后,进去提交sitemap即可: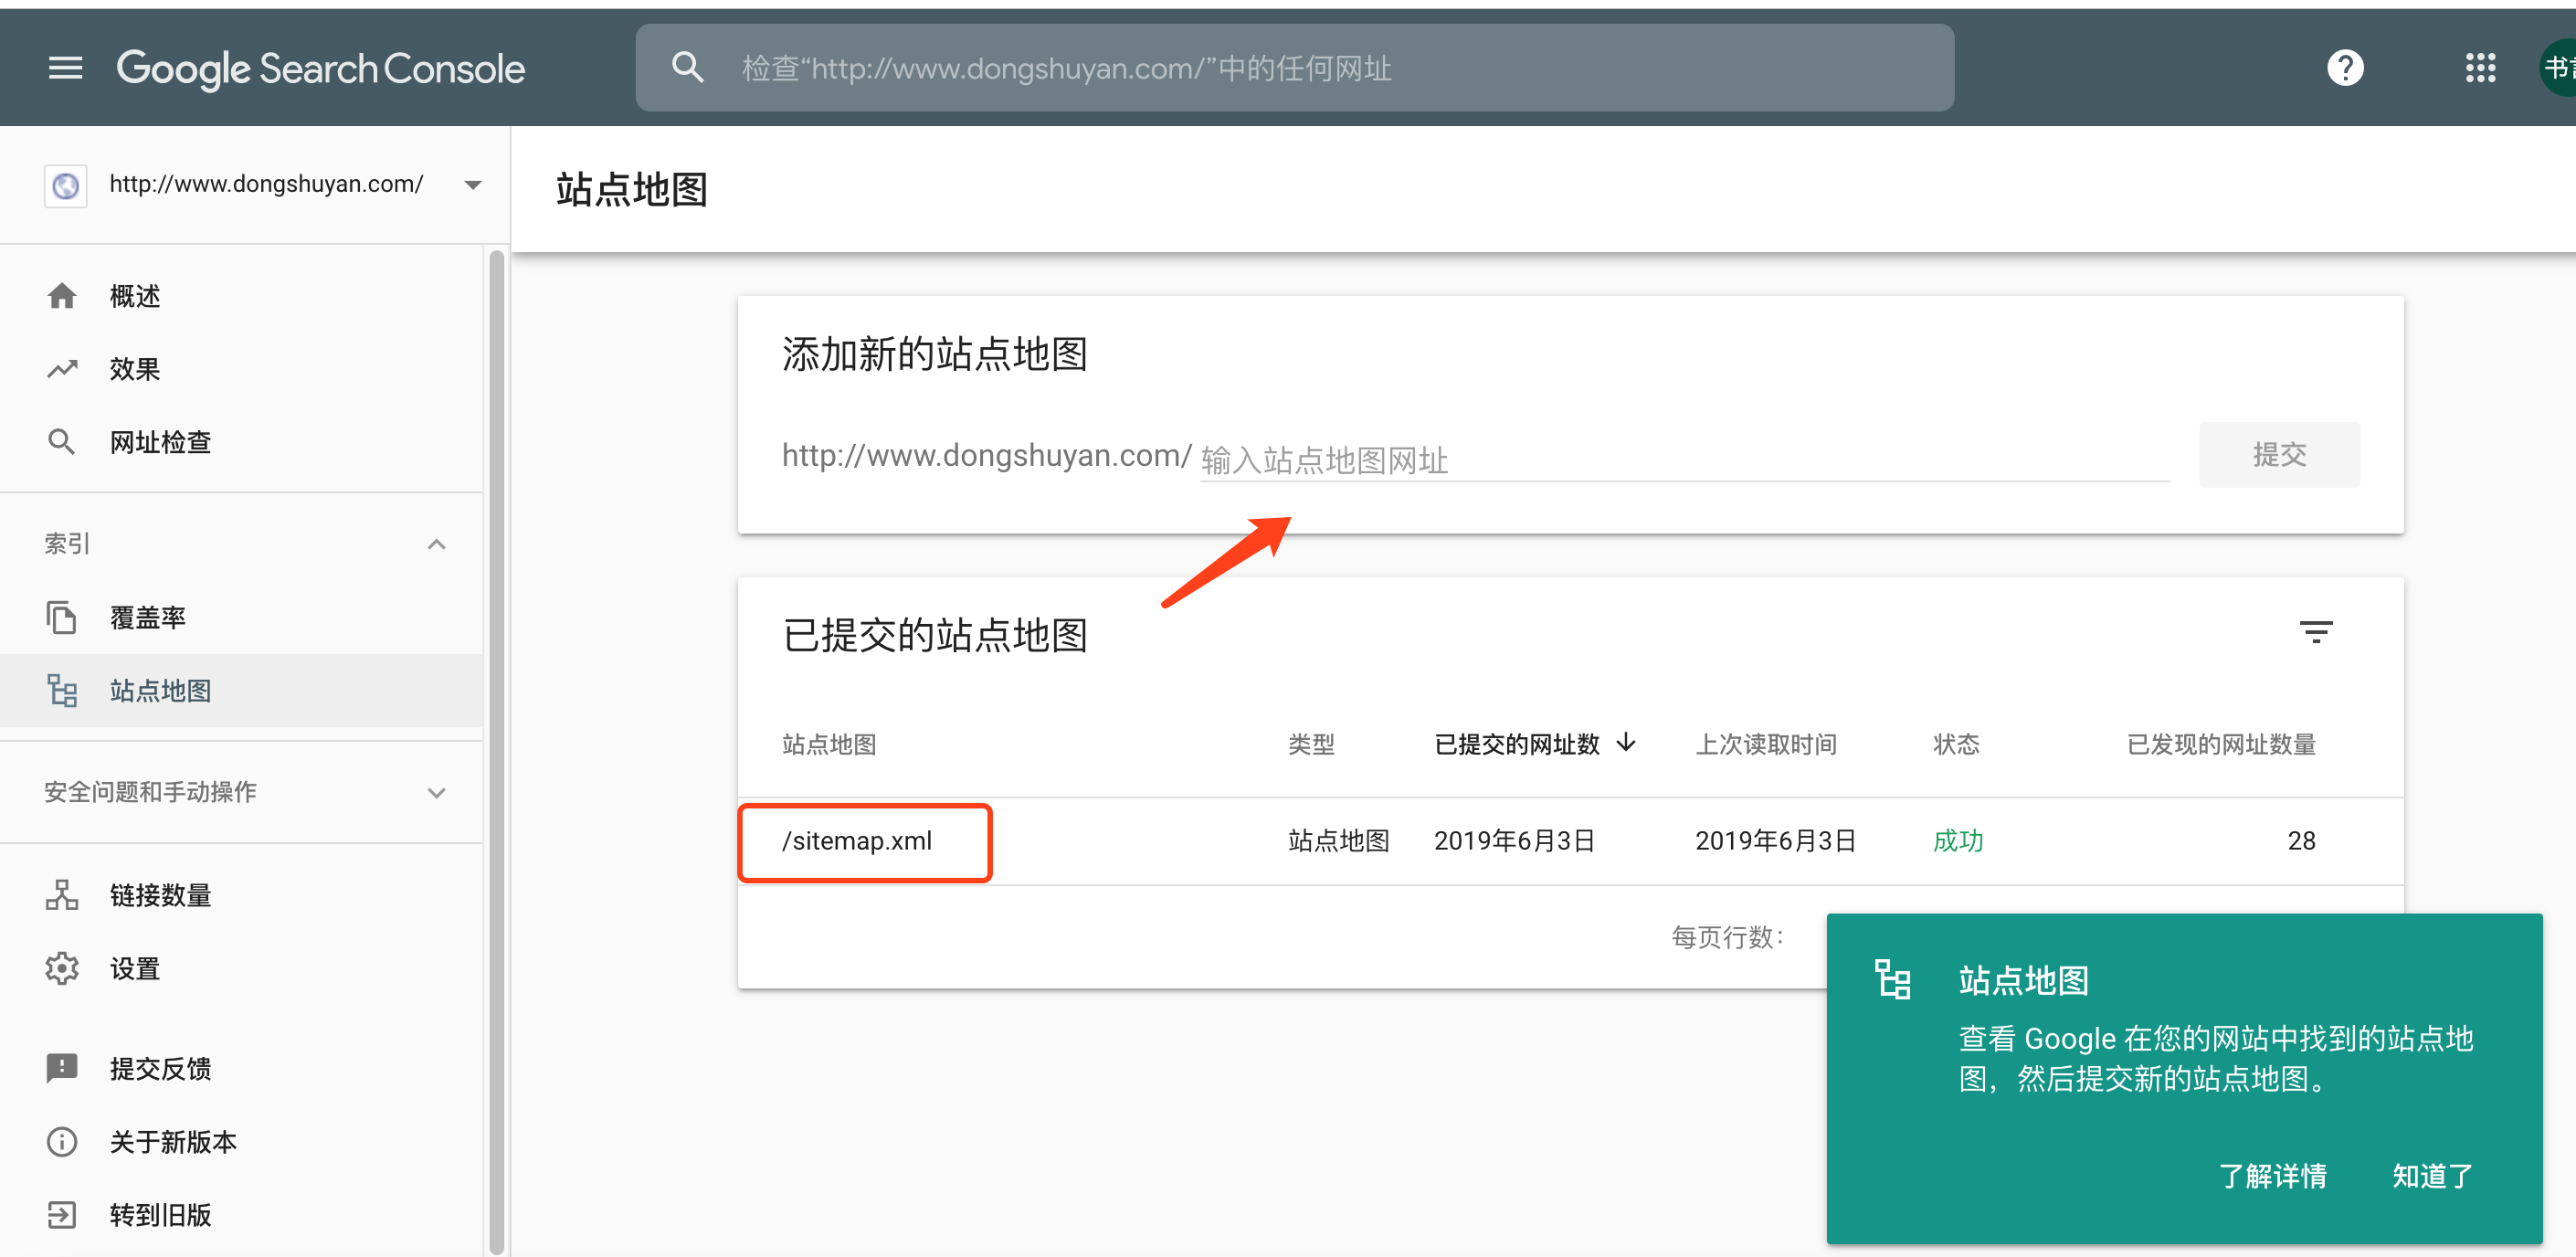
17 Valine评论系统进阶
17.0 添加Valine评论
1.注册
点击这里登录或注册Leancloud
2.创建评论项目
点这里创建应用,应用名看个人喜好
3.找到key
选择刚刚创建的应用>设置>选择应用 Key,然后你就能看到你的APP ID和APP KEY了
4设置中的Web 安全域名
为了您的数据安全,请填写应用>设置>安全设置中的Web安全域名,例如:
1
|
http://dongshuyan.com
|
5.修改主题配置
5.1首先在
1
|
theme/yilia/_partial/article.ejs
|
的最末尾加上
1
|
<% if ((theme.valine_type === 2 || (theme.valine_type === 1 && post.valineenbale)) && !index){ %>
|
5.2然后在
1
|
theme/yilia/_config.yml
|
中找位置加入
1
|
#6、Valine https://valine.js.org
|
如果你的valine_type: 也是1,那么然后就需要在你文章抬头加上
1
|
valineenbale:true
|
17.1 管理评论系统
Valine管理界面
选择你的项目-存储-数据-Comment
在这里你就可以尽情地管理你的评论数据了。
据说有进阶版,不过我暂时还没有尝试,有兴趣的可以去看看教程:
Valine: 独立博客评论系统
Valine Admin 配置手册
github_Valine
17.2 评论邮件通知(测试失败不知道为什么😂)
如果要开启email通知要将LeanCloud -> 设置 -> 邮件模板 -> 用于重置密码的邮件主题进行修改
原来的是这样:
用于重置密码的邮件主题
1重设 {{appname}} 的密码
内容
1
|
<p>Hi, {{username}}</p>
|
自定义重置密码页面
1
|
https://leancloud.cn/reset.html
|
我们把它改成这样:
用于重置密码的邮件主题
1你在{{appname}} 的评论收到了新的回复
内容
1
|
<p>Hi, {{username}}</p>
|
最后在你本地博客 themes/yilia/_config.yml里面进行修改:把验证码和评论回复打开即可
1
|
verify: true #验证码
|
17.3 CDN修改
建议将自带的CDN改成第三方CDN,为啥???10+s的加载那酸爽是在是过瘾。
文件目录:themes/yilia/layout/_partial/post/valine.ejs
1
|
//cdn.jsdelivr.net/npm/valine/dist/Valine.min.js
|
官方的CDN是
1
|
//unpkg.com/valine/dist/Valine.min.js
|
17.4 云引擎
1.首先要在github上面新建一个项目,可以起名”Valine-Admin”
2.在leancloud中 云引擎 -> 设置中找
2.1把你的github链接帖进去,例如:
1
|
https://github.com/dongshuyan/Valine-Admin.git
|
2.2复制出来Deploy Key
2.3在你github的这个项目里面的“settings”里面的“Deploy keys”添加这个Deploy key。
3.部署
剩下的有时间再搞吧,参考链接:
DesertsP/Valine-Admin
Valine Admin 配置手册
18添加板娘(有点占地方还是不要了)
虽然我没有成功不过从Ziven的主页来看,板娘在yilia是可以成功的。
可以参考:
Hexo博客yilia主题首页添加helper-live2d模型插件
hexo模版yilia添加可爱的看板娘
1.博客根目录下安装(还是看上面的文档吧)
1
|
npm install hexo-helper-live2d --save
|
2.配置
打开根目录下的_config.yml文件,添加以下代码:
1
|
live2d:
|
下载更多模型
把github模型下载到本地,解压后将assets目录拷贝到博客根目录中的live2d_models(自己新建,文件名不可改)里,再修改_config.yml 里的live2d中model.use即可(改为live2d_models中的模型名字就行)。
19刚发现一个标签的bug
如果我一个标签A是B的前缀,那么搜索标签A的时候,属于标签B的文章也会被搜索出来。
举例,我有一个标签叫“Mac”还有一个标签叫“machine learning”
搜索“Mac”的时候属于“machine learning”的文章也会被搜出来。😂
20文章顶部转载说明(原创)
20.1配置yilia主题文件
在
1
|
themes/yilia/layout/_partial/article.ejs
|
中下面标注的位置添加代码
1
|
<% if (!post.noDate){ %>
|
添加的代码如下
1
|
<!-- 文章头增加转载声明 -->
|
创建新文件
1
|
themes/yilia/source-src/css/topdeclare.scss
|
并添加如下CSS代码。
1
|
.declare {
|
为
1
|
themes/yilia/source-src/css/main.scss
|
添加如下代码:
1
|
@import "./topdeclare";
|
20.2配置显示
修改为
1
|
themes/yilia/_config.yml
|
在里面加入:
1
|
#顶部版权基础设定:0-关闭声明; 1-文章对应的md文件里有topdeclare: true属性,才有版权声明; 2-所有文章均有版权声明
|
然后在需要进行版权声明的文章的md文件头部,设置属性
1
|
topdeclare:true
|
即可。
21 google广告
21.1 前提条件
1.首先你得有个网站
2.然后你得有几篇文章 最好是原创的
3.有一个google账户
4.你的google账户必须设置过生日,没设置的赶紧先把生日设置好(我估计可能是限制未成年人吧)
如果你达成以上条件 那么我们可以开始了
21.2 注册 Google Adsense
去google Adsense官网即可,链接如下:
google Adsense官网
ps.这个网站打开是真的慢
打开网站之后就可以开始注册了(即使你有google账户也要注册!)
1.官网点击注册(sign up),进入注册页面
2.在注册页面填写你的信息(网站地址不可以是二级域名)
3.在之后填写你的地址信息
4.地址信息填完毕之后会给你一串代码,类似如下:
1
|
<script async src="https://pagead2.googlesyndication.com/pagead/js/adsbygoogle.js"></script>
|
5.把这一串代码放在
1
|
博客目录\themes\yilia\layout\_partial\head.ejs
|
文件的
1
|
<head>与</head>
|
之间,然后在命令行里
1
|
hexo clean
|
将网站同步好
6.同步好之后返回Google Adsense点击已经粘贴代码。
google从网站检测到这段代码即可,等待启动即可。
21.3 审核通过
稍等一天时间,如果没有问题,即可审核通过。
有问题就改问题,然后在申请。
21.4 添加展示广告
1.在网页上找到“广告” -> “广告单元” -> “创建新的广告单元” -> “展示广告”
2.然后再界面里面先填写一个名字(例如ad_google_1)
3.点击创建
4.将生成的代码添加到
1
|
博客目录\themes\yilia\layout\_partial\article.ejs
|
中对应适当位置即可,注意别让广告扰乱了页面布局,影响全局美感。
添加代码如下:
1
|
可以在文章开头添加:
|
然后还需要再
1
|
/theme/yilia/_config.yml
|
中合适位置添加
1
|
#google广告基础设定:0-关闭广告; 1-文章对应的md文件里有googlead: true属性,才有广告; 2-所有文章均有广告
|
使用教程如上面提示:
0-关闭广告;
1-文章对应的md文件里有googlead: true属性,才有广告;
2-所有文章均有广告
5.添加完毕
在网页中点击“大功告成”
6.想网页上传
hexo clean
hexo g
hexo d
7.等待一小时左右大约会出现广告
22 Gitment/Gitalk评论系统
感觉gitment 和 gitalk也不错
可以参考
Hexo主题yilia增加gitalk评论插件
Hexo-yilia使用gitment/gitalk评论系统
Gitment给基于hexo的yilia主题的博客搭建免费评论系统
自己配置了一下gitalk
22.1 注册 OAuth Application
注册网址:https://github.com/settings/applications/new
1
|
Application name
|
注册成功后,会获取到 Client ID/scerct 。
22.2配置
1
|
layout/_partial/post目录下新增gitalk.ejs文件
|
1
|
<div id="gitalk-container" style="padding: 0px 30px 0px 30px;"></div>
|
修改source-src/css/目录下comment.scss文件
1
|
disqus_thread, .duoshuo, .cloud-tie-wrapper, #SOHUCS, #gitment-ctn, #gitalk-container {
|
在
1
|
layout/_partial
|
目录下的article.ejs文件内新增gitalk相关的配置代码:
1
|
<% if(theme.gitalk.enable){ %>
|
最后在yilia主题配置文件中新增gitalk相关的配置:
1
|
gitalk:
|
踩坑教程:
Gitment评论功能接入踩坑教程
[gitalk] 解决配置gitalk插件后初始化登录时跳转回首页
登录报错/?error=redirect_uri_mismatch& #162
23.tag中含有大写字母的bug
总之tag别用大写字母!!!
24 hexo d上传失败
显示:
1
|
INFO Deploying: git
|
我这里是网络代理问题。
25 跳转到指定位置
html里面加上
1
|
<a name="printcenter1"></a>
|
然后跳转xx.html#printcenter1
参考
Hexo文章置顶的方法
Hexo增加置顶属性
Hexo 基于yilia主题及其它插件优化
Hexo yilia 主题一揽子使用方案
在Hexo中自动为Yilia主题增加版权声明
Hexo-Yilia进阶笔记
Hexo+yilia主题实现文章目录和添加视频
hexo的next主题个性化教程:打造炫酷网站
Hexo博客Yilia主题修改记录
Hexo Yilia 主题进阶配置
Hexo博客提交百度和Google收录
DesertsP/Valine-Admin
Valine Admin 配置手册
Valine: 独立博客评论系统
github_Valine
动态版娘
Hexo-添加看板娘(进阶版)
hexo yilia 主题添加 google 广告
Google AdSense 申请日志及教程
Hexo-yilia使用gitment/gitalk评论系统
Gitment给基于hexo的yilia主题的博客搭建免费评论系统
Hexo博客yilia主题首页添加helper-live2d模型插件
hexo模版yilia添加可爱的看板娘
Gitment评论功能接入踩坑教程
[gitalk] 解决配置gitalk插件后初始化登录时跳转回首页
登录报错/?error=redirect_uri_mismatch& #162
Hexo主题yilia增加gitalk评论插件

 浙公网安备 33010602011771号