


官方网站:https://kubernetes.io/docs/reference/kubectl/kubectl/
官方手册:https://kubernetes.io/docs/reference/generated/kubectl/kubectl-commands
kubectl 是 kube-apiserver 的客户端管理工具,来管理整个kubenetes 集群
- node network:承载kubernetes集群中各个“物理”Node(master和minion)通信的网络;
- service network:由kubernetes集群中的Services所组成的“网络”;
- flannel network: 即Pod网络,集群中承载各个Pod相互通信的网络。
下面是中文手册地址
http://docs.kubernetes.org.cn/468.html
示例:
启动nginx实例。
Kubernetes 提供了一个类似于 docker run 的命令 kubectl run,可以方便的创建一个容器(实际上创建的是一个由 deployment 来管理的 Pod):
[root@kube ~]# kubectl run --image=nginx:alpine nginx-app --port=80
kubectl run --generator=deployment/apps.v1 is DEPRECATED and will be removed in a future version. Use kubectl run --generator=run-pod/v1 or kubectl create instead.
deployment.apps/nginx-app created
[root@kube ~]# kubectl get pods
NAME                         READY   STATUS              RESTARTS   AGE
busy1-78c9f4b47-tjc6z        0/1     CrashLoopBackOff    238        21h
busy2-7f9dbf96d6-2d778       0/1     ContainerCreating   0          21h
busy3-9877c76bf-ts5rl        0/1     ContainerCreating   0          21h
nginx-7bb7cd8db5-6sgvp       1/1     Running             0          22h
nginx-app-7756966bc9-qrksb   0/1     ContainerCreating   0          24s
  //Running 为启动完成
等到容器变成 Running 后,就可以用 kubectl 命令来操作它了,比如
-
kubectl get- 类似于docker ps,查询资源列表 -
kubectl describe- 类似于docker inspect,获取资源的详细信息 -
kubectl logs- 类似于docker logs,获取容器的日志 -
kubectl exec- 类似于docker exec,在容器内执行一个命令kubectl run并不是直接创建一个 Pod,而是先创建一个 Deployment 资源(replicas=1),再由与 Deployment 关联的 ReplicaSet 来自动创建 Pod,
[root@kube ~]# kubectl get pods
NAME                         READY   STATUS              RESTARTS   AGE
busy1-78c9f4b47-tjc6z        0/1     CrashLoopBackOff    239        21h
busy2-7f9dbf96d6-2d778       0/1     ContainerCreating   0          21h
busy3-9877c76bf-ts5rl        0/1     ContainerCreating   0          21h
nginx-7bb7cd8db5-6sgvp       1/1     Running             0          22h
nginx-app-7756966bc9-qrksb   1/1     Running             0          3m56s
[root@kube ~]# kubectl exec nginx-app-7756966bc9-qrksb ps aux
PID   USER     TIME  COMMAND
    1 root      0:00 nginx: master process nginx -g daemon off;
    6 nginx     0:00 nginx: worker process
   12 root      0:00 ps aux
[root@kube ~]# kubectl describe pod nginx-app-7756966bc9-qrksb
Name:           nginx-app-7756966bc9-qrksb
Namespace:      default
Priority:       0
Node:           kube.node1/10.2.61.22
Start Time:     Tue, 16 Jul 2019 14:39:02 +0800
Labels:         pod-template-hash=7756966bc9
                run=nginx-app
Annotations:    <none>
Status:         Running
IP:             10.244.2.7
Controlled By:  ReplicaSet/nginx-app-7756966bc9
Containers:
  nginx-app:
    Container ID:   docker://6f50a8038d1f9b484c3af46fa21ef0bdce963b95c4f7f5980302bc70ca46eea6
    Image:          nginx:alpine
    Image ID:       docker-pullable://nginx@sha256:17bd1698318e9c0f9ba2c5ed49f53d690684dab7fe3e8019b855c352528d57be
    Port:           80/TCP
    Host Port:      0/TCP
    State:          Running
      Started:      Tue, 16 Jul 2019 14:39:36 +0800
    Ready:          True
    Restart Count:  0
    Environment:    <none>
    Mounts:
      /var/run/secrets/kubernetes.io/serviceaccount from default-token-bsthb (ro)
Conditions:
  Type              Status
  Initialized       True
  Ready             True
  ContainersReady   True
  PodScheduled      True
Volumes:
  default-token-bsthb:
    Type:        Secret (a volume populated by a Secret)
    SecretName:  default-token-bsthb
    Optional:    false
QoS Class:       BestEffort
Node-Selectors:  <none>
Tolerations:     node.kubernetes.io/not-ready:NoExecute for 300s
                 node.kubernetes.io/unreachable:NoExecute for 300s
Events:
  Type    Reason     Age    From                 Message
  ----    ------     ----   ----                 -------
  Normal  Scheduled  8m9s   default-scheduler    Successfully assigned default/nginx-app-7756966bc9-qrksb to kube.node1
  Normal  Pulling    8m8s   kubelet, kube.node1  Pulling image "nginx:alpine"
  Normal  Pulled     7m36s  kubelet, kube.node1  Successfully pulled image "nginx:alpine"
  Normal  Created    7m36s  kubelet, kube.node1  Created container nginx-app
  Normal  Started    7m35s  kubelet, kube.node1  Started container nginx-app
[root@kube ~]# curl http://10.244.2.7
<!DOCTYPE html>
<html>
<head>
<title>Welcome to nginx!</title>
<style>
    body {
        width: 35em;
        margin: 0 auto;
        font-family: Tahoma, Verdana, Arial, sans-serif;
    }
</style>
</head>
<body>
<h1>Welcome to nginx!</h1>
<p>If you see this page, the nginx web server is successfully installed and
working. Further configuration is required.</p>

<p>For online documentation and support please refer to
<a href="http://nginx.org/">nginx.org</a>.<br/>
Commercial support is available at
<a href="http://nginx.com/">nginx.com</a>.</p>

<p><em>Thank you for using nginx.</em></p>
</body>
</html>
[root@kube ~]#
service
前面虽然创建了 Pod,但是在 kubernetes 中,Pod 的 IP 地址会随着 Pod 的重启而变化,并不建议直接拿 Pod 的 IP 来交互。那如何来访问这些 Pod 提供的服务呢?使用 Service。Service 为一组 Pod(通过 labels 来选择)提供一个统一的入口,并为它们提供负载均衡和自动服务发现。比如,可以为前面的 nginx-app 创建一个 service:
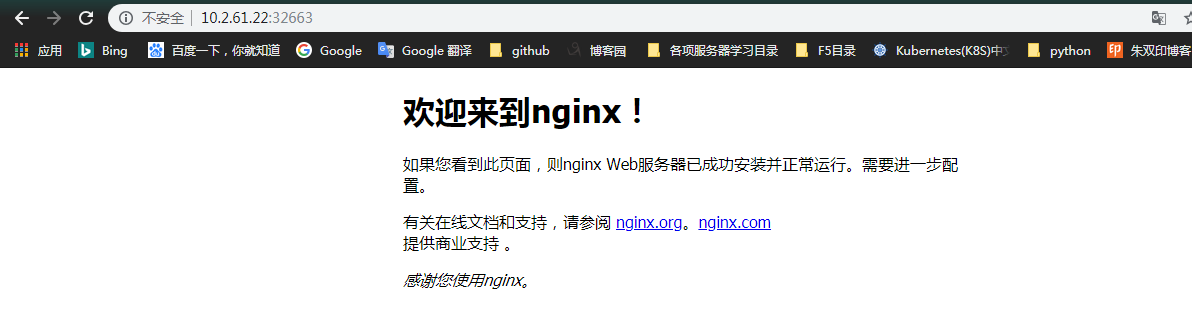
[root@kube ~]# kubectl expose deployment nginx-app --port=8080 --target-port=80 --type=NodePort
service/nginx-app exposed
[root@kube ~]# kubectl describe service nginx-app
Name:                     nginx-app
Namespace:                default
Labels:                   run=nginx-app
Annotations:              <none>
Selector:                 run=nginx-app
Type:                     NodePort
IP:                       10.104.204.161
Port:                     <unset>  8080/TCP
TargetPort:               80/TCP
NodePort:                 <unset>  32663/TCP
Endpoints:                10.244.2.7:80
Session Affinity:         None
External Traffic Policy:  Cluster
Events:                   <none>
[root@kube ~]# curl http://10.104.204.161
^C
[root@kube ~]# curl http://10.104.204.161:8080
<!DOCTYPE html>
<html>
<head>
<title>Welcome to nginx!</title>
<style>
    body {
        width: 35em;
        margin: 0 auto;
        font-family: Tahoma, Verdana, Arial, sans-serif;
    }
</style>
</head>
<body>
<h1>Welcome to nginx!</h1>
<p>If you see this page, the nginx web server is successfully installed and
working. Further configuration is required.</p>

<p>For online documentation and support please refer to
<a href="http://nginx.org/">nginx.org</a>.<br/>
Commercial support is available at
<a href="http://nginx.com/">nginx.com</a>.</p>

<p><em>Thank you for using nginx.</em></p>
</body>
</html>
[root@kube ~]#
NodePort:                 <unset>  32663/TCP
//在node 绑定了  32663 端口
扩展应用
通过修改 Deployment 中副本的数量(replicas),可以动态扩展或收缩应用:
root@kube ~]# kubectl scale --replicas=3 deployment/nginx-app
deployment.extensions/nginx-app scaled
[root@kube ~]#
[root@kube ~]# kubectl get deploy
NAME        READY   UP-TO-DATE   AVAILABLE   AGE
busy1       0/1     1            0           22h
busy2       0/1     1            0           22h
busy3       0/1     1            0           22h
nginx       1/1     1            1           23h
nginx-app   2/3     3            2           68m
[root@kube ~]#
滚动升级(Rolling Update)通过逐个容器替代升级的方式来实现无中断的服务升级:
更新应用的话,就可以直接用 kubectl set 命令:
滚动升级的过程可以用 rollout 命令查看:
[root@kube ~]# kubectl set image deployment/nginx-app nginx-app=nginx:1.9.1
deployment.extensions/nginx-app image updated

[root@kube ~]# kubectl rollout status -w
error: required resource not specified
[root@kube ~]# kubectl rollout status deploy/nginx-app -w
Waiting for deployment "nginx-app" rollout to finish: 1 out of 3 new replicas have been updated...
资源限制
Kubernetes 通过 cgroups 提供容器资源管理的功能,可以限制每个容器的 CPU 和内存使用,比如对于刚才创建的 deployment,可以通过下面的命令限制 nginx 容器最多只用 50% 的 CPU 和 128MB 的内存:
[root@kube ~]# kubectl set resources deploy nginx-app -c=nginx-app  --limits=cpu=200m,memory=128M
deployment.extensions/nginx-app resource requirements updated
[root@kube ~]#

 浙公网安备 33010602011771号