.netCore3.0 Ocelot 制作简单负载均衡 (一)
开发环境
环境版本:vs2019
框架版本:.netCore 3.0
注意:.netCore 3.1 Ocelot 暂时不支持我这种方式!
1.项目创建
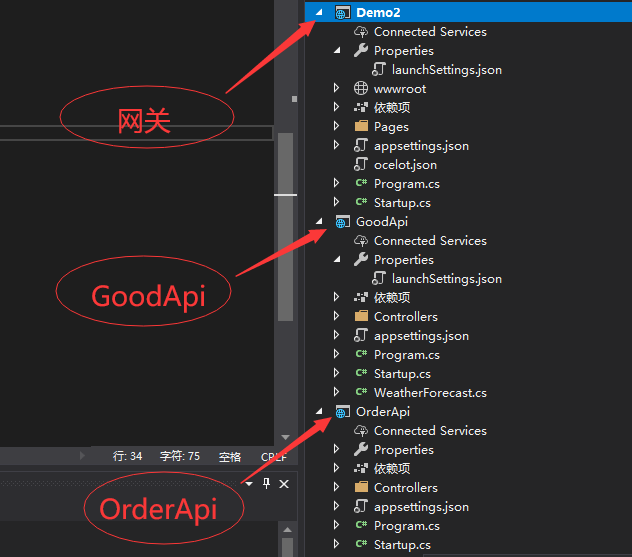
创建的项目结构如上所示
注意创建本次项目时是使用的是http
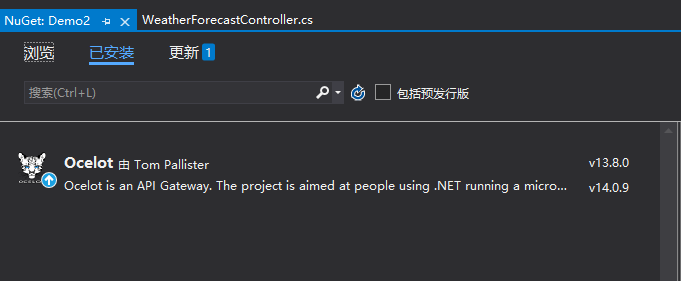
(1) 给OcelotDemo网关项目添加Ocelot包以及配置文件
首先给OcelotDemo添加Nuget包,可以右键“管理Nuget”包,然后搜索Ocelot添加,
注意我这里版本为13.8.0,
如下图所示:
也可以通过命令
Install-Package Ocelot -Version 13.8.5
进行安装。方式随你喜欢。
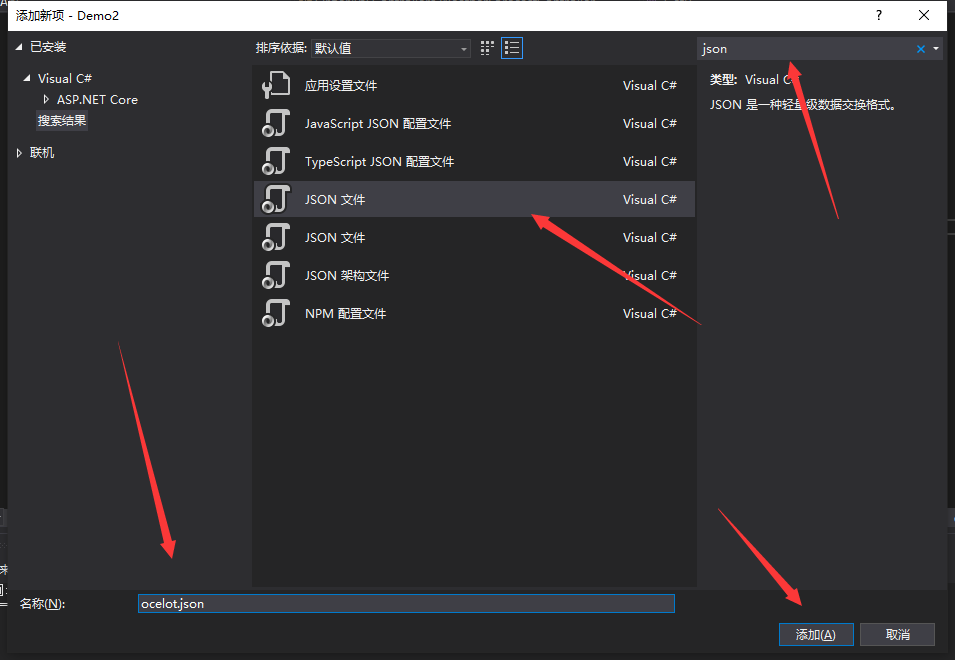
然后给Demo2项目新建一个json文件,新建的方式就是,右键Demo2项目,然后选择“添加”-》“新建项”,在弹出的窗口里面找到json文件,并写好文件的名字即可,(当然,也可以用快捷键
Ctrl+Shilt+A
)如下图所示:
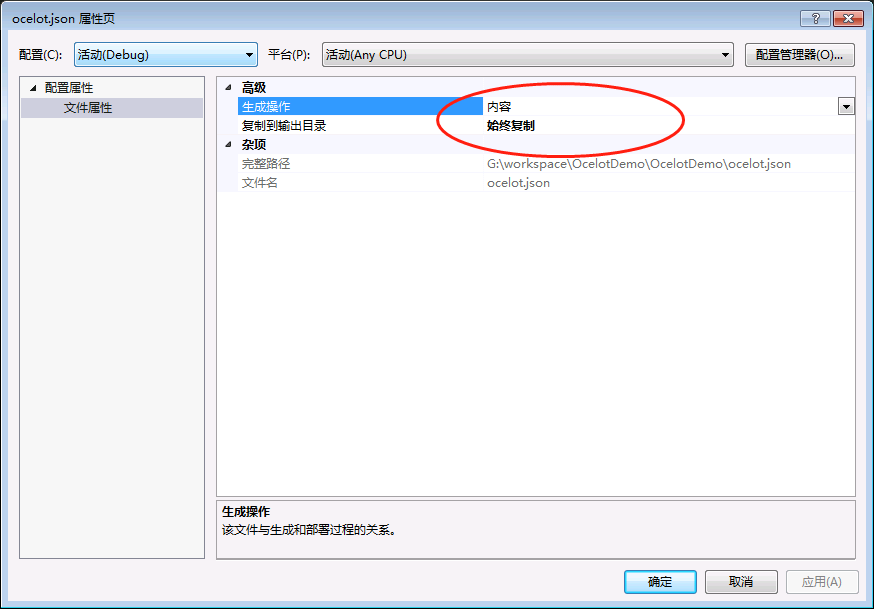
当然,你还需要右键你刚刚设置的ocelot.json文件,并设置“复制到输出目录”的属性为“始终复制”如下所示:
接下来,可以按照我写的非常简单的配置进行配置。
- {
- "ReRoutes": [
- {
- "DownstreamPathTemplate": "/{everything}",
- "DownstreamScheme": "http",
- "DownstreamHostAndPorts": [
- {
- "Host": "localhost",
- "Port": 1001
- },
- {
- "Host": "localhost",
- "Port": 1002
- }
- ],
- "UpstreamPathTemplate": "/{everything}",
- "UpstreamHttpMethod": [ "Get", "Post" ],
- "LoadBalancerOptions": {
- "Type": "RoundRobin"
- }
- }
- ],
- "GlobalConfiguration": {
- }
- }
上面配置,有两个节点,分别是ReRoutes数组,以及GlobalConfiguration。这里简单做一下阐述:
| key | value | ||||||||
|---|---|---|---|---|---|---|---|---|---|
| ReRoutes | 告诉Ocelot如何处理上游的请求。 | ||||||||
| DownstreamPathTemplate | 下游的路由模板,即真实处理请求的路径模板如:/api/... | ||||||||
| DownstreamScheme | 请求的方式,如:http,htttps | ||||||||
| DownstreamHostAndPorts | 下游的IP以及端口,可以有多个(如果使用负载均衡),方便实现负载均衡,当然你也可以使用服务发现,实现下游服务的自动注册与发现,这篇文章不会讲解。 | ||||||||
| UpstreamPathTemplate | 上游请求的模板,即用户真实请求的链接 | ||||||||
| UpstreamHttpMethod | 上游请求的http方法,是个数组,你可以写多个。 | ||||||||
| LoadBalancerOptions |
负载均衡选项(DownstreamHostAndPorts有多个的时候才能看到效果),有三种方式
|
||||||||
| GlobalConfiguration | 顾名思义就是全局配置,此节点的配置允许覆盖ReRoutes里面的配置,你可以在这里进行通用的一些配置信息。 |
完成json配置后,在Demo2中添加Ocelot支持
首先在Demo2项目的Program.cs中加载上一步我们添加的Ocelot的配置文件,如下所示:
- public static IHostBuilder CreateHostBuilder(string[] args) =>
- Host.CreateDefaultBuilder(args)
- .ConfigureAppConfiguration((hostingContext, config) =>
- {
- config
- .SetBasePath(hostingContext.HostingEnvironment.ContentRootPath)
- .AddJsonFile("appsettings.json", true, true)
- .AddJsonFile($"appsettings.{hostingContext.HostingEnvironment.EnvironmentName}.json", true, true)
- .AddJsonFile("ocelot.json")
- .AddEnvironmentVariables();
- })
- .ConfigureWebHostDefaults(webBuilder =>
- {
- webBuilder.UseStartup<Startup>();
- });
然后,在Startup.cs中,添加Ocelot服务并启用Ocelot中间件,这里你需要在Startup.cs文件中引入下面两个命名空间:
- using Ocelot.DependencyInjection;
- using Ocelot.Middleware;
在ConfigureServices方法中添加
- services.AddOcelot();
在Configure方法中添加
- app.UseOcelot().Wait();
这样我们的Ocelot就算搭建好了
通过ocelot.json配置来看
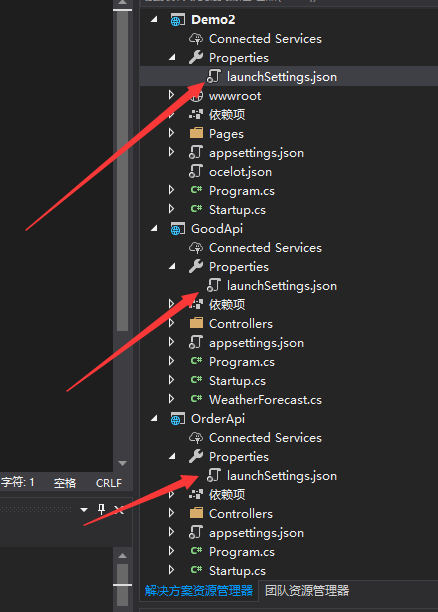
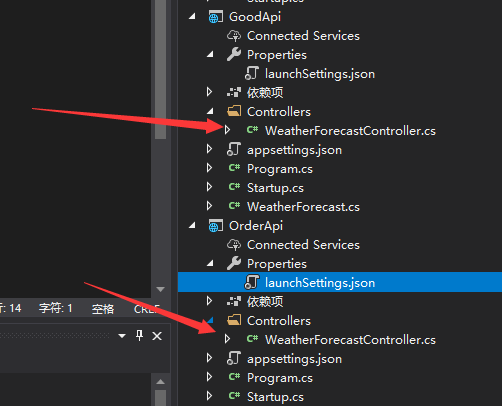
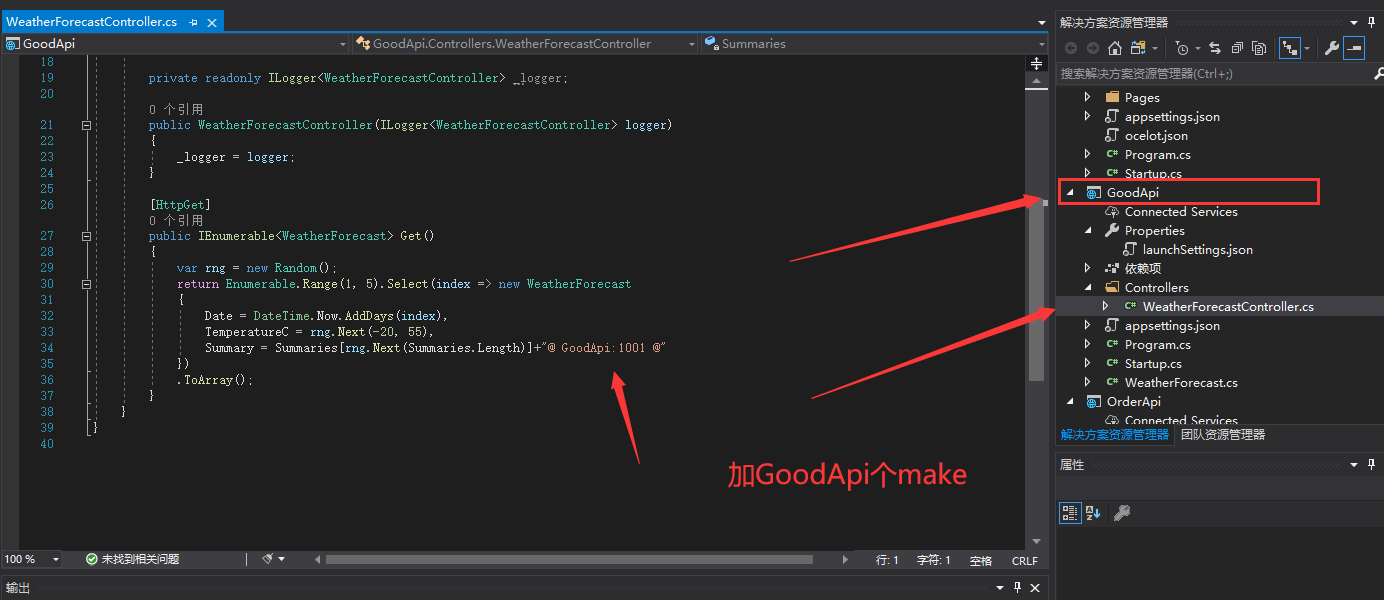
1.我们需要配置launchsettings.json并make
Ocelot 配置为:
- {
- "profiles": {
- "Demo2": {
- "commandName": "Project",
- "launchBrowser": true,
- "applicationUrl": "http://localhost:5000",
- "environmentVariables": {
- "ASPNETCORE_ENVIRONMENT": "Development"
- }
- }
- }
- }
GoodApi 配置为:
- {
- "profiles": {
- "GoodApi": {
- "commandName": "Project",
- "launchBrowser": true,
- "launchUrl": "weatherforecast",
- "applicationUrl": "http://localhost:1001",
- "environmentVariables": {
- "ASPNETCORE_ENVIRONMENT": "Development"
- }
- }
- }
- }
OrderApi 配置为:
- {
- "profiles": {
- "OrderApi": {
- "commandName": "Project",
- "launchBrowser": true,
- "launchUrl": "weatherforecast",
- "applicationUrl": "http://localhost:1002",
- "environmentVariables": {
- "ASPNETCORE_ENVIRONMENT": "Development"
- }
- }
- }
- }
然后标记一下控制器
Ok!
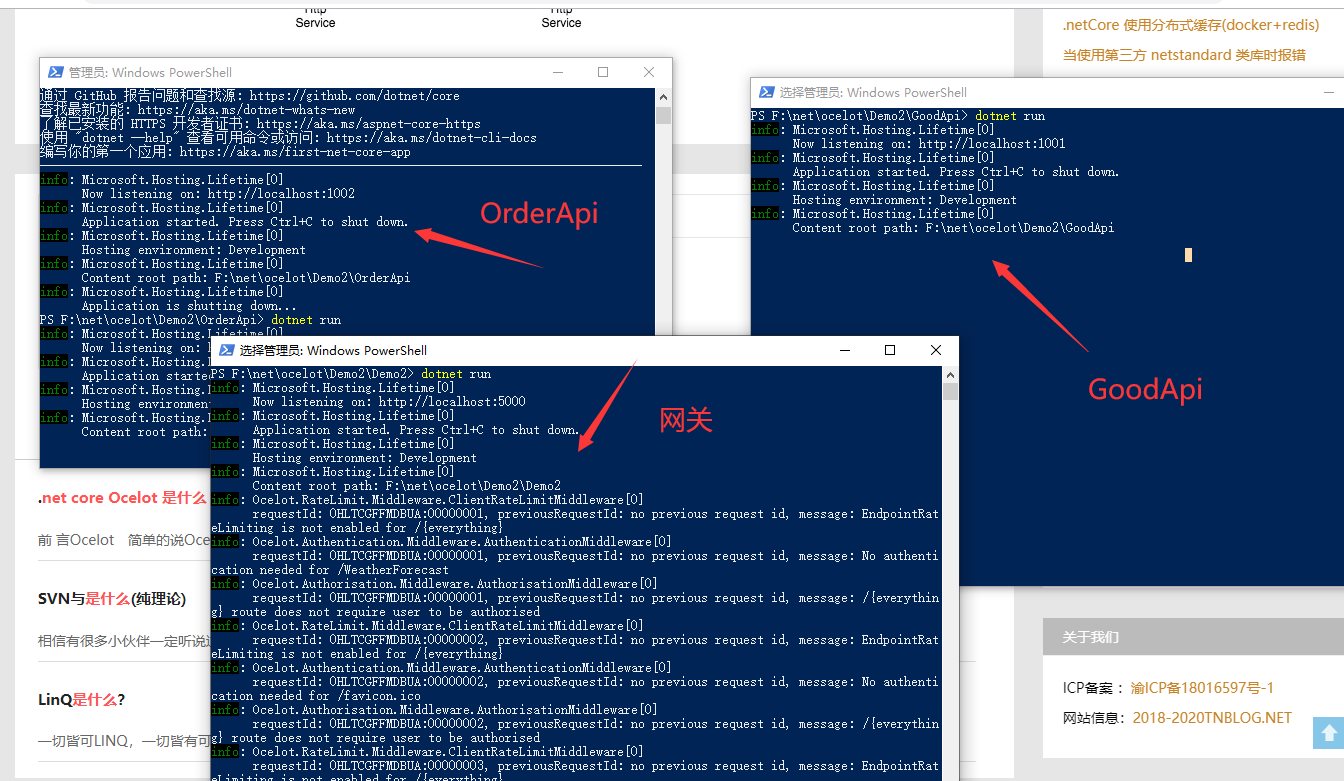
然后通过三个Powershell通过dotnet来运行,如下图所示:
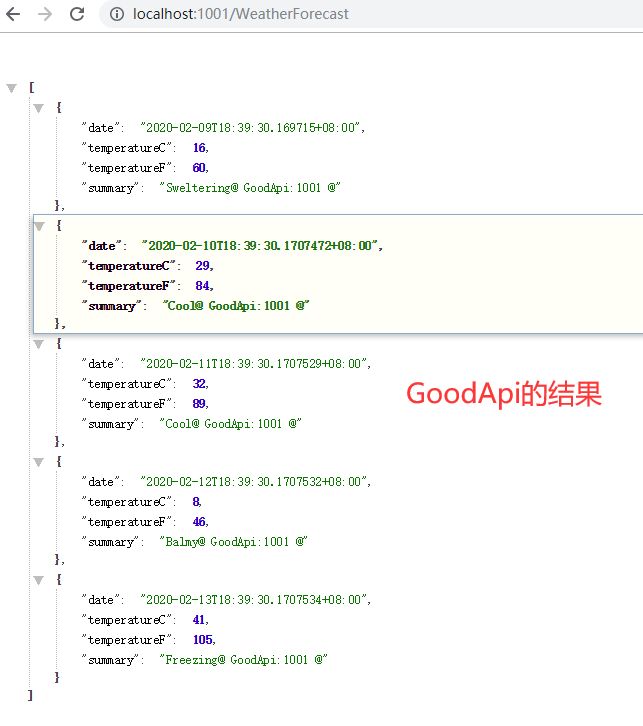
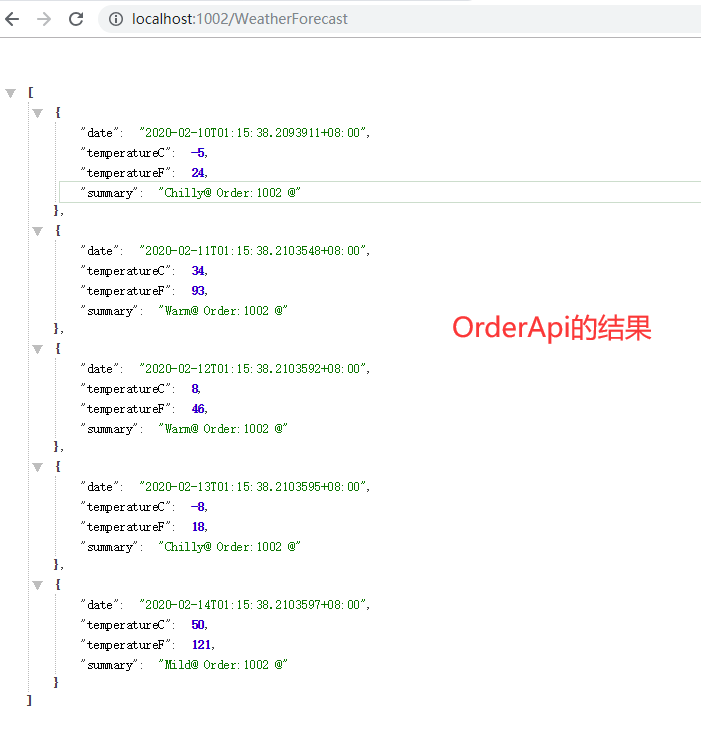
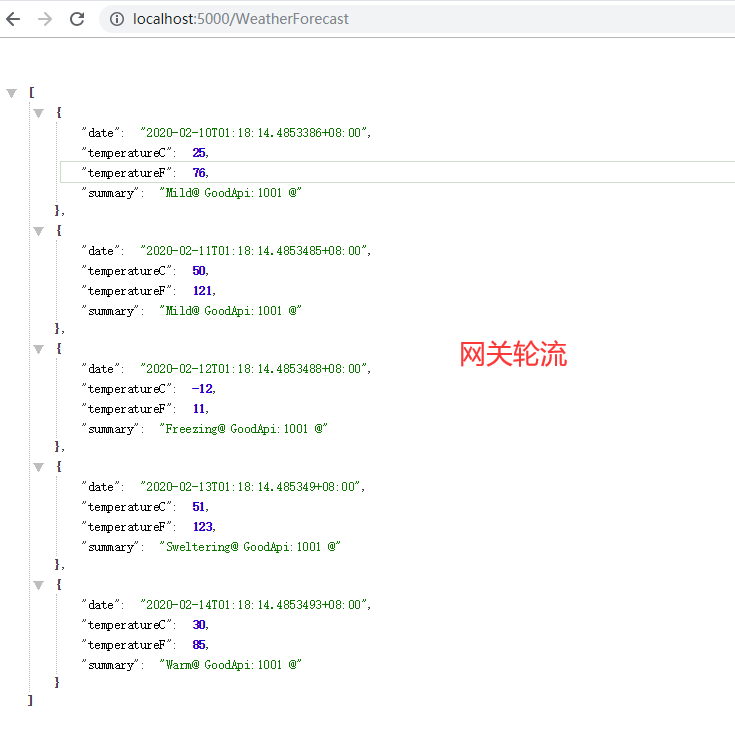
先来看看两个Api接口
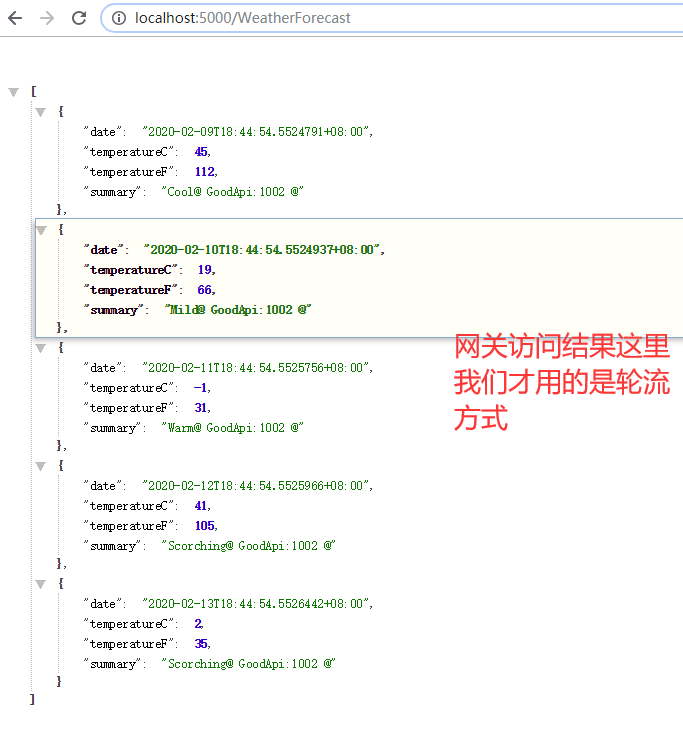
然后通过网关访问达到的结果
总结
本篇文章只是记录了,如何快速的成功的使用ocelot,并进行了简单的配置,配置中又引入了一个负载均衡的策略,最后通过代码进行了相关的实现以及测试!关于其他的一些配置,我会在下面的文章中进行阐述。

 浙公网安备 33010602011771号