android中的常用布局管理器(三)
接上篇博客
(5)TableLayout 表格布局管理器
在android中,线性布局和表格布局用的是最多的。
在很多的输出操作中,往往会使用表格的形式对显示的数据进行排版,tablelayout采用表格形式对控件的布局进行管理的,在布局的管理中,要使用TableRow进行表格行的控制,之后 所有的组件要在tableRow中进行增加。
在表格布局管理器中可以添加多个TableRow标记,TableRow标记占用一行,由于TableRow标记也是容器,所以在该标记中还可以添加其他组件,在TableRow标记中,每添加一个组件,表格就 会增加一列,在表格布局管理器中,直接向中添加UI组件,那么这个组件将独占一行。
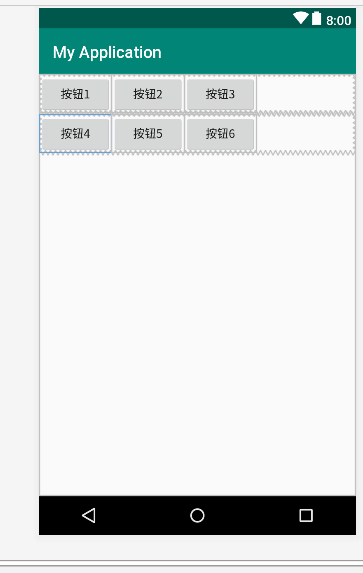
例子:两行三列的表格布局管理器
<?xml version="1.0" encoding="utf-8"?>
<TableLayout xmlns:android="http://schemas.android.com/apk/res/android"
    xmlns:app="http://schemas.android.com/apk/res-auto"
    xmlns:tools="http://schemas.android.com/tools"
    android:layout_width="match_parent"
    android:layout_height="match_parent"
    tools:context=".MainActivity">
<TableRow>
    <Button
        android:layout_width="wrap_content"
        android:layout_height="wrap_content"
        android:text="按钮1"
         />
    <Button
        android:layout_width="wrap_content"
        android:layout_height="wrap_content"
        android:text="按钮2"
        />
    <Button
        android:layout_width="wrap_content"
        android:layout_height="wrap_content"
        android:text="按钮3"
        />
</TableRow>
   <TableRow>
       <Button
           android:layout_width="wrap_content"
           android:layout_height="wrap_content"
           android:text="按钮4"
           />
       <Button
           android:layout_width="wrap_content"
           android:layout_height="wrap_content"
           android:text="按钮5"
           />
       <Button
           android:layout_width="wrap_content"
           android:layout_height="wrap_content"
           android:text="按钮6"
           />
   </TableRow>

</>
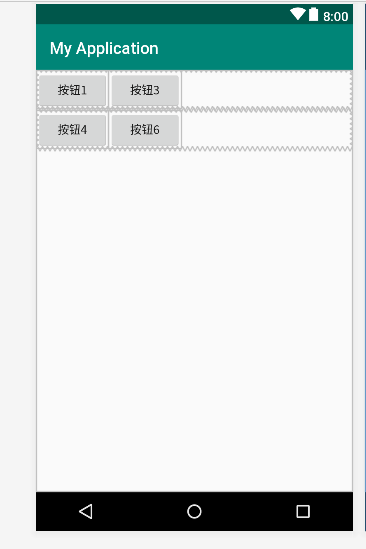
设置列数的隐藏:
android:collapseColumns="1" 隐藏第二列(若隐藏多列,中间用“,”隔开)
设置列的拉伸:
android:stretchColumns="1" 设置列的拉伸(若拉伸多列,中间用“,”隔开)

设置某一列的收缩
android:shrinkColumns="1" 设置第2列收缩

(6) GridLayout 网格布局管理器(可以 夸行列显示)
GridLayout布局使用虚细线将布局划分为行、列和单元格,也支持一个控件在行、列上都有交错排列。而GridLayout使用的其实是跟LinearLayout类似的API,只不过是修改了一下相关的标 签而已,所以对于开发者来说,掌握GridLayout还是很容易的事情。
GridLayout的布局策略简单分为以下三个部分:
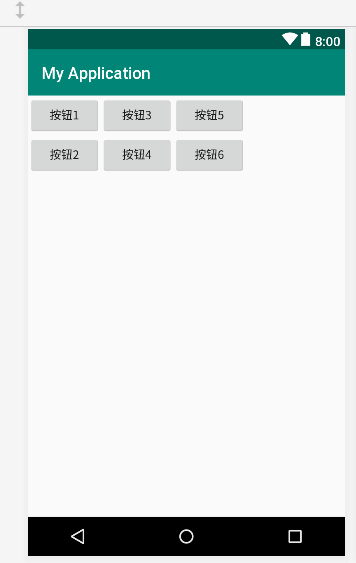
(1) 首先,它与LinearLayout布局一样,也分为水平和垂直两种方式,默认是水平布局,一个控件挨着一个控件从左到右依次排列,但是通过指定android:columnCount设置列数的属 性后,控件会自动换行进行排列。另一方面,对于GridLayout布局中的子控件,默认按照wrap_content的方式设置其显示,这只需要在GridLayout布局中显式声明即可。
(2) 其次,若要指定某控件显示在固定的行或列,只需设置该子控件的android:layout_row和android:layout_column属性即可,但是需要注意:android:layout_row=”0”表示从第一行 开始,android:layout_column=”0”表示从第一列开始,这与编程语言中一维数组的赋值情况类似。
(3) 最后,如果需要设置某控件跨越多行或多列,只需将该子控件的android:layout_rowSpan或者layout_columnSpan属性设置为数值,再设置其layout_gravity属性为fill即可,前一个 设置表明该控件跨越的行数或列数,后一个设置表明该控件填满所跨越的整行或整列。
-----------------------------------------------------------------------------------------------------------------
原文链接:https://blog.csdn.net/jianghuiquan/article/details/8299973
GridLayout与LinearLayout类似,需要指定布局方向
android:orientation:vertical,horizontal
android:rowCount:指定行数
android:columnCount:指定列数
android:layout_columnSpan="2",跨列合并
android:layout_rowSpan="2",跨行合并
合并之后需要填充,设置
android:layout_gravity="fill"
指定网格显示的位置,索引值从0开始
android:layout_row="0"
android:layout_column="3"
例子:
android:columnCount="2" 两列
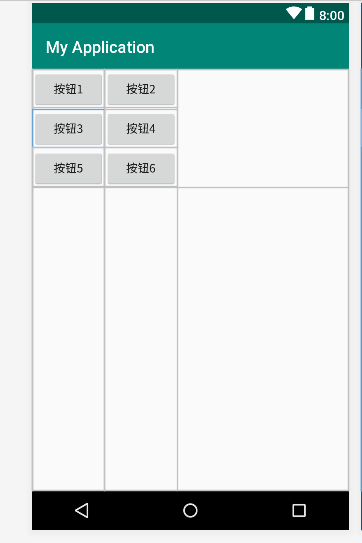
android:rowCount="2"   设置最大行数为2(两行)
android:orientation="vertical"   垂直排列

 浙公网安备 33010602011771号