
【本地AI部署】comfyUI + zImageTurbo
首先声明,这是我第一次折腾这些,不是很懂,一些说法表达可能不准确,因此仅供参考。
硬件准备
电脑,我的是windows11, RTX3060 6G,配置不高,因此一些大模型就没法考虑了
关键是我电脑存储空间也不太够……
环境准备
CUDA:https://developer.nvidia.com/cuda-toolkit
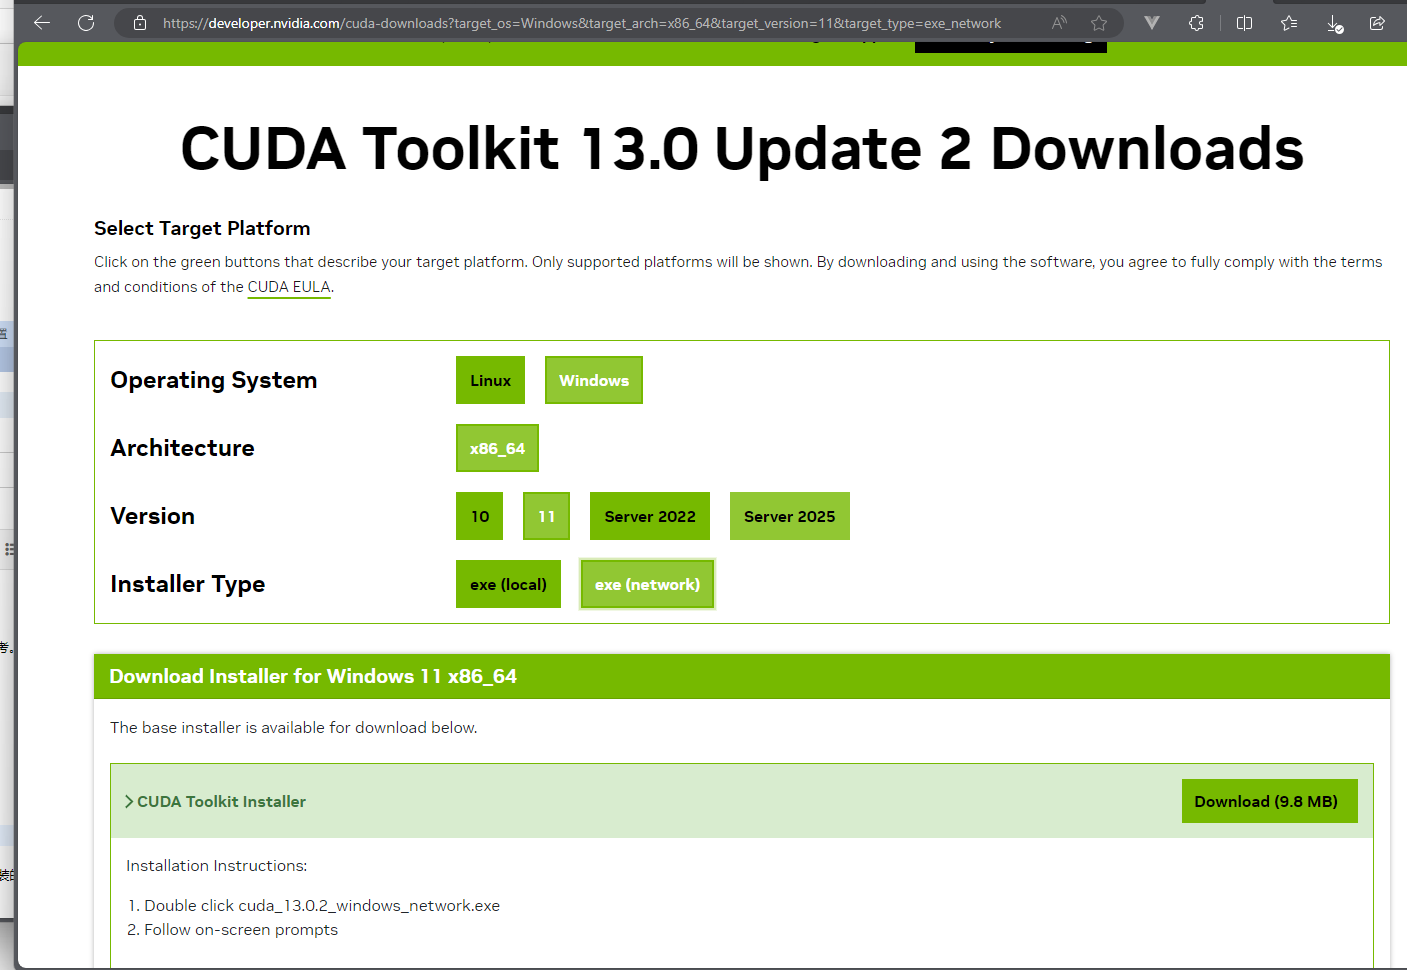
下载安装。https://www.cnblogs.com/zwj/p/20220214cnda.html
(安装了cuda就行)
Anconda。不用anconda本地就装个python也行(3.10),如果想用anconda但是没安装的话,可以看:https://www.cnblogs.com/zwj/p/Anaconda-install.html
可以百度下怎么安装。
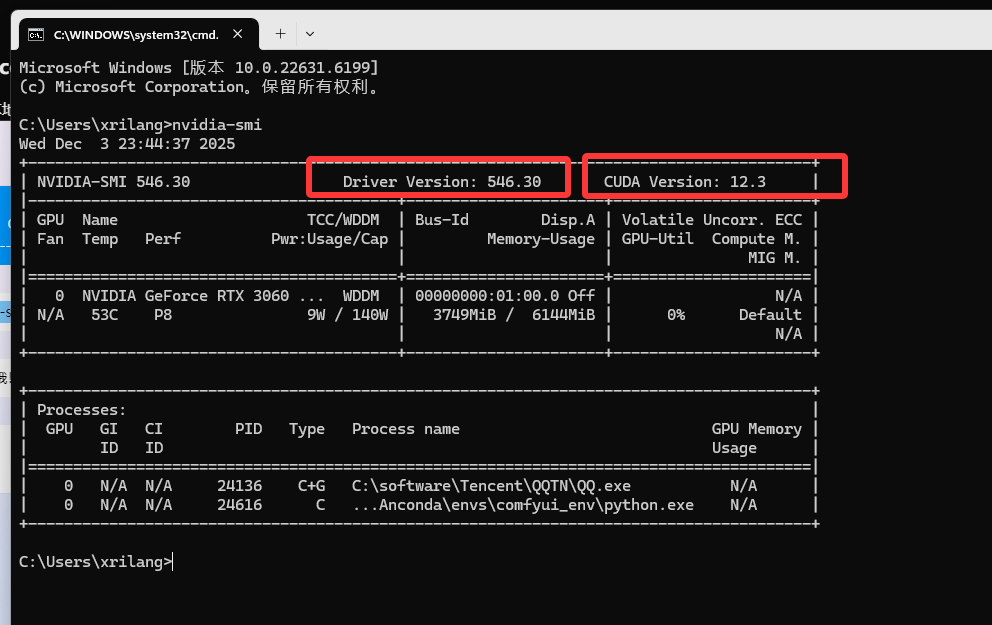
nvidia-smi
ComfyUI
参考资料:https://comfyui-wiki.com/zh/install/install-comfyui/install-comfyui-on-windows
(官方能直接下载windows exe:https://www.comfy.org/zh-cn/download)
我是看的这个博客:https://comfyui.org/zh/comfyui-windows-conda-venv
conda创建环境,下载comfyUI,安装依赖
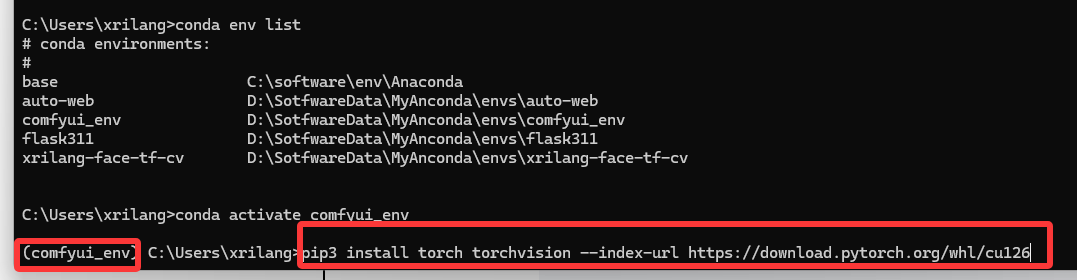
conda create -n comfyui_env python=3.10
conda activate comfyui_env
git clone https://github.com/comfyanonymous/ComfyUI.git C:\ComfyUI
cd C:\ComfyUI
pip install -r requirements.txt
注意,不想安装C记得改,安装C请确保至少有20GB空间
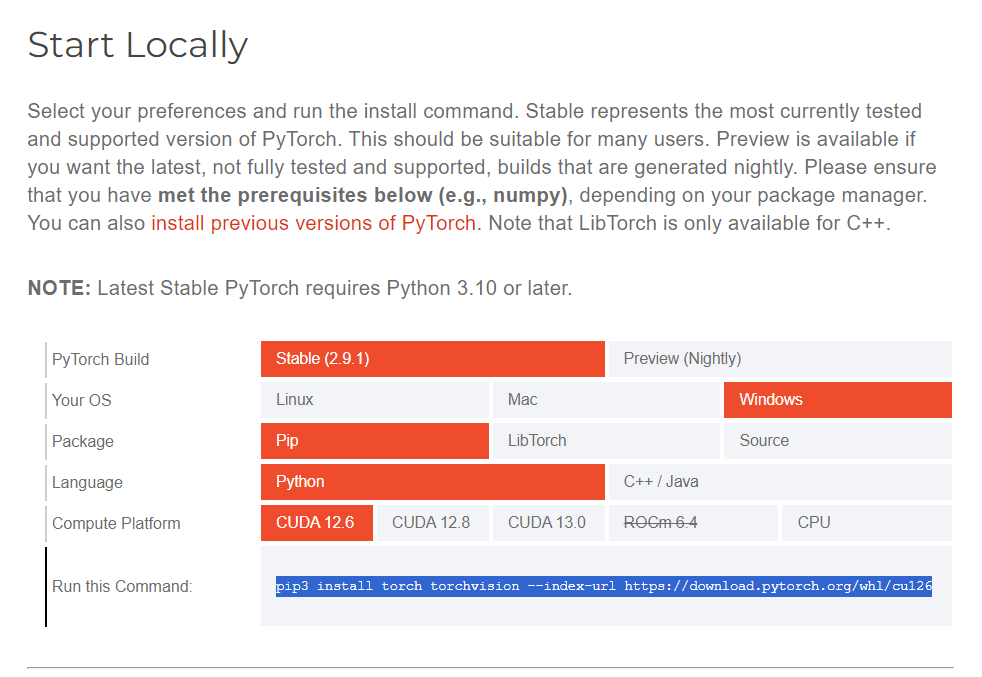
如果遇到PyTorch不兼容问题,删除了重新安装
pip uninstall torch torchvision torchaudio
https://pytorch.org/get-started/locally/
这个浏览器里面,选择适合你的情况,然后复制最后的命令
安装完可以验证一下:
python -c "import torch; print(torch.cuda.is_available())"

模型
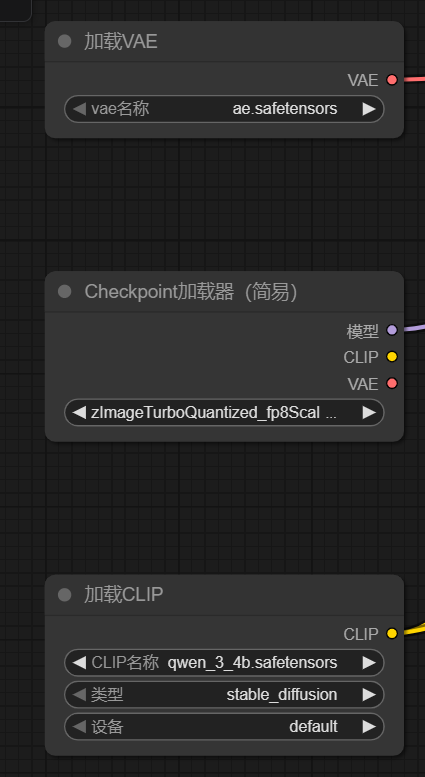
models\text_encoders:qwen_3_4b.safetensors
下载地址:https://huggingface.co/Comfy-Org/z_image_turbo/blob/main/split_files/text_encoders/qwen_3_4b.safetensors
models\vae:ae.safetensors
下载地址:https://huggingface.co/Comfy-Org/z_image_turbo/blob/main/split_files/vae/ae.safetensors
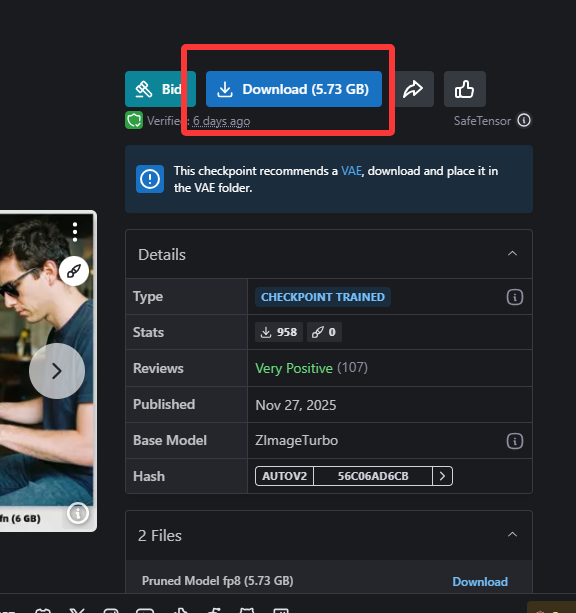
models\checkpoints:zImageTurboQuantized_fp8ScaledE4m3fnKJ.safetensors
下载地址:
https://civitai.com/models/2169712/z-image-turbo-quantized-for-low-vram?modelVersionId=2443345
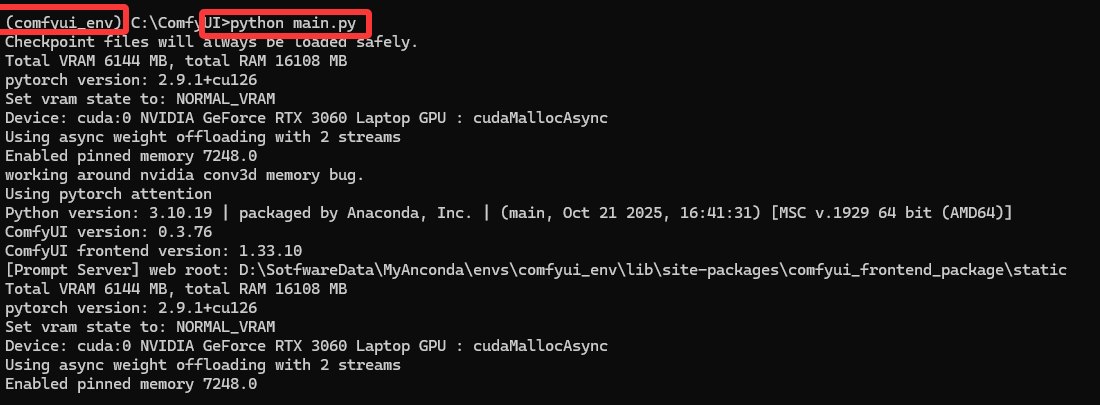
放到对应文件夹,然后运行
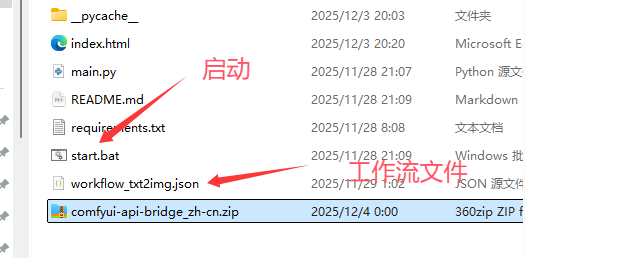
python main.py
将工作流拖进去(工作流和comfyui-api-bridge放在了一起的,后面有下载地址,如果下载地址失效了,可以自己创建一个.json文件把下面代码复制进去)
{
  "2": {
    "inputs": {
      "text": "a beautiful landscape, high quality, 8k",
      "speak_and_recognation": {
        "__value__": [
          false,
          true
        ]
      },
      "clip": [
        "16",
        0
      ]
    },
    "class_type": "CLIPTextEncode",
    "_meta": {
      "title": "正向"
    }
  },
  "4": {
    "inputs": {
      "seed": 1065951732236213,
      "steps": 8,
      "cfg": 1,
      "sampler_name": "euler",
      "scheduler": "simple",
      "denoise": 1,
      "model": [
        "15",
        0
      ],
      "positive": [
        "2",
        0
      ],
      "negative": [
        "9",
        0
      ],
      "latent_image": [
        "5",
        0
      ]
    },
    "class_type": "KSampler",
    "_meta": {
      "title": "K采样器"
    }
  },
  "5": {
    "inputs": {
      "width": 768,
      "height": 768,
      "batch_size": 1
    },
    "class_type": "EmptyLatentImage",
    "_meta": {
      "title": "空Latent图像"
    }
  },
  "6": {
    "inputs": {
      "vae_name": "ae.safetensors"
    },
    "class_type": "VAELoader",
    "_meta": {
      "title": "加载VAE"
    }
  },
  "7": {
    "inputs": {
      "samples": [
        "4",
        0
      ],
      "vae": [
        "6",
        0
      ]
    },
    "class_type": "VAEDecode",
    "_meta": {
      "title": "VAE解码"
    }
  },
  "8": {
    "inputs": {
      "filename_prefix": "ComfyUI",
      "images": [
        "7",
        0
      ]
    },
    "class_type": "SaveImage",
    "_meta": {
      "title": "保存图像"
    }
  },
  "9": {
    "inputs": {
      "text": "blurry, ugly, bad, lowres, jpeg artifacts, watermark, distorted, noisy, artifact, glitch, oversaturation, neon tones, harsh contrast or glow, color cast, pixelated, blocky",
      "speak_and_recognation": {
        "__value__": [
          false,
          true
        ]
      },
      "clip": [
        "16",
        0
      ]
    },
    "class_type": "CLIPTextEncode",
    "_meta": {
      "title": "反向"
    }
  },
  "15": {
    "inputs": {
      "ckpt_name": "zImageTurboQuantized_fp8ScaledE4m3fnKJ.safetensors"
    },
    "class_type": "CheckpointLoaderSimple",
    "_meta": {
      "title": "Checkpoint加载器(简易)"
    }
  },
  "16": {
    "inputs": {
      "clip_name": "qwen_3_4b.safetensors",
      "type": "stable_diffusion",
      "device": "default"
    },
    "class_type": "CLIPLoader",
    "_meta": {
      "title": "加载CLIP"
    }
  }
}
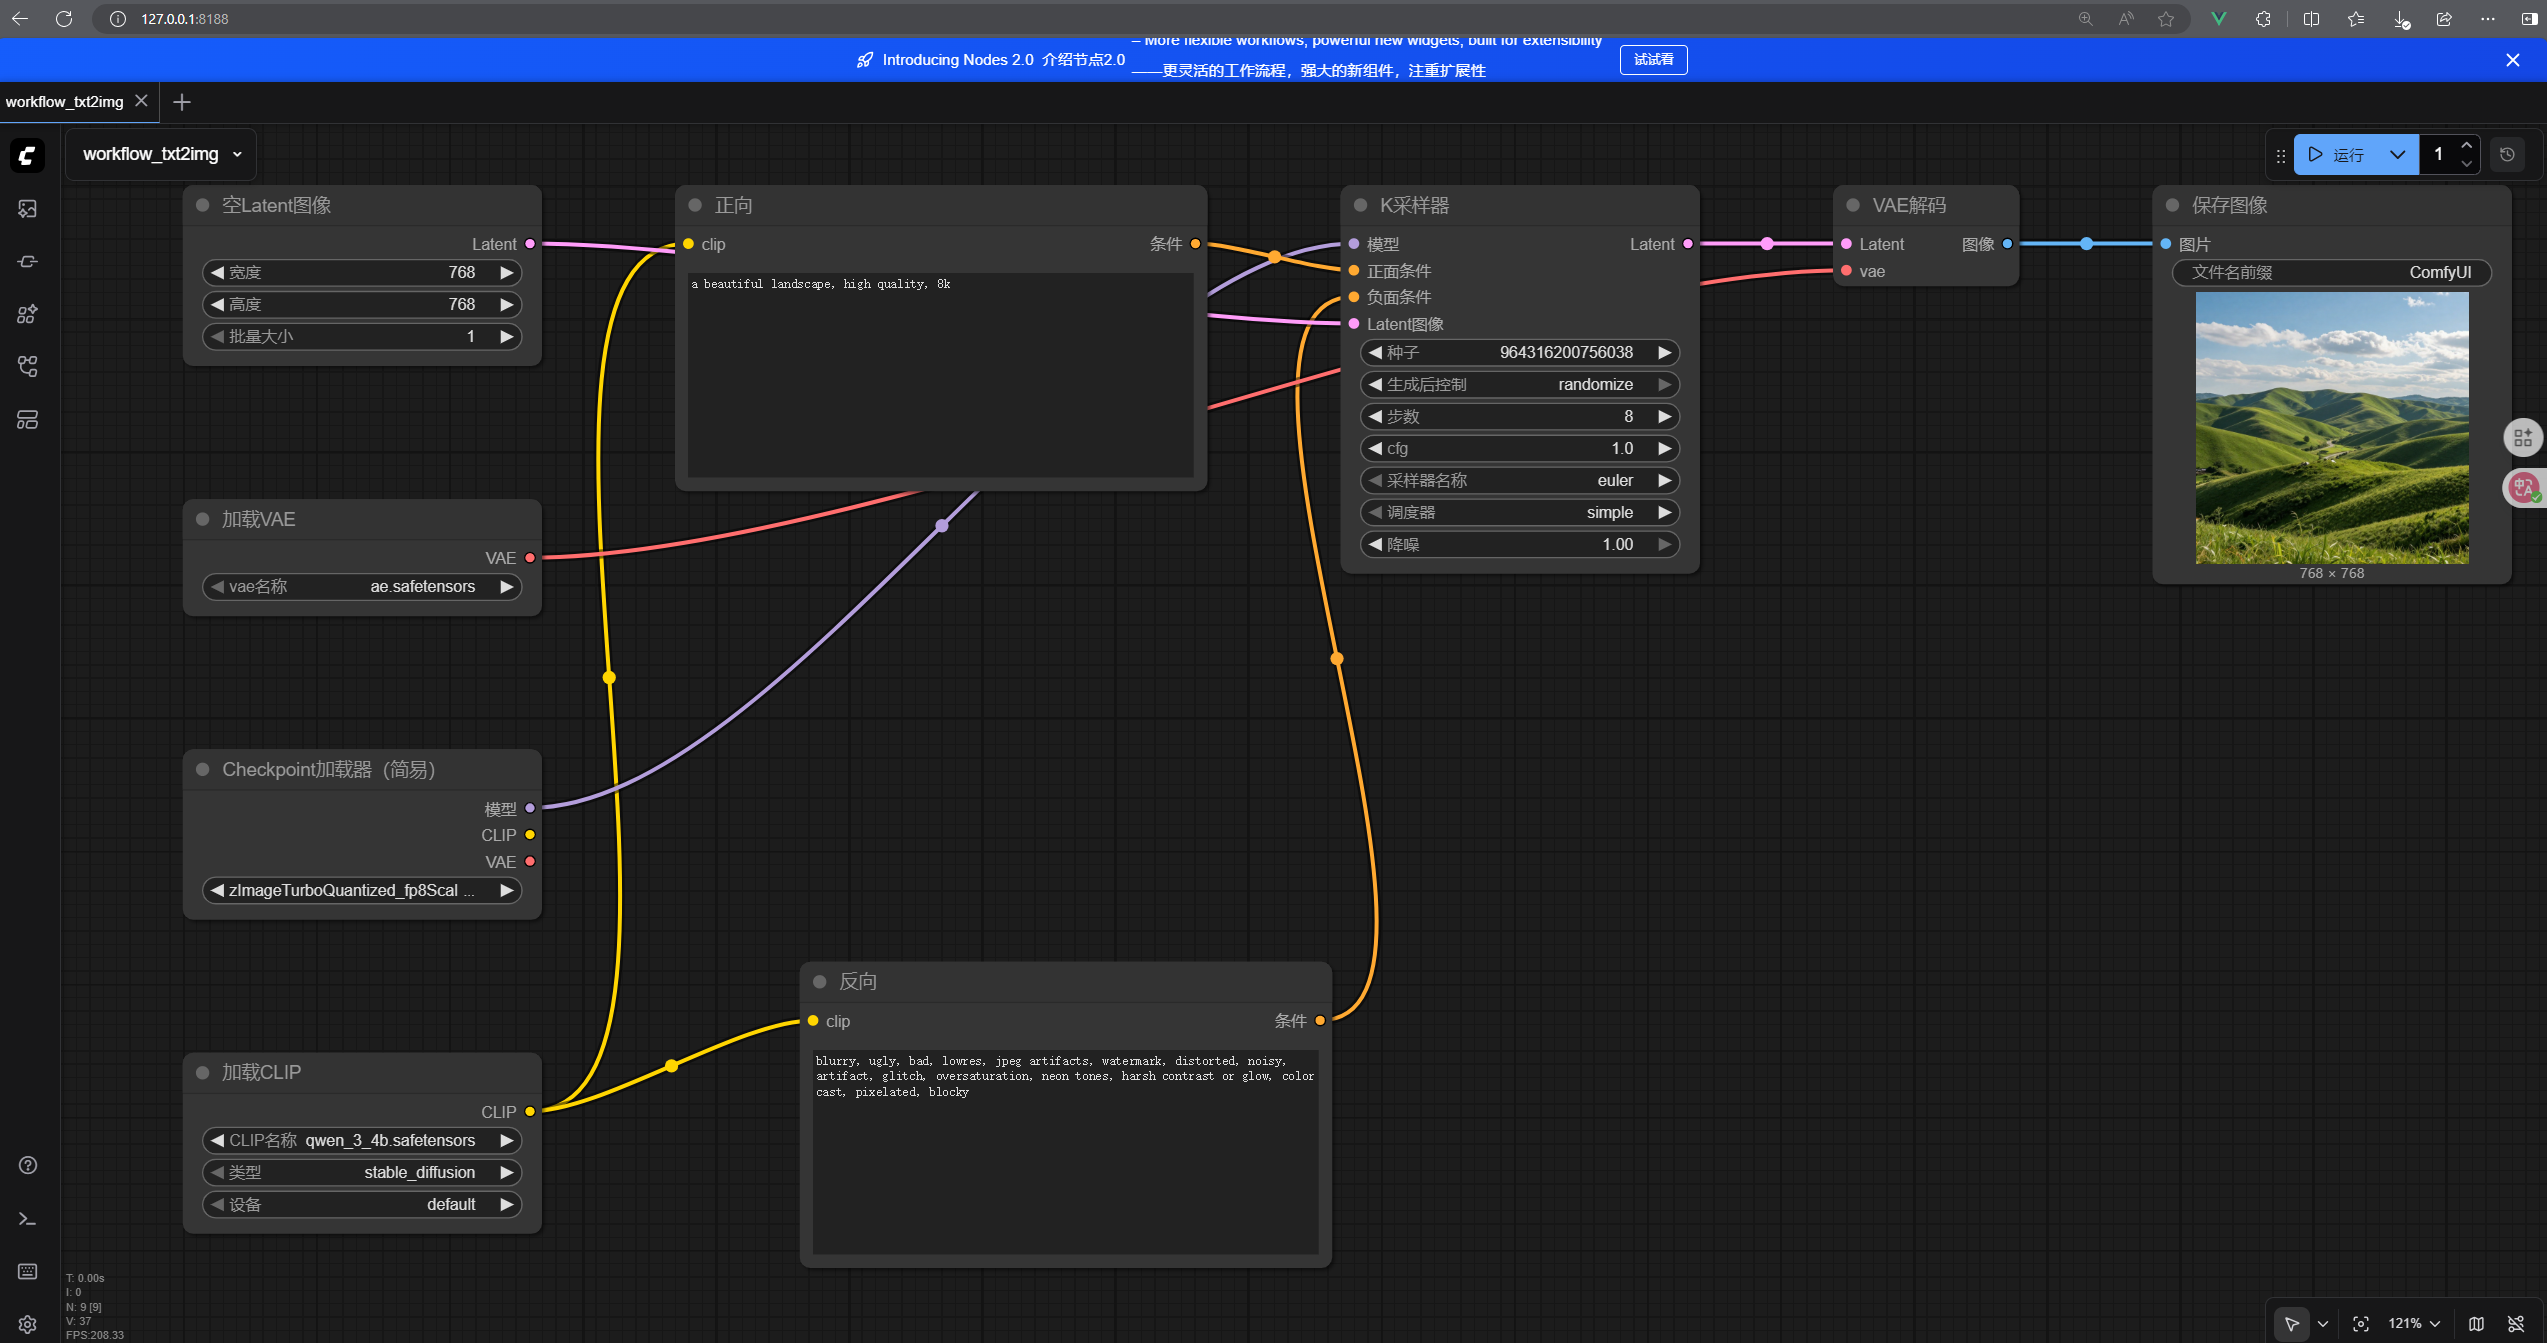
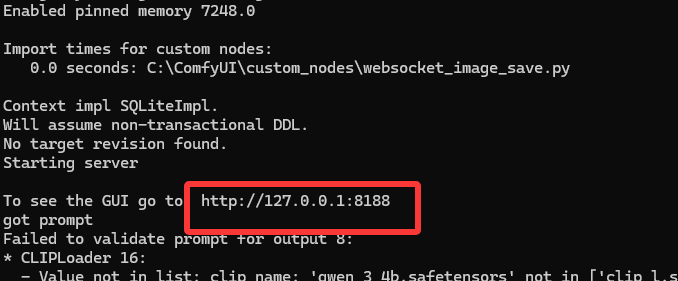
检查下配置有问题没,然后点运行,就可以了
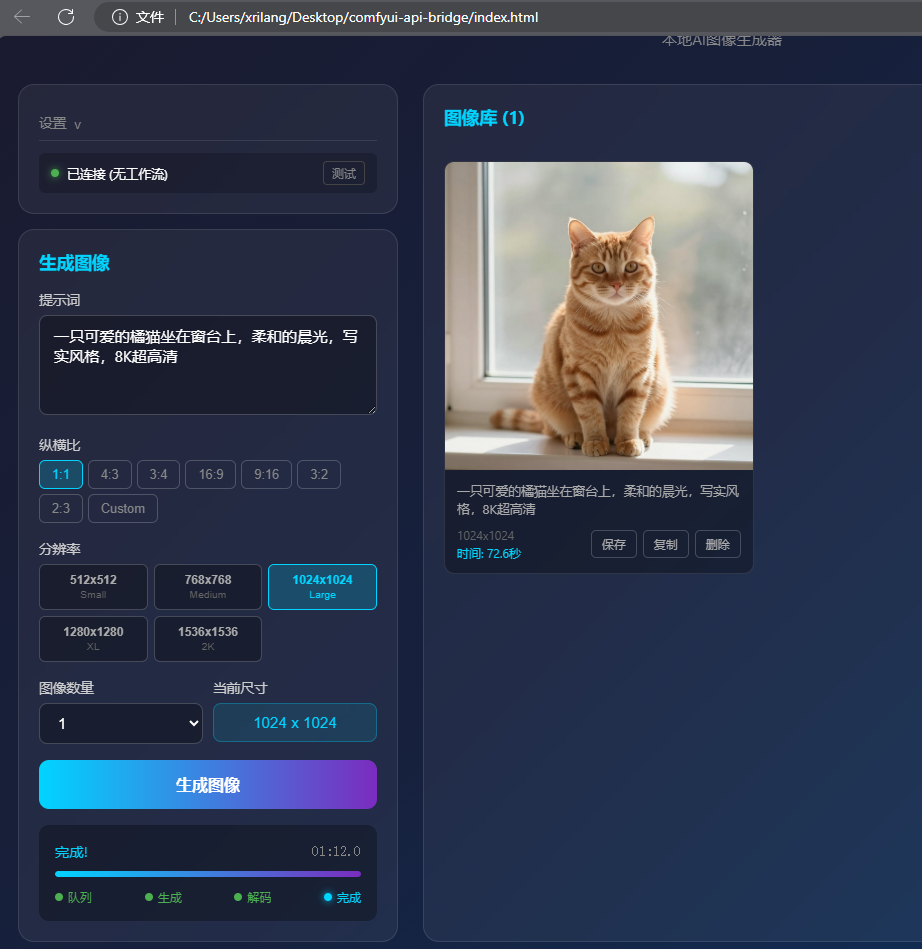
comfyui-api-bridge
pip install -r requirements.txt
安装依赖然后运行start.bat脚本。
comfyui-api-bridge可以从……额我是从linuxDo里面佬分享的下载的,然后我发现v1才能看帖子emm
好吧,那我就上传一份到云盘。https://yp.mllt.cc/s/Lxhd/mllt9920
(访问密码:mllt9920)

这两个选其中一个下载就行了,zh-cn是我用trae把index.html页面汉化了一下
最后,你电脑的情况是这样了:
启动了ComfyUI,8188端口
启动了comfyui-api-bridge:8000端口
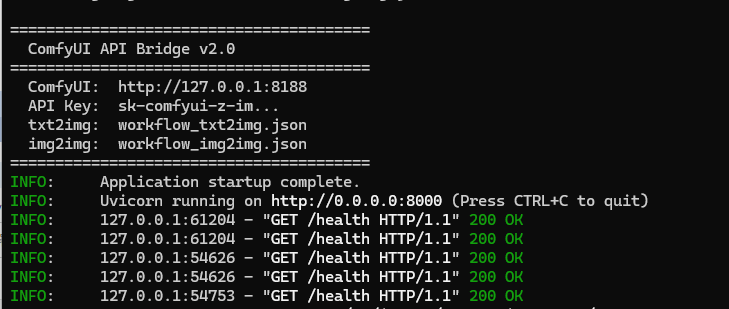
index.html打开就可以用了
一些有用的网站:
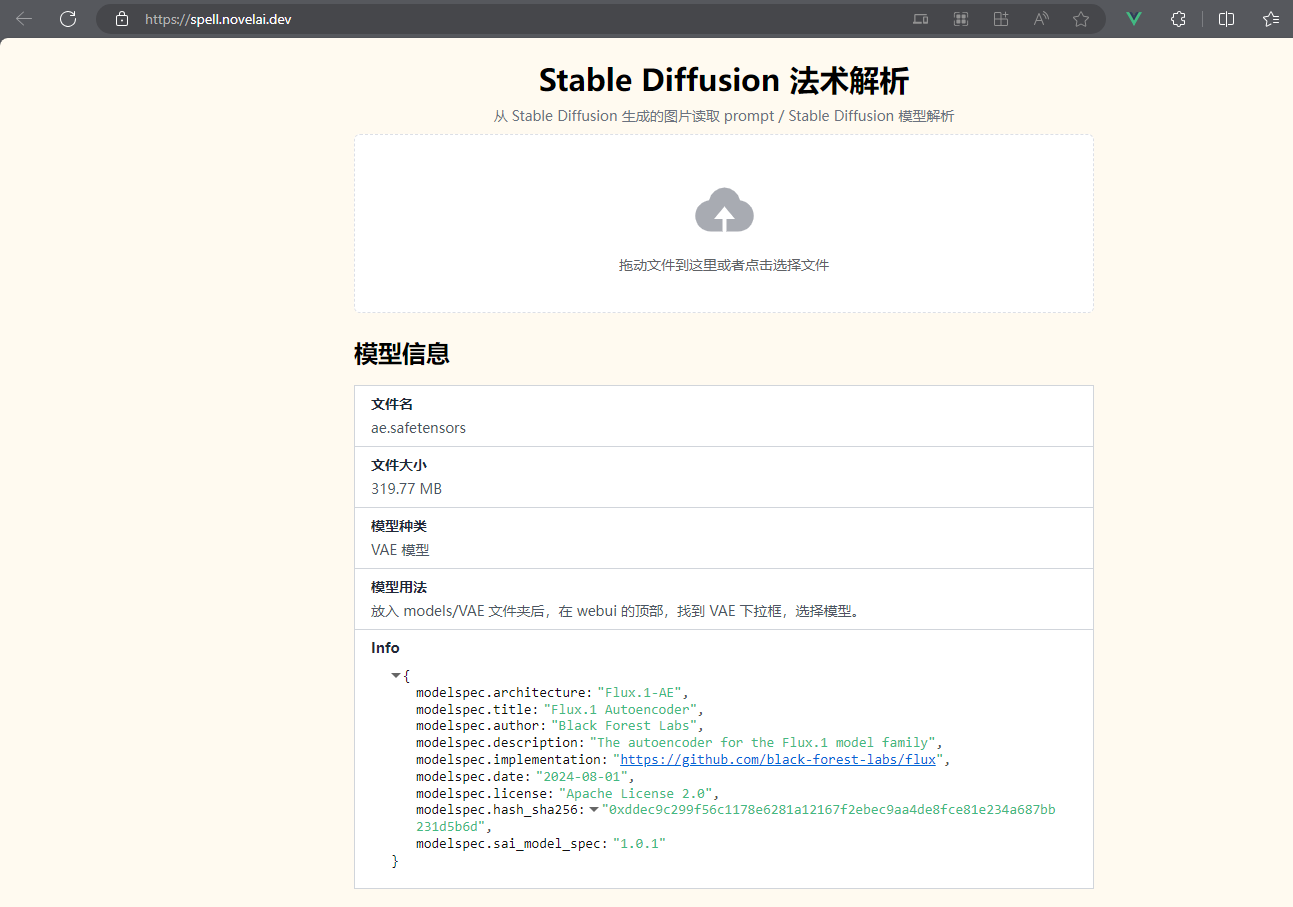
模型信息检测,告诉你应该放哪:https://spell.novelai.dev/
如果链接挂了,可以去看他github仓库:https://github.com/Akegarasu/stable-diffusion-inspector
起源:https://linux.do/t/topic/1234434
cuDNN:https://developer.nvidia.cn/cudnn
PyTorch:https://pytorch.org/get-started/locally/
https://docs.nvidia.com/cuda/cuda-toolkit-release-notes/index.html
麻烦点
- 电脑配置要支持
- CUDA和PyTorch要兼容
- 模型要放对位置
- 工作流要正确
- 程序都要启动(别漏了)
就可以愉快玩耍了。
如果觉得本文写的比较乱,还有一篇是根据本文让AI整理的:
https://www.cnblogs.com/zwj/p/19304453/ai_lcoal_zimage_ai
作者:萌狼蓝天
QQ:3447902411(仅限技术交流,添加请说明方向)
转载请注明原文链接:https://www.cnblogs.com/zwj/p/19304354/ai_local_zimg

 浙公网安备 33010602011771号