一、项目准备
1、新建一个vue的项目,确保能在浏览器正常访问。然后在项目的根目录下新建一个Dockerfile的文件,内容如下
注意:前提时项目中有dist文件夹。
FROM nginx
COPY dist /usr/share/nginx/html/
COPY nginx.conf /etc/nginx/nginx.conf
2、在根目录下创建一个nginx.conf,内容如下
worker_processes  1;
events {
    worker_connections  1024;
}
http {
    include       mime.types;
    default_type  application/octet-stream;
    sendfile        on;
    keepalive_timeout  65;
    server {
        listen       9001;
        server_name  localhost;
        location / {
            root   /usr/share/nginx/html;
            try_files $uri $uri/ /index.html;
        }
        error_page   500 502 503 504  /50x.html;
        location = /50x.html {
            root   html;
        }
    }
}
注意:root 后面应该写完整的路径/usr/share/nginx/html,而不能只写html。
在浏览器访问服务器ip:8081,通过nginx转发到localhost:9001。这里只是访问前端,没有访问后台。localhost可以写成服务器ip
二、将代码提交到GitHub
地址:https://github.com/zwh0910/vue-print.git,
#初始化仓库
git init
#将代码添加到暂存区
git add .
#提交代码
git commit -m "add files"
#将代码推送到GitHub
git remote add origin https://github.com/zwh0910/vue-print.git
git push -u origin master
三、项目配置
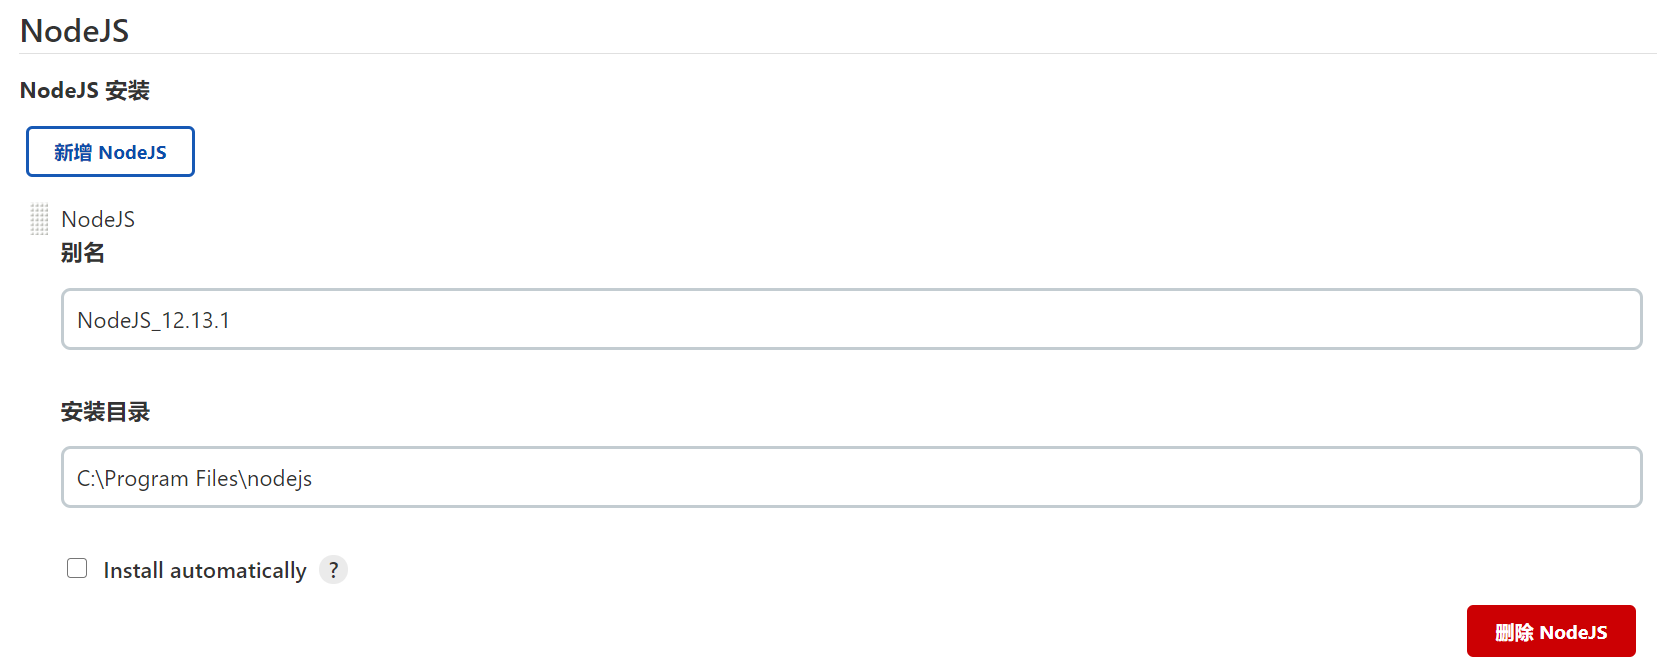
1、下载nodeJS压缩包,下载地址:https://nodejs.org/zh-cn/download/,然后拷贝到服务器并解压到/root/jenkins/data目录下

2、在jenkins中安装nodeJs插件,然后重启jenkins
3、全局工具配置nodeJs

如果配置本地的NodeJS,如下所示:
4、新建一个自由风格的软件项目
注意:部署前端,要新建一个自由风格软件项目。如果是部署后端,则新建一个maven项目。
5、配置git

6、配置版本规则
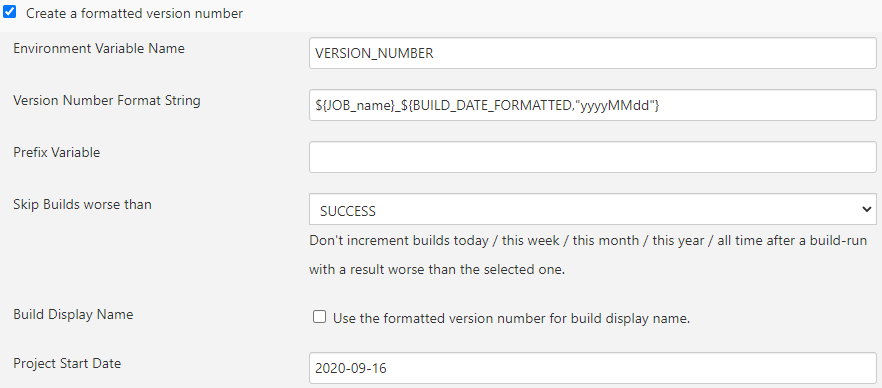
VERSION_NUMBER
${JOB_name}_${BUILD_DATE_FORMATTED,"yyyyMMdd"}
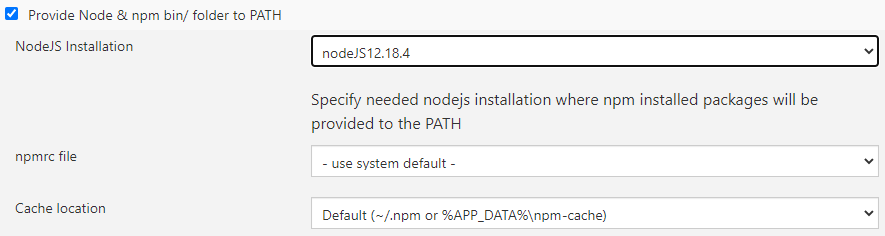
7、配置ndoeJS
8、构建中添加“执行shell”
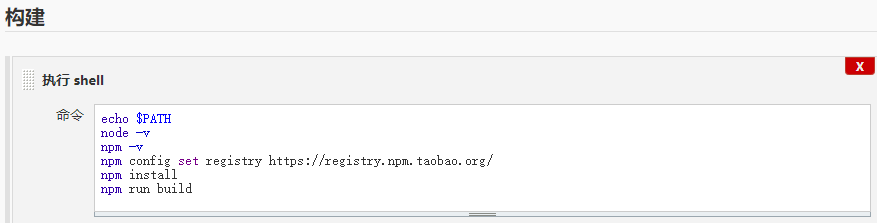
echo $PATH
node -v
npm -v
npm config set registry https://registry.npm.taobao.org/
npm install
npm run build
9、构建中添加“build/publish docker images”
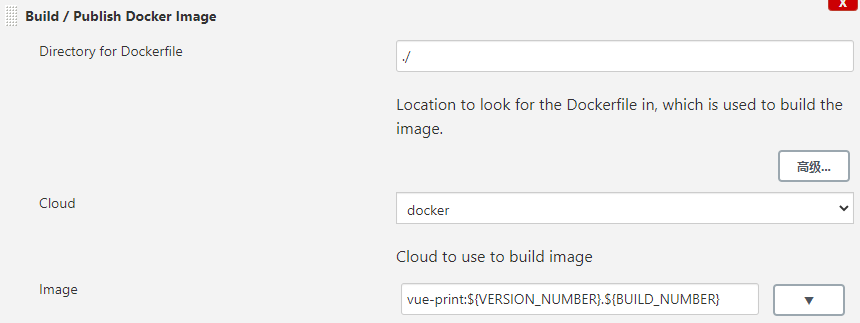
vue-print:${VERSION_NUMBER}.${BUILD_NUMBER}
10、构建中添加Execute shell script on remote host using ssh
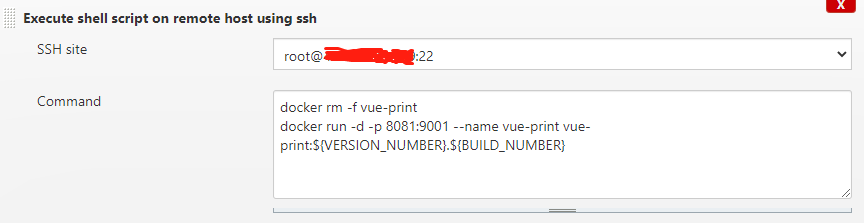
docker rm -f vue-print
docker run -d -p 8081:9001 --name vue-print vue-print:${VERSION_NUMBER}.${BUILD_NUMBER}
注意:1、浏览器访问端口为8081,修改该代码可以防止端口冲突。2、9001端口要在nginx.conf中配置,即通过8081端口访问9001端口。
端口映射,前面的端口为主机的端口,后面的端口为nginx容器的端口。
11、点击立即构建,构建成功后访问http://服务器ip:8081/

 浙公网安备 33010602011771号