


vuejs3.0 从入门到精通——网页图形绘制:登录页面安全升级,JS动态生成图片验证码功能
网页图形绘制:登录页面安全升级,JS动态生成图片验证码功能
一、实验目标
- 掌握 Canvas 的基本用法。
- 掌握使用 Canvas 绘制文本的方法。
- 掌握使用 Canvas 绘制线段的方法。
- 掌握使用 Canvas 导出图片的方法。
- 掌握 JS 的基本语法和程序结构。
- 掌握 JS 函数的定义和应用。
- 掌握 JS 数组的定义和应用。
- 掌握 JS 面向对象编程方法。
- 掌握 JS DMO 操作。
- 综合应用 JS 编程技术和 Canvas 绘图,实现图片验证码功能。
二、实验任务
- 通过 JS 生成图片验证码。
- 使用 HTML5 编写登录页面并应用图片验证码。
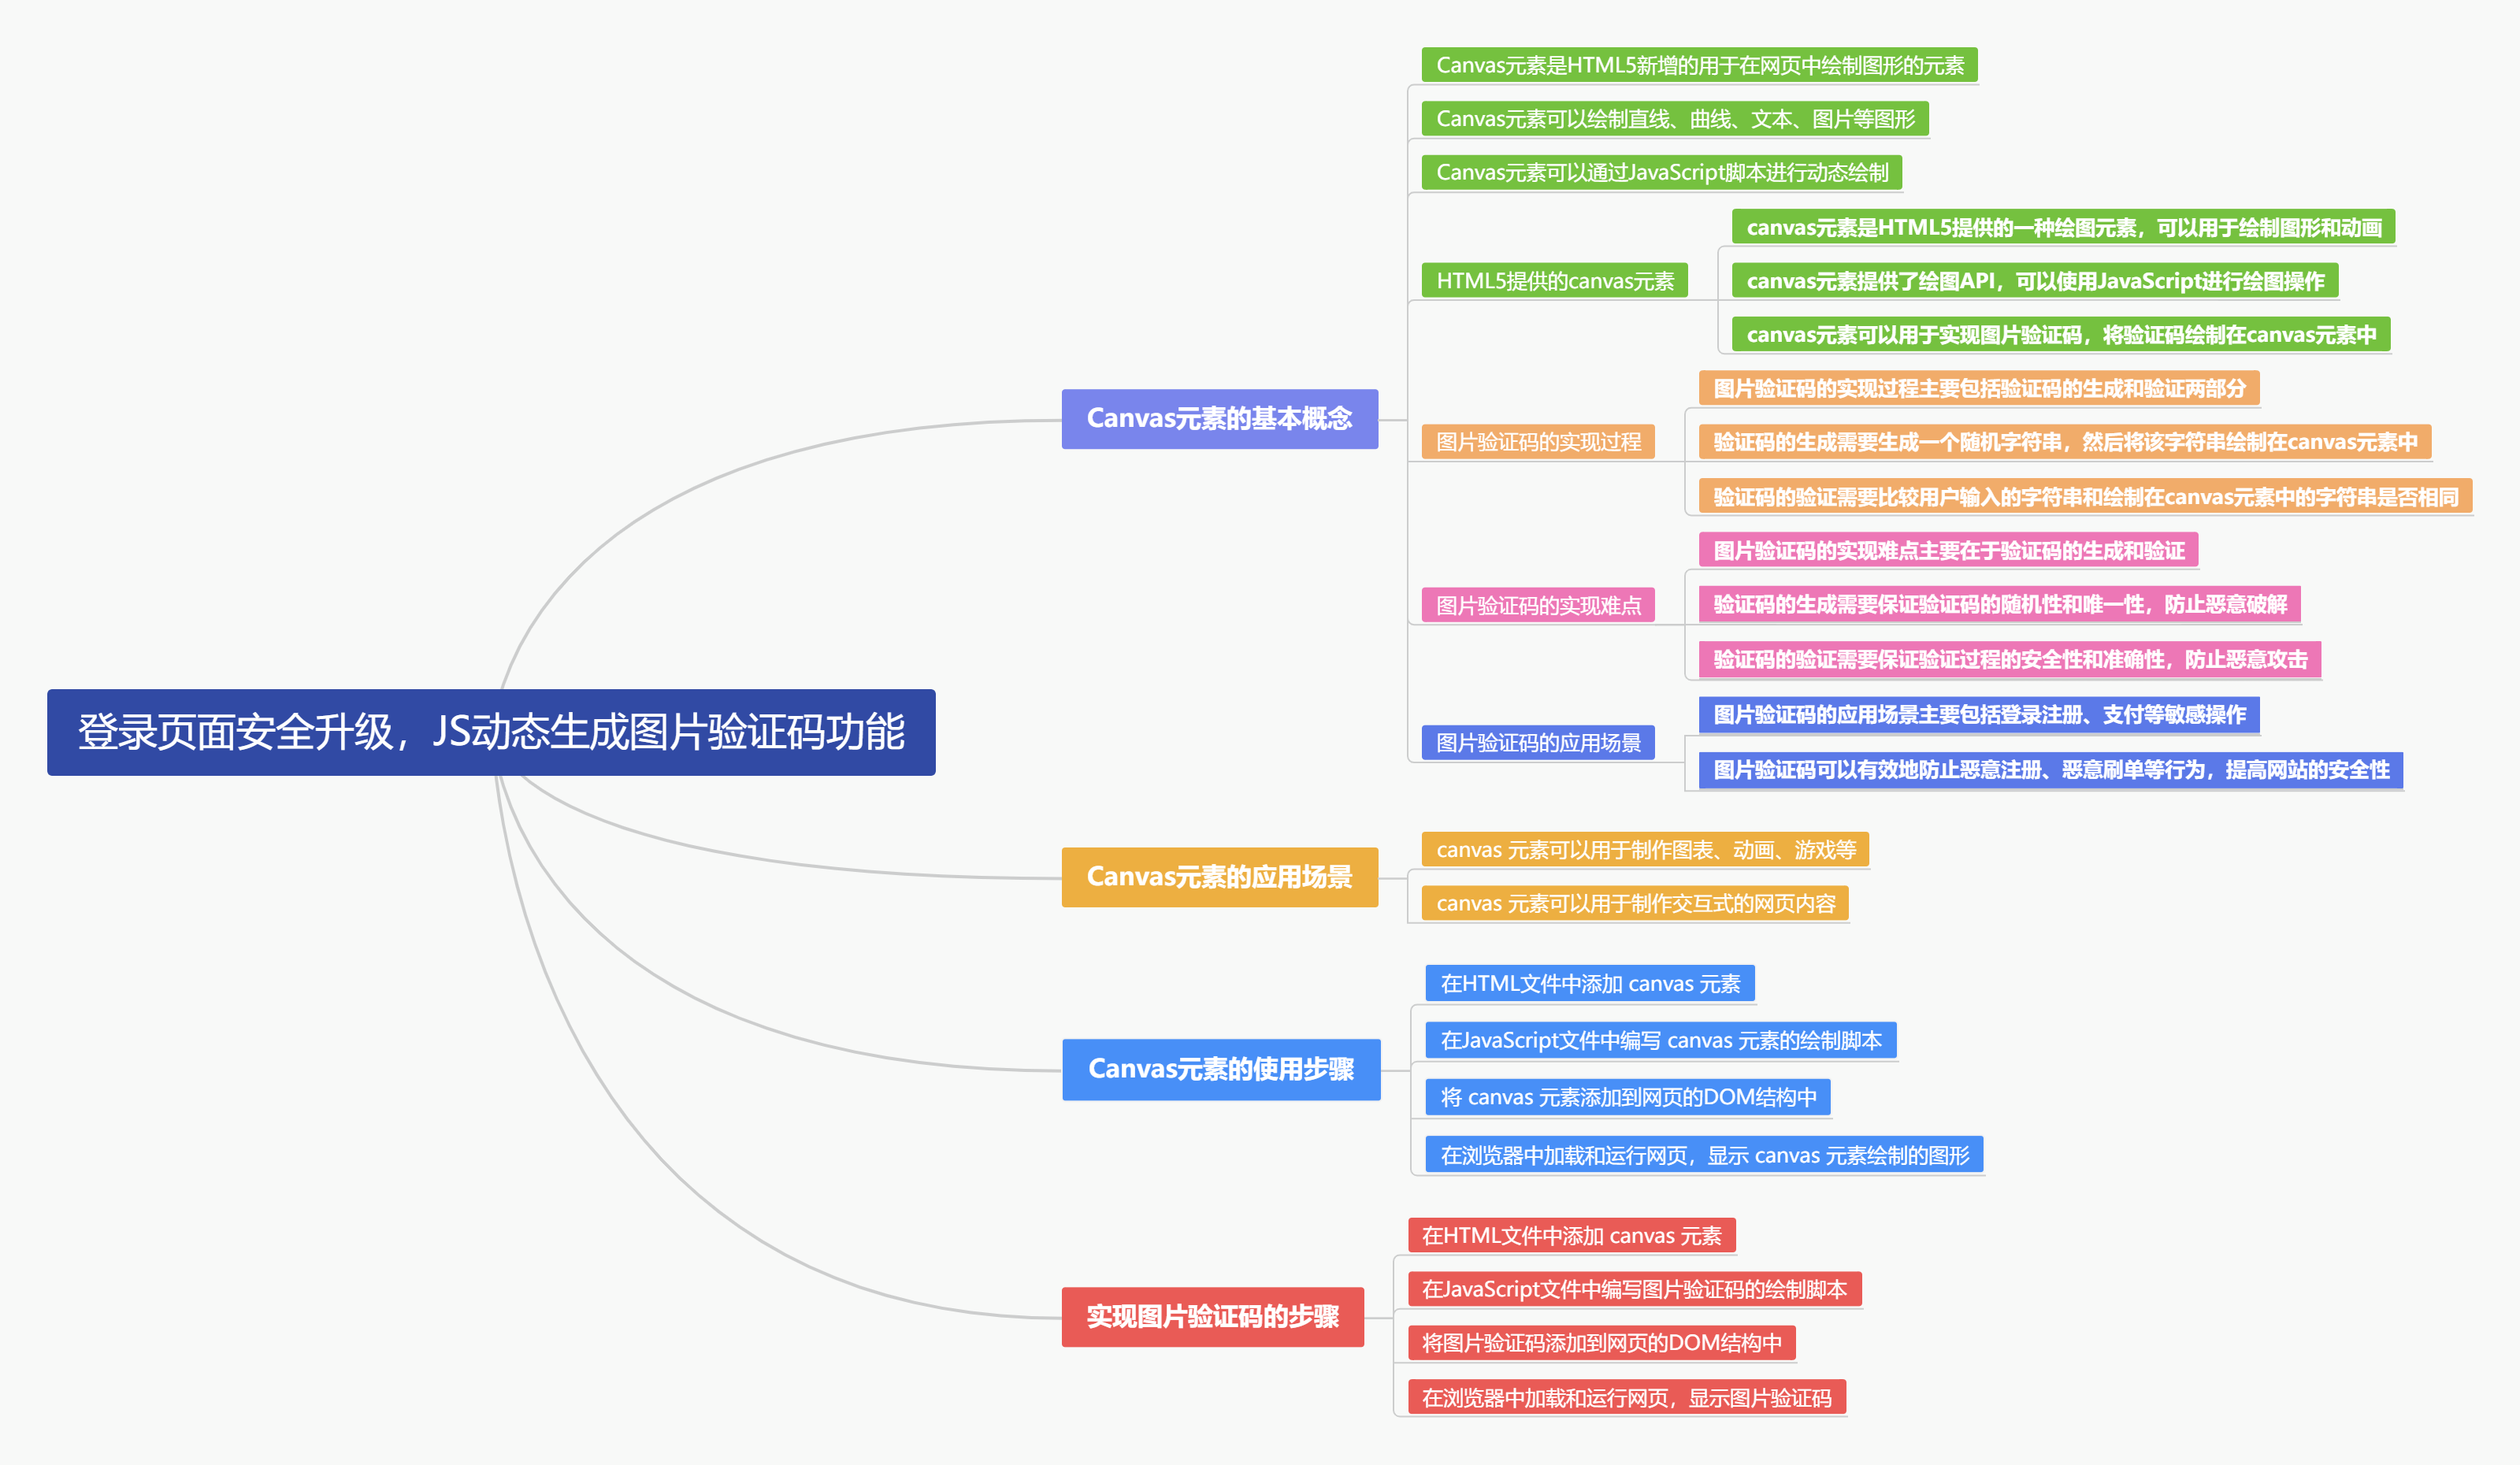
三、设计思路
我们运用HTML5强大的Canvas元素,结合JavaScript脚本,精心绘制出一张富含随机文本、随机直线(干扰线)以及随机点(干扰点)的图片验证码。这一过程中,我们巧妙地借助了Math.random()函数,赋予图片验证码出色的随机性,使得每张验证码都独一无二,极大地提升了其安全性和防机器识别能力。这样的设计不仅保障了用户登录的安全性,也为用户带来了更流畅、更安全的登录体验。
四、实现实施(跟我做)
目录结构:
Jquery下载地址:https://code.jquery.com/jquery-3.6.1.min.js
4.1、步骤一:通过 JS 生成图片验证码
创建一个 JS 脚本,将其命名为 "verificationCode.js"。代码如下:
var nums = [
  "1",
  "2",
  "3",
  "4",
  "5",
  "6",
  "7",
  "8",
  "9",
  "0",
  "A",
  "B",
  "C",
  "D",
  "E",
  "F",
  "G",
  "H",
  "I",
  "J",
  "K",
  "L",
  "M",
  "N",
  "O",
  "P",
  "Q",
  "R",
  "S",
  "T",
  "U",
  "V",
  "W",
  "X",
  "Y",
  "Z",
  "a",
  "b",
  "c",
  "d",
  "e",
  "f",
  "g",
  "h",
  "i",
  "j",
  "k",
  "l",
  "m",
  "n",
  "o",
  "p",
  "q",
  "r",
  "s",
  "t",
  "u",
  "v",
  "w",
  "x",
  "y",
  "z",
];

var colors = [
  "red",
  "blue",
  "green",
  "yellow",
  "orange",
  "purple",
  "pink",
  "brown",
  "gray",
  "black",
  "white",
];

var str = "";

//调用 drawCode()方法获取验证码,将验证码保存在全局变量 verVal 中
var verVal = drawCode();

//绘制验证码函数
function drawCode() {
  //获取 HTML 网页中的画布
  var canvas = document.getElementById("verifyCanvas");

  if (!canvas) {
    console.error("验证码画布元素不存在");
  } else {
    //获取画布 2D 上下文
    var context = canvas.getContext("2d");
    //设置画布填充色
    context.fillStyle = "white";
    //清空画布
    context.fillRect(0, 0, canvas.width, canvas.height);
    //设置字体和字号
    context.font = "bold 30px 'Arial Black'";
    //定义3个数组,用于存储坐标
    var rand = new Array();
    var x = new Array();
    var y = new Array();

    for (var i = 0; i < 4; i++) {
      rand.push(rand[i]); //这行代码将 rand 数组中当前索引 i 的元素添加到 rand 数组的末尾。
      rand[i] = nums[Math.floor(Math.random() * nums.length)];
      x[i] = i * 20 + 10;
      y[i] = Math.random() * 20 + 10;

      //设置字体颜色
      context.fillStyle = colors[Math.floor(Math.random() * colors.length)];
      //在指定位置上绘制文本
      context.fillText(rand[i], x[i], y[i]);
    }

    //将数组转换为字符串并转换为大写形式
    var str = rand.join("").toUpperCase();

    //绘制 3条随机线
    for (var i = 0; i < 3; i++) {
      //设置线条颜色
      context.strokeStyle = colors[Math.floor(Math.random() * colors.length)];
      //设置线条宽度
      context.lineWidth = 1;
      //绘制一条随机线
      context.beginPath();
      context.moveTo(
        Math.floor(Math.random() * canvas.width),
        Math.floor(Math.random() * canvas.height)
      );
      context.lineTo(
        Math.floor(Math.random() * canvas.width),
        Math.floor(Math.random() * canvas.height)
      );
      context.stroke();
    }

    //绘制 30个 随机点
    for (var i = 0; i < 30; i++) {
      //设置点颜色
      context.fillStyle = colors[Math.floor(Math.random() * colors.length)];
      //绘制一个随机点
      context.fillRect(
        Math.floor(Math.random() * canvas.width),
        Math.floor(Math.random() * canvas.height),
        1,
        1
      );
    }

    //绘制图片
    convertCanvasToImage(canvas);
    return str;
  }
}

//绘制随机线函数
function drawline(canvas, context) {
  //设置路径起点
  context.moveTo(
    Math.floor(Math.random() * canvas.width),
    Math.floor(Math.random() * canvas.height)
  );
  //绘制直线路径
  context.lineTo(
    Math.floor(Math.random() * canvas.width),
    Math.floor(Math.random() * canvas.height)
  );
  //设置线条宽带

  context.lineWidth = 0.25;
  //设置线条描边颜色
  context.strokeStyle = "rgb(168,168,168,0.3)";

  //对路径进行描边
  context.stroke();
}

// 绘制随机点函数
function drawDot(canvas, context) {
  // 根据画布的宽度生成一个随机整数作为x坐标
  var px = Math.floor(Math.random() * canvas.width);

  // 根据画布的高度生成一个随机整数作为y坐标
  var py = Math.floor(Math.random() * canvas.height);

  // 将画笔移动到指定的随机点位置
  context.moveTo(px, py);

  // 从当前位置(即随机点)画一条到稍微偏离一点的线的终点,这里是为了形成一个点的效果
  // 因为线的宽度是0.5,所以这样画出来的效果是一个小圆圈,看起来像是一个点
  context.lineTo(px + 1, py + 1);

  // 设置线的宽度为0.5
  context.lineWidth = 0.5;

  // 对之前定义的路径进行描边,也就是画出从moveTo到lineTo的那条小线段,从而形成一个点
  context.stroke();
}

//绘制图片函数
function convertCanvasToImage(canvas) {
  //隐藏画布
  document.getElementById("verifyCanvas").style.display = "none";
  var image = document.getElementById("code_img");
  //将画布导出为图片,并设置图片的来源 URL
  image.src = canvas.toDataURL("image/png");
  return image;
}

//单机图片刷新验证码
$("#code_img").click(function () {
  //移除画布
  $("#verifyCanvas").remove();
  //在 img 前面添加画布
  $("#code_img").before(
    '<canvas id="verifyCanvas" width="100" height="40"></canvas>'
  );
  //调用 drawCode()方法获取验证码,将验证码保存在全局变量 verVal 中
  var verVal = drawCode();
});
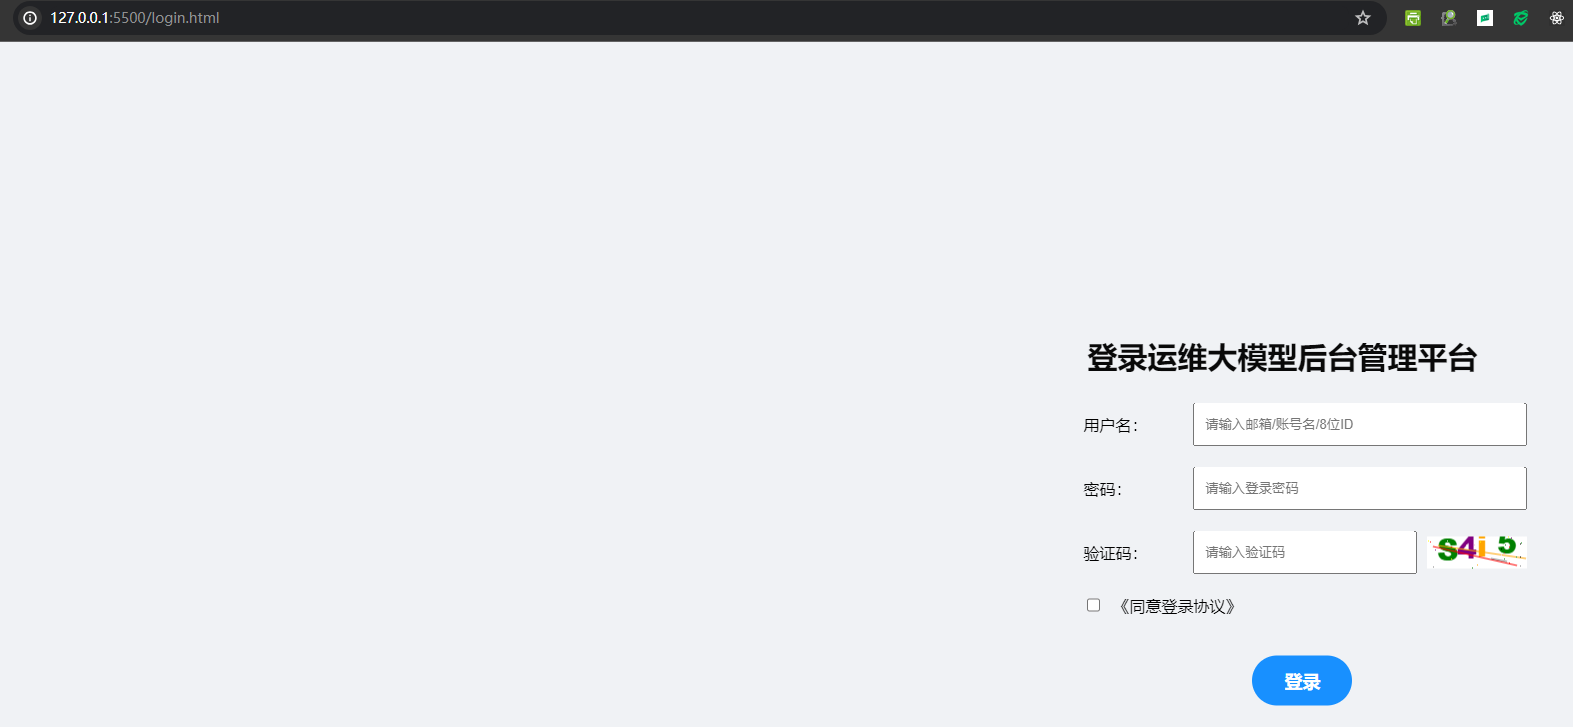
4.2、步骤二:在登录页面中应用图片验证码
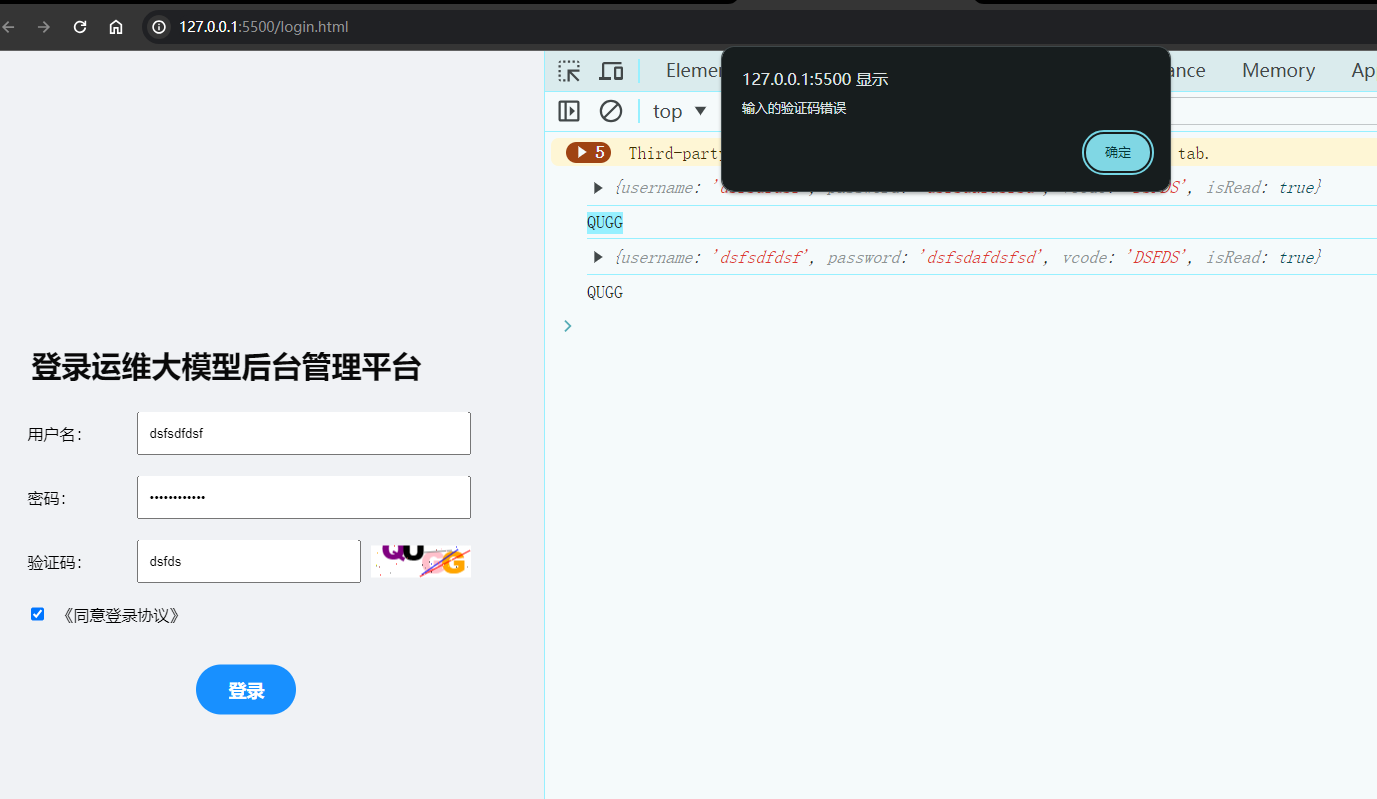
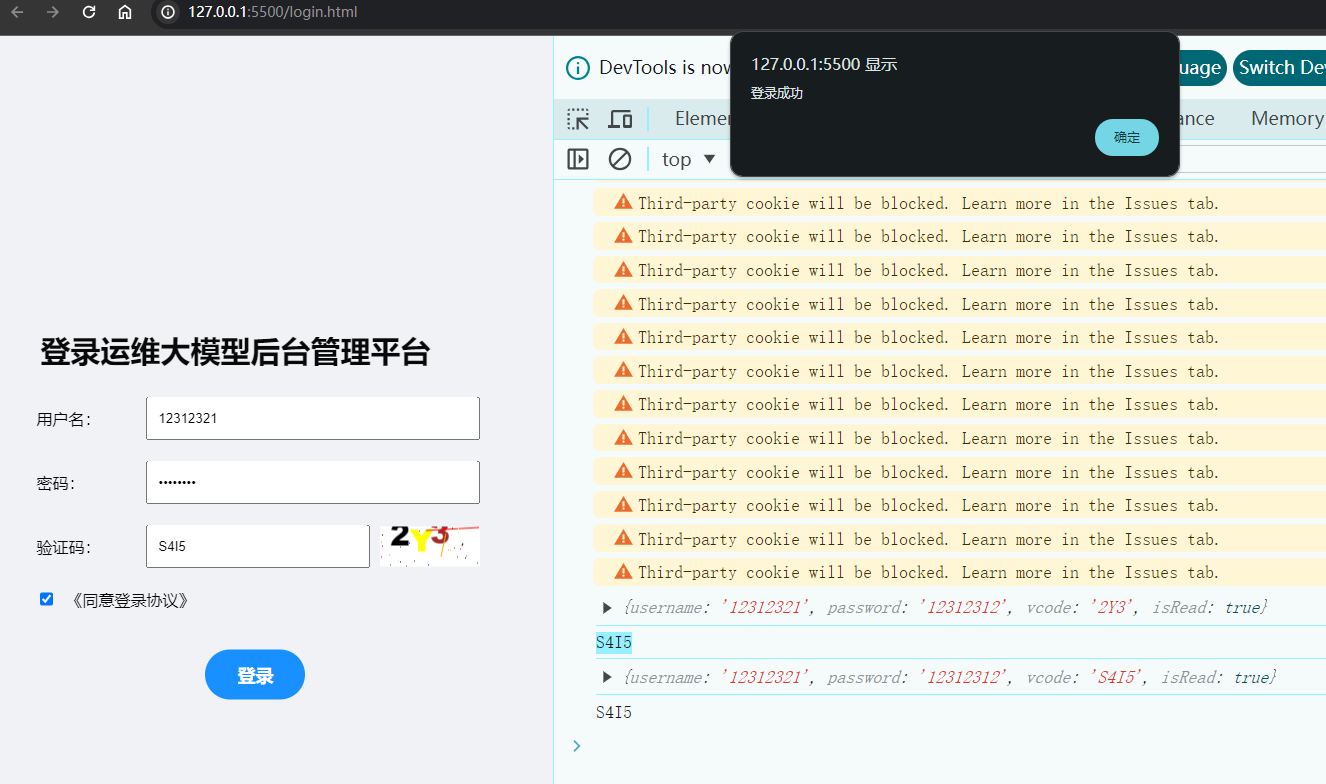
创建一个名为 login.html 的 HTML 静态网页,在该页面中创建一个登录表单,并通过 <script> 标签引入前面的 verificationCode.js 脚本文件,以添加图片验证码。创建 submit 事件处理程序,对输入的验证码进行检查,如果输入的验证码与图片验证码匹配,则允许登录,否则阻止登录。代码如下:
<!DOCTYPE html>
<html lang="en">
  <head>
    <meta charset="UTF-8" />
    <meta name="viewport" content="width=device-width, initial-scale=1.0" />
    <title>登录运维大模型后台管理平台</title>
    <style>
      .login-form {
        position: fixed;
        top: 50%;
        right: 13%;
        transform: translateY(-50%);
        width: 500px;
        height: 500px;
        max-width: 1000px;
        height: auto;
        display: flex;
        flex-direction: column;
        justify-content: center;
        align-items: flex-end;
      }

      .large-input {
        width: 450px;
        height: 50px;
      }

      .login-btn {
        position: fixed;
        width: 100px;
        height: 50px;
        right: 35%;
        background-color: #1890ff;
        border-radius: 30px;
        display: flex;
        justify-content: center;
        align-items: center;
        color: #fff;
        border: none;
        font-size: 18px;
        font-weight: bold;
      }

      .login-title {
        position: fixed;
        right: 10%;
        font-size: 30px;
        color: #090909;
        font-weight: bold;
        width: auto;
        max-width: 100%;
        height: auto;
        margin-bottom: 350px;
      }

      body {
        margin: 0;
        padding: 0;
        display: flex;
        justify-content: center;
        align-items: center;
        min-height: 100vh;
        background-color: #f0f2f5;
      }

      .form-item {
        display: flex;
        flex-direction: row;
        align-items: center;
        margin-bottom: 20px;
      }

      .form-label {
        width: 100px; /* 根据需要调整 label 的宽度 */
        margin-right: 10px; /* 在 label 和 input 之间增加间距 */
      }

      .form-item input[type="text"],
      .form-item input[type="password"] {
        flex-grow: 1; /* 让 input 根据剩余空间自适应宽度 */
        margin-left: 0; /* 去除默认的左右间距 */
        padding: 10px;
      }

      input[type="text"],
      input[type="password"] {
        width: 200px;
        height: 20px;
        padding: 10px;
      }

      .checkbox-label {
        display: inline-block;
        margin-left: 10px;
      }

      #code_img {
        cursor: pointer;
        margin-left: 10px;
      }

      button[type="submit"] {
        width: 100px;
        height: 50px;
        background-color: #1890ff;
        border-radius: 30px;
        color: #fff;
        border: none;
        font-size: 18px;
        font-weight: bold;
        cursor: pointer;
        margin-top: 20px;
      }
    </style>
  </head>
  <body>
    <div class="login-form">
      <h2 class="login-title">登录运维大模型后台管理平台</h2>

      <form onsubmit="handleSubmit(event)">
        <div class="form-item">
          <label for="username" class="form-label">用户名:</label>
          <input
            type="text"
            id="username"
            placeholder="请输入邮箱/账号名/8位ID"
            required
          />
        </div>

        <div class="form-item">
          <label for="password" class="form-label">密码:</label>
          <input
            type="password"
            id="password"
            placeholder="请输入登录密码"
            required
          />
        </div>

        <div class="form-item">
          <label for="vcode" class="form-label">验证码:</label>
          <input type="text" id="vcode" placeholder="请输入验证码" required />
          <canvas width="100" height="32" id="verifyCanvas"></canvas>
          <img id="code_img" title="单击刷新验证码" alt="vcode" />
        </div>

        <div class="form-item">
          <input type="checkbox" id="isRead" />
          <label for="isRead" class="checkbox-label">《同意登录协议》</label>
        </div>

        <button type="submit" class="login-btn">登录</button>
      </form>
    </div>

    <script src="jquery-3.6.1.min.js"></script>
    <script src="verificationCode.js"></script>
    <script>
      function handleSubmit(event) {
        event.preventDefault(); // 阻止表单默认提交行为

        const form = {
          username: document.getElementById("username").value,
          password: document.getElementById("password").value,
          vcode: document.getElementById("vcode").value.toUpperCase(),
          isRead: document.getElementById("isRead").checked,
        };
        console.log(form);
        console.log(verVal);

        if (form.vcode !== verVal) {
          alert("输入的验证码错误");
          document.getElementById("vcode").focus(); // 将焦点定位到验证码输入框
          return false;
        } else {
          alert("登录成功");
          // 实际情况下,这里会发起Ajax请求或执行其他登录逻辑
          return true;
        }
      }
    </script>
  </body>
</html>
4.3、步骤三:测试图片验证码

 浙公网安备 33010602011771号